Advanced Arthroscopic Techniques for the Subtalar and First MTP Joints
Key Takeaway
Advanced foot and ankle arthroscopy provides minimally invasive solutions for complex pathologies, including subtalar synovitis, sinus tarsi syndrome, and first metatarsophalangeal (MTP) joint osteochondral lesions. This comprehensive guide details evidence-based surgical techniques, precise portal placement, and postoperative protocols. By mastering these advanced arthroscopic interventions, orthopedic surgeons can optimize functional outcomes, minimize neurovascular complications, and effectively manage challenging conditions such as ankle arthrofibrosis and septic arthritis.
ADVANCED INDICATIONS IN ANKLE ARTHROSCOPY
While anterior and posterior ankle arthroscopy have become standard procedures for the management of osteochondral lesions of the talus (OLTs) and anterior impingement, the indications for arthroscopic intervention in the foot and ankle continue to expand. The application of endoscopic techniques to complex intra-articular pathologies offers the distinct advantages of minimized soft tissue morbidity, accelerated rehabilitation, and enhanced visualization of intricate articular anatomy.
Septic Arthritis of the Ankle
The management of septic arthritis necessitates emergent joint decompression, thorough irrigation, and targeted antimicrobial therapy to prevent irreversible chondrolysis. While arthrotomy has historically been the gold standard, arthroscopic management is increasingly utilized for its ability to provide superior visualization and comprehensive synovectomy with minimal surgical trauma.
Currently, there is sparse literature regarding the exclusive use of arthroscopy for the treatment of septic arthritis of the ankle. In one notable series evaluating 78 infected joints—which included five ankles—investigators reported a highly favorable 91% cure rate following arthroscopic intervention. In a separate cohort of 89 infected joints (three of which were ankles), functional outcomes were stratified as 61% good to excellent, 20% satisfactory, and 19% poor.
Surgical Warning: Despite these promising clinical outcomes, the current literature only supports a Grade C recommendation (poor evidence) for the use of arthroscopy in ankle septic arthritis. Surgeons must maintain a low threshold to convert to an open arthrotomy if loculated purulence cannot be adequately cleared or if the infection extends into extra-articular soft tissue planes.
During the procedure, copious irrigation with a minimum of 6 to 9 liters of normal saline is recommended. A comprehensive synovectomy should be performed using an aggressive shaver to remove the bacterial glycocalyx and inflammatory mediators that drive cartilage destruction.
Arthrofibrosis of the Ankle
Arthrofibrosis of the ankle typically presents as painful, restricted range of motion following severe trauma, intra-articular fractures, or previous open surgical interventions. The pathogenesis involves the proliferation of dense, disorganized fibrotic scar tissue within the anterior and posterior gutters, obliterating the normal capsular recesses.
The literature currently consists primarily of small case series (Level IV studies) evaluating the efficacy of arthroscopic lysis of adhesions. Most of these studies report promising results, demonstrating significant improvements in dorsiflexion and overall functional scores. However, similar to septic arthritis, there is only a Grade C recommendation (poor evidence) for the use of ankle arthroscopy in the treatment of arthrofibrosis.
Arthroscopic management requires meticulous resection of the hypertrophic fibrotic bands. Surgeons must exercise extreme caution when debriding the anterior capsule to avoid iatrogenic injury to the anterior neurovascular bundle (deep peroneal nerve and dorsalis pedis artery), which may be encased in scar tissue and pulled closer to the joint line.
SUBTALAR ARTHROSCOPY: PRINCIPLES AND TECHNIQUES
Subtalar arthroscopy has evolved into a highly effective diagnostic and therapeutic modality for a variety of hindfoot pathologies. The complex, multi-faceted anatomy of the subtalar joint makes open exploration challenging and morbid, rendering the arthroscopic approach highly advantageous.
Clinical Indications and Patient Selection
Patients presenting with sinus tarsi syndrome or isolated subtalar synovitis typically localize their pain to the lateral hindfoot, specifically demonstrating point tenderness over the sinus tarsi and the lateral aspect of the subtalar joint during clinical examination.
As with anterior ankle impingement, standard radiographic imaging and advanced modalities (MRI) may occasionally be negative or inconclusive. In these scenarios, the definitive diagnosis is often confirmed via a targeted diagnostic subtalar injection. Complete alleviation of the patient’s symptoms following the fluoroscopically guided instillation of a local anesthetic (e.g., 1% lidocaine or 0.5% bupivacaine) into the subtalar joint strongly supports the indication for subtalar arthroscopy.
Patient Positioning and Operating Room Setup
The setup for subtalar arthroscopy closely mirrors that of standard ankle arthroscopy.
* Supine Position: The operative extremity is placed in a dedicated leg holder with the hip and knee flexed, allowing the foot to hang free over the edge of the bed. This facilitates gravity-assisted distraction and easy manipulation of the hindfoot.
* Lateral Decubitus Position: Alternatively, the patient can be placed in the lateral decubitus position with the operative foot hanging off a well-padded bump. This position provides excellent access to the lateral hindfoot and is particularly useful if concomitant lateral ligamentous reconstruction or calcaneal fracture fixation is planned.
A non-sterile thigh tourniquet is applied and inflated following exsanguination to ensure a bloodless surgical field, which is critical for visualizing the tight confines of the subtalar joint.
Portal Anatomy and Placement
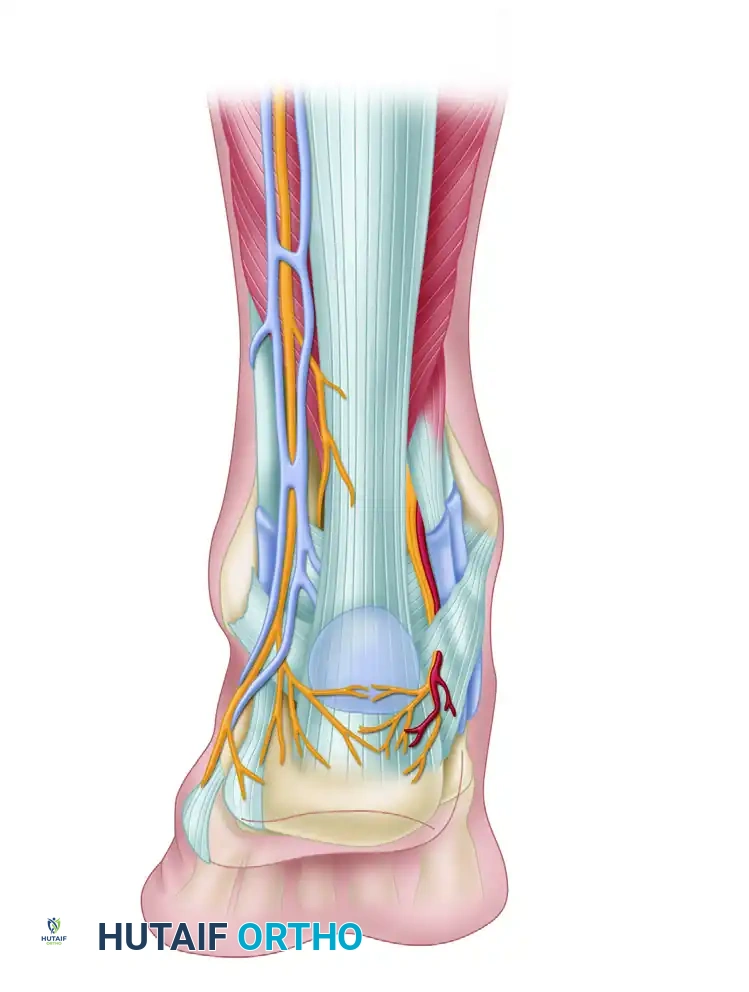
Precise portal placement is the most critical step in subtalar arthroscopy. The portals must be established carefully to avoid iatrogenic injury to the superficial peroneal nerve, the sural nerve, and the lesser saphenous vein.
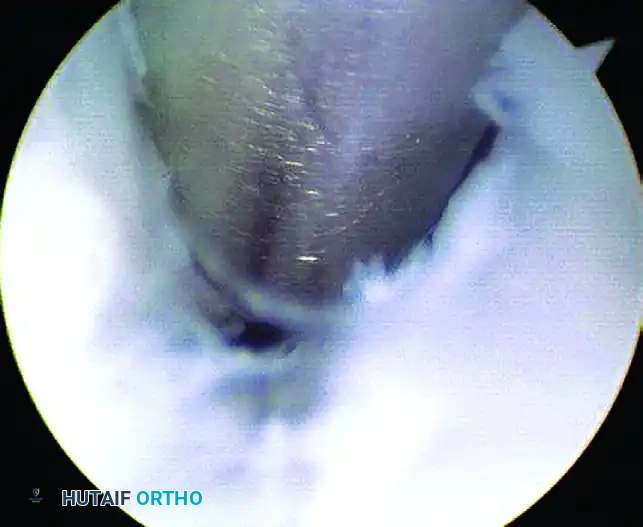
FIGURE 50-13 Subtalar portals must be made carefully to avoid neurovascular injury. A, Anterolateral portal. B, Central portal.
- Central Portal: After joint insufflation with 10 to 15 mL of normal saline, the central portal is established first. It is located approximately 1 cm anterior and 1 cm distal to the tip of the lateral malleolus, directly over the sinus tarsi.
- Anterolateral Portal: This portal is established under direct intra-articular visualization using a spinal needle for localization. It is typically placed 1 to 2 cm anterior to the central portal, taking care to avoid the terminal branches of the superficial peroneal nerve.
FIGURE 50-13 C, Posterolateral portal anatomy demonstrating the proximity of the lesser saphenous vein and sural nerve.
- Posterolateral Portal: Occasionally, a posterolateral portal is necessary for adequate posterior access. This is placed just proximal to the tip of the lateral malleolus, immediately anterior to the Achilles tendon.
Clinical Pearl: The subtalar joint can also be approached entirely through posterior portals (posteromedial and posterolateral), utilizing a prone setup identical to that described for posterior ankle arthroscopy. This is highly effective for posterior facet pathologies and os trigonum excision.
Surgical Technique: Subtalar Arthroscopy (Technique 5-3)
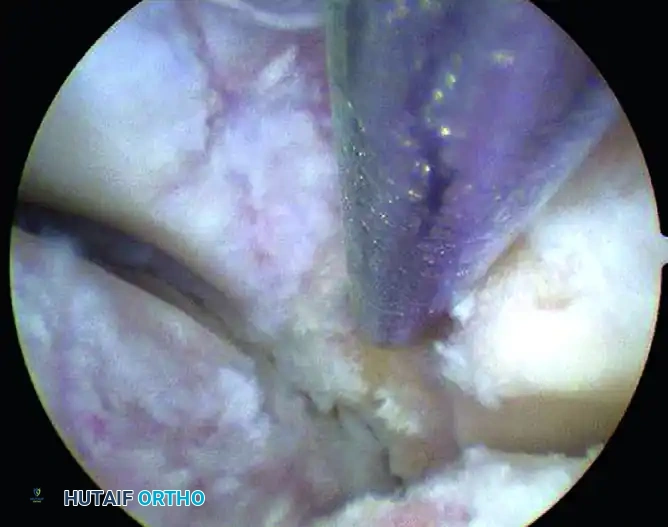
Upon initial entry into the subtalar joint, visualization is notoriously difficult. The arthroscope is often immediately confronted with a "red out" due to the dense, hypertrophic synovitis that fills the sinus tarsi.
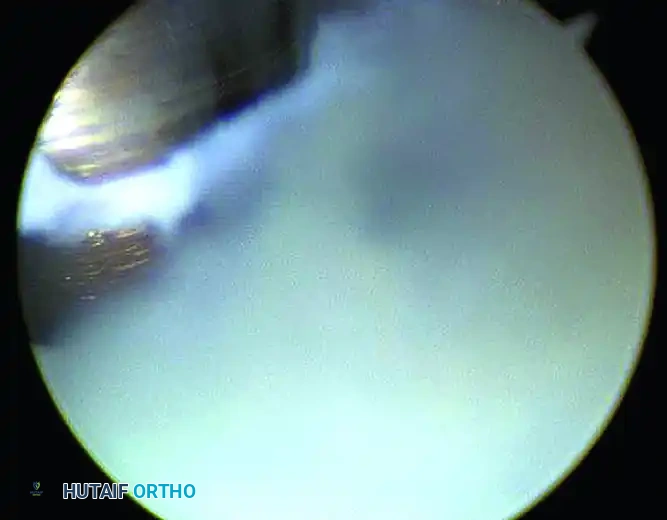
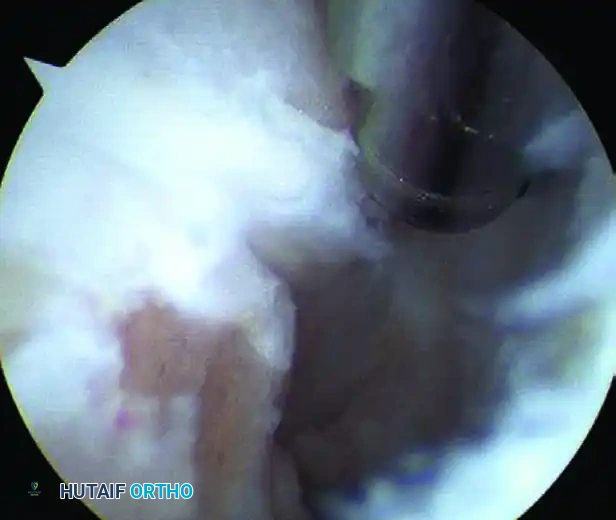
FIGURE 50-14 Anterior subtalar débridement. A, Initial view obscured by dense synovitis. B, Visualization following aggressive synovial resection.
- Initial Debridement: After triangulation is achieved to place the working portals, the surgeon must blindly but carefully commence debridement using a 3.5 mm or 2.9 mm full-radius shaver. Continue this targeted debridement until the articular surfaces of the joint can be clearly visualized.
- Anterior Aspect Debridement: Systematically debride the anterior aspect of the posterior facet. This often requires the resection of the attenuated or torn interosseous talocalcaneal ligament, which is a frequent source of chronic pain in sinus tarsi syndrome.
- Lateral Aspect Debridement: Rotate the arthroscope and working instruments to address the lateral aspect of the posterior facet, where the debridement of reactive synovitis and fibrotic tissue is often necessary.
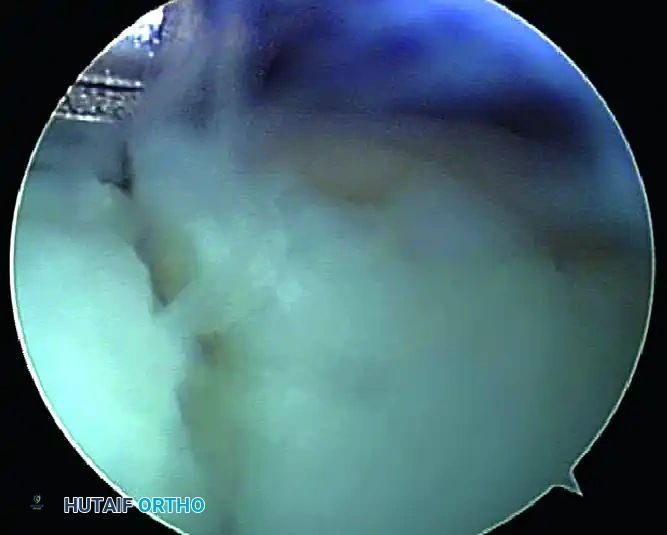
FIGURE 50-15 Arthroscopic view demonstrating the lateral aspect of the posterior facet where débridement of synovitis is often necessary. Switch portals as needed for better access.
Throughout the procedure, the surgeon should frequently switch the arthroscope and the shaver between the central and anterolateral portals to maximize the field of view and ensure comprehensive joint clearance.
Advanced Applications and Clinical Outcomes
Subtalar arthroscopy is not limited to soft tissue debridement. It serves as a powerful adjunct in complex hindfoot trauma and reconstruction:
* Calcaneal Fractures: Arthroscopic debridement can be profoundly helpful for managing deep, persistent pain following calcaneal fractures. Studies indicate that 80% of patients experience considerable pain relief, with an 82% overall satisfaction rate. Furthermore, subtalar arthroscopy can be utilized in conjunction with fluoroscopy for the percutaneous reduction and internal fixation of intra-articular calcaneal fractures, ensuring anatomic restoration of the posterior facet.
* Subtalar Arthrodesis: The arthroscope can be used to prepare the joint surfaces for a minimally invasive subtalar arthrodesis through a lateral or posterior approach, preserving the lateral soft tissue envelope and reducing nonunion rates.
Postoperative Care: The postoperative protocol is similar to that following standard ankle arthroscopy. Patients are typically placed in a bulky soft dressing and allowed weight-bearing as tolerated in a controlled ankle motion (CAM) boot, provided no osseous procedures (like microfracture or arthrodesis) were performed. Early range of motion is encouraged to prevent recurrent arthrofibrosis.
Outcomes: When performed for therapeutic rather than purely diagnostic purposes, subtalar arthroscopy yields good or excellent results in 86% to 94% of patients, with an impressive 97% of patients reporting satisfaction with the procedure. Complications are exceedingly rare and most commonly involve transient neurological neurapraxias (e.g., superficial peroneal or sural nerve irritation) that resolve spontaneously over time.
FIRST METATARSOPHALANGEAL (MTP) JOINT ARTHROSCOPY
Arthroscopy of the first metatarsophalangeal (MTP) joint is an advanced, technically demanding procedure indicated for the management of early-stage hallux rigidus, symptomatic osteochondral lesions (OCLs), loose bodies, and focal synovitis. By avoiding a dorsal arthrotomy, surgeons can preserve the extensor hallucis longus (EHL) gliding mechanism and minimize postoperative stiffness.
Patient Setup and Joint Distraction
The first MTP joint is a highly congruent, tight articulation. Adequate distraction is an absolute prerequisite for safe instrument insertion and to prevent iatrogenic scuffing of the delicate metatarsal head cartilage.
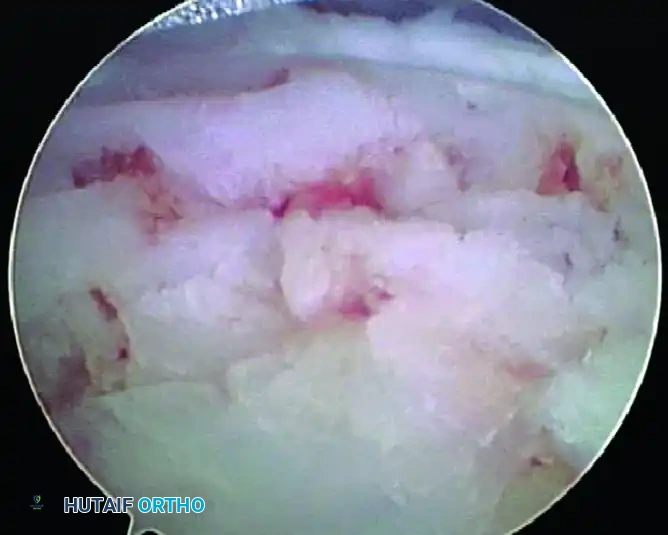
FIGURE 50-17 A, Distraction of the first metatarsophalangeal joint utilizing a sterile finger trap.
The patient is positioned supine. A sterile finger trap is applied securely to the hallux. Longitudinal traction is applied either manually by an assistant or via a dedicated gravity distraction system utilizing 5 to 10 pounds of weight over the end of the operating table.
Portal Placement
Two primary dorsal portals are utilized for first MTP joint arthroscopy. The EHL tendon serves as the primary anatomical landmark.
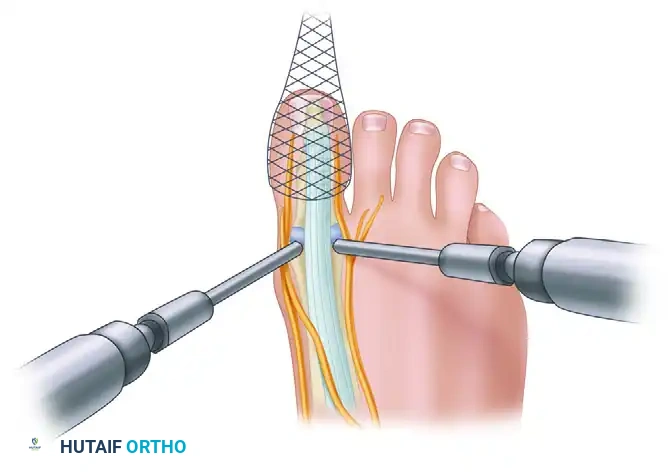
FIGURE 50-17 B, Placement of the dorsal medial and dorsal lateral portals relative to the extensor hallucis longus tendon and regional neurovascular structures.
- Dorsomedial Portal: Located just medial to the EHL tendon at the level of the joint line. Care must be taken to avoid the dorsomedial cutaneous nerve.
- Dorsolateral Portal: Located just lateral to the EHL tendon. The surgeon must be mindful of the terminal branches of the deep peroneal nerve in this region.
Surgical Warning: Always use a "nick and spread" technique with a small hemostat when establishing these portals. Plunging with a scalpel blade can easily lacerate the EHL tendon or the adjacent dorsal sensory nerves.
Surgical Technique: Osteochondral Lesion Management (Technique 50-4)
Once the portals are established, a 2.7 mm or 1.9 mm 30-degree arthroscope is introduced. The joint is systematically inspected, evaluating the metatarsal head, the proximal phalanx base, and the sesamoid articulation.
FIGURE 50-16 A, Arthroscopic visualization of a focal osteochondral lesion on the first metatarsophalangeal joint.
For the treatment of osteochondral lesions, the following steps are executed:
1. Debridement: The unstable cartilage flaps surrounding the lesion are excised using a small arthroscopic shaver or curette until stable, vertical margins of healthy hyaline cartilage are achieved.
2. Bed Preparation: The necrotic subchondral bone at the base of the defect is debrided to expose a healthy, bleeding bony bed.
3. Microfracture: An arthroscopic awl is introduced to perform marrow stimulation (microfracture). Holes are placed 2 to 3 mm apart, penetrating the subchondral plate to a depth of approximately 4 mm to allow the egress of mesenchymal stem cells and the formation of a robust fibrocartilage clot.
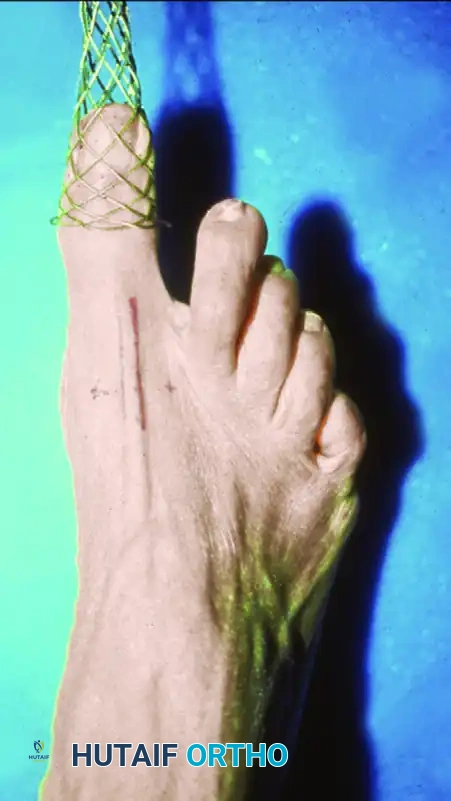
FIGURE 50-16 B, The first MTP joint after thorough débridement and successful microfracture of the osteochondral defect.
Postoperative Care for First MTP Arthroscopy
Following microfracture of the first MTP joint, the patient is placed in a rigid postoperative shoe. Weight-bearing is typically restricted to the heel for the first 2 to 4 weeks to protect the maturing fibrocartilage clot. Passive range of motion exercises are initiated early (within the first week) to promote cartilage healing and prevent capsular contracture. Return to high-impact activities or pivoting sports is generally delayed until 10 to 12 weeks postoperatively, pending clinical and radiographic evidence of healing.
📚 Medical References
- subtalar arthroscopy. In Kelikian AS, ed: Operative treatment of the foot and ankle, Stamford, Conn, Appleton & Lange, 1999.
- Ferkel RD, Fasuloi GJ: Arthroscopic treatment of ankle injuries, Orthop Clin North Am 25:17, 1994.
- Ferkel RD, Karzel RP, Del Pizzo W, et al: Arthroscopic treatment of anterolateral impingement of the ankle, Am J Sports Med 19:440, 1991.
- Ferkel RD, Scranton PE: Current concepts review: arthroscopy of the ankle and foot, J Bone Joint Surg 75A:1233, 1993.
- Flick AB, Gould N: Osteochondritis dissecans of the talus: a review of the literature and a new surgical approach for medial dome lesions, Foot Ankle Int 5:165, 1985.
- Fordyce AJW, Horn CV: Arthrography in recent injuries of the ligaments of the ankle, J Bone Joint Surg 54B:116, 1972.
- Freeman MA: Instability of the foot after injuries to the lateral ligament of the ankle, J Bone Joint Surg 47B:669, 1965.
- Freeman MA: Treatment of ruptures of the lateral ligament of the ankle, J Bone Joint Surg 47B:661, 1965.
- Frey C, Bell J, Teresi L, et al: A comparison of MRI and clinical examination of acute lateral ankle sprains, Foot Ankle Int 17:533, 1996.
- Fussell ME, Godley DR: Ankle arthrography in acute sprains, Clin Orthop Relat Res 93:278, 1973.
- Gautier E, Kilker D, Jakob RP: Treatment of cartilage defects of the talus by autologous osteochondral grafts, J Bone Joint Surg 84B:237, 2002.
- Gepstein R, Conforty B, Weiss RE, et al: Closed percutaneous drilling for osteochondral lesions of the talus, Clin Orthop Relat Res 213:197, 1986.
- Giannini S, Buda R, Grigolo B: Autologous chondrocyte transplantation in osteochondral lesions of the ankle joint, Foot Ankle Int 22:513, 2001.
- Giannini S, Vannini F, Buda R: Osteoarticular grafts in the treatment of OCD of the talus: mosiacplasty versus autologous chondrocyte transplantation, Foot Ankle Clin 7:621, 2002.
- Gillespie HS, Boucher P: Watson-Jones repair of lateral instability of the ankle, J Bone Joint Surg 53A:920, 1971.
- Good CJ, Jones MA, Livingstone BN: Reconstruction of the lateral ligament of the ankle, Injury 7:63, 1975.
- Goossens M, De Stoop N, Claessens H, et al: Posterior subtalar joint arthrography: a useful tool in the diagnosis of hindfoot disorders, Clin Orthop Relat Res 249:248, 1989.
- Gordon RB: Arthrography of the ankle joint: experience in one hundred seven studies, J Bone Joint Surg 52A:1623, 1970.
- Gould N, Seligson D, Gassman J: Early and late repair of lateral ligament of the ankle, Foot Ankle Int 1:84, 1980.
- Greene TA, Hillman SK: Comparison of support by a semirigid orthosis and adhesive ankle taping before, during and after exercise, Am J Sports Med 18:498, 1990.
- Gross AE, Agnidis Z, Hutchison CR: Osteochondral defects of the talus treated with fresh osteochondral allograft transplantation, Foot Ankle Int 22:385, 2001.
- Guhl JF: New techniques for arthroscopic surgery of the ankle: preliminary report, Orthopedics 9:261, 1986.
- Gustilo TB, Gordon SS: Osteochondral fractures of the talus (osteochondritis dissecans), Minn Med 51:237, 1968.
- Hamilton WG: The modifi ed Broström procedure for acute and
You Might Also Like