Solving Severe Acetabular Bone Loss with Cup-Cage Reconstruction
Key Takeaway
Discover the latest medical recommendations for Solving Severe Acetabular Bone Loss with Cup-Cage Reconstruction. Acetabular bone loss, often due to aseptic loosening of hip implants, manifests as acute groin pain and inability to weight bear. Radiological assessment typically reveals severe osteolysis of the ilium and ischium. Diagnosis centers on the extent of acetabular bone loss. Treatment, such as cup-cage reconstruction, aims to address significant defects and restore stability in complex revision total hip arthroplasty cases.
A 72-year-old patient presents with a chronically painful, unstable total hip arthroplasty. Imaging reveals severe acetabular deficiency with significant superior and medial migration. How do you classify this defect to guide your surgical strategy?
Candidate: I would use the Paprosky classification. Based on the superior and medial migration, it sounds like a Type 3A or 3B defect. Type 3 involves loss of the superior dome and potentially the posterior column, whereas 3B suggests pelvic discontinuity.
Failing to define the structural integrity of the columns. Simply stating the type is insufficient; you must correlate the classification with the loss of the columns (anterior/posterior) and the status of the ischial tuberosity, which are the determinants for mechanical fixation.
I would categorize this using the Paprosky classification to assess host bone stock. A Type 3A defect shows superior migration with compromise of the ischial tuberosity and posterior column, while Type 3B indicates extensive superior/medial migration and pelvic discontinuity. I would specifically look for the loss of the "supporting" pillars: the ilium (superiorly) and the ischium (inferiorly), as this dictates whether a standard cup, a cup-cage construct, or a custom triflange is indicated.
You have decided to proceed with a cup-cage reconstruction for a Paprosky 3B defect. Explain the biomechanical rationale for adding a metal cage to a highly porous shell.
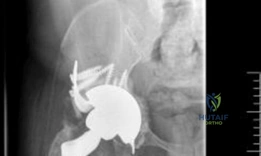
Candidate: The porous cup provides biological fixation through ingrowth, but in a 3B defect, there isn't enough bone for stability. The cage acts as an internal fixator or an exoskeleton to protect the cup while it integrates.
Focusing only on the cage being "stronger." The key is the "load-sharing" concept. A failing candidate fails to mention that the cage protects the cup from shear and micromotion, which is essential for biologic ingrowth in the early postoperative period.
In severe defects, host bone contact is often <50%. The highly porous cup relies on a high coefficient of friction for initial stability, but this is insufficient in Paprosky 3B/pelvic discontinuity. The cage provides a "belt and suspenders" construct: it bridges the defect, securing to the intact ilium and ischium. This load-sharing exoskeleton protects the porous cup from excessive shear/micromotion, enabling primary biologic ingrowth. Once the cup integrates, the construct transitions from mechanical fixation to biologic stability, preventing late fatigue failure of the hardware.
During the procedure, you have placed the porous cup and the cage. How do you optimize the version and inclination of the final polyethylene liner?
Candidate: I would orient the cage to fit the bone and then cement the liner inside. The liner can be positioned however I want since it's cemented into the cage.
Ignoring the preparation of the interface. Candidates often forget to mention that the back of the liner should be scored or prepared to improve interdigitation with the cement, which is critical for preventing late loosening of the liner from the metal cage.
The primary advantage of the cup-cage technique is the ability to decouple component orientation from articular geometry. I would prioritize the cup and cage for maximum host bone contact and rigid mechanical fixation. I would then score the back of the polyethylene liner to enhance cement interdigitation. While the cement is in a doughy state, I would manipulate the liner into the desired anatomic orientation (typically 15-20° anteversion and 40-45° inclination) and hold it rigidly until the cement fully cures, ensuring I remove any excess cement to mitigate third-body wear.