Tibial Fracture Extending into the Plafond: Intramedullary Secrets
Key Takeaway
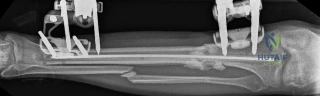
Learn more about Tibial Fracture Extending into the Plafond: Intramedullary Secrets and how to manage it. A tibial shaft fracture extending into the plafondintramedullary involves a diaphyseal break reaching the ankle joint. For optimal treatment, percutaneous screw fixation stabilizes the joint, followed by an intramedullary nail for the shaft. This approach minimizes soft-tissue damage and allows for early weight-bearing and rehabilitation, crucial for preventing secondary joint displacement during recovery.
A 45-year-old male sustains a high-energy distal tibial fracture with articular extension (AO/OTA 43-C1) following a fall from height. You are considering intramedullary nailing. Walk me through the critical preoperative planning, specifically how you would utilize imaging to ensure a successful outcome.
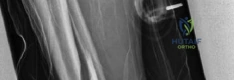
Candidate: I would obtain standard radiographs and a CT scan. The CT is mandatory to understand the articular split. I would look at the 3D reconstructions to plan where to put my lag screws so they don't block the nail, then proceed to surgery.
The candidate fails to articulate the "why" behind the imaging. Simply mentioning "CT" is insufficient. They miss the requirement of planning for independent articular reduction, the necessity of checking for intra-articular debris, and the specific goal of mapping "safe zones" for lag screws to avoid interference with the nail trajectory.
A structured response is required: 1) Articular Mapping: Use CT to define the coronal/sagittal planes of the split and check for impaction. 2) Hardware Planning: Identify specific safe corridors for independent lag screws to ensure they are perpendicular to the fracture plane and definitively outside the "nail path." 3) Implant Templating: Confirm nail length and distal locking geometry. 4) Soft Tissue Assessment: Note if clinical exam corresponds to imaging regarding potential surgical timing (e.g., waiting for skin wrinkles).
During the procedure, you have reduced the articular block and are about to insert the nail. However, you are concerned about the "bell-clapper" effect in the distal metaphysis. How do you mitigate this, and what is your specific strategy for blocking screw placement?
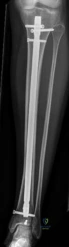
Candidate: The bell-clapper effect occurs because the canal is too wide. I would use Poller screws to tighten the fit. I'd place them on the side of the fracture where I think the nail might drift, using fluoroscopy to guide me.
Vague placement ("on the side of the fracture") demonstrates a lack of biomechanical understanding. The candidate must define the relationship between the screw, the nail path, and the specific plane of potential deformity (valgus vs. procurvatum).
The candidate must define the rule: Place the blocking screw on the concave side of the deformity. Specifically: To prevent valgus, place an AP screw in the distal fragment on the medial side of the central axis. To prevent procurvatum, place a medial-to-lateral screw on the posterior side of the central axis. Emphasize that these are placed prior to reaming to act as a physical guide for the nail.
We see here a radiograph of a patient post-fixation. The alignment appears slightly off. How do you assess if this is acceptable, and what are the specific radiographic thresholds for revision in a distal third tibial fracture?
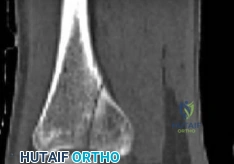
Candidate: I'd look at the AP and lateral views. If it looks straight, it's fine. If there is significant deformity, I might need to take them back to theatre to adjust the screws or the nail.
Using subjective terms like "looks straight" or "significant deformity" is a major red flag in a vivas. Candidates must quote the established anatomical/clinical thresholds to demonstrate rigor.
State clear, numeric thresholds: Varus/Valgus > 5 degrees and Procurvatum/Recurvatum > 10 degrees are typically unacceptable and necessitate revision, particularly in the distal third due to the impact on ankle joint loading mechanics. Mention that these are assessed on standing (or long-leg) radiographs if the patient is sufficiently mobilized, comparing the mechanical axis to the contralateral side.