Introduction to Distal Humerus Fractures and Surgical Approaches
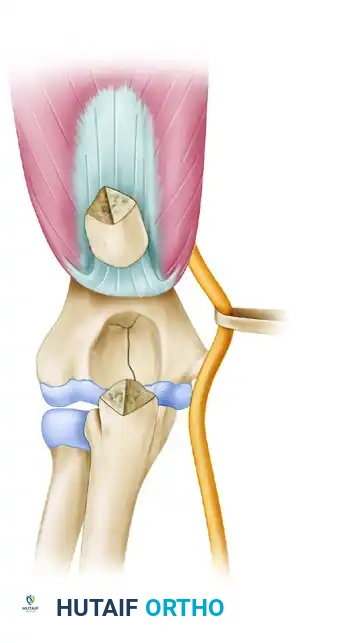
Fractures of the distal humerus represent a formidable challenge in orthopedic trauma, demanding meticulous preoperative planning, profound anatomical knowledge, and precise surgical execution. Intra-articular distal humerus fractures (AO/OTA Type 13-C) disrupt the critical "triangle of stability" formed by the medial column, lateral column, and the articular spool of the trochlea. The primary goal of surgical intervention is the anatomic restoration of the articular surface, followed by rigid bicolumnar fixation to the humeral shaft, permitting early, active range of motion (ROM).
While triceps-sparing, triceps-splitting, and triceps-reflecting (e.g., TRAP) approaches have gained popularity for less complex fracture patterns or total elbow arthroplasty, the trans-olecranon osteotomy remains the undisputed gold standard for severe, comminuted intra-articular fractures. By reflecting the extensor mechanism proximally, the surgeon gains unparalleled, direct orthogonal visualization of the entire articular surface, particularly the trochlear sulcus and capitellum.
Clinical Pearl: The olecranon osteotomy provides up to 57% visualization of the distal humeral articular surface, compared to only 35% with a triceps-splitting approach. It is the approach of choice when absolute articular congruity must be restored in the setting of severe comminution.
Alternative exposures: The modified Kocher lateral approach combined with a medial triceps-reflecting approach provides access similar to an olecranon osteotomy but preserves the extensor mechanism.

The triceps-splitting approach to the distal humerus. While useful for extra-articular fractures or arthroplasty, it limits direct visualization of the anterior articular surface compared to an osteotomy.
Preoperative Planning and Patient Positioning
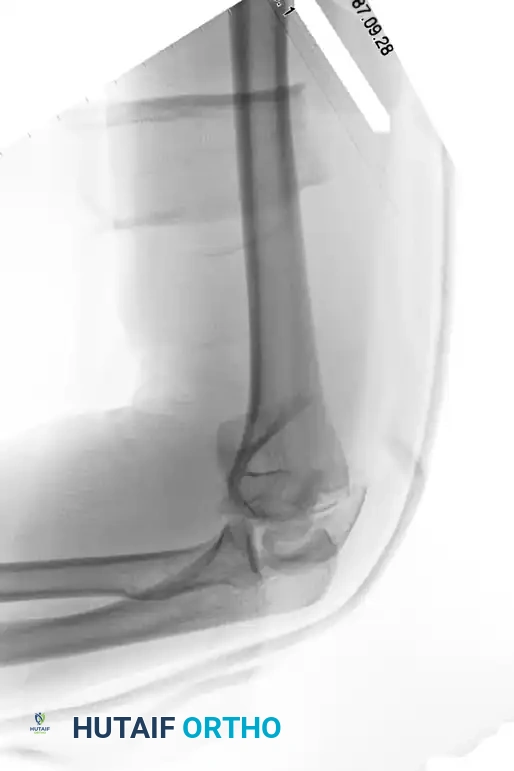
Thorough preoperative imaging is mandatory. Standard anteroposterior (AP) and lateral radiographs of the elbow should be supplemented with a fine-cut computed tomography (CT) scan with 3D reconstructions. This allows the surgeon to map the fracture lines, identify the "key" fragments that will dictate the reduction sequence, and anticipate the need for headless compression screws or mini-fragment plates.
Positioning Options
The patient may be positioned in the lateral decubitus, prone, or supine position, depending on surgeon preference and concomitant injuries.
- Lateral Decubitus: The most common position. The arm is draped over a radiolucent post (e.g., a padded Mayo stand). This allows gravity to assist with elbow flexion and provides excellent access to the posterior elbow.
- Prone: Excellent for isolated distal humerus fractures, allowing the arm to rest on a radiolucent arm board. However, it poses airway and anesthetic challenges in polytrauma patients.
- Supine: An increasingly favored position, particularly for polytrauma patients. An advantage of the supine position is improved anterior exposure of the joint, which is highly beneficial for very low fractures and fractures with anterior comminution.
Surgical Warning: Fixation of a fracture with extension into the humeral shaft can be difficult to reduce with the patient supine due to the lack of gravity assistance. When the supine position is chosen, the use of a specialized arm holder is strongly recommended.

An arm holder (e.g., Elbow LOC, Symmetry Medical) assists significantly with arm positioning and maintaining reduction during surgery in the supine position.
Prepare and drape the entire forequarter to allow the placement of a sterile tourniquet on the proximal arm. Ensure the C-arm fluoroscopy unit can easily swing in for AP and lateral views without compromising the sterile field.
Step-by-Step Surgical Technique
1. Incision and Superficial Dissection
Make a generous posterior midline incision. To prevent painful postoperative scarring directly over the bony prominence, incorporate a slight lateral curve over the tip of the olecranon. Develop full-thickness fasciocutaneous flaps medially and laterally. Avoid undermining the subcutaneous tissues to preserve the vascular supply to the skin flaps, reducing the risk of postoperative wound necrosis.
2. Ulnar Nerve Management
The ulnar nerve must be identified, mobilized, and protected early in the procedure.
- Locate the nerve proximally at the medial border of the triceps.
- Dissect the ulnar nerve free from the medial edge of the triceps and release it from the cubital tunnel posterior to the medial epicondyle.
- Release the arcade of Struthers proximally and Osborne's fascia distally to ensure the nerve is completely free of tethering points.
Surgical Warning: Preserve the extrinsic vascular structures (vasa nervorum) that supply the ulnar nerve. Excessive skeletonization of the nerve can lead to ischemic neuropathy. Use a vessel loop to gently retract the nerve, avoiding excessive traction.
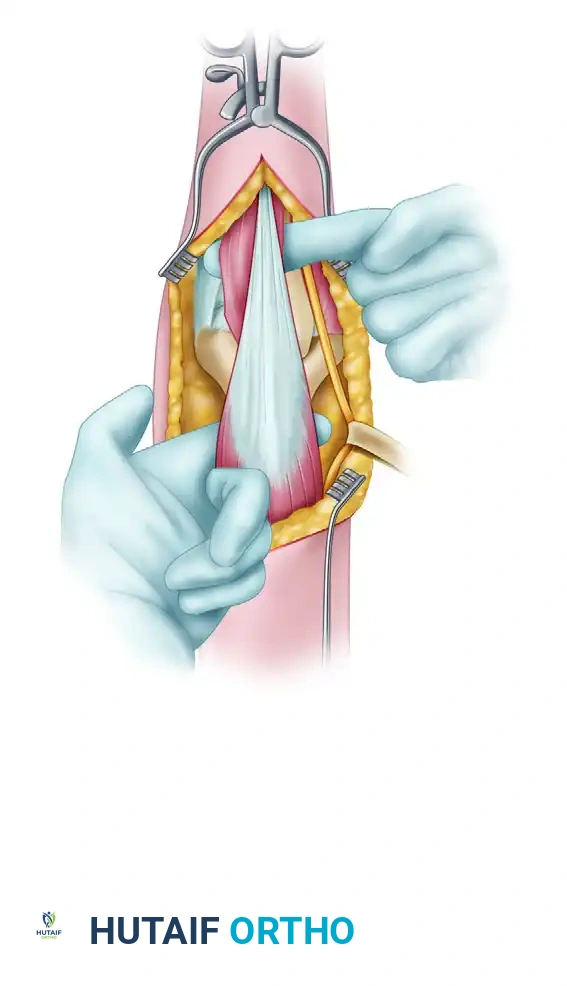
3. Triceps and Anconeus Dissection
Laterally, dissect the triceps off the lateral intermuscular septum. Incise the interval between the triceps and anconeus muscles to expose the joint capsule. Alternatively, to preserve the anconeus innervation (derived from the radial nerve), utilize the interval between the anconeus and the extensor carpi radialis brevis (ECRB), elevating the anconeus in continuity with the triceps flap. Ensure that both the medial and lateral olecranon articular surfaces can be clearly visualized prior to the osteotomy.
4. The Olecranon Osteotomy
The osteotomy must be planned meticulously to ensure stable repair and prevent articular step-off.
- Pre-drilling: Predrill the holes for olecranon fixation before making the osteotomy. This ensures perfect alignment during closure. While tension band wiring is historical, we routinely use plate fixation for the olecranon, as it provides superior biomechanical stability and allows for earlier mobilization.
- The Chevron Cut: Make a distally oriented (apex distal) chevron osteotomy. The apex-distal shape increases the surface area for healing and provides intrinsic rotational stability.
- Execution: Use a thin-bladed oscillating saw directed toward the bare area (sulcus) of the articular surface of the olecranon. Do not cut completely through the articular cartilage with the saw.
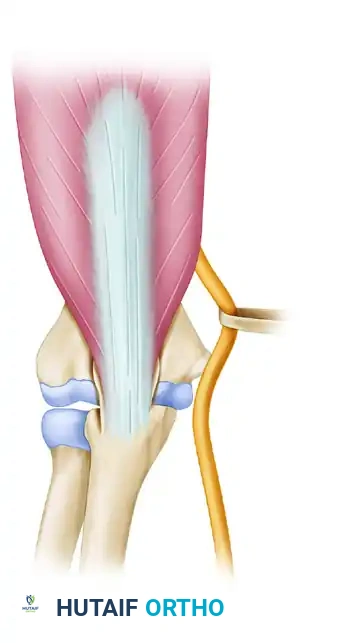
The olecranon osteotomy is marked in the shape of a shallow V or apex-distal chevron.
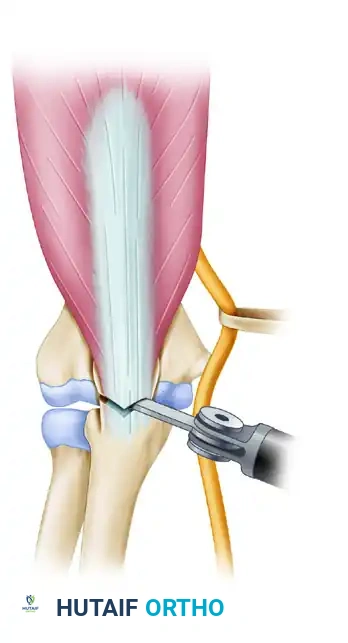
A thin-blade oscillating saw is used to start the osteotomy, stopping just short of the subchondral bone.
- Completion: Use a sharp osteotome to carefully complete the osteotomy by cracking the subchondral bone and articular cartilage.
Pitfall: If the osteotomy is forcefully wedged open with the osteotome before the bone is adequately weakened, a large, uncontrolled cartilaginous flap can be created inadvertently, complicating the repair.
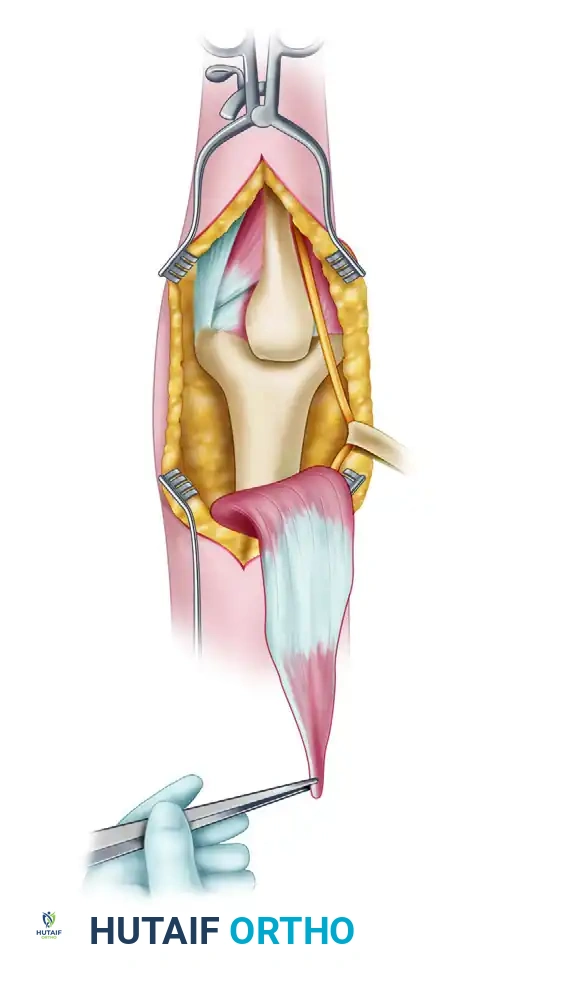
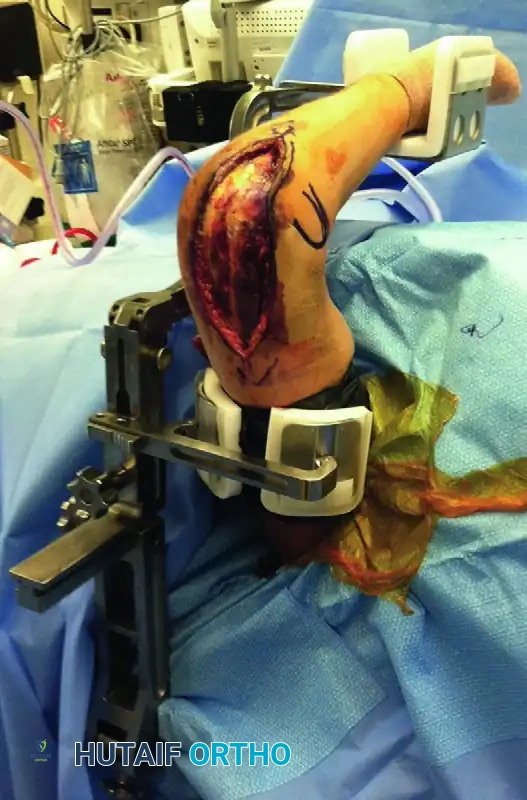
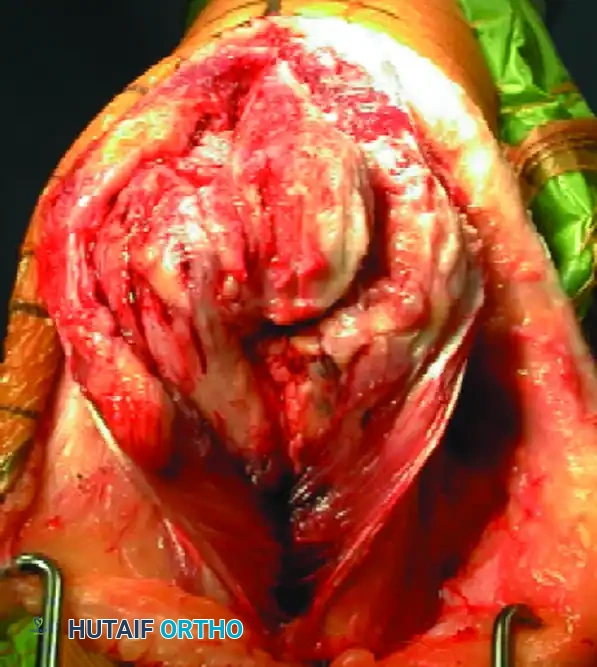
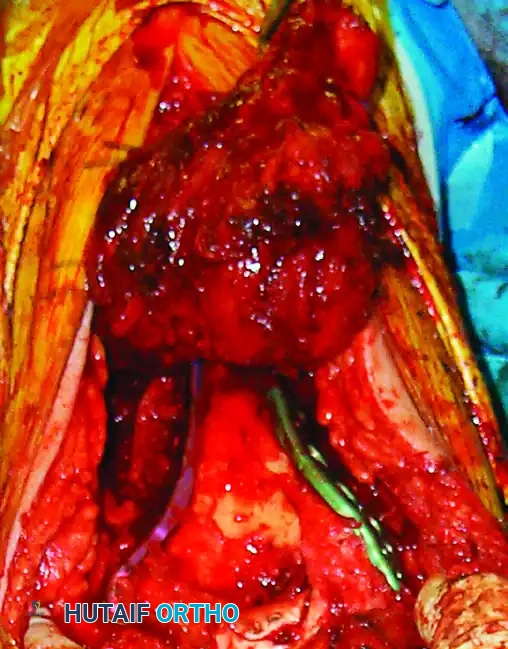
The osteotomized proximal olecranon fragment is elevated proximally. The ulnar nerve is isolated, mobilized, and protected throughout this maneuver.
Raise the triceps with the proximal olecranon fragment, and dissect the triceps musculature off the posterior humerus, preserving the periosteum where possible.
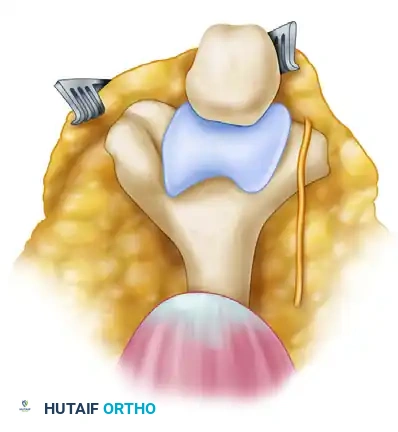
5. Fracture Reduction and Articular Reconstruction
With the distal humerus fully exposed, thoroughly débride the fracture edges to clean the surfaces of hematoma and interposed soft tissue.
The fundamental principle of complex distal humerus ORIF is to convert a Type C (intra-articular bicolumnar) fracture into a Type A (extra-articular) fracture by first reconstructing the articular block.
- Use threaded Kirschner wires (K-wires) as joysticks to manipulate the medial and lateral condyles.
- If the articular fracture is simple, reduce the fracture with the joysticks and a Weber clamp, and insert K-wires for provisional fixation.
Provisional fixation of the articular block using K-wires and reduction forceps.
- Complex Articular Comminution: Reconstruct the articular surface "around the clock." Provisionally fix the reconstructed fragments. If either the medial or lateral condyle has a good "key" to reduction with the humeral shaft, reduce that condyle to the shaft first.
- A countersunk mini-fragment (2.0-mm or 2.4-mm) lag screw can be used for provisional or definitive fixation of the articular block because its low profile will not interfere with subsequent plate positioning.
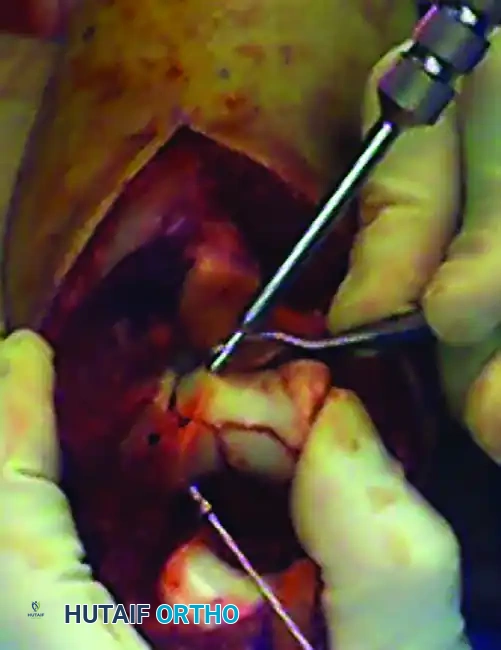
- Use headless compression screws, mini-fragment screws, or absorbable screws for the fixation of small osteochondral fragments and articular comminution.

Fixation of a small osteochondral fragment with an absorbable or headless screw.
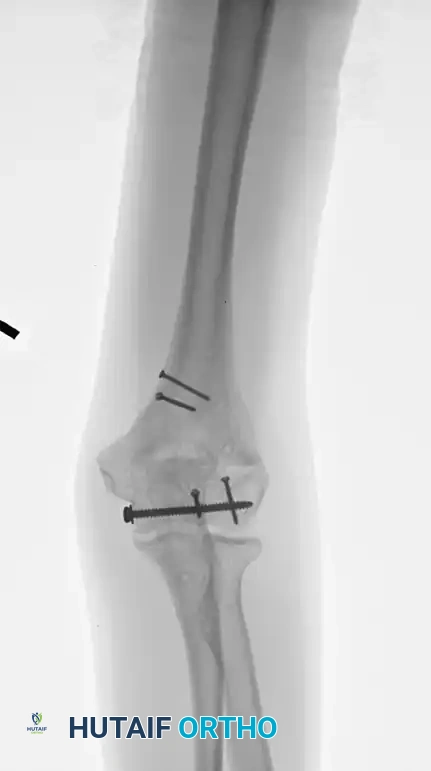
A very distal intercondylar fracture fixed with headless screws and mini-fragment buttress plating through the olecranon osteotomy approach.
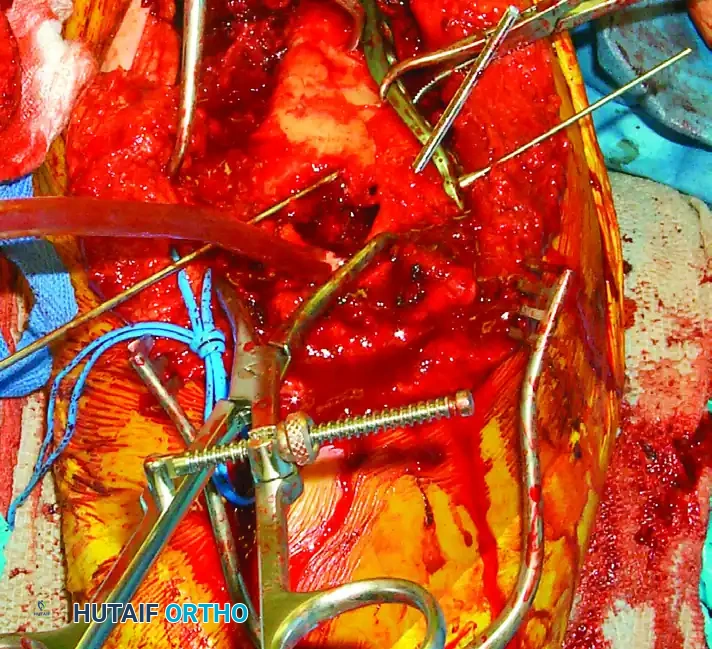
6. Bicolumnar Plate Fixation
Once the articular block is reconstructed and provisionally attached to the shaft, rigid bicolumnar plating is required. Plate the column with the better key to reduction first, followed by the opposite column.
There are two primary biomechanical constructs for bicolumnar plating:
1. Orthogonal (90-90) Plating: One plate is placed on the medial ridge, and the other is placed on the posterior aspect of the lateral column.
2. Parallel Plating: Plates are placed directly medially and laterally (180 degrees apart). Biomechanical studies (e.g., O'Driscoll's principles) suggest parallel plating may offer superior stability in axial compression, though both constructs are clinically acceptable if applied correctly.
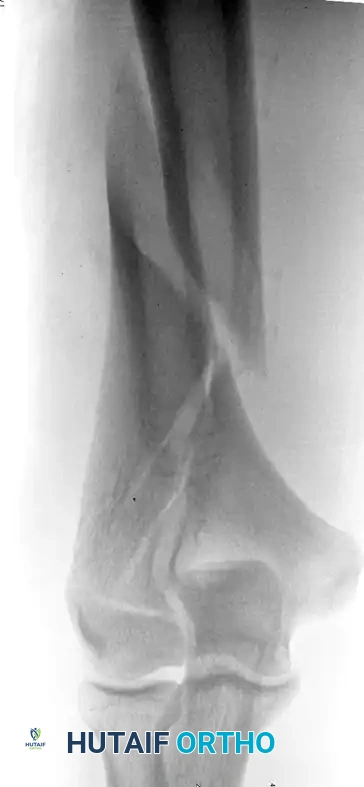
Preoperative imaging of a supracondylar fracture with intraarticular extension.
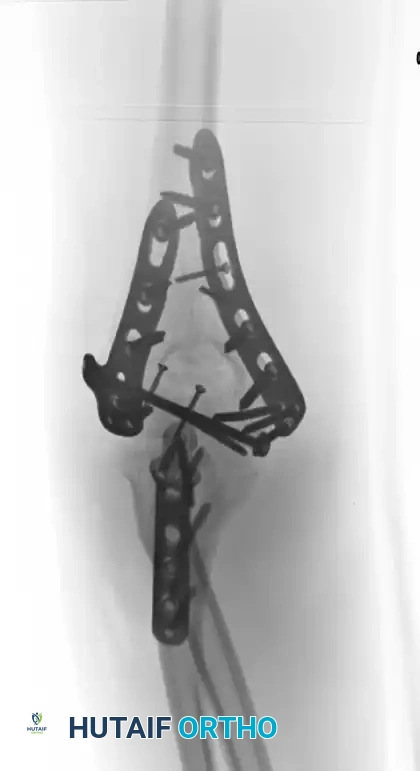
Fixation achieved with 90-90 locked plates through an olecranon osteotomy approach.
Radiograph demonstrating a healed fracture after the removal of symptomatic hardware.
Alternatively, direct medial and lateral parallel plating can be utilized based on the fracture morphology.
Preoperative AP radiograph of a distal humeral fracture with severe intraarticular extension.
Postoperative radiograph demonstrating anatomic reduction after direct medial and lateral parallel plate fixation.
Clinical Pearl: Evaluate every screw under fluoroscopy to ensure that it does not cross the articular surface. The olecranon fossa must remain clear of hardware to allow for full elbow extension.
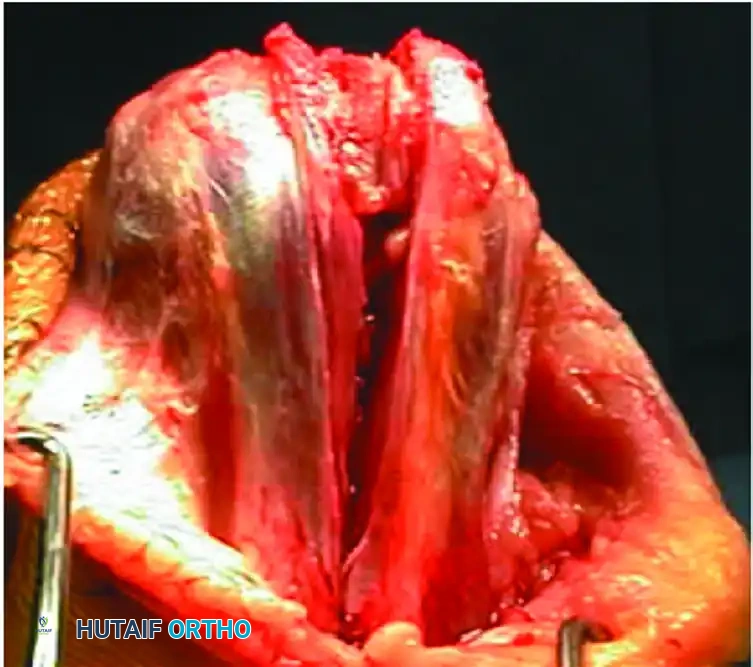
Intraoperative view of definitive bicolumnar plate fixation. Notice the meticulous preservation of the soft tissue envelope.
7. Osteotomy Repair and Closure
After confirming the stability of the distal humerus fixation and verifying full ROM without impingement, the olecranon osteotomy must be repaired.
- Reduce the proximal olecranon fragment anatomically. The chevron shape should interlock perfectly, restoring rotational stability.
- Fix the osteotomy using the pre-drilled holes. While tension band wiring with K-wires and figure-of-eight wire is a traditional method, modern practice heavily favors anatomic proximal ulna locking plates. Plating provides superior compression, reduces the risk of hardware prominence, and allows for aggressive early rehabilitation.
Repair of the olecranon osteotomy. Anatomic reduction of the chevron cut is critical to restore the articular congruity of the greater sigmoid notch.
Final intraoperative view of the repaired olecranon osteotomy prior to layered closure.
- Ulnar Nerve: Consider transposing the ulnar nerve anteriorly if the medial plate hardware is prominent or if the nerve rests with tension over the implants. Otherwise, an in situ release is acceptable. Document the nerve's position meticulously in the operative note.
- Close the incision in layers. Repair the fascial intervals securely. Place a closed suction drain deep to the fascial layer to prevent hematoma formation, which can lead to heterotopic ossification or infection.
- Close the subcutaneous tissue and skin with non-absorbable sutures or staples.
Postoperative Care and Rehabilitation Protocol
The success of distal humerus ORIF relies heavily on the postoperative rehabilitation protocol. The primary enemy of elbow trauma is stiffness.
- Immediate Post-op: The elbow is splinted in extension or slight flexion (30-40 degrees) to
