Basic Skin Closure & Z-Plasty Techniques in Hand Surgery
Key Takeaway
Early and meticulous skin closure in hand surgery is paramount to preserving the essential gliding mechanisms of the hand. This comprehensive guide details primary closure techniques, tension-relieving positioning, apical suturing, dog-ear excisions, and Z-plasty flap transpositions. Emphasizing precise tissue plane alignment, these evidence-based protocols minimize infection, prevent excessive scarring, and ensure optimal functional recovery for complex palmar and dorsal hand defects.
PRINCIPLES OF BASIC SKIN CLOSURE IN THE HAND AND WRIST
The functional integrity of the hand relies heavily on the preservation of its intricate gliding mechanisms. Early and meticulous closure of hand wounds is a fundamental tenet of orthopedic surgery, designed to mitigate the risk of deep space infection and prevent excessive, restrictive scarring. Immediate soft-tissue coverage becomes an absolute surgical imperative when critical avascular or poorly vascularized structures—such as denuded bone, articular cartilage, or tendon devoid of paratenon—are exposed. Desiccation of these underlying structures leads to rapid necrosis, subsequent infection, and catastrophic loss of hand function.
Whenever anatomically feasible, direct skin suture without tension remains the gold standard for wound closure. The biomechanical properties of the skin dictate the approach: dorsal hand skin is highly mobile and elastic, whereas palmar skin is thick, glabrous, and firmly tethered to the underlying palmar aponeurosis via vertical fibrous septa.
Neurovascular Considerations During Closure
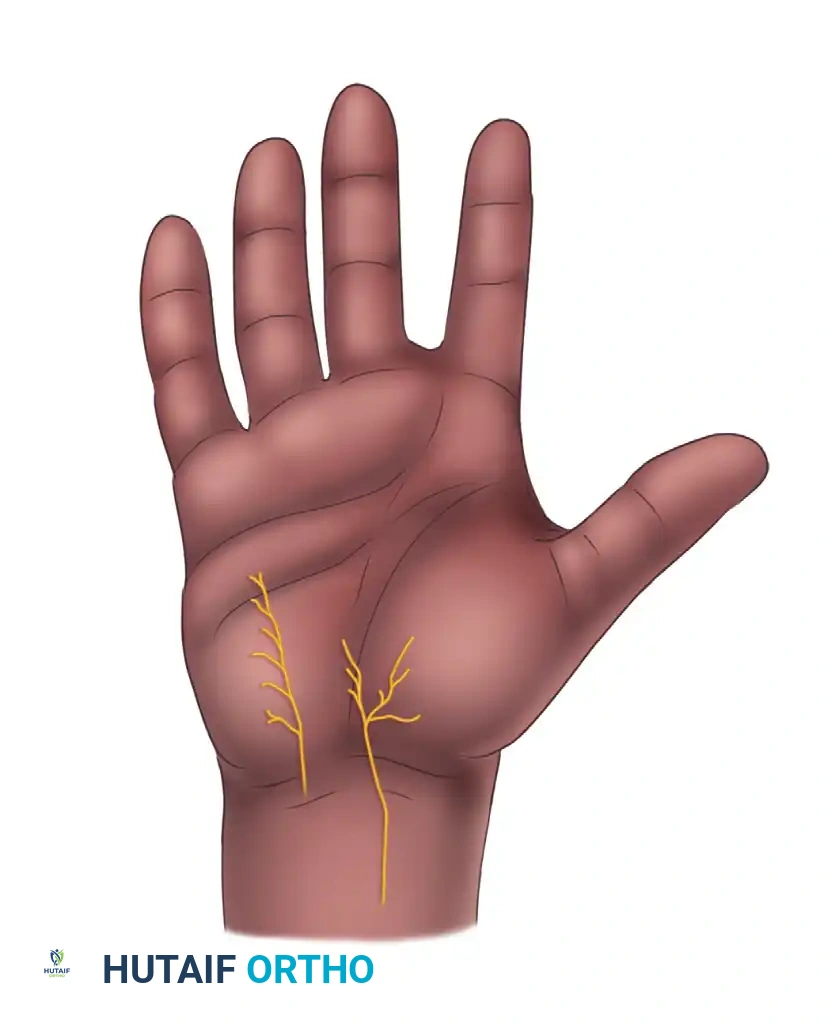
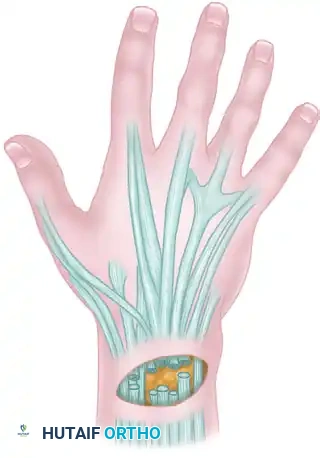
Before executing any closure, the surgeon must be acutely aware of the superficial neurovascular anatomy, particularly the palmar cutaneous branches of the median and ulnar nerves, which are highly susceptible to iatrogenic injury or entrapment in scar tissue.
Clinical Pearl: The palmar cutaneous branch of the ulnar nerve (PCBu) originates approximately 23 mm (Du) proximal to the thenar crease. The most ulnar subbranch of the palmar cutaneous branch of the median nerve (PCBm) terminates roughly 12 mm (Dm) from the thenar crease, while its most radial subbranch terminates about 5 mm (Dr) from the crease. Incisions and deep dermal sutures in these zones must be placed with extreme caution to avoid painful neuromas.
Tension-Relieving Positioning
On the dorsum of the hand or wrist, primary closure is frequently achievable even following considerable loss of mobile skin. This is accomplished by utilizing the viscoelastic properties of the skin and altering joint positions. Extending the wrist recruits mobile skin from the distal forearm, effectively relieving tension across the dorsal defect.
Surgical Warning: While wrist extension is a valuable maneuver for dorsal closure, extreme caution must be exercised to avoid hyperextending the metacarpophalangeal (MCP) joints. Prolonged MCP hyperextension leads to contracture of the collateral ligaments, resulting in severe, often irreversible, stiffness.
If a large dorsal defect is closed under maximum tension utilizing wrist extension, the patient's postoperative flexion of the wrist and fingers will be temporarily limited. In such cases, the surgeon must anticipate that secondary replacement of the skin by full-thickness or split-thickness grafting may be necessary at a later stage to restore full fist-making capability.
SUTURE PLACEMENT AND TISSUE APPROXIMATION
The theoretical advantages of primary closure by direct suture are entirely jeopardized unless each suture is placed with exacting precision. The fundamental goal is the anatomic restoration of tissue planes; the epidermis must align perfectly with the epidermis, and the dermis with the dermis.
In the digits, palm, and dorsum of the hand, buried subcutaneous sutures are almost never necessary and are generally contraindicated. The subcutaneous tissue in the hand is sparse, and buried foreign material (even absorbable suture) can provoke a localized inflammatory response, increasing the risk of infection and restrictive adhesions.
Pitfalls of Inadequate Suturing
Placing an insufficient number of sutures, or placing them too superficially and too close to the skin edges, severely compromises the integrity of the wound closure.

When sutures are placed too superficially:
1. The underlying deep dermal and subcutaneous tissues fail to heal properly, creating a dead space prone to hematoma formation.
2. The skin edges tend to separate (dehiscence) between the sutures under normal physiological tension.
3. The localized tension on the small bite of tissue leads to focal ischemia and necrosis around the suture tracks.
Conversely, a sufficient number of sutures, placed deeply to capture the robust dermis and positioned well away from the fragile skin edges, ensures broad tissue apposition, eliminates dead space, and distributes tension evenly across the wound bed.
ADVANCED SUTURING TECHNIQUES
The Apical Stitch (Half-Buried Mattress Suture)
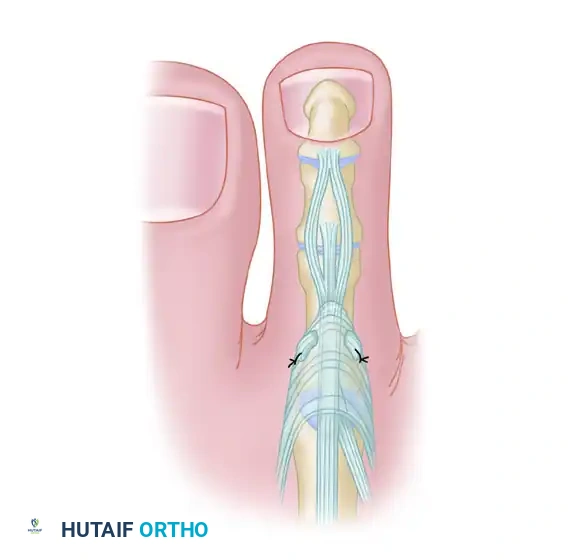
When closing complex lacerations or elective surgical flaps that feature a sharp, acute angle (V-shaped flaps), standard simple interrupted sutures are contraindicated at the apex. A standard suture placed through the tip of a flap will strangulate the delicate subdermal vascular plexus, inevitably leading to tip necrosis.
The apical stitch, also known as the half-buried horizontal mattress suture, is specifically designed to secure these sharp angles.
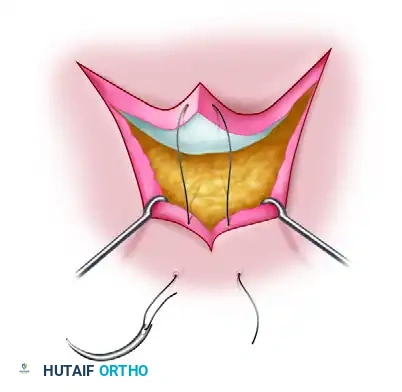
Biomechanics of the Apical Stitch:
The needle enters the skin of the non-flap side, passes through the deep dermis of the flap tip horizontally (parallel to the skin surface, without penetrating the epidermis of the flap), and exits the skin on the opposite non-flap side. This technique effectively anchors the flap into position without compromising its fragile terminal microcirculation.
Management of Redundant Tissue: "Dog Ear" Excision
When a wound with unequal edge lengths is closed, or when a flap is rotated, a standing cone of redundant tissue—colloquially known as a "dog ear"—frequently forms at the apices of the incision. Leaving a dog ear is cosmetically unacceptable and can interfere with the fit of orthotic devices or gloves.
There are multiple techniques for excising a dog ear. One common method involves splitting the redundant tissue down the middle to create two distinct triangles, which are then individually excised at their bases. The line of excision on one side serves as a precise template for the contralateral side.
An alternative, highly effective method for excising a dog ear is detailed below:
Step-by-Step Dog Ear Excision:
1. Elevation: The redundant fold of skin is elevated and caught at its absolute apex using a sharp skin hook.
-
Retraction and Incision: The fold is retracted firmly to one side. A scalpel is used to incise the skin along the base of the fold on the opposite side. The point where the incision ends (Point X) forms the new apex of the flap.
-
Unfolding and Excision: The skin is then unfolded across the newly created incision line. The resulting overlapping triangular flap of redundant tissue is sharply excised.
-
Final Closure: The newly tailored edges are approximated with simple interrupted sutures, resulting in a flat, tension-free closure.
ALTERNATIVE CLOSURE STRATEGIES
When primary closure by direct suture is impossible without exerting excessive tension, alternative reconstructive strategies must be employed without prolonged delay (ideally within 5 days to prevent chronic colonization and fibrosis).
Skin Grafting
Defects that cannot be closed primarily are typically managed with skin grafts (split-thickness or full-thickness, depending on the functional demands of the recipient site).
Healing by Secondary Intention (Open Palm Technique)
In specific clinical scenarios, intentionally leaving palmar wounds open is highly advantageous. The classic example is the McCash open palm technique used in the surgical management of severe Dupuytren disease or other long-standing volar contractures.
Transverse palmar wounds, even those with gaps as large as 2 to 3 cm, possess a remarkable capacity to heal uneventfully by secondary intention over 6 to 8 weeks. This open technique allows for the continuous egress of postoperative hematoma and edema fluid, significantly reducing overall hand swelling, minimizing the risk of deep space infection, and allowing immediate postoperative mobilization of the digits. Similarly, palmar digital and proximal interphalangeal skin gaps can successfully heal by secondary intention.
Z-PLASTY: PRINCIPLES AND TISSUE TRANSPOSITION
The Z-plasty is a fundamental application of the transposition type of local flap. It involves the construction of suitably designed skin flaps from adjacent areas, which are then transposed to release a linear contracture.
Biomechanics and Geometry of Z-Plasty
The primary biomechanical effect of a Z-plasty is a gain in length along the central limb, accompanied by a change in the orientation of the scar (typically by 90 degrees). Its primary indication is the release of a long, narrow scar contracture surrounded by adjacent tissue that is sufficiently mobile to allow shifting without risking ischemic necrosis.
Surgical Warning: Z-plasty should never be used in an attempt to close a wide fusiform defect, nor should it be utilized in the primary closure of an acute wound, unless the wound is a clean, linear laceration identical to a surgical incision.
The success of a Z-plasty depends entirely on precise geometric planning. The angle that the central limb of the Z makes with each of the two peripheral limbs dictates the theoretical gain in length:
* 30-degree angles: Yield a 25% increase in length.
* 45-degree angles: Yield a 50% increase in length.
* 60-degree angles: Yield a 75% increase in length.
Angles less than 45 degrees are generally impractical because the resulting narrow flap tips are highly susceptible to vascular compromise and necrosis. Conversely, angles greater than 60 degrees create flaps that are excessively broad and difficult to transpose without creating severe, counterproductive tension. Therefore, the optimal angle for most hand applications is between 45 and 60 degrees.
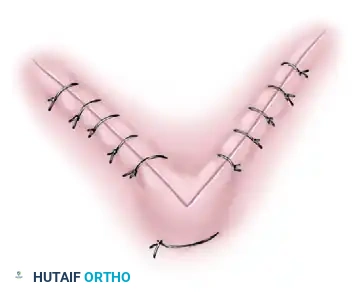
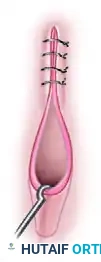
Surgical Technique: Simple Z-Plasty
-
Incision Planning: Design the central limb of the Z directly along the line of the scar contracture that requires release.
-
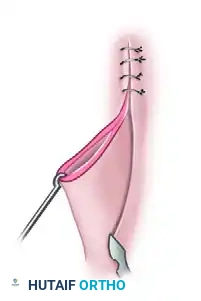
Flap Creation: Make the two peripheral limbs of the Z equal in length to the central limb. Ensure the angle between each peripheral limb and the central limb is equal (typically 60 degrees). Incise the skin and carefully elevate the triangular flaps, ensuring a robust subcutaneous base to preserve the subdermal plexus.
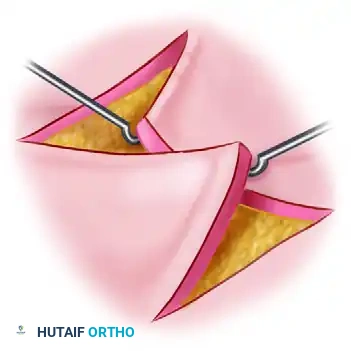
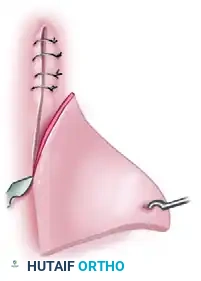
-
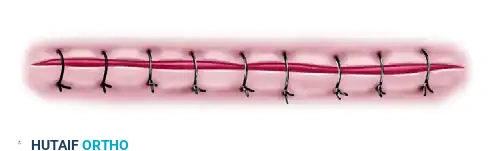
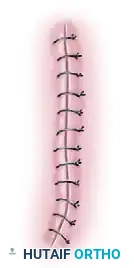
Transposition and Suture: Transpose the flaps into their new positions. Handle the delicate points of the flaps with atraumatic technique (using skin hooks rather than crushing forceps). Secure the tips of the transposed flaps using the apical stitch (half-buried mattress suture) to prevent tip necrosis, followed by simple interrupted sutures along the limbs.

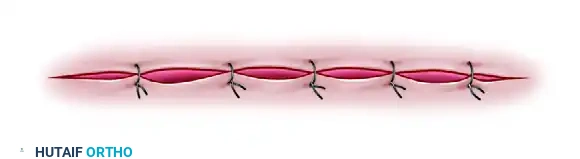
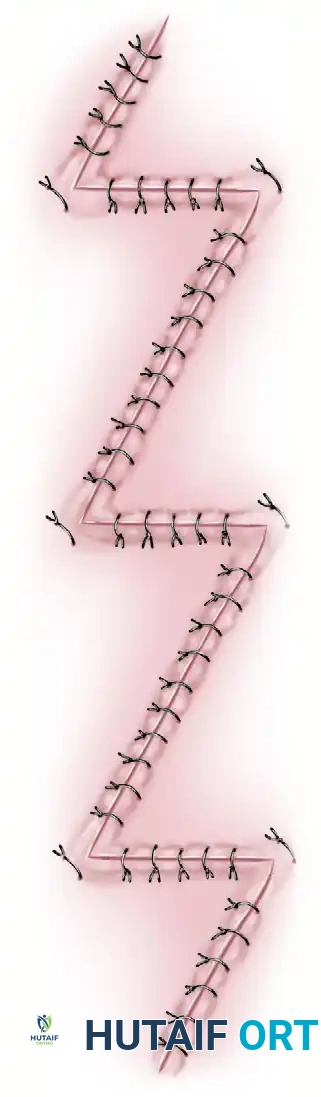
Multiple Z-Plasties
A single large Z-plasty may not be feasible for releasing a very long contracture (such as a longitudinal burn scar crossing multiple joints), as it would require harvesting excessively large flaps that exceed the available mobile skin. In these instances, a continuous series of multiple Z-plasties is indicated.
Multiple Z-plasties distribute the tension across several smaller transposed flaps, effectively lengthening the scar while keeping the flaps within safe vascular dimensions.

The McGregor Modification
McGregor introduced a highly effective modification of the standard multiple Z-plasty, specifically tailored for use in the fixed, unyielding palmar skin of the hand and fingers.
In the McGregor modification, the lengths of the limbs may vary, allowing adjoining flaps to be made larger or smaller depending on the local availability of mobile skin. However, the fundamental rule remains: the lengths of the limbs of each individual Z must be equal to one another. Furthermore, the oblique limbs are intentionally curved rather than straight. This curvature broadens the tips of the flaps, significantly increasing their vascular cross-section and reducing the risk of ischemic necrosis in the unforgiving palmar environment.
Additionally, specialized three-flap arrangements (such as the jumping man flap or modified double opposing Z-plasties) are highly effective for relieving complex web space contractures, particularly in the second, third, or fourth interdigital webs.
POSTOPERATIVE PROTOCOLS
Following any complex skin closure or Z-plasty in the hand, meticulous postoperative care is required:
* Immobilization: The hand should be immobilized in a bulky, non-compressive soft dressing with a volar orthosis. The wrist is typically placed in slight extension (20-30 degrees), MCP joints in 70-90 degrees of flexion, and IP joints in full extension (the intrinsic-plus or "safe" position) to prevent collateral ligament contracture.
* Elevation: Strict elevation above heart level for the first 48-72 hours is critical to minimize edema, which can compromise flap microcirculation.
* Mobilization: If the closure is tension-free, early protected active range of motion (AROM) can begin within 3 to 5 days under the guidance of a certified hand therapist. If the closure is under tension or a graft was utilized, immobilization may be extended to 10-14 days.
* Suture Removal: Sutures in the hand are typically left in place for 10 to 14 days. In areas of high tension or thick palmar skin, they may remain for up to 21 days to prevent dehiscence.
You Might Also Like