Single-Stage Flexor Tendon Grafting: Comprehensive Surgical Techniques
Key Takeaway
Single-stage flexor tendon grafting is indicated for delayed presentations, segmental tendon loss, or severe myocontracture. Success relies on strict prerequisites: pliable skin, full passive joint motion, intact A2 and A4 pulleys, and adequate sensation. This guide details donor tendon harvesting, precise graft tensioning, and meticulous surgical techniques to restore digital flexion while avoiding complications like the lumbrical plus finger.
INTRODUCTION AND INDICATIONS
The reconstruction of finger flexors within the critical Zone II—historically termed "no man's land"—remains one of the most formidable challenges in hand surgery. When the flexor digitorum sublimis (FDS) and flexor digitorum profundus (FDP) tendons have been divided within the fibro-osseous sheath, primary repair is the gold standard. However, single-stage flexor tendon grafting becomes the procedure of choice when primary repair is precluded.
Indications for a single-stage tendon graft include:
* Delayed Presentation: A significant delay in treatment leading to tendon retraction and irreversible myocontracture of the muscle belly, rendering end-to-end approximation impossible without excessive tension.
* Segmental Tendon Loss: Traumatic defects where a gap exists in the tendon substance.
* Failed Primary Repair: Rupture of a previous repair with subsequent tendon retraction and scarring, provided the retinacular pulley system remains largely intact.
💡 Clinical Pearl: The "Tissue Equilibrium" Concept
Tendon grafting should never be performed in a traumatized, inflamed, or stiff digit. The concept of "tissue equilibrium" dictates that the soft tissue bed must be completely healed and supple before introducing an avascular graft.
PREOPERATIVE PREREQUISITES AND PATIENT SELECTION
The success of a single-stage flexor tendon graft is entirely dependent on the preoperative condition of the digit. Boyes' criteria and subsequent modifications outline strict prerequisites that must be met before proceeding:
- Pliable Soft Tissue Bed: The skin and subcutaneous tissues must be supple, well-vascularized, and free of dense, restrictive scarring.
- Wound Healing: All previous traumatic or surgical wounds must be completely healed.
- Resolution of Edema: The digit must be free of induration and swelling.
- Full Passive Range of Motion (ROM): The proximal interphalangeal (PIP) and distal interphalangeal (DIP) joints must have a full, unrestricted passive arc of motion. A tendon graft cannot overcome a joint contracture.
- Adequate Sensibility: Sensation in the finger must be normal, or at least one digital nerve must be intact. If one digital nerve is divided, it may be repaired concurrently with the grafting procedure, provided the contralateral nerve is functioning.
- Intact Pulley System: The critical A2 (proximal phalanx) and A4 (middle phalanx) pulleys must be intact to prevent bowstringing and ensure mechanical efficiency. If these are incompetent, a two-stage reconstruction with silicone rod placement and pulley reconstruction is mandated.
Prognostic Factors: Age is a highly significant prognostic indicator. The most favorable outcomes are observed in patients aged 10 to 30 years. Conversely, results are notably poorer in very young children (due to compliance issues) and in patients older than 50 years (due to joint stiffness and diminished neuroplasticity).
DONOR TENDON SELECTION AND HARVESTING TECHNIQUES
The ideal donor tendon should possess adequate length, a suitable diameter that easily glides within the flexor sheath, and minimal donor-site morbidity.
1. The Palmaris Longus Tendon (First Choice)
The palmaris longus is the premier choice for flexor tendon grafting. It fulfills all biomechanical requirements: it is flat, surrounded by a rich paratenon, and provides approximately 15 cm of length.
Preoperative Assessment:
The presence of the palmaris longus must be confirmed clinically prior to surgery. It is present unilaterally in 85% of individuals and bilaterally in 70%.
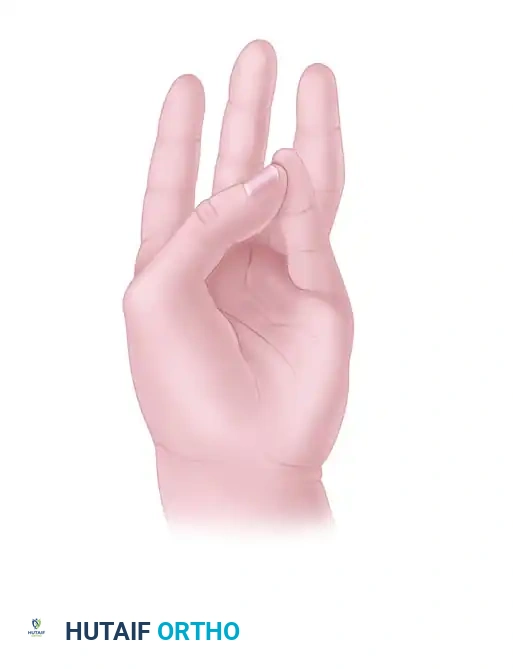
Schaeffer’s Test: Instruct the patient to appose the tips of the thumb and little finger while actively flexing the wrist. The tendon will prominently bowstring at the volar wrist.
Harvesting Technique:
1. Make a short transverse incision directly over the tendon, just proximal to the distal wrist flexion crease.
2. Identify the tendon, grasp it with a hemostat, and apply distal traction to palpate its proximal course.
3. Make a second transverse incision at the junction of the middle and proximal thirds of the volar forearm.
4. Identify the tendon proximally, divide it at its musculotendinous junction, and withdraw the segment distally.
5. Alternative: A tendon stripper can be utilized through a single distal incision, though this sacrifices the paratenon.
2. The Plantaris Tendon (Second Choice)
When the palmaris longus is absent or insufficient, the plantaris tendon is an excellent alternative. It is present in 93% of the population and offers nearly double the length of the palmaris longus, yielding enough material for two separate grafts.
Anatomical Considerations:
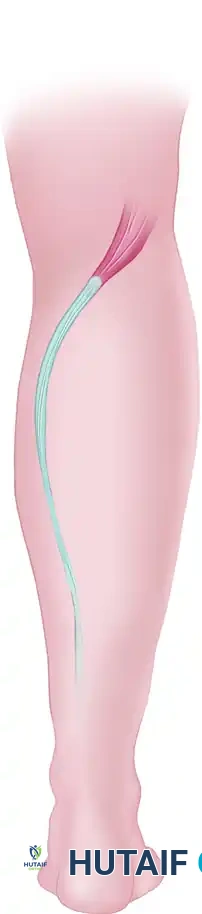
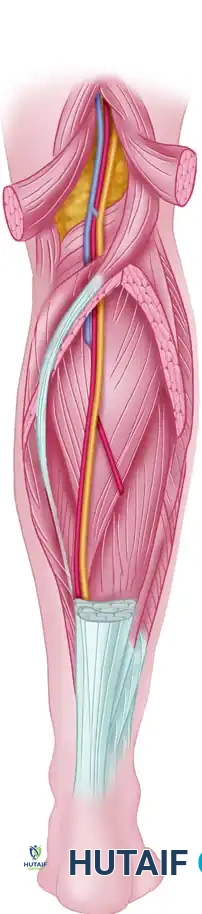
The plantaris muscle belly lies in the popliteal fossa, and its long, slender tendon courses distally between the gastrocnemius and soleus, inserting anteromedial to the Achilles tendon.

Harvesting Technique:
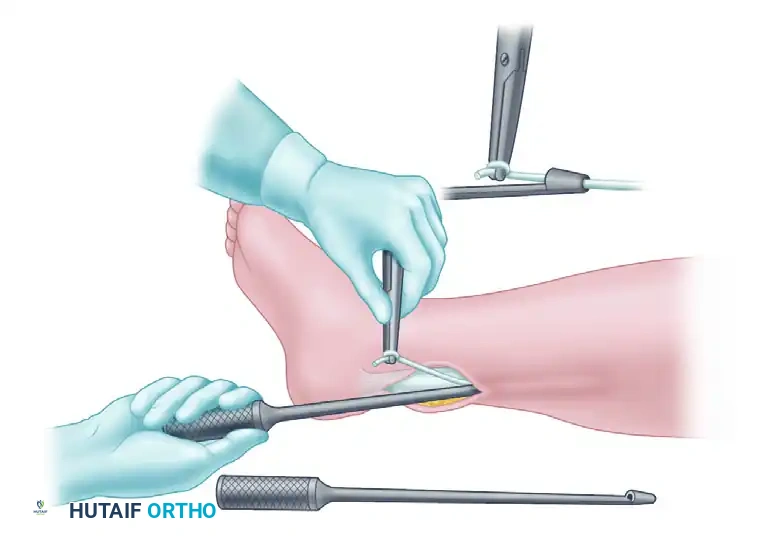
1. Make a small medial longitudinal incision just anterior to the insertion of the Achilles tendon.
2. Identify the plantaris tendon as a distinct slip separate from the Achilles.
3. Divide the tendon near its calcaneal insertion.

- Thread the free end through the loop of a Brand tendon stripper.
- With the knee in full extension, hold the distal tendon taut and advance the stripper proximally up the calf.
- Resistance will be encountered at the gastrocsoleus fascia; overcome this with firm, steady pressure.
- Advance the stripper approximately 25 cm until the muscle belly is reached. Palpate the stripper through the skin, make a 5 cm longitudinal incision over it, free the muscle belly, and divide the tendon under direct vision.
3. Alternative Donor Grafts
- Long Extensors of the Toes: Used when multiple grafts are required. They are less desirable due to multiple interconnections and a higher propensity for adhesion formation.
- Extensor Indicis Proprius (EIP): Can be utilized, but requires careful repair of the extensor hood to prevent extensor lag.
- Flexor Digitorum Sublimis (FDS): Generally contraindicated as a free graft. It is too thick, leading to central avascular necrosis, severe local inflammatory reactions, and dense adhesions.
SURGICAL TECHNIQUE: SINGLE-STAGE TENDON GRAFTING
Step 1: Incision and Exposure
Meticulous exposure is critical to prevent vascular compromise to the skin flaps and to visualize the entire flexor apparatus.
1. Utilize a Brunner zigzag or a volar oblique/midlateral incision on the volar aspect of the finger.
2. Extend the exposure from the distal phalanx to the proximal finger crease.
3. Surgical Warning: Carefully avoid entering the PIP joint laterally, as the subcutaneous fat is exceptionally thin in this region.
4. Identify and protect the neurovascular bundles bilaterally. Ensure skin flaps are elevated full-thickness to prevent marginal necrosis.
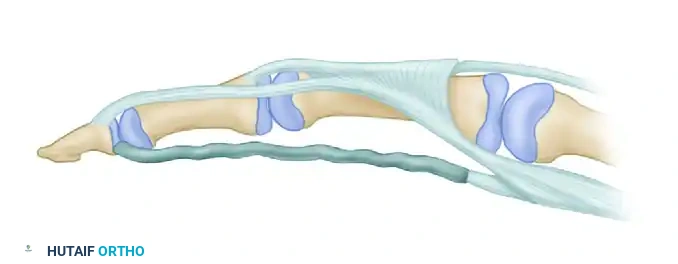
Step 2: Preparation of the Flexor Sheath
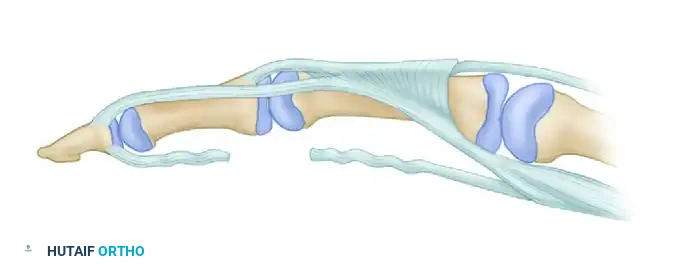
- Expose the fibro-osseous flexor sheath. The primary objective is to preserve as much unscarred sheath as possible to act as a gliding surface and a barrier to adhesions.
- Crucial Step: Excise no more than absolutely necessary of the A2 and A4 pulleys. Complete excision of either will result in severe bowstringing and a profound loss of tendon excursion and mechanical advantage.
- Free the scarred FDS and FDP tendons.
- Preserve the volar plates of the PIP and DIP joints. In patients with inherent ligamentous laxity or hyperextensible joints, perform a tenodesis of the FDS stump to the proximal phalanx to prevent a postoperative swan-neck deformity.
Step 3: Distal Graft Insertion
The distal attachment must be robust enough to withstand early active or controlled passive motion protocols.
- Divide both native tendons at their insertions.
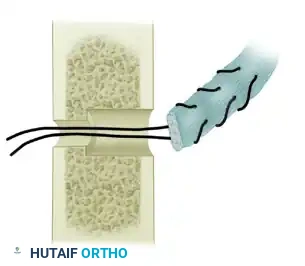
- Using a small osteotome or chisel, raise a small osteoperiosteal flap on the volar surface of the distal phalanx, just distal to the DIP joint.
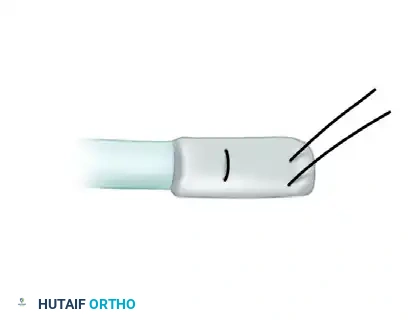
- Under this bone flap, drill a small hole using a Kirschner wire. The hole must be large enough to accommodate two strands of 4-0 monofilament wire or non-absorbable suture.
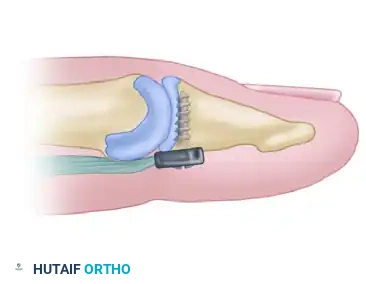
- Place a pull-out wire (retrograde Bunnell technique or single-loop antegrade) into the distal end of the donor graft.
- Thread the pull-out wire through the drill hole in the distal phalanx. Pass the needles straight through the nail plate or the hyponychium.
- Tie the suture over a sterile felt pad and button on the dorsal aspect of the fingertip. Reinforce the volar attachment with an absorbable mattress suture.
🔪 Pediatric Alternative
In children, to avoid the distress of later removing a pull-out button, suture the distal end of the graft directly into a longitudinal split in the remaining distal FDP stump, provided the stump is robust enough to hold a core suture.

Step 4: Proximal Graft Passage and Tensioning
- Make a transverse palmar incision over the midbelly of the lumbrical muscles.
- Identify the proximal stumps of the FDS and FDP. Divide the FDS as far proximally as possible and discard it. Retain the FDP for motor attachment to the graft.
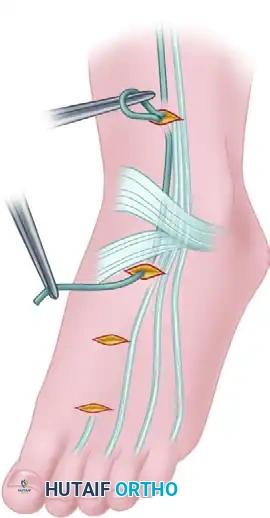
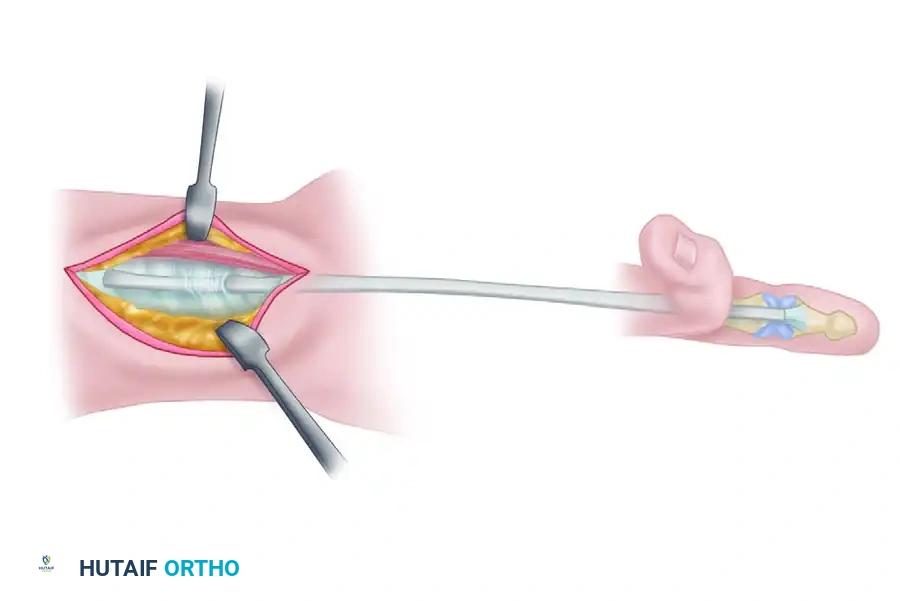
- Pass the donor graft proximally through the preserved flexor sheath into the palm. Technique tip: Wet the tendon with saline and use a smooth suture passer or a 22-gauge wire loop to facilitate smooth passage without fraying the graft.
Setting the Tension:
Setting the correct tension is arguably the most difficult and critical step of the procedure.
1. Place the wrist in neutral (0 degrees) and the finger in full extension.
2. Apply physiological traction to the proximal FDP musculotendinous unit and distal traction on the graft.
3. Mark the proposed junction site with a sterile methylene blue pen.
4. The Cascade Rule: Adjust the tension so that when the wrist is passively extended, the grafted finger is automatically brought into a posture of slightly more flexion than the adjoining normal digits. The normal cascade of the hand dictates increasing digital flexion from the index to the small finger.
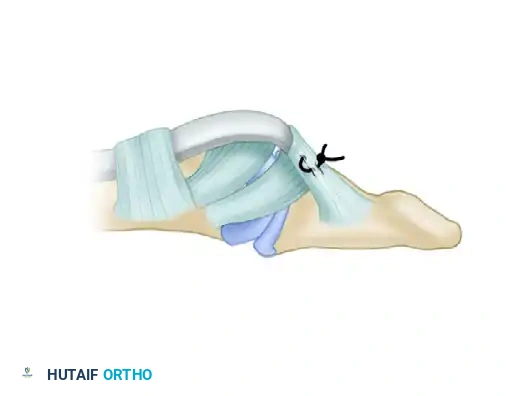
Step 5: Proximal Anastomosis
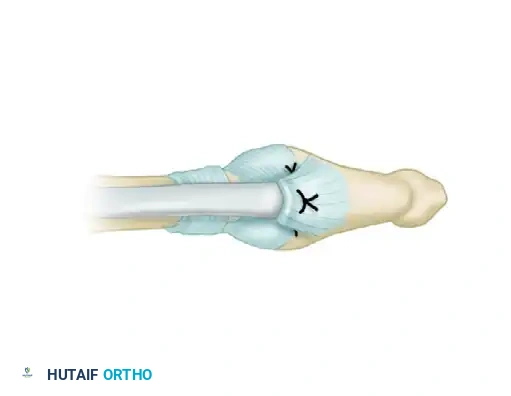
- Perform the proximal anastomosis using a Pulvertaft "fish-mouth" weave or a crisscross Bunnell method. The Pulvertaft weave is vastly superior as it allows for fine-tuning of tension before final knot tying and provides immense biomechanical strength.
- Weave the graft through the FDP motor tendon at least three times, securing each pass with a horizontal mattress suture of 3-0 or 4-0 non-absorbable braided material.


🚨 Surgical Warning: Avoid the Lumbrical
NEVER suture the lumbrical muscle to the tendon junction. Doing so artificially increases resting tension in the lumbrical, directly causing a postoperative "lumbrical plus" deformity.
CLOSURE AND POSTOPERATIVE PROTOCOL
Hemostasis and Closure
- Deflate the tourniquet prior to skin closure. Obtain meticulous hemostasis using bipolar electrocautery. A postoperative hematoma within the flexor sheath will inevitably lead to dense fibrosis and graft failure.
- Apply manual pressure for 5 minutes.
- Close the palmar and digital wounds with non-absorbable monofilament sutures. Avoid deep subcutaneous sutures that may tether the graft.
- Insert a small drain in the proximal palmar wound if oozing persists.
Splinting and Rehabilitation
- Apply a sterile, non-adherent dressing.
- Immobilize the hand in a dorsal blocking splint (posterior short-arm splint).
- Wrist: 40 to 45 degrees of flexion. (Avoid forced hyperflexion to prevent median nerve compression).
- MCP Joints: 60 to 70 degrees of flexion.
- IP Joints: Full extension.
- In pediatric patients, extend the splint above the elbow (long-arm cast) to prevent the child from removing the dressing.
Rehabilitation Phases:
* 0-4 Weeks: The hand is elevated strictly for the first 48 hours. Rehabilitation depends on surgeon preference, utilizing either a modified Kleinert (active extension against rubber band traction) or a Duran (controlled passive motion) protocol. The avascular graft undergoes a phase of necrosis and revascularization, making it highly susceptible to rupture during this period. No active flexion is permitted.
* 3-4 Weeks: The distal pull-out button and suture are removed.
* 4-8 Weeks: Protected, gentle active motion is initiated. The dorsal blocking splint is gradually discontinued.
* 8-12 Weeks: Progressive strengthening begins.
* 12-14 Weeks: Return to normal, forceful activities and heavy lifting is permitted.
COMPLICATIONS AND PITFALLS
The "Lumbrical Plus" Finger
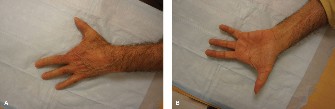
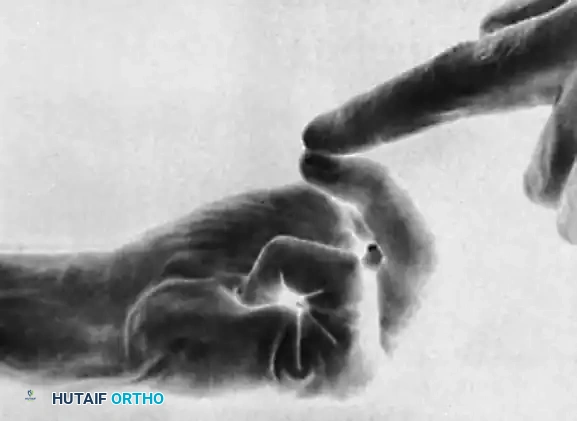
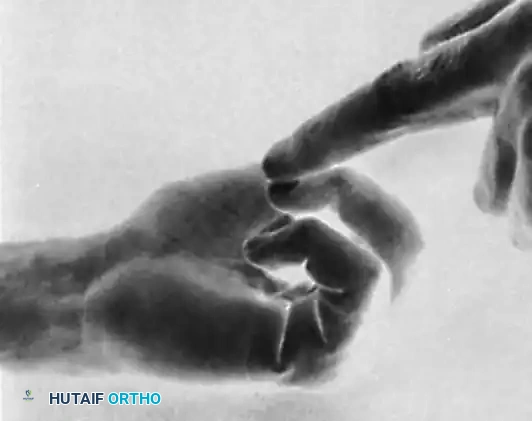
The most notorious complication specific to flexor tendon grafting (and FDP avulsions) is the "lumbrical plus" finger.
Pathophysiology:
This phenomenon occurs when the tendon graft is sutured under insufficient tension (the graft is too "long"). When the patient attempts to actively flex the digit, the FDP muscle contracts. Because the graft is lax, the proximal pull of the FDP is transmitted entirely through the intact lumbrical muscle (which originates from the FDP tendon in the palm) rather than through the distal graft.
The lumbrical muscle inserts onto the lateral band of the extensor mechanism. Therefore, the proximal pull causes paradoxical extension of the PIP and DIP joints during an active attempt at finger flexion.
Clinical Presentation:
The middle finger is most commonly affected. When the patient attempts to make a fist, the MCP joint flexes, but the PIP and DIP joints remain rigidly extended.
Prevention and Treatment:
* Prevention: Ensure precise tensioning during the proximal anastomosis. Do not incorporate the lumbrical into the repair site.
* Treatment: If the deformity is established and functionally limiting, surgical intervention is required. The treatment of choice is a simple release (transection) of the involved lumbrical muscle in the palm, which eliminates the paradoxical extensor pull and restores the transmission of force through the tendon graft.
📚 Medical References
- Flexor tendon grafting, Hand Clin 1:97, 1985.
- Wilson RL, Carter MS, Holdeman VA, et al: Flexor profundus injuries treated with delayed two-staged tendon grafting, J Hand Surg 5:74, 1980.
- Wilson S, Sammut D: Flexor tendon graft attachment: a review of methods and a newly modifi ed tendon graft attachment, J Hand Surg 28B:116, 2003.
You Might Also Like