Distal Biceps Tendon Injury: Crucial Steps for Optimal Diagnosis & Care
Key Takeaway
For anyone wondering about Distal Biceps Tendon Injury: Crucial Steps for Optimal Diagnosis & Care, For a suspected distal biceps tendon rupture, characterized by a pop and pain in the antecubital fossa after an eccentric overload injury, an MRI is the most appropriate next step. This imaging assesses the integrity of the distal biceps tendon, distinguishing between complete versus partial tears. Diagnostic clarity is crucial for guiding urgent management and potential early surgical intervention.
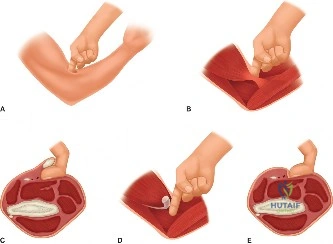
A 45-year-old active male presents to your clinic reporting a sudden "pop" in his dominant elbow while lifting a heavy crate. He has pain in the antecubital fossa and associated ecchymosis. You examine the patient and note the following findings in the image below. What is your clinical diagnosis and your physical examination strategy to confirm it?
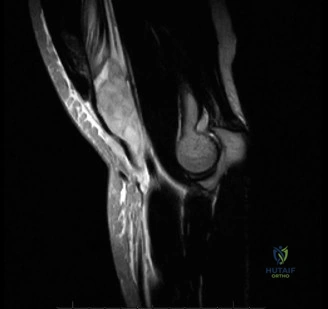
Candidate: The patient likely has a distal biceps tendon rupture. I would examine him for a palpable defect in the cubital fossa, weakness in flexion and supination, and ecchymosis. I would perform the "Hook Test" to see if I can hook my finger around the biceps tendon.
Failing to mention the "Hook Test" specifically, or forgetting to check for the integrity of the lacertus fibrosus. Also, failing to differentiate between acute and chronic presentations or neglecting to mention the neurovascular exam (specifically assessing the LACN sensation and distal pulses).
This is a classic distal biceps tendon rupture. My exam starts with inspection for the 'Popeye' sign and ecchymosis in the cubital fossa. I would perform the Hook Test: with the elbow flexed to 90 degrees and the forearm supinated, I should be able to hook my index finger under the lateral edge of the tendon. Absence of this cord-like structure is diagnostic. I would also assess the lacertus fibrosus; if it is intact, the muscle belly will not retract significantly. Finally, I would perform a thorough neurovascular exam, specifically testing sensation in the lateral forearm (LACN) and ensuring distal pulses are palpable, acknowledging that the brachial artery lies in close proximity.
The diagnosis is confirmed. The patient is a manual laborer who wants to return to full-duty work. He asks about the surgical options and the risks involved. Specifically, explain the "internervous plane" and the primary nerve at risk during your preferred approach.
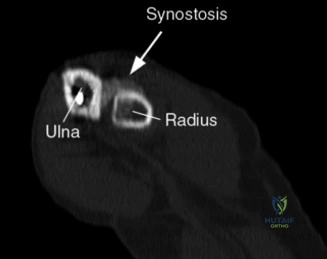
Candidate: I would perform a single-incision anterior approach. The internervous plane is between the brachioradialis (radial nerve) and the pronator teres (median nerve). The main nerve at risk is the posterior interosseous nerve (PIN).
Not explaining *why* the PIN is at risk or failing to mention how to protect it during the procedure (i.e., the role of forearm pronation). Also, forgetting to mention the Lateral Antebrachial Cutaneous Nerve (LACN) which is at risk during the skin incision.
For a primary repair, the single-incision anterior approach is standard. The internervous plane lies between the brachioradialis (innervated by the radial nerve) and the pronator teres (innervated by the median nerve). The most critical structure at risk is the Posterior Interosseous Nerve (PIN). To protect the PIN, I perform the dissection and tuberosity drilling with the forearm in full pronation; this moves the PIN posterior to the radial tuberosity and away from the surgical field. Additionally, I use a deep retractor against the radial shaft to physically protect the nerve. I would also warn the patient of the risk of injury to the Lateral Antebrachial Cutaneous Nerve (LACN), which is superficial and prone to sensory neuropraxia.
You are now in the operating room. You have exposed the radial tuberosity. Describe your technique for fixation of the tendon to the bone and explain why you choose this method.
Candidate: I use the cortical button technique. I drill into the tuberosity, pass the button through, and flip it on the posterior cortex. Then I tension the sutures to pull the tendon into the bone tunnel. It is stronger than other methods.
Candidates often fail to describe the technical steps accurately (e.g., forgetting the need for a bicortical tunnel) or fail to address the nuance of tunnel diameter and tendon tensioning. Also, failing to explain that the tendon must be placed in a supinated position to restore the normal anatomical relationship.
I favor the cortical button (e.g., EndoButton) fixation because it offers the highest biomechanical strength for early range of motion. The technique involves creating a bicortical tunnel through the radial tuberosity. The tendon is whip-stitched using a Krackow pattern. The button is passed through the anterior cortex, deployed, and flipped on the posterior cortex. I tension the sutures with the forearm in approximately 30-45 degrees of supination, as this is the anatomical position of the radial tuberosity for optimal mechanical advantage of the biceps as a supinator. This construct allows for "bone-to-tendon" healing within the tunnel, which is mechanically superior to simple suture anchors.