Peroneus Brevis Tenodesis and Complex Hindfoot Arthrodesis: A Master Surgical Guide
Key Takeaway
The Myerson peroneus brevis tenodesis is a highly effective surgical intervention for chronic lateral ankle instability and hindfoot varus. By utilizing the non-essential peroneus brevis tendon, surgeons can reconstruct the lateral ligamentous complex. This comprehensive guide details the biomechanical rationale, precise surgical steps, tendon routing, calcaneal fixation, and adjunctive triple arthrodesis techniques required to correct severe cavovarus and calcaneocavus deformities in both neuromuscular and non-neuromuscular patients.
INTRODUCTION TO LATERAL ANKLE RECONSTRUCTION
Chronic lateral ankle instability, particularly when complicated by a varus hindfoot deformity and peroneal tendon weakness, presents a formidable challenge to the orthopaedic surgeon. When the ankle joint is unstable in varus due to chronic insufficiency of the lateral ligamentous complex and the dynamic peroneal stabilizers, anatomic repair alone is often insufficient. In these complex scenarios, Myerson recommended a robust tenodesis utilizing the peroneus brevis tendon.
The rationale for utilizing the peroneus brevis is rooted in its expendability in specific pathologic states; in patients with profound neuromuscular weakness, it often possesses no active function, making it an ideal autograft for structural stabilization. This comprehensive masterclass details the preoperative evaluation, biomechanical principles, and step-by-step surgical execution of the Myerson peroneus brevis tenodesis, alongside adjunctive triple arthrodesis techniques for severe cavovarus and calcaneocavus deformities.
PREOPERATIVE EVALUATION AND INDICATIONS
Clinical Assessment
Patients typically present with a history of recurrent inversion injuries, subjective "giving way," and lateral-sided ankle pain. A thorough biomechanical examination must assess hindfoot alignment (varus vs. valgus), midfoot mobility, and forefoot-driven hindfoot deformities (e.g., a plantarflexed first ray driving the hindfoot into varus).
Neurologic evaluation is critical. The surgeon must differentiate between isolated ligamentous insufficiency and underlying neuromuscular disorders, such as Charcot-Marie-Tooth (CMT) disease or other hereditary sensorimotor neuropathies (HSMN). This distinction dictates whether the entire peroneus brevis tendon or only a split graft should be harvested.
Radiographic Analysis
Before proceeding with surgery, it is imperative to obtain standard weight-bearing radiographs of the foot and ankle, supplemented by stress views (talar tilt and anterior drawer).
Clinical Pearl: Always evaluate the tibiotalar joint for asymmetric narrowing or tilt. If the tibiotalar joint is tilted into varus, degenerative articular changes have usually occurred.
Myerson suggested that mild degenerative changes are not an absolute contraindication for joint-sparing procedures such as a calcaneal osteotomy or a triple arthrodesis combined with a peroneus brevis tenodesis. However, if the talar tilt is fixed, rigid, and accompanied by severe articular pain, a pantalar arthrodesis should be considered as the definitive salvage procedure.
Surgical Decision Making
- Mild to Moderate Deformity: Débridement, synovectomy, and removal of osteophytes and loose bodies may suffice when combined with ligamentous reconstruction.
- Flexible Hindfoot Varus: Realignment of the hindfoot with a lateralizing calcaneal osteotomy shifts the weight-bearing axis laterally, protecting the tenodesis.
- Rigid Hindfoot Varus: Requires a triple arthrodesis to achieve a plantigrade, stable foot.
- Neuromuscular Status:
- Hereditary Sensorimotor Neuropathy (HSMN): The entire peroneus brevis tendon can be utilized because it lacks functional motor capacity.
- Non-Neuromuscular Instability: The peroneus brevis tendon is split (anterior half harvested, posterior half retained) to preserve eversion strength, akin to the Chrisman-Snook reconstruction.
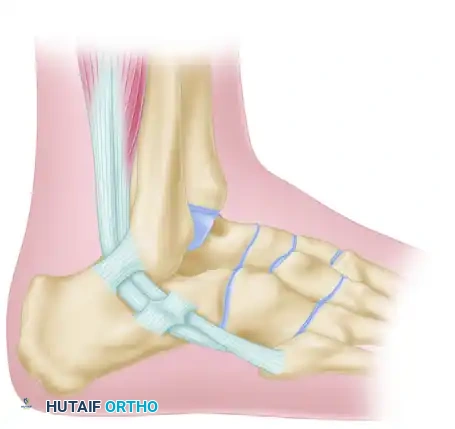
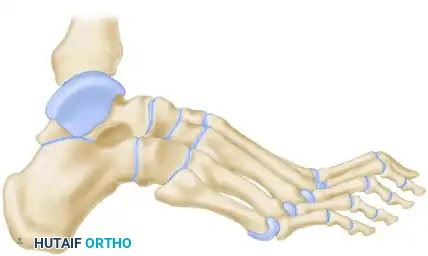
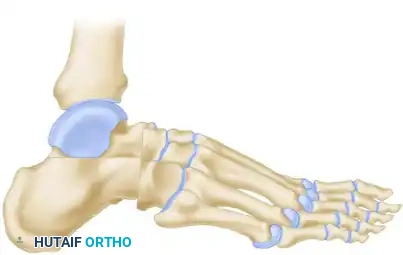
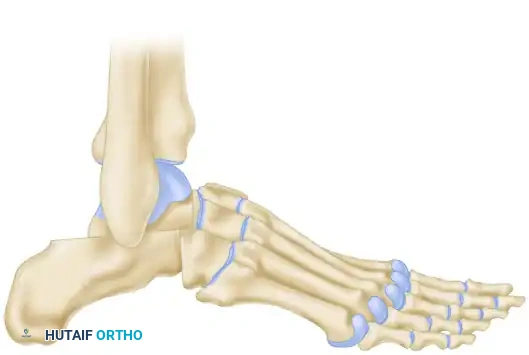
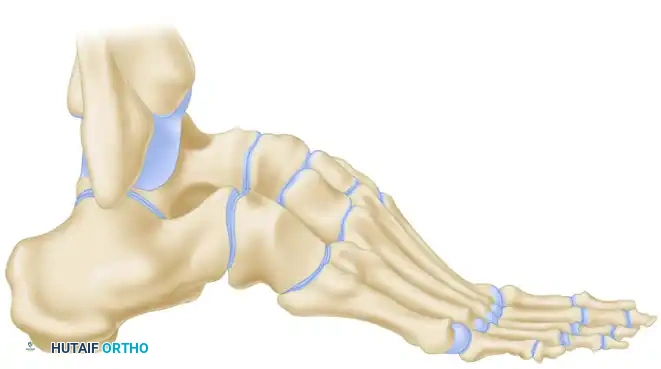
SURGICAL ANATOMY OF THE PERONEAL TENDONS
Understanding the spatial relationship of the peroneal tendons is paramount for safe harvest and routing.
- Proximal to the Fibula: The peroneus longus and brevis share a common synovial sheath within the retromalleolar groove.
- At the Fibula: Immediately posterior to the lateral malleolus, the peroneus longus lies anterior or superficial to the brevis tendon.
- Distal to the Fibula: This relationship changes as the tendons rotate; the brevis tendon becomes superficial and inserts onto the base of the fifth metatarsal.
Surgical Warning: The brevis tendon can be easily identified proximally because its muscle fibers extend much further distally on the tendon compared to the peroneus longus, which has no attached muscle at this level.
SURGICAL TECHNIQUE: MYERSON PERONEUS BREVIS TENODESIS
Patient Positioning and Anesthesia
The patient is placed in the lateral decubitus position with all bony prominences meticulously padded. A thigh tourniquet is applied. Regional anesthesia (popliteal block) combined with general anesthesia or deep sedation is preferred to provide optimal postoperative pain control.
Step 1: Incision and Exposure
Make a curvilinear incision posterolateral to the fibula. Begin 8 to 10 cm proximal to the tip of the fibula, tracking just posterior to the peroneal tendons.
Continue the incision distally along the lateral border of the hindfoot toward the cuboid, ensuring the sural nerve is identified and protected throughout the exposure.
Step 2: Tendon Identification and Harvest
Open the peroneal tendon sheath proximally, taking great care not to divide the superior peroneal retinaculum. Preserving this retinacular tissue is critical to prevent postoperative tendon subluxation.
Identify the peroneus brevis tendon proximally.

For Patients with Hereditary Sensorimotor Neuropathy (HSMN):
Transect the entire peroneus brevis tendon 8 to 10 cm proximal to the tip of the fibula. Sharply peel the muscle fibers off the tendon to maximize the length and girth of the graft.
For Patients Without Motor Neuropathy:
If only half the tendon is to be used, split off the anterior half. Leave the posterior half intact, as this segment has a more direct insertion onto the muscle belly, thereby preserving dynamic eversion.
Step 3: Distal Tendon Preparation
Near the calcaneocuboid joint, identify the peroneus brevis tendon and deliver it into the distal aspect of the wound.
Divide the separate distal sheath enclosing the peroneus brevis. Split the tendon longitudinally, ensuring that the distal 1 to 2 inches of the tendon remain firmly attached to its insertion at the base of the fifth metatarsal.
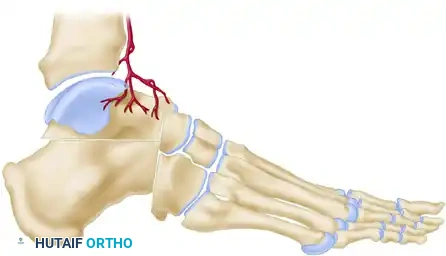
Step 4: Fibular Tunnel Preparation
Attention is turned to the lateral malleolus. Drill a 4.5-mm hole into the fibula from anterior to posterior, located approximately 1 cm proximal to the distal tip of the fibula.
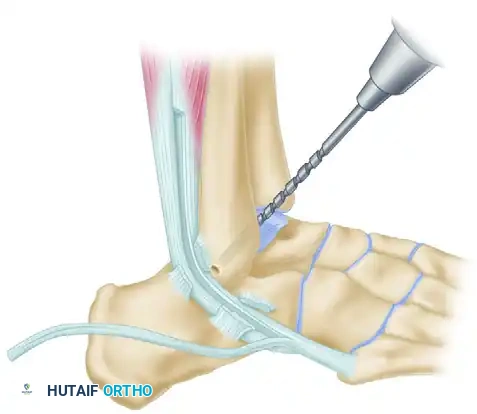
Clear the tunnel of any bony debris using a curette to ensure smooth passage of the tendon graft.
Step 5: Tendon Routing and Fibular Fixation
Pass the prepared tendon through the fibular hole from anterior to posterior.
Surgical Pearl: Hold the ankle in a strictly neutral position (0 degrees of dorsiflexion/plantarflexion and neutral inversion/eversion) during tensioning.
Suture the tendon to the robust periosteum over the anterior aspect of the fibula using non-absorbable sutures to establish the first point of fixation.
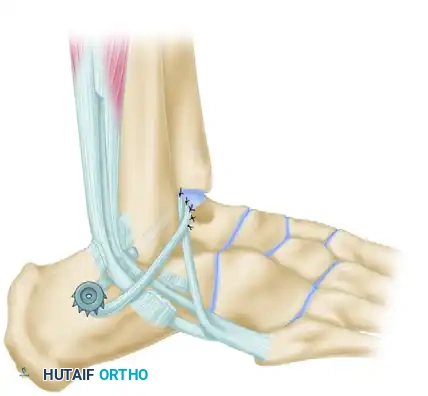
Step 6: Calcaneal Fixation
Pass the tendon deep to the peroneus longus tendon. The graft must now be secured to the lateral wall of the calcaneus to recreate the calcaneofibular ligament (CFL).
Drill a pilot hole into firm subchondral bone on the lateral aspect of the calcaneus. Select a 4-mm cancellous screw of appropriate length, paired with a spiked ligament washer.
Surgical Warning: Usually, a screw 30 mm long is sufficient. When measuring, add 3 to 4 mm to accommodate the thickness of the spiked washer. It is absolutely critical that the screw is not so long that it penetrates the medial calcaneal cortex, which could severely damage or tether the flexor hallucis longus (FHL) tendon or neurovascular bundle.
Pull the tendon inferior to the fibula to establish appropriate tension. Pass a No. 11 or No. 15 blade directly through the substance of the tendon to create a small slit. Insert the screw and washer through this slit. While maintaining strict traction on the tendon, advance the screw until the spiked washer gains firm, compressive purchase against the lateral calcaneal cortex. (If the lateral cortex is sclerotic, tapping may be required).
Step 7: Final Routing and Closure
Pass the remaining free end of the tendon (which is usually about 2 cm long) superficial to the peroneus longus tendon. Loop it back and attach it securely to itself at the tip of the fibula using multiple interrupted non-absorbable sutures.
Deflate the tourniquet, achieve meticulous hemostasis, and close the subcutaneous tissues and skin in a layered fashion.
Postoperative Care for Tenodesis
The patient is placed in a well-padded, short-leg, non-weight-bearing cast for 4 weeks. Following this initial phase of rigid immobilization, the cast is transitioned to a removable walking boot for an additional 4 weeks. Progressive weight-bearing and active range-of-motion (ROM) exercises of the ankle and subtalar joint are initiated during this second phase, followed by formal physical therapy focusing on peroneal strengthening and proprioception.
COMPLEX DEFORMITIES: TRIPLE ARTHRODESIS FOR CAVOVARUS AND CALCANEOCAVUS
In cases where the hindfoot varus is rigid, or when severe cavus or calcaneocavus deformities are present (often secondary to poliomyelitis or advanced CMT), soft tissue reconstruction alone will fail. A structural realignment via triple arthrodesis is mandated.
Siffert, Forster, and Nachamie Triple Arthrodesis
For severe cavus deformities, the Siffert, Forster, and Nachamie modification of the triple arthrodesis is highly effective. This technique focuses on resecting a specific dorsal wedge to plantarflex the forefoot and correct the arch.
Biomechanical Goal: A wedge of bone is removed by osteotomy from the midtarsal and subtalar joints. Crucially, the superior part of the talar head is retained to form a structural "beak."
The soft tissue structures anterior to the ankle joint are left undisturbed to maintain vascularity and anterior stability.
In the final position, the forefoot is displaced plantarward, and the dorsal cortex of the navicular is locked securely beneath the remaining "beak" of the talar head. This bony lock prevents dorsal subluxation of the midfoot and maintains the corrected arch height.
Arthrodesis for Calcaneocavus Deformity
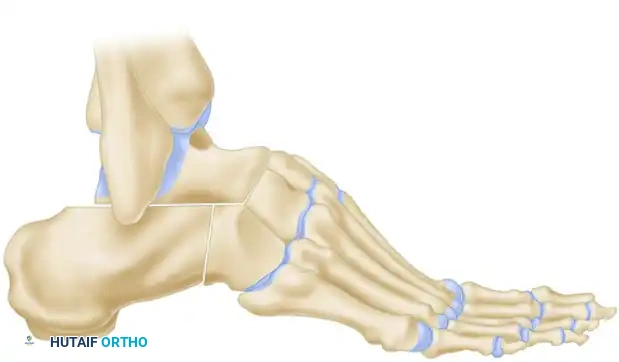
Calcaneocavus deformities require a different geometric resection. The primary issue is a vertically oriented calcaneus combined with a plantarflexed forefoot.

A posteriorly based wedge is resected from the subtalar joint.
Following the resection, the entire foot is displaced posteriorly at the subtalar joint. This posterior translation increases the lever arm of the Achilles tendon (if functional) and flattens the longitudinal arch, correcting the calcaneal pitch.
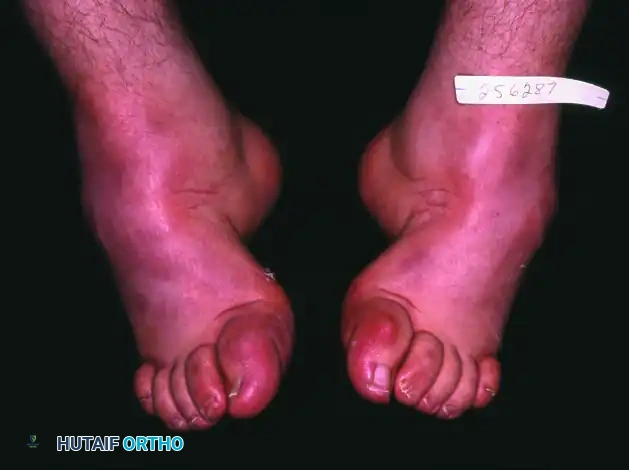
Severe Calcaneocavovarus (Poliomyelitis Sequelae)
In the most extreme cases of calcaneocavovarus, often seen as late sequelae of poliomyelitis, the deformity is rigid and multi-planar.
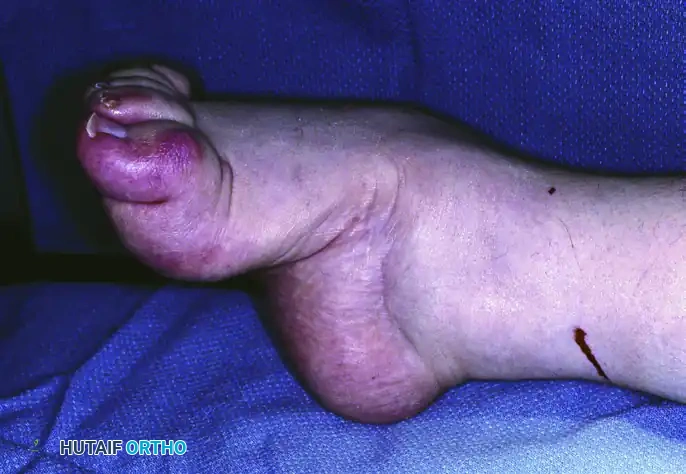
Medial and frontal clinical views demonstrate the profound elevation of the arch and varus rotation of the heel.
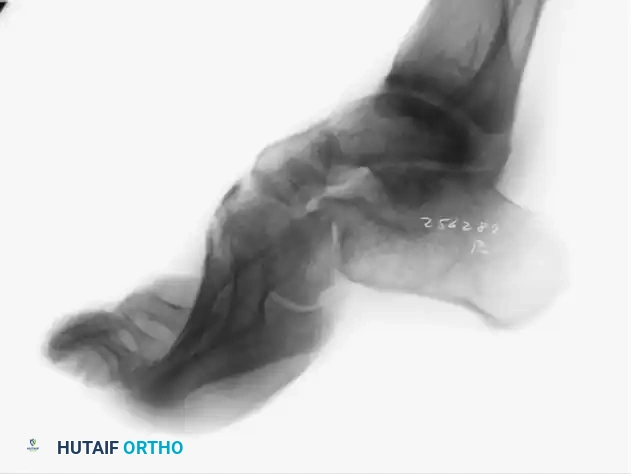
Weight-bearing radiographs confirm the vertical calcaneus and severe midfoot breach.
To correct this profound cavus deformity, standard wedge resections are insufficient. The entire navicular must be excised to adequately shorten the medial column and allow the forefoot to be brought up and out of its rigidly plantarflexed and adducted position.
Dunn Arthrodesis
The Dunn arthrodesis is a powerful technique designed specifically to address severe cavus by shortening the foot and shifting the pivot point.
The skin incision is made laterally, and a substantial amount of bone is resected, specifically targeting the complete excision of the navicular.
By removing the navicular, the medial column is drastically shortened.
The foot (excluding the talus) is then displaced posteriorly at the subtalar joint.
In the final reconstructed position, the head of the talus is apposed directly to the cuneiforms. This posterior displacement of the foot relative to the talus restores a plantigrade weight-bearing surface and significantly improves the biomechanical advantage of the posterior calf musculature.
You Might Also Like
