Orthopaedic Skin Grafts and Flaps: Surgical Techniques
Key Takeaway
Free skin grafts are fundamental in orthopaedic soft tissue reconstruction. The selection between split-thickness and full-thickness grafts dictates both graft survival and functional outcome. This guide details the biomechanical principles of graft contraction, precise dermatome harvesting techniques, and the application of tie-over bolster dressings to ensure optimal graft adherence and integration in complex musculoskeletal defects.
INTRODUCTION TO ORTHOPAEDIC GRAFTS AND FLAPS
The management of complex musculoskeletal trauma frequently necessitates advanced soft tissue reconstruction. In orthopaedic surgery, the reconstructive ladder dictates that wound coverage should be achieved using the simplest, most effective method that restores both form and function. When primary closure is impossible due to tissue loss, free skin grafts and local flaps become indispensable tools in the surgeon’s armamentarium.
The successful application of grafts and flaps requires a profound understanding of skin biomechanics, vascular physiology, and meticulous surgical technique. This comprehensive guide explores the critical principles of free skin grafting, the precise utilization of dermatomes, the step-by-step application of split-thickness skin grafts (STSG), and the execution of advanced local reconstructive techniques, such as the filleted finger flap for severe hand trauma.
BIOMECHANICS AND PHYSIOLOGY OF FREE GRAFTS
A free skin graft is a segment of dermis and epidermis that is completely detached from its native blood supply and transferred to a recipient site. The survival of the graft depends entirely on the vascularity of the recipient bed.
The Thickness Paradigm: Take vs. Function
The fundamental axiom of free skin grafting in orthopaedics is a delicate balance between graft survival and long-term functional durability.
Clinical Pearl: "The thinner the graft, the better the take; however, when the graft is expected to be permanent, the thicker the graft, the better the function."
- Thin Split-Thickness Skin Grafts (STSG): Thin grafts consist of the epidermis and a minimal layer of the papillary dermis. Because they have a lower metabolic demand and a thinner barrier for revascularization, they exhibit a superior "take" rate, even in suboptimal recipient beds. However, thin grafts are highly susceptible to secondary contraction—often contracting by 50% to 75% of their original size. They also offer poor resistance to friction and mechanical shear, making them less ideal for weight-bearing surfaces or joint creases.
- Thick Split-Thickness and Full-Thickness Skin Grafts (FTSG): Thick grafts include the epidermis and a substantial portion (or the entirety) of the reticular dermis. The dense collagen network of the reticular dermis provides excellent durability, allowing the graft to withstand friction and constant use. Furthermore, thick grafts undergo significantly less secondary contraction, typically shrinking only about 10%. The trade-off is a higher metabolic demand, requiring a pristine, highly vascularized recipient bed for successful integration.
Phases of Graft Healing
Understanding the physiology of graft integration is critical for postoperative management:
* Plasmatic Imbibition (Days 1-2): The graft absorbs plasma exudate from the recipient bed via capillary action, sustaining the cells and causing the graft to swell.
* Inosculation (Days 3-4): Capillary buds from the recipient bed align and connect with the severed vessels on the undersurface of the graft.
* Angiogenesis (Days 5+): New blood vessels grow directly into the graft, establishing a permanent vascular network.
INDICATIONS AND TIMING FOR GRAFTING
The timing of soft tissue coverage is a critical determinant of orthopaedic outcomes. Prolonged exposure of vital structures—such as tendons devoid of paratenon, bones stripped of periosteum, or neurovascular bundles—leads to desiccation, necrosis, and deep infection.
Surgical Warning: The sooner the graft can be applied, the better. As long as there is no sepsis or gross contamination, it is not necessary to wait for the formation of a granulation tissue bed.
Immediate or early grafting (within 72 hours of injury) minimizes fibrotic scarring and accelerates rehabilitation. However, the recipient bed must be meticulously debrided of all necrotic tissue. A graft will not survive on exposed cortical bone without periosteum, exposed cartilage, or exposed tendon without paratenon; in such cases, local or free vascularized flaps are required.
SURGICAL HARVESTING TECHNIQUES: DERMATOMES
The precise harvesting of a skin graft dictates both the quality of the coverage and the morbidity of the donor site. Dermatomes are calibrated instruments designed to harvest skin at highly specific depths.
Electrically Powered Dermatomes
Electrically powered dermatomes (e.g., Zimmer dermatome) are the workhorses of modern orthopaedic soft tissue coverage. They are highly efficient and relatively simple to operate.
- Advantages: They are not difficult to assemble and use. Even an inexperienced operator can cut consistently good, uniform grafts up to 7.5 cm wide.
- Preparation: Skin glue is not required. Instead, light lubrication of the donor skin and the dermatome blade with mineral oil or sterile petrolatum is highly helpful to ensure smooth gliding.
- Technique: The skin must be held taut by an assistant using a straight edge or tongue depressor. The dermatome is advanced with firm, downward, and forward pressure at a 45-degree angle.
- Limitations: Bony prominences (e.g., the anterior tibia, greater trochanter) are not satisfactory donor sites with these dermatomes, as the rigid underlying bone can cause the blade to gouge the tissue, creating full-thickness defects.
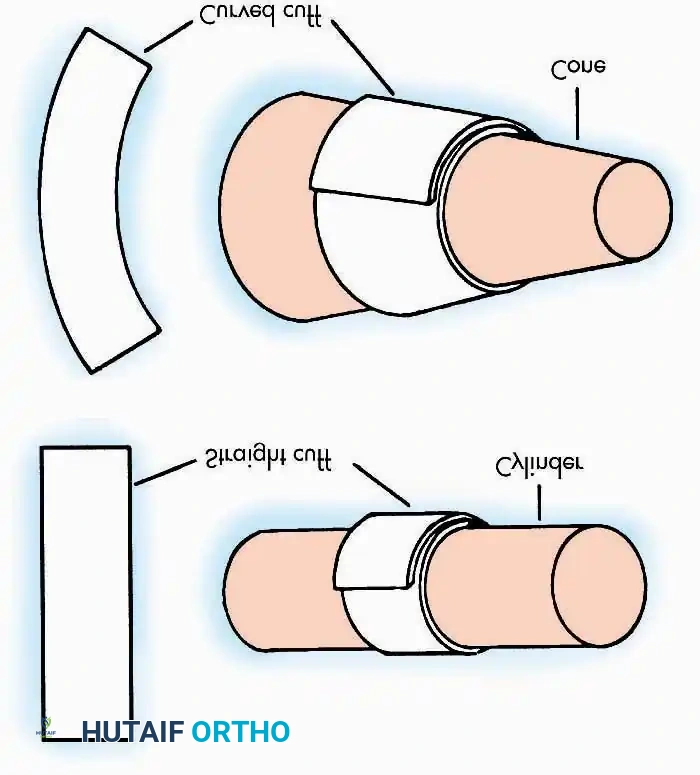
Manual Drum Dermatomes (The Reese Dermatome)
The Reese drum dermatome is a precision manual instrument that requires a higher degree of technical skill but offers unparalleled control over graft thickness and width.
- Advantages: It is excellent for cutting grafts more than 7.5 cm wide and usually controls the thickness of the grafts more accurately than powered devices.
- Preparation: Unlike powered dermatomes, the Reese drum requires the application of specialized skin glue to adhere the skin to the drum.
Step-by-Step Reese Dermatome Technique:
1. Tape Application: Stretch the specialized rubber tape tightly and evenly over the drum.
2. Adhesive Application: Apply the skin glue to both the donor site and the drum tape. Crucial Step: Wait at least 3 minutes for the glue to dry and become tacky before applying the dermatome to the skin.
3. Harvesting: Rotate the drum slowly to engage the skin. As the skin adheres to the drum, lift up gently while oscillating the blade to cut the graft.
4. Safety Precaution: Keep the blade from slipping around the drum to avoid being struck on the palmar side of the wrist—a common mechanism of iatrogenic injury for the inexperienced operator.
Always cut the graft slightly larger than the recipient area to accommodate for primary contraction (the immediate shrinkage of the graft upon harvesting due to dermal elastin).
TECHNIQUE: APPLICATION OF SPLIT-THICKNESS SKIN GRAFTS
The application of the graft is as critical as the harvest. Failure to secure the graft properly will result in shear forces that disrupt inosculation, leading to graft necrosis.
Step 1: Inset and Suturing
Once the recipient bed is confirmed to be hemostatic, the graft is placed over the defect. It is secured using fine non-absorbable sutures (e.g., 4-0 or 5-0 nylon) or surgical staples. The graft must be tension-free but smooth.
Figure A: The split-thickness graft has been sutured over the defect. The redundant edges of the graft are being carefully trimmed to match the exact contour of the wound.
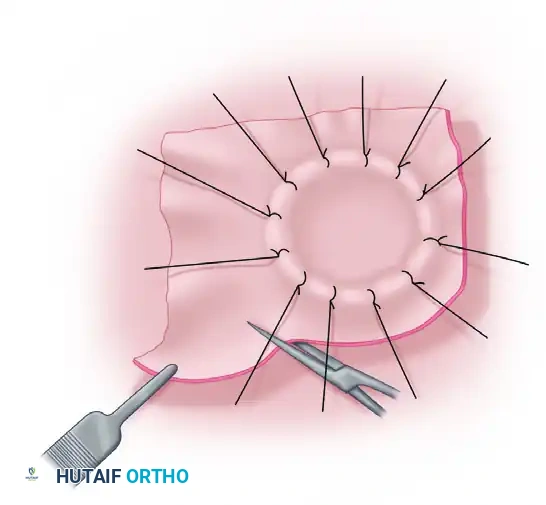
Step 2: The Tie-Over Bolster Dressing
To prevent hematoma or seroma formation beneath the graft, and to eliminate shear forces, a tie-over bolster dressing is mandatory for complex or contoured orthopaedic defects.
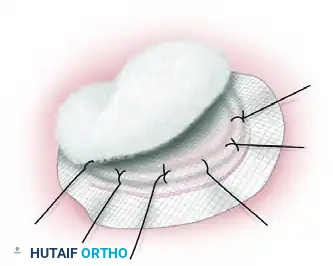
Figure B: A sheet of finely meshed, non-adherent gauze (such as Xeroform or Adaptic) is placed directly over the graft. A pack of moist cotton or fluffed gauze is then placed over the non-adherent layer to act as a compressive bolster.
Step 3: Securing the Bolster
The sutures used to inset the graft are left intentionally long. These long suture tails are then tied directly over the moist cotton pack, compressing the graft firmly against the recipient bed.
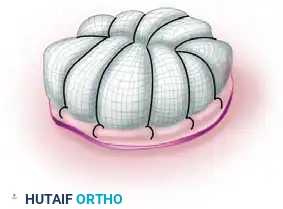
Figure C: The long sutures have been tied over the pack, creating a secure, immobile tie-over bolster dressing. This ensures intimate contact between the graft and the vascular bed, facilitating plasmatic imbibition.
Step 4: Post-Healing Debridement
After the graft has fully integrated (typically evaluated at 10 to 14 days postoperatively), any overlapping or non-vascularized edges will desiccate.
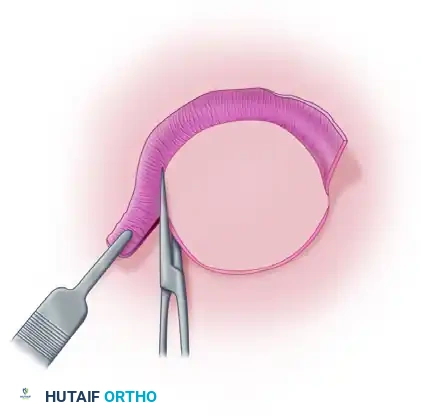
Figure D: The necrotic, redundant edges of the graft are being trimmed away after the central portion of the graft has successfully healed and revascularized.
ADVANCED RECONSTRUCTION: THE FILLETED GRAFT AND FLAP
In severe orthopaedic hand trauma, digits may be injured beyond functional salvage (e.g., severe crush injuries with irreversible neurovascular or skeletal damage). However, the glabrous skin of these unsalvageable digits is highly specialized, durable, and sensate.
Rather than discarding this valuable tissue through a standard amputation, the surgeon can harvest a "filleted graft" or "filleted flap" from the injured finger to cover adjacent palmar or dorsal hand defects. When the vascular pedicle is preserved, this acts as an axial pattern flap; when completely detached, it acts as a specialized full-thickness graft.
Surgical Technique: The Filleted Finger Flap
1. Defect Assessment and Flap Design:
The primary defect in the hand is debrided and prepared. The unsalvageable digit is identified, and incisions are planned to "fillet" the skin off the underlying phalanges while preserving the digital neurovascular bundles if possible.
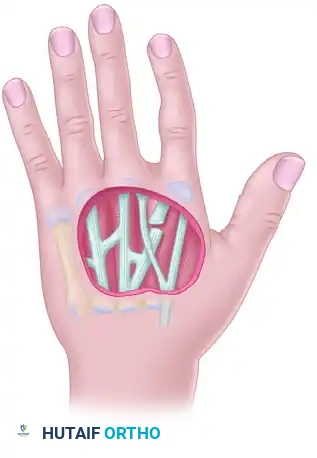
Figure 65-3 A: Visualization of the palmar defect and the adjacent severely injured digit selected for filleting.
2. Skeletal and Tendinous Excision:
The bone, tendons, and joint capsules of the injured digit are meticulously excised. The goal is to unfold the skin envelope of the finger into a flat, pliable sheet of tissue.
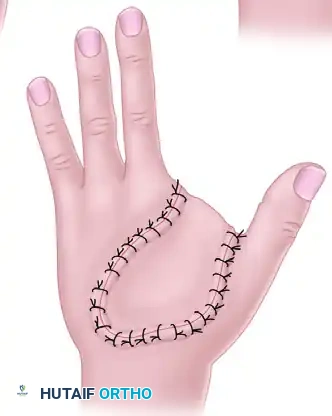
Figure 65-3 B: Internal view of the digit during the filleting process. The phalanges and flexor apparatus are removed, leaving the vascularized soft tissue envelope intact.
3. Flap Elevation:
The filleted skin is fully opened. If acting as a pedicled flap, the digital artery and nerve are carefully protected at the base to ensure robust perfusion and potential sensation.
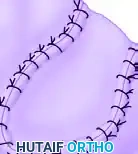
Figure 65-3 C: The filleted tissue is elevated, demonstrating a broad, durable sheet of glabrous skin ready for transposition.
4. Transposition and Inset:
The filleted flap is rotated into the primary hand defect. Because this tissue is native to the hand, it provides a perfect match in terms of thickness, durability, and color.

Figure 65-3 D: The flap is transposed over the palmar defect. The robust subcutaneous fat and thick dermis provide excellent coverage for exposed tendons or neurovascular structures.
5. Final Closure:
The flap is sutured into place. The donor site of the amputated digit is closed primarily, resulting in a highly functional and aesthetically acceptable reconstruction without the need for distant donor site morbidity.
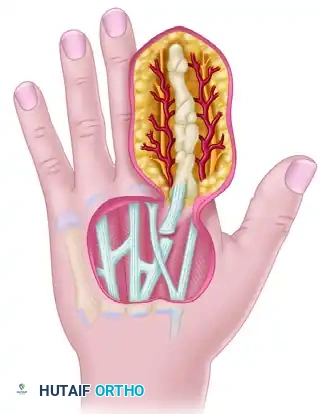
Figure 65-3 E: Final appearance after the filleted graft has been fully inset and sutured, successfully reconstructing the complex palmar defect.
POSTOPERATIVE PROTOCOLS AND COMPLICATION MANAGEMENT
The success of any orthopaedic graft or flap extends well into the postoperative period. Strict adherence to rehabilitation protocols is mandatory.
Immobilization
The grafted extremity must be strictly immobilized. Joint movement adjacent to the graft site generates shear forces that will sever the fragile capillary buds forming during the inosculation phase. Custom orthoses or plaster splints should be applied in the operating room, placing the limb in a functional position while neutralizing tension on the graft.
Dressing Management
- The First Takedown: Unless there are systemic signs of infection, excessive pain, or foul-smelling drainage, the initial tie-over bolster dressing should remain undisturbed for 5 to 7 days. Premature removal risks avulsing the newly adherent graft.
- Hematoma and Seroma: Fluid accumulation beneath the graft is the most common cause of graft failure. If a hematoma is identified early (within 24-48 hours), it can sometimes be evacuated by rolling a sterile cotton swab over the graft toward a peripheral edge, or by making a small slit in the graft (pie-crusting) to allow drainage.
Long-Term Rehabilitation
Once the graft is fully integrated (typically 2 to 3 weeks), aggressive scar management must begin. This includes the use of silicone gel sheeting, compressive garments, and deep friction massage to prevent hypertrophic scarring and to mitigate the effects of secondary graft contraction. For thick grafts and flaps, sensory re-education may be required, particularly in hand reconstruction.
You Might Also Like