SUBPECTORAL BICEPS TENODESIS
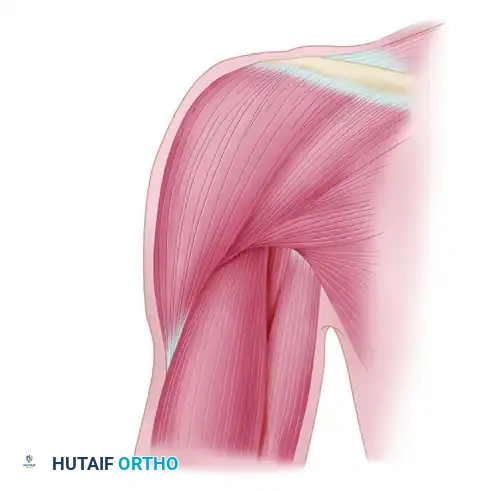
Pathological conditions of the long head of the biceps (LHB) tendon—ranging from tendinosis and partial tearing to instability within the bicipital groove—are recognized as significant generators of anterior shoulder pain. While simple tenotomy is an option for low-demand or elderly patients, subpectoral biceps tenodesis (as popularized by Mazzocca et al.) remains the gold standard for active patients. By securing the tendon distal to the intertubercular groove, this technique completely removes the diseased tendon from the confined space of the groove, thereby eliminating the "sliding" pain mechanism while restoring the anatomic length-tension relationship of the biceps muscle.
Indications and Biomechanical Rationale
Subpectoral tenodesis is indicated for SLAP lesions in older patients, severe LHB tendinopathy, subluxation or dislocation of the LHB associated with subscapularis tears, and failed prior conservative management. Biomechanically, securing the tendon in the subpectoral region provides robust cortical fixation, minimizes the risk of postoperative cramping or cosmetic "Popeye" deformity, and preserves elbow flexion and forearm supination strength.
Patient Positioning and Diagnostic Arthroscopy
- Positioning: The patient is placed in the beach chair position. Ensure the arm is entirely free to be manipulated through a full range of motion, particularly abduction and internal rotation, which are critical for the open portion of the procedure.
- Diagnostic Arthroscopy: Perform a standard diagnostic glenohumeral joint examination.
- Portal Placement: Identify the rotator interval between the supraspinatus and subscapularis tendons. Establish a standard anterior portal using either an inside-out or outside-in technique.
- Tendon Evaluation: Introduce a probe through the anterior portal. Pull the LHB tendon into the glenohumeral joint to evaluate its mobility, structural integrity, and the presence of hidden lesions.
Surgical Pearl: Because pathological processes of the biceps tendon most frequently occur within the intertubercular groove, it is absolutely critical that this extra-articular portion be drawn into the joint for thorough visual inspection.
- Tenotomy: Once LHB pathology is confirmed, use an arthroscopic cutting instrument or thermal ablator through the anterior portal to tenotomize the biceps tendon precisely at its base (origin at the superior glenoid tubercle/labrum). A shaver may be utilized to débride the proximal stump, ensuring a stable and smooth base to prevent mechanical catching.
Surgical Approach and Dissection
Transitioning to the open subpectoral approach requires meticulous attention to anatomic landmarks to avoid neurovascular injury.
- Arm Positioning: Abduct and internally rotate the arm. This maneuver brings the bicipital groove and the LHB tendon anteriorly, making them more accessible.
- Incision Planning: Palpate the inferior border of the pectoralis major tendon. On the anteromedial aspect of the arm, make a longitudinal incision beginning 1 cm superior to the inferior border of the pectoralis major and extending 3 cm distally.
- Hemostasis and Analgesia: Inject the planned incision site with a local anesthetic containing epinephrine to optimize subcutaneous hemostasis and provide preemptive perioperative analgesia.
- Superficial Dissection: Dissect through the subcuticular tissue. Use electrocautery to control bleeding and clear the overlying fatty tissue until the fascia overlying the pectoralis major, coracobrachialis, and biceps is clearly identified.
Surgical Warning: If these specific anatomic landmarks are not visualized, the dissection plane may be too lateral. Conversely, if the cephalic vein is encountered within the deltopectoral groove, the dissection is too proximal and lateral. Adjust your trajectory accordingly.
- Deep Fascial Incision: Once the inferior border of the pectoralis major is identified, incise the fascia over the coracobrachialis and biceps in a proximal-to-distal direction. It is imperative to visualize the horizontal fibers of the pectoralis muscle and confine the deep dissection below this level.
- Tendon Identification: Utilize blunt finger dissection under the inferior edge of the pectoralis muscle. Palpate superiorly along the anteromedial humerus to identify the longitudinal, fusiform structure of the biceps tendon within its sheath.
Tendon Retrieval and Preparation
- Retraction: Place a pointed Hohmann retractor into the pectoralis major tendon, resting the tip on the proximal humerus to retract the muscle belly proximally and laterally.
- Medial Protection: Position a blunt Chandler retractor on the medial aspect of the humerus to gently retract the coracobrachialis and the short head of the biceps tendon.
Surgical Warning: Avoid vigorous or forceful medial retraction. The musculocutaneous nerve courses medially in this vicinity and is highly susceptible to traction neuropraxia.
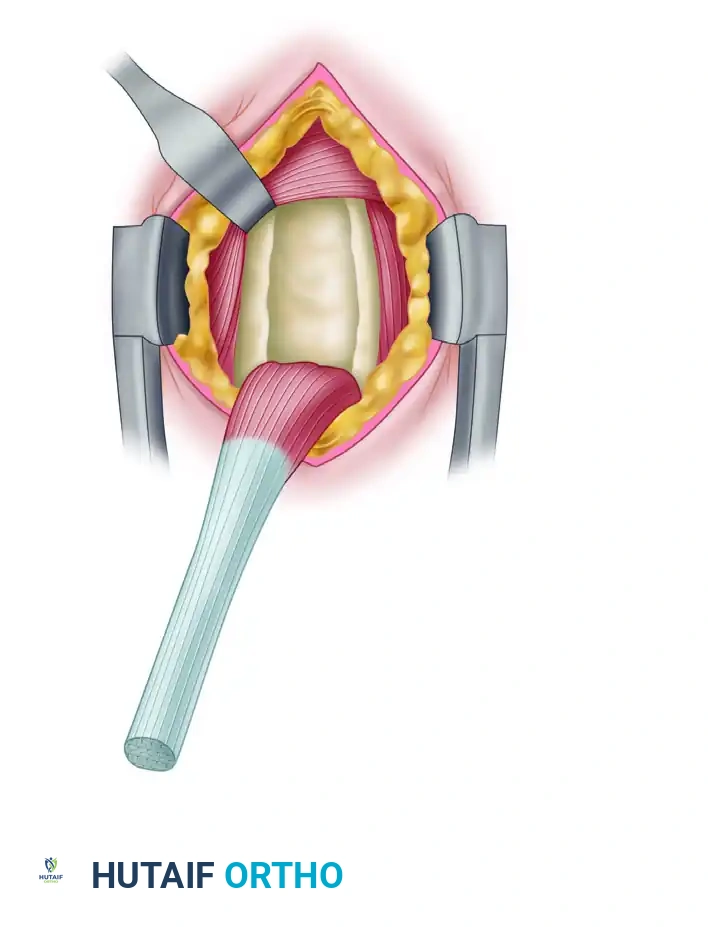
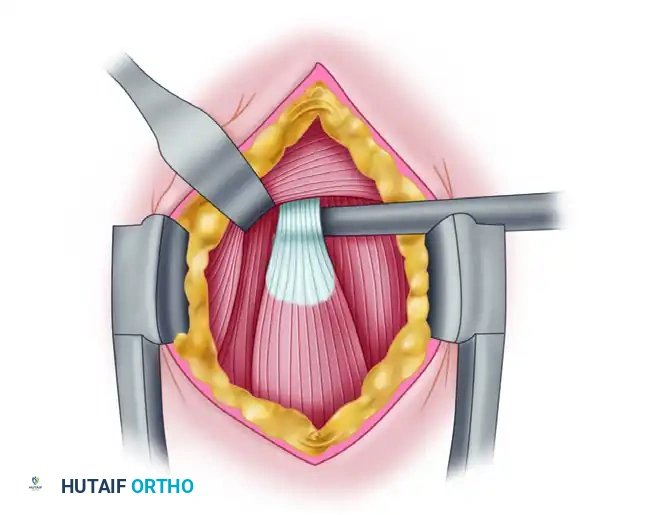
- Tendon Delivery: Once the LHB tendon is isolated, pass a right-angle clamp deep to it and sweep it out of the wound.
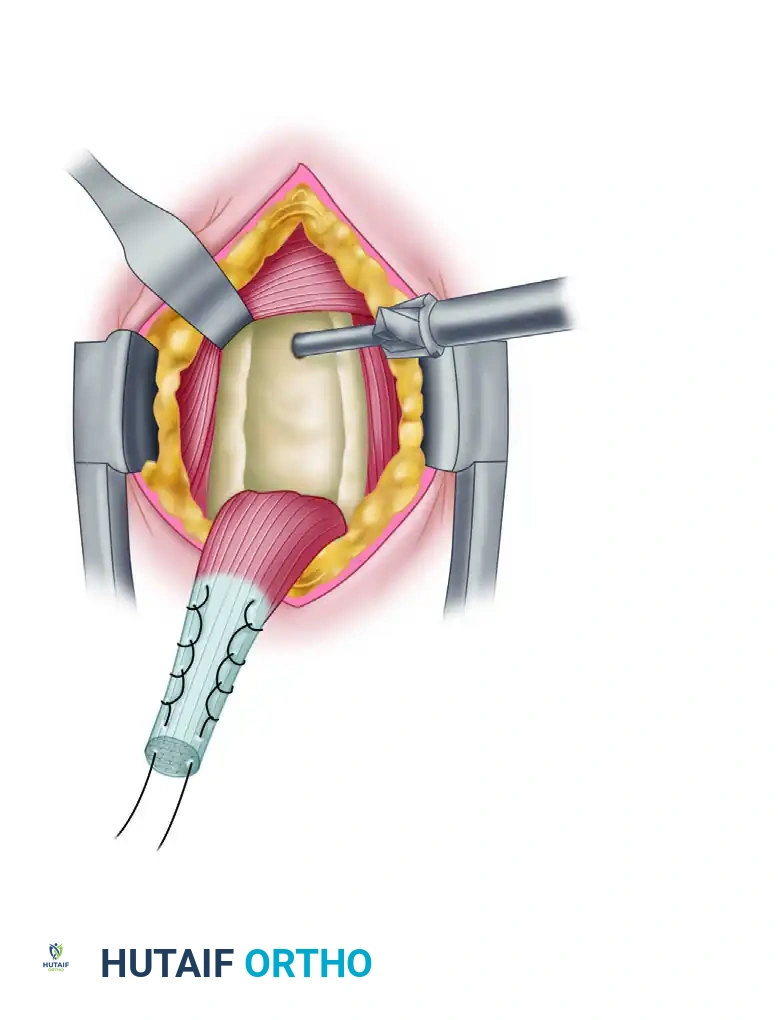
- Tendon Resection: To ensure appropriate physiological tensioning, resect the diseased proximal portion of the tendon. Leave exactly 20 to 25 mm of tendon proximal to the musculotendinous junction.
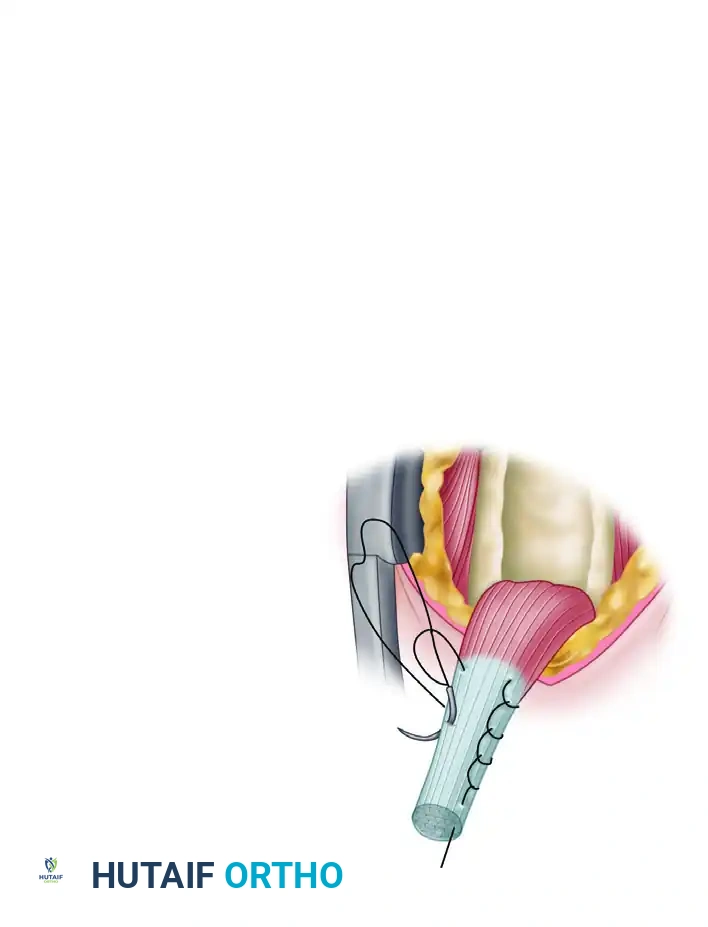
- Suture Weaving: Using a Krackow or whip-stitch technique, weave a No. 2 nonabsorbable high-tensile suture into the proximal 15 mm of the tendon.
Clinical Pearl: Securing the proximal 15 mm ensures adequate tendon volume for interference fixation within the bone tunnel, while simultaneously positioning the musculotendinous junction perfectly beneath the inferior border of the pectoralis major. This is the critical step for restoring proper muscle-tendon tension and optimizing postoperative cosmesis.
Bone Tunnel Preparation and Interference Fixation
- Periosteal Preparation: Approximately 1 cm proximal to the inferior border of the pectoralis major tendon, reflect the periosteum to create a rectangular footprint roughly 2 × 1 cm.
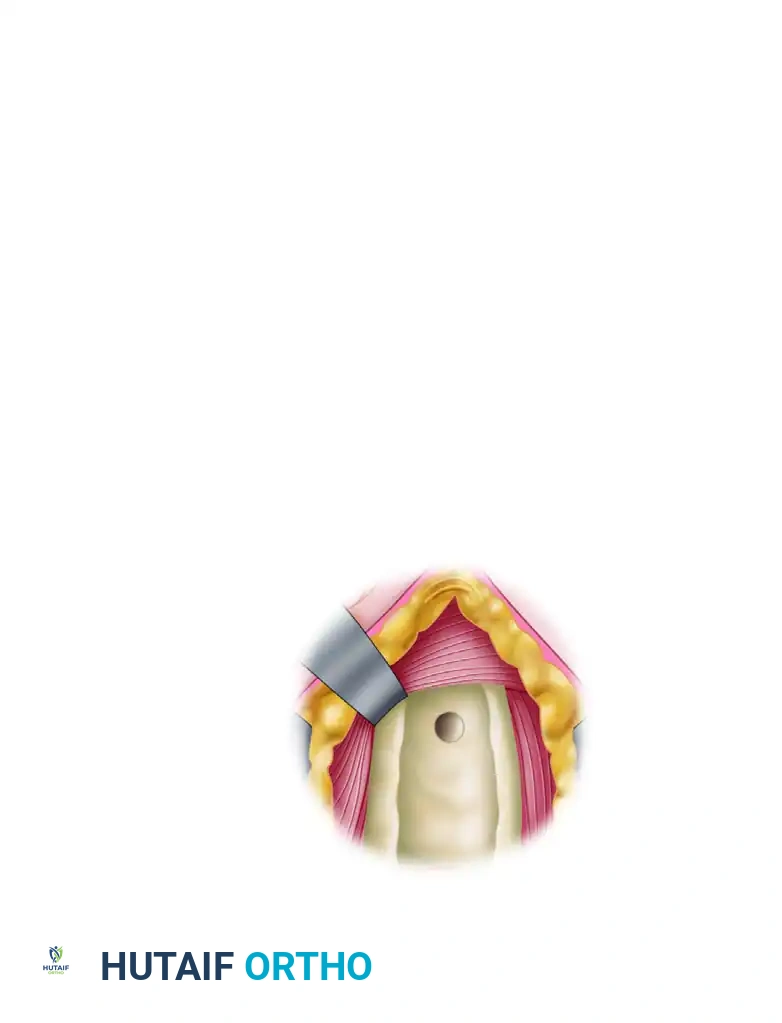
- Guidewire Placement: Insert a guidewire at the junction of the middle and distal thirds of the intertubercular groove, situated between the lesser and greater tuberosities.
- Reaming: Over-ream the guidewire with an 8-mm reamer to create a unicortical bone tunnel exactly 15 mm deep.
- Irrigation: Thoroughly clear all bone debris from the surgical field with copious irrigation to prevent heterotopic ossification and ensure clear visualization.
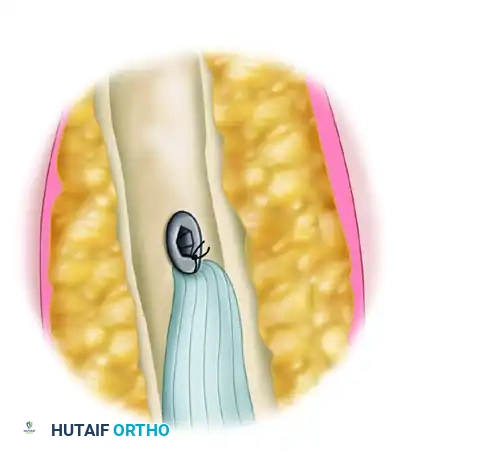
- Screw Preparation: Thread one limb of the nonabsorbable suture through a biotenodesis screwdriver loaded with an 8 × 12 mm interference screw. Wrap the end of the suture securely into the screw cleat.
- Tendon Docking: Place the tip of the tenodesis screwdriver into the bone tunnel, plunging the tendon into the socket. Advance the interference screw over the tendon. Once the screw head is flush with the anterior humeral cortex, remove the screwdriver.
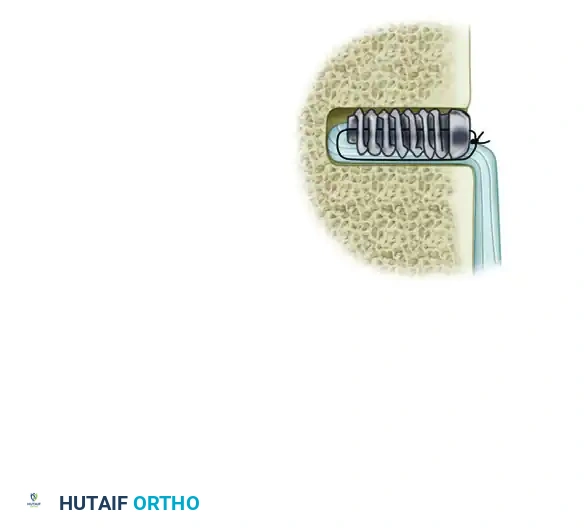
- Final Fixation: Tie the free limb of the suture (adjacent to the tendon) to the limb that passed through the screw. This hybrid technique provides both a robust interference fit and secondary suture anchor stability.
- Anatomic Verification: Upon completion of fixation, verify that the musculotendinous junction rests in its exact anatomic location underneath the inferior border of the pectoralis major tendon.
- Closure: Complete the procedure with standard layered wound closure.
Postoperative Care
A sling is worn during sleep for the first 4 weeks. During waking hours, the sling is utilized only if the patient experiences difficulty maintaining passive elbow flexion or when navigating crowded public areas to prevent accidental sudden extension. The sling is discontinued entirely after 4 weeks.
Rehabilitation progression is often dictated by concomitant procedures (e.g., rotator cuff repair). If an isolated subpectoral biceps tenodesis is performed, active strengthening activities must be strictly restricted until 6 weeks postoperatively to allow for biologic tendon-to-bone healing. While many patients feel capable of resuming activities as tolerated by 2 weeks, they must be explicitly counseled regarding the high risk of construct failure or tendon pull-out if loaded prematurely.
DISTAL BICEPS TENDON RUPTURE
Pathoanatomy and Mechanism of Injury
Distal rupture of the biceps tendon is a relatively uncommon but highly debilitating injury that typically occurs in middle-aged men (fourth to sixth decades of life). The classic mechanism of injury involves a sudden, unexpected eccentric load applied to the biceps muscle while the elbow is flexed to 90 degrees and the forearm is supinated—such as catching a falling heavy object.
When the elbow is extended, the biceps muscle is twice as powerful as the supinator muscle in supinating the forearm; this mechanical advantage is magnified when the elbow is flexed. Therefore, failure to anatomically reattach the tendon to the radial tuberosity results in a permanent 40% to 50% loss of supination strength and a 30% loss of elbow flexion strength.
Clinical Evaluation and Diagnostic Testing
Patients typically report hearing or feeling a distinct "pop" at the time of injury, followed immediately by sharp pain, swelling, and extensive ecchymosis in the antecubital fossa.
Physical examination reveals:
* Superior Migration: The muscle belly retracts proximally, creating the classic "Popeye" deformity.
* Palpable Defect: A distinct void is felt in the antecubital fossa where the distal tendon normally resides.
* Weakness: Profound weakness during resisted forearm supination and elbow flexion.
Two highly specific clinical tests are utilized to confirm the diagnosis:
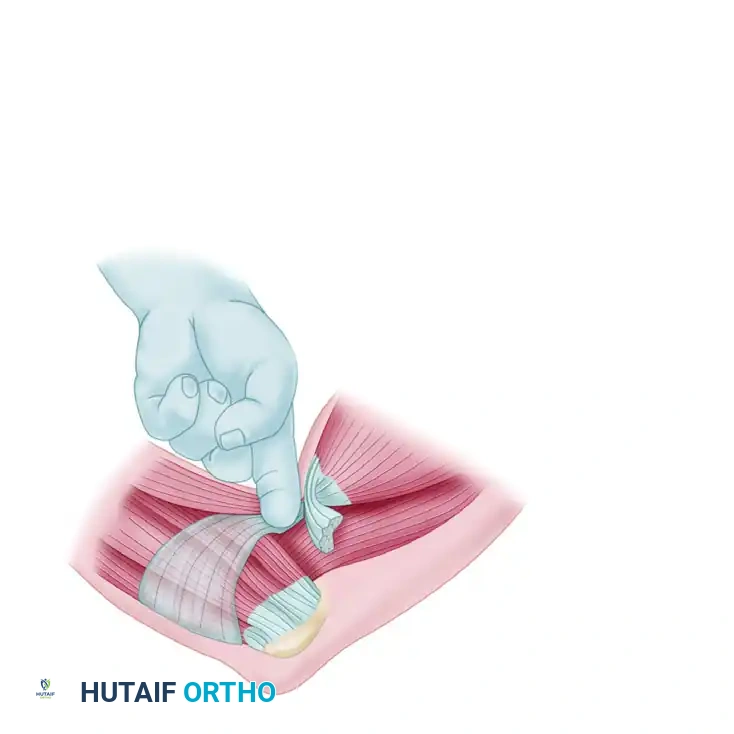
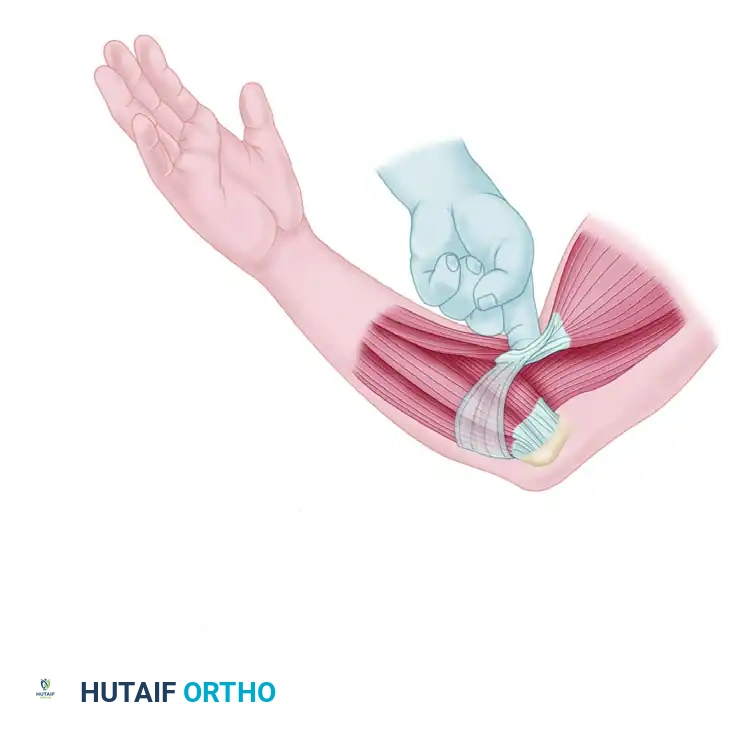
- The Biceps Squeeze Test: Analogous to the Thompson test for Achilles tendon ruptures. The patient is seated with the elbow flexed 60 to 80 degrees (minimizing brachialis tension) and the forearm slightly pronated. The examiner firmly squeezes the biceps muscle belly with both hands. An intact tendon will cause the forearm to passively supinate. Lack of supination indicates a complete rupture. This test boasts a positive predictive value of 95% and a sensitivity of 100%.
- The Hook Test: The patient actively flexes and supinates the elbow. The examiner attempts to "hook" their index finger under the cordlike structure of the biceps tendon in the antecubital fossa from the lateral side.
Clinical Pearl: The Hook Test has a reported 100% sensitivity and specificity. However, the examiner must ensure they are hooking the lateral edge of the tendon. Hooking from the medial edge may lead to a false negative, as the intact lacertus fibrosus (bicipital aponeurosis) can easily be mistaken for an intact distal biceps tendon.
Advanced Imaging Modalities
While complete ruptures are often clinically obvious, partial ruptures or cases with severe swelling may require advanced imaging.
* MRI: Magnetic Resonance Imaging is the gold standard for distinguishing complete from partial ruptures, identifying the degree of tendon retraction, and evaluating for tendinosis or brachialis contusion. The FABS position (Flexed elbow to 90 degrees, Abducted shoulder to 180 degrees, and Supinated forearm) is highly recommended to obtain a true, uninterrupted longitudinal view of the distal tendon inserting onto the radial tuberosity.
* Ultrasound: A faster, cost-effective, and dynamic imaging modality, though its accuracy is highly operator-dependent.
Surgical Management Strategies
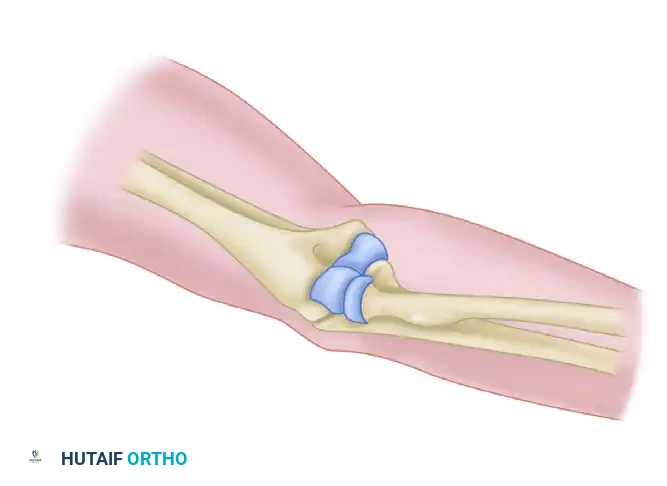
The consensus in orthopedic surgery is that the distal biceps tendon must be reattached to its anatomic footprint on the radial tuberosity to restore the biomechanical cam effect required for powerful supination. Surgical treatment is broadly divided into two-incision and single-incision techniques.
Two-Incision Technique (Boyd and Anderson)
Historically, anterior single-incision approaches that exposed the radial tuberosity carried an unacceptably high risk of injury to the posterior interosseous nerve (PIN) and the radial artery. Boyd and Anderson developed the two-incision technique to mitigate this risk.
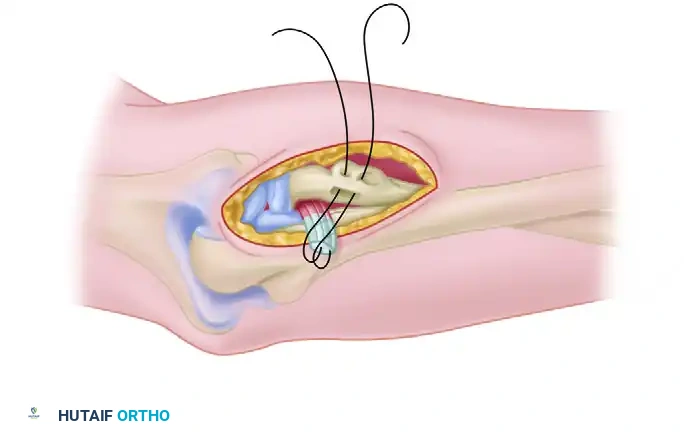
- Anterior Incision: A small transverse incision is made in the antecubital crease to retrieve the retracted tendon and prepare it with locking sutures.
- Posterolateral Incision: A second incision is made posterolaterally over the radial head and neck. The forearm is maximally pronated to bring the radial tuberosity into the posterolateral wound, safely rotating the PIN away from the surgical field.
- Fixation: The tendon is passed between the radius and ulna and secured into a bony trough on the tuberosity.
Surgical Warning: Early iterations of the two-incision technique were plagued by radioulnar synostosis and heterotopic ossification (HO). Modern modifications—such as using a muscle-splitting approach through the supinator and utilizing a high-speed burr or osteotome instead of a drill to create the bony trough—prevent the disbursement of osteogenic bone dust into the interosseous space, drastically reducing the incidence of HO.
Single-Incision Technique and Fixation Biomechanics
Advancements in implant technology have popularized the single-incision anterior approach. This technique utilizes a limited anterior incision and relies on specialized hardware (cortical buttons, interference screws, or suture anchors) for fixation.
- Advantages: Limited exposure of the radial tuberosity, superior cosmetic results, and a decreased risk of heterotopic ossification compared to the two-incision approach.
- Disadvantages: Increased implant costs, lack of a large bony trough for broad tendon revascularization, and a higher risk of lateral antebrachial cutaneous nerve (LABCN) or PIN neuropraxia due to the required deep anterior retraction.
Biomechanical studies comparing fixation methods have yielded varying results. However, modern consensus indicates that cortical button fixation (often combined with an interference screw for a hybrid construct) provides the highest ultimate pull-out strength and the least displacement under cyclic loading, surpassing both isolated suture anchors and traditional transosseous bone tunnels.
Complications and Clinical Outcomes
Regardless of the technique chosen, surgical repair of the distal biceps yields excellent clinical outcomes, with patients predictably regaining near-normal flexion and supination strength.
Surgeons must counsel patients on the distinct complication profiles of each approach:
* Single-Incision: Higher incidence of transient nerve injuries (specifically the LABCN, presenting as lateral forearm numbness).
* Two-Incision: Higher historical risk of heterotopic ossification and radioulnar synostosis, though modern techniques have largely mitigated this threat.
Postoperative rehabilitation generally involves a brief period of immobilization (1-2 weeks) in 90 degrees of flexion, followed by a hinged elbow brace allowing progressive extension. Strengthening is delayed until 6 to 8 weeks to ensure robust tendon-to-bone healing at the tuberosity.
