INTRODUCTION TO PELVIC EXTERNAL FIXATION
Pelvic ring disruptions represent some of the most challenging injuries in orthopedic trauma, often accompanied by life-threatening hemorrhage and profound hemodynamic instability. The application of a pelvic external fixator is a cornerstone of damage control orthopedics (DCO). By reducing pelvic volume, external fixation provides a tamponade effect on venous and cancellous bone bleeding, stabilizes the fracture ends to promote clot formation, and facilitates patient mobilization and nursing care.
While historically used as definitive fixation, modern paradigms primarily utilize external fixation as a provisional stabilization tool, bridging the gap to definitive open reduction and internal fixation (ORIF) or percutaneous screw fixation. However, in select cases—such as highly contaminated open pelvic fractures, severe soft tissue compromise (e.g., Morel-Lavallée lesions), or specific anterior ring injuries—external fixation may serve as the definitive treatment modality.
This comprehensive masterclass details the biomechanical principles, preoperative planning, and step-by-step surgical execution of both iliac crest and supraacetabular external fixation, alongside the application of posterior pelvic clamps.
CLASSIFICATION OF PELVIC AND SACRAL INJURIES
Understanding the underlying fracture pattern is paramount before applying an external fixator. The mechanism of injury dictates the vector of instability, which in turn dictates the required vector of reduction and frame construct.
The Denis Classification of Sacral Fractures
Sacral fractures frequently accompany pelvic ring disruptions. The Denis classification categorizes these injuries based on their anatomical location relative to the sacral foramina, which has direct implications for neurologic injury and posterior ring stability.

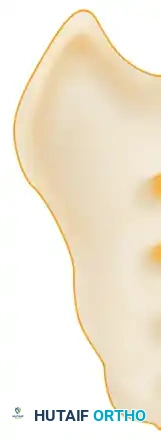

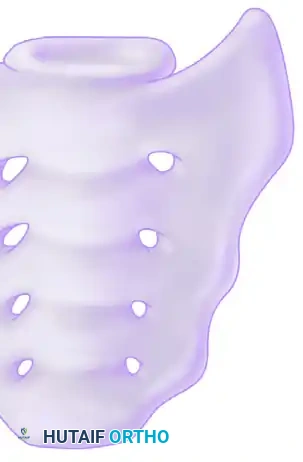
FIGURE 56-47 & 56-48: Denis classification of sacral fractures, differentiating three zones of injury: Zone I (sacral ala), Zone II (foraminal region), and Zone III (spinal canal). The most medial fracture extension classifies the injury. Accompanied by 40-degree caudal inlet and 40-degree cephalad outlet views of the pelvis.
Tile and Young-Burgess Classifications
The Tile classification assesses stability, dividing injuries into rotationally and vertically stable (Type A), rotationally unstable but vertically stable (Type B), and rotationally and vertically unstable (Type C).
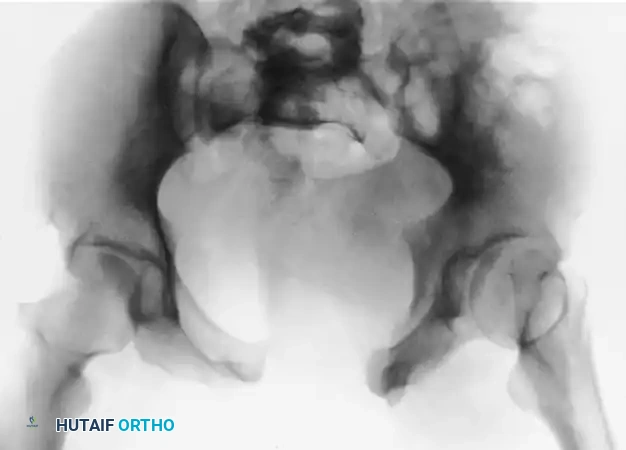
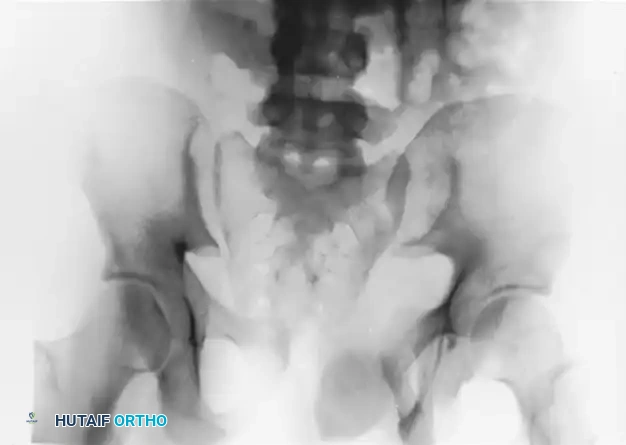
FIGURE 56-49: A, Tile type B1 pelvic injury demonstrating diastasis of the pubic symphysis and anterior widening of the sacroiliac joint. B, CT scan confirming that the posterior sacroiliac joint ligaments remain intact.
💡 Clinical Pearl: The "Open Book" Pelvis
In anteroposterior compression (APC) injuries resulting in an "open book" pelvis (Tile B1), the anterior external fixator is highly effective. By applying internal rotation forces to the hemipelves, the fixator closes the anterior ring, reduces pelvic volume, and indirectly compresses the posterior sacroiliac complex if the posterior tension band remains intact.
Complex Injury Patterns: Lateral Compression (LC)
Lateral compression injuries often result in internal rotation of the hemipelvis. While external fixation is classically used to close an open book pelvis, it can also be used to open a severely internally rotated LC injury, though this is less common and requires careful posterior ring assessment.
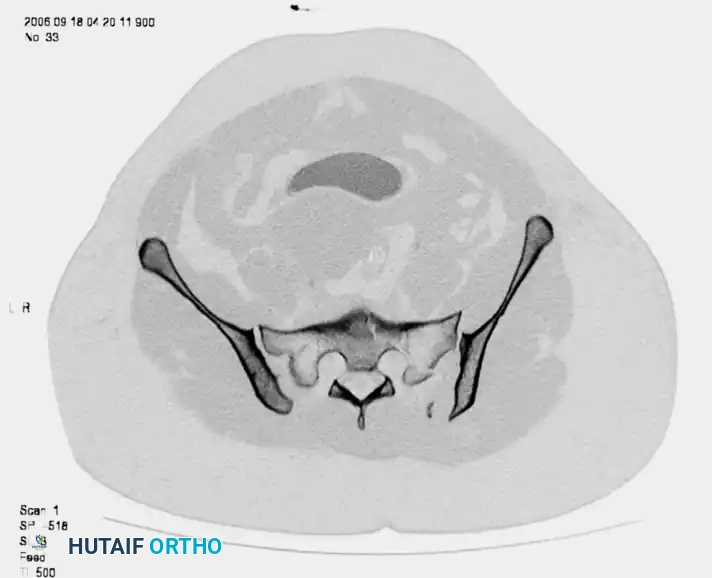
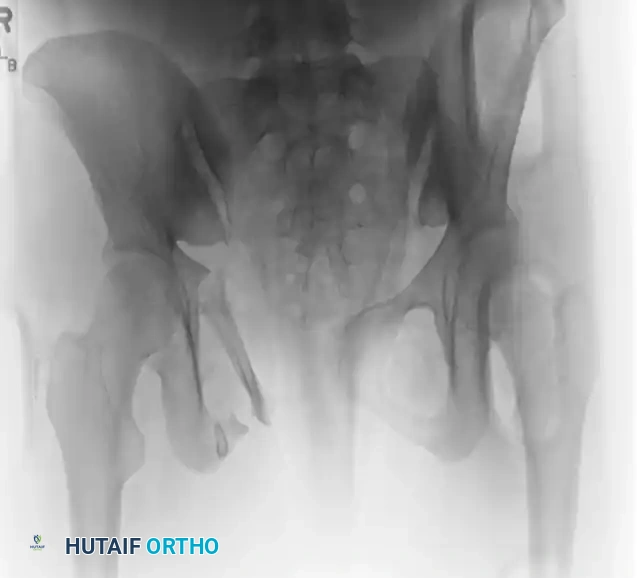


FIGURE 56-46 A-D: Young and Burgess lateral compression type III (LC III) injury with marked displacement of the right pubic ramus. Preoperative anteroposterior, inlet, outlet views, and CT scan demonstrate the severe rotational instability.
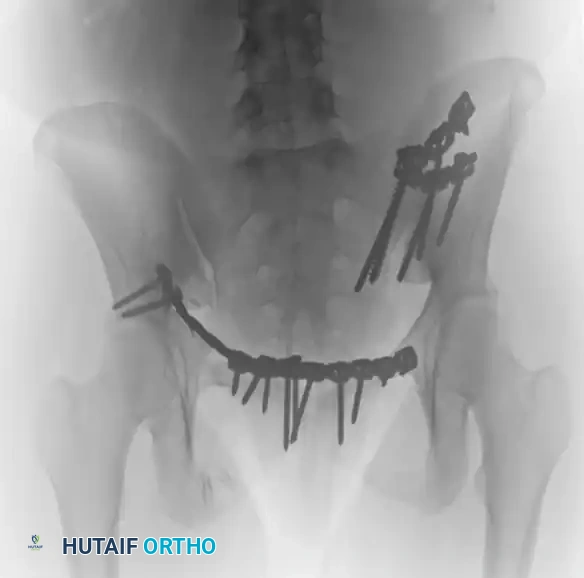
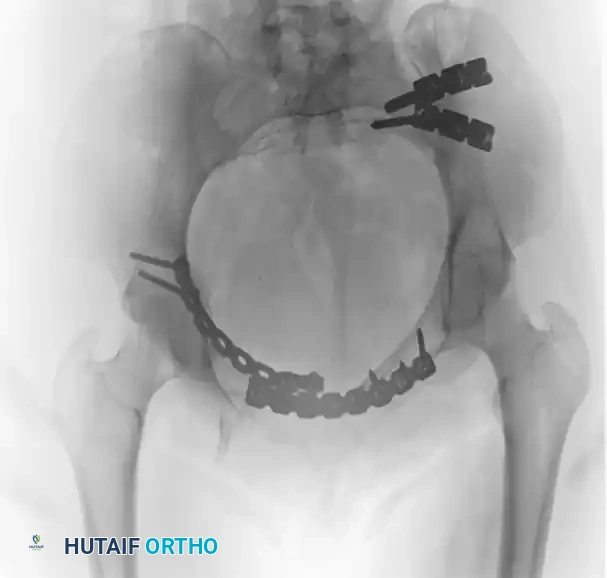
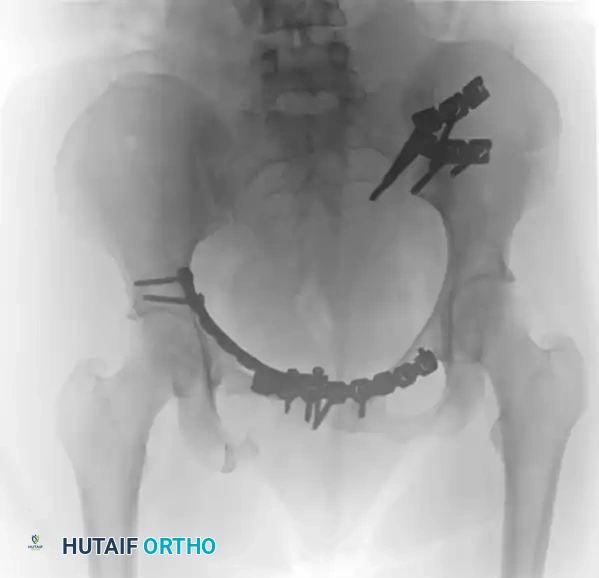
FIGURE 56-46 E-G: Postoperative anteroposterior, inlet, and outlet views following definitive treatment with open reduction and internal fixation (ORIF) of the left sacroiliac joint, pubic symphysis, and right pubic ramus fractures.
PREOPERATIVE PLANNING AND POSITIONING
- Patient Positioning: Place the patient supine on a fully radiolucent Jackson table or a standard operating table with a radiolucent top. Ensure that the C-arm can freely maneuver to obtain true AP, Inlet (40-60 degrees caudal), Outlet (40-60 degrees cephalad), Iliac Oblique, and Obturator Oblique views.
- Provisional Reduction: Attempt to attain and maintain reduction with skeletal traction (distal femoral or proximal tibial) or pelvic binders placed distally over the greater trochanters before the placement of the external fixator. A binder placed too high (over the iliac crests) will impede surgical access and fail to close the pelvic ring effectively.
- Preparation: Prep and drape the entire abdomen, pelvis, and bilateral thighs to allow access for pin placement, frame assembly, and potential conversion to open approaches if necessary.
SURGICAL TECHNIQUE 1: ILIAC CREST EXTERNAL FIXATION
The iliac crest approach is the traditional method for pelvic external fixation. It is rapid, requires minimal fluoroscopy, and is highly effective for provisional stabilization. However, the bone of the iliac crest is relatively thin, leading to a higher risk of pin loosening compared to the supraacetabular approach.
⚠️ Surgical Warning: Abdominal Protuberance
In obese patients or those with significant abdominal distension, the iliac crest frame may impinge on the abdomen. In such cases, a supraacetabular frame is strongly preferred as it sits more distally and anteriorly, avoiding abdominal impingement.
Step-by-Step Procedure
- Landmark Identification: Palpate the iliac wing 2 to 4 cm proximal to the anterior superior iliac spine (ASIS). This region represents the gluteal tubercle, the widest portion of the anterior iliac bone, which provides the optimal corridor for pin insertion between the inner and outer cortical tables.
- Incision: Make a 1 to 2 cm stab incision perpendicular to the iliac wing. Bluntly dissect down to the bone using a hemostat to protect the lateral femoral cutaneous nerve (LFCN), which typically courses medial to the ASIS but can have aberrant lateral branches.
- Orientation: Place a guidewire or a periosteal elevator along the inner table of the iliac wing to provide tactile orientation of the pelvic slope. The iliac wing curves outward and backward; failing to respect this anatomy will result in cortical perforation.
- Drilling: Drill along the inner third of the iliac wing. The trajectory should be directed toward the triradiate cartilage (aiming toward the hip joint).
- Pin Insertion: After drilling a starting point manually, place a 5.0-mm or 6.0-mm half-pin between the tables. Rely heavily on sensory feedback (the "feel" of cancellous bone) to keep the pin within the iliac cortical tables.
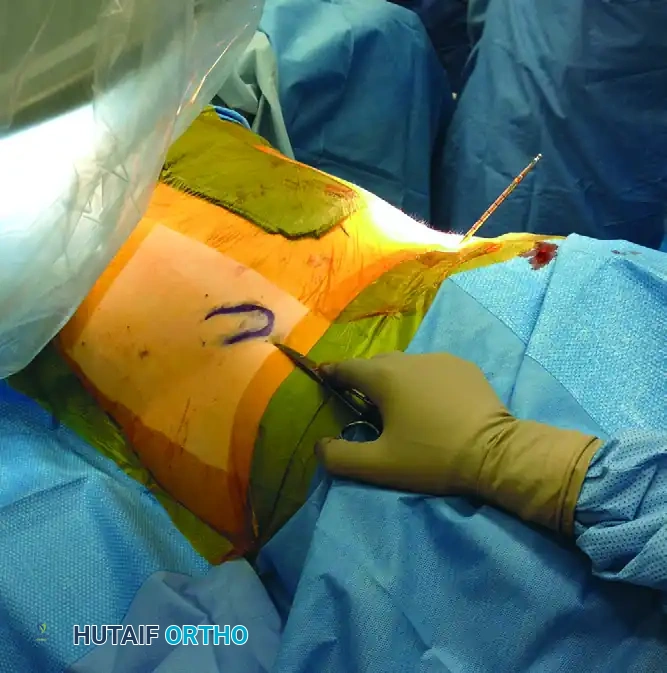
FIGURE 56-50: Pin placement in the hemipelvis in relation to the body. The pins must remain within the narrow medullary canal of the iliac wing to ensure adequate purchase and avoid visceral or vascular injury.
- Second Pin Placement: Place a second pin 2 to 3 cm posterior to the first pin in a converging pattern to increase the biomechanical pull-out strength of the construct.
- Contralateral Placement: Repeat the procedure on the contralateral hemipelvis.
- Frame Assembly: Connect the pin clusters with carbon fiber crossbars.
- Reduction and Compression: If reduction of an "open book" injury is needed, manually compress the pelvis at the iliac wings or greater trochanters (often requiring an assistant), and then definitively tighten the external fixator clamps.
SURGICAL TECHNIQUE 2: SUPRAACETABULAR EXTERNAL FIXATION
Supraacetabular external fixation has largely superseded the iliac crest technique in modern trauma centers. The pins are placed into the dense bone corridor extending from the anterior inferior iliac spine (AIIS) to the posterior sciatic notch. This provides vastly superior biomechanical stability, lower rates of pin loosening, and allows for unrestricted access to the abdomen for concurrent general surgery procedures (e.g., laparotomy).
Step-by-Step Procedure
- Vascular Assessment: Palpate and mark the external iliac pulse. The neurovascular bundle lies medial to the starting point; meticulous technique is required to avoid iatrogenic injury.
- Starting Point Identification: Palpate the ASIS. The incision will be in direct line with the ASIS, approximately 2 to 3 cm distally, corresponding to the AIIS.
- Fluoroscopic Confirmation: Confirm the proximal-distal starting point on a fluoroscopic Iliac Oblique view. The starting point must be exactly at the teardrop of the AIIS.
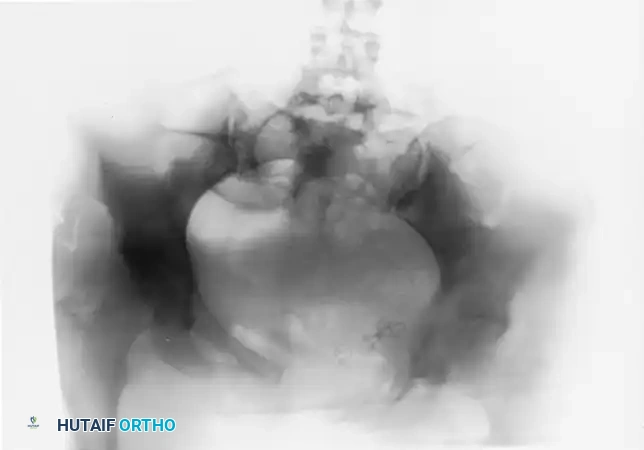
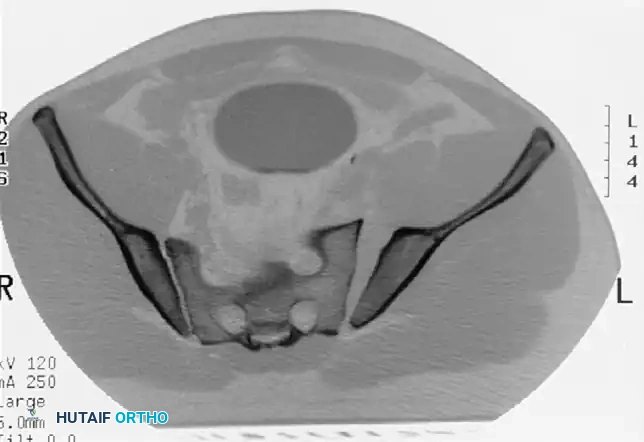
FIGURE 56-51: Starting point for supraacetabular external fixation. The fluoroscopic teardrop of the AIIS must be perfectly visualized to ensure the pin enters the dense supraacetabular corridor.
- Soft Tissue Dissection: Make a 2 cm longitudinal incision. Gently spread the soft tissues down to the bone using blunt dissection. Insert a drill sleeve to protect the soft tissues.
- Trajectory: Aim the drill or pin 20 to 30 degrees medially (toward the umbilicus) and 20 to 30 degrees cephalad.
- Fluoroscopic Guidance:
- Iliac Oblique View: Confirms the starting point is at the apex of the AIIS. If the pin is on the apex, the mediolateral starting point is correct.
- Obturator Oblique View: Confirms the pin is contained within the anterior and posterior tables of the ilium above the acetabulum.
- Inlet/Outlet Views: Ensure the pin is not violating the hip joint (too distal) or exiting the inner table into the true pelvis (too medial).
🔪 Surgical Pitfall: Lateral Overlay
There is significant radiographic overlay laterally on the AP view. A starting point that appears correct on an AP radiograph may actually be too lateral, causing the pin to exit the outer table of the pelvis into the gluteal musculature, resulting in catastrophic loss of fixation. Always rely on the Iliac Oblique view for the starting point.
- Pin Advancement: With the use of self-tapping 5.0-mm or 6.0-mm pins, drill 2 to 3 cm initially, taking extreme care not to slide medially (into the pelvis) or laterally (out of the ilium).
- Reaching the Sciatic Notch: Advance the pin just to the sciatic notch, which is an area of exceptionally dense bone. Confirm this depth on Iliac and Obturator Oblique views. The pin should ideally be 80 to 100 mm in length within the bone.
Diagrammatic representation of the supraacetabular pin trajectory, demonstrating the dense osseous corridor above the acetabular dome.
- Frame Construction: Connect the pins to a subcutaneous or standard anterior crossbar. In vertically unstable fractures, skeletal traction should be maintained until definitive posterior ring fixation is achieved.
POSTERIOR PELVIC CONTROL: PELVIC CLAMPS
In vertically unstable (Tile Type C) fractures, an anteriorly applied external fixator does not adequately control motion in the posterior sacroiliac complex. The anterior frame acts as a hinge, allowing the unstable hemipelvis to migrate proximally.
To address this during the acute resuscitation phase, pelvic clamps were developed to provide direct posterior compression. The two primary devices are the Ganz C-clamp and the pelvic stabilizer developed by Browner et al.
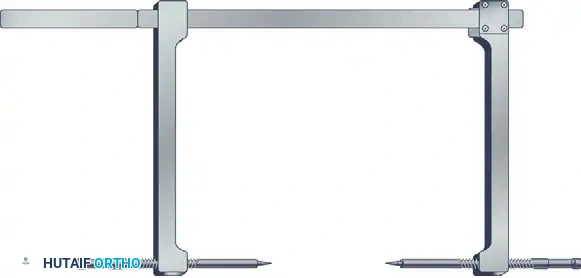
The Ganz C-Clamp
The Ganz C-clamp utilizes large, percutaneously placed pins driven directly into the outer table of the ilium, corresponding to the region of the sacroiliac joint posteriorly. By applying direct transverse compression, it effectively closes the posterior ring and provides massive tamponade to presacral venous bleeding.
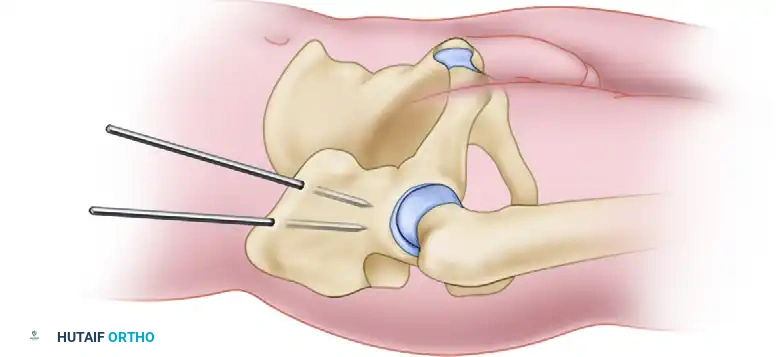
FIGURE 56-52: Ganz “antishock” pelvic fixator for immediate, provisional stabilization of hemodynamically unstable pelvic fractures.
Application and Contraindications
- Landmarks: The intersection of a line drawn along the axis of the femur and a line drawn posteriorly from the ASIS.
- Application: The pins are driven to the outer table of the ilium, and the clamp is tightened to compress the SI joints.
- Contraindications: We firmly believe that an iliac wing fracture close to the sacroiliac joint (crescent fracture) is an absolute contraindication to the use of this device. Applying compression across a fractured iliac wing will cause medial displacement of the fracture fragment into the true pelvis, potentially lacerating the iliac vessels or lumbosacral plexus. Furthermore, highly comminuted transforaminal sacral fractures may over-compress, leading to severe sacral nerve root crush injuries.
- Duration: The Ganz C-clamp is strictly a temporary stabilizing device. It should be removed within 5 days, transitioning to definitive internal fixation once the patient is physiologically optimized.
POSTOPERATIVE CARE AND PROTOCOLS
The management of the external fixator postoperatively is dictated by whether the frame is provisional or definitive.
- Definitive Treatment: If the external fixator is used for the definitive treatment of the pelvic fracture (e.g., in a pure symphyseal diastasis with high infection risk for internal plating), the frame is left in place for 8 to 12 weeks, depending on the fracture type, patient age, and quality of reduction.
- Pin Site Care: Pin site care must be meticulous to prevent superficial infections from tracking into the medullary canal. Protocols dictate cleaning the pin-skin interface with half-strength hydrogen peroxide swabs or chlorhexidine twice daily to clean away the crusted transudate that often forms.
- Dressings: The dressing around the pin site should apply mild compression to the skin (e.g., using Xeroform or a specialized foam sponge) to minimize skin motion around the pins. Skin tethering is a primary cause of pin tract irritation and subsequent infection.
- Complication Management: If a pin becomes infected and loose, it has lost its biomechanical purchase and acts as a nidus for osteomyelitis. It should be removed and replaced at a different site, and the original pin site should be aggressively curetted and irrigated. Oral or intravenous antibiotics should be tailored to local antibiograms, typically covering common skin flora (Staphylococcus aureus).
-
Mobilization: Patients with anterior external fixators for rotationally unstable (but vertically stable) injuries can often be mobilized out of bed to a chair, or allowed touch-down weight-bearing, depending on the integrity of the posterior pelvic ring. Vertically unstable injuries require strict bed rest or skeletal traction until the posterior ring is definitively stabilized.
