Anatomical Endoscopic ACL Reconstruction BPTB Graft
Key Takeaway
Anatomical single-bundle endoscopic anterior cruciate ligament (ACL) reconstruction utilizing a bone-patellar tendon-bone (BPTB) graft remains the gold standard for restoring knee stability in high-demand patients. This comprehensive surgical guide details patient positioning, precise graft harvesting, meticulous notch preparation, and anatomical tunnel placement. By adhering to strict biomechanical principles and anatomical landmarks, orthopaedic surgeons can achieve optimal graft isometry, rigid fixation, and superior long-term clinical outcomes.
INTRODUCTION AND BIOMECHANICAL RATIONALE
Anatomical single-bundle endoscopic anterior cruciate ligament (ACL) reconstruction utilizing a bone-patellar tendon-bone (BPTB) autograft remains the gold standard for restoring knee kinematics, particularly in high-demand, pivoting athletes. The BPTB graft offers unparalleled advantages, including high ultimate tensile strength (approximately 2,977 N, compared to the native ACL's 2,160 N), superior stiffness, and the biological benefit of bone-to-bone healing within the osseous tunnels. This allows for rigid aperture fixation, early aggressive rehabilitation, and a statistically significant reduction in graft laxity over time.
The primary objective of this procedure is the precise anatomical restoration of the ACL footprint. Historically, non-anatomical, isometric tunnel placements resulted in persistent rotational instability. Modern techniques emphasize placing the graft within the native femoral and tibial footprints to restore both anteroposterior translation and rotational stability.
PREOPERATIVE EVALUATION AND PATIENT POSITIONING
Meticulous preoperative planning and patient positioning are critical for ensuring unobstructed arthroscopic access and optimal tunnel trajectory.
Examination Under Anesthesia (EUA)
After the induction of general endotracheal anesthesia, a comprehensive examination of both the uninjured and injured knees is mandatory.
- Establish a baseline reference for physiological ligamentous laxity on the contralateral knee.
- On the injured knee, meticulously document the Lachman test, anterior drawer, and pivot shift grades. This confirms the diagnosis and dictates the necessity for concurrent procedures (e.g., anterolateral ligament reconstruction or lateral extra-articular tenodesis in cases of explosive pivot shifts).
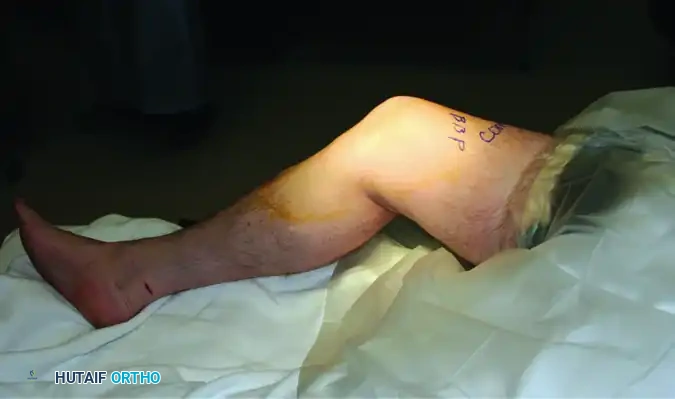
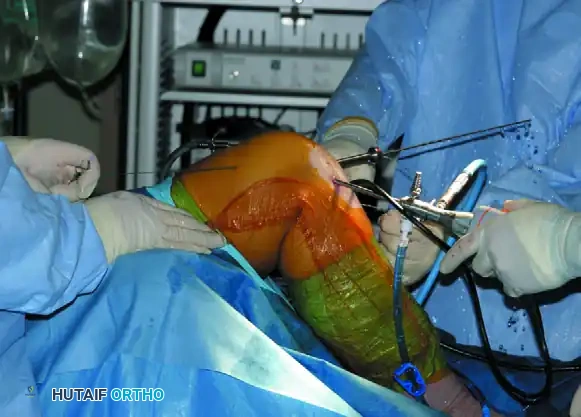
Operating Room Setup
- Place the patient supine on the operating table.
- Apply a well-padded tourniquet high on the proximal thigh.
- Utilize a lateral thigh post positioned at the level of the tourniquet. Ensure the post is adequately padded to prevent neuropraxia.
- Secure a 5-L intravenous saline bag (or a dedicated footrest) to the table to act as a mechanical stop, maintaining the knee in 90 degrees of flexion during graft harvest and tunnel drilling.
- Prepare and drape the extremity using standard sterile arthroscopy drapes. Exsanguinate the limb with an Esmarch bandage and inflate the tourniquet to 100 mm Hg above the patient’s systolic blood pressure.
Surgical Pearl: If the preoperative diagnosis is equivocal, or if complex multiligamentous pathology is suspected requiring prolonged tourniquet times (>90 minutes), perform a diagnostic arthroscopy prior to tourniquet inflation and graft harvest. Inject the portals with local anesthetic containing epinephrine to maintain hypotensive anesthesia and control bleeding.
Pharmacological Prophylaxis
Unless contraindicated, administer weight-based prophylactic intravenous antibiotics and ketorolac (Toradol) prior to tourniquet inflation. For patients under 65 years, 30 mg of ketorolac is administered; for those over 65 or weighing less than 50 kg, 15 mg is indicated. This preemptive analgesia significantly reduces postoperative narcotic requirements.
BONE-PATELLAR TENDON-BONE GRAFT HARVEST
The harvest of the BPTB graft must be executed with precision to prevent catastrophic complications such as patellar fracture or patellar tendon rupture.
Surgical Approach
- With the knee held securely at 90 degrees of flexion, make a 4 to 6-cm medial parapatellar incision. The incision begins just inferior to the lower pole of the patella and extends distally, remaining slightly medial to the tibial tuberosity.
- Perform sharp subcutaneous dissection to expose the anterior aspect of the patella and the patellar tendon.
- Incise the peritenon longitudinally in the midline. Carefully dissect and reflect the peritenon flaps medially and laterally. Preserving the peritenon is vital for subsequent closure and minimizing postoperative anterior knee pain.
Tendon and Bone Plug Extraction
- Maintain the knee in flexion to keep the patellar tendon under tension. Measure the total width of the tendon.
- Harvest the central one-third of the tendon (typically a 9 to 10-mm wide graft, not exceeding one-third of the total width). For larger athletes, an 11-mm graft may be indicated; for smaller patients, an 8-mm or 9-mm graft is appropriate.
- Maintain a strict, straight, single-fiber plane during the longitudinal incisions of the tendon to avoid compromising the graft's structural integrity.
Surgical Warning: When making bone cuts, avoid creating sharp, right-angle corners in the patella, as these act as stress risers and significantly increase the risk of postoperative patellar fracture.
- Utilize an oscillating saw with a 1-cm-wide blade. Direct the saw blade 15 degrees obliquely relative to a line perpendicular to the anterior cortex of the patella. Keep approximately 2 mm of the blade visible to ensure a cut depth of exactly 8 mm.
- The patellar bone plug should measure 10 mm in width and 20 mm in length, starting from the inferior pole.
- Repeat the process for the tibial bone plug, creating a block 10 mm wide and 25 mm long. Free the distal tibial plug using a curved osteotome.
- To prevent contamination, immediately drill a 2-mm hole 3 mm from the distal tip of the tibial plug and pass a No. 5 nonabsorbable suture (e.g., Tevdek). An assistant must maintain control of this suture.
- Complete the proximal patellar cut with the oscillating saw or a fine osteotome, ensuring the cut remains parallel to the anterior cortex.
GRAFT PREPARATION
Meticulous graft preparation on a dedicated back table is essential for smooth tunnel passage and rigid fixation.
- Secure the graft on a commercially available graft preparation board.
- Contour both the patellar and tibial bone plugs using a rongeur. Pass the plugs through a sizing cylinder (trial) matching the intended tunnel diameter (typically 9 or 10 mm). The entire graft must pass through the trial without resistance.
- "Bullet" or chamfer the leading edges of the bone plugs to facilitate intra-articular passage and prevent the graft from catching on the tunnel apertures.
- Drill a 2-mm hole in the patellar plug (which will become the femoral plug) and pass a No. 5 nonabsorbable suture.
- Drill a corresponding hole in the tibial plug and pass an 18-gauge steel wire. The wire provides superior tensile strength during distal tensioning and prevents suture cut-out.
- Mark the bone-tendon junctions on the cancellous side of both plugs using a sterile surgical marker (methylene blue). Measure and record the total length of the graft, the length of the tendinous portion, and the lengths of both bone plugs.
- Wrap the prepared graft in a sterile, saline-soaked sponge and store it safely.
DIAGNOSTIC ARTHROSCOPY AND NOTCH PREPARATION
Portal Placement and Joint Evaluation
- Create standard anteromedial (AM) and anterolateral (AL) arthroscopy portals. Ensure the incisions do not compromise the remaining native patellar tendon.
- Systematically evaluate the joint, addressing any concomitant meniscal or chondral pathology. Meniscal repairs should be performed prior to ACL graft fixation, with the sutures tied after the graft is secured.
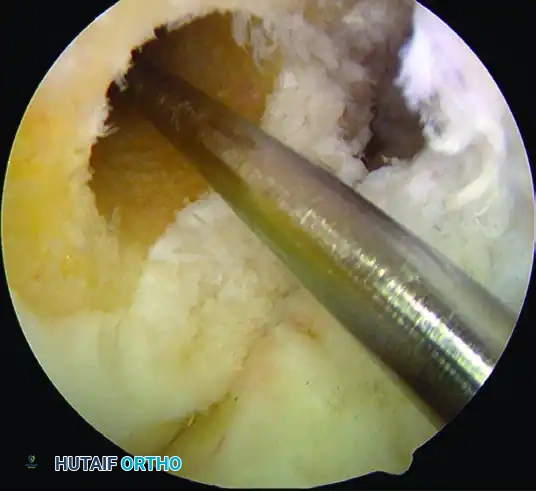
Intercondylar Notch Debridement
- Introduce the arthroscope through the AL portal and a 5.5-mm full-radius shaver through the AM portal.
- Resect the ligamentum mucosum and perform a partial infrapatellar fat pad excision to optimize visualization.
- Carefully debride the ruptured ACL stump. Slide the shaver between the ACL stump and the posterior cruciate ligament (PCL).
Surgical Warning: Always orient the cutting window of the shaver superiorly or laterally to avoid iatrogenic injury to the intact PCL.
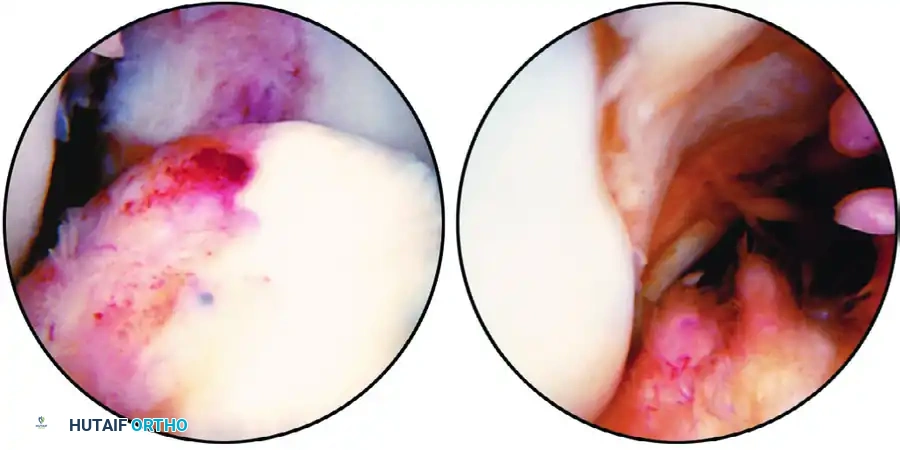
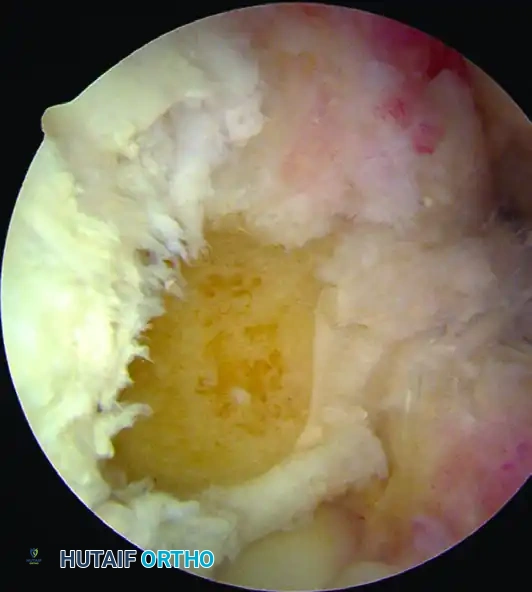
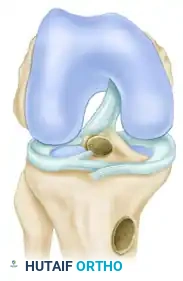
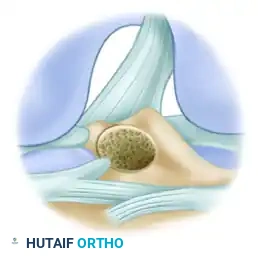
Figure 51-39: (A) Calcified stump of the anterior cruciate ligament after a chronic tear. (B) The "empty lateral wall sign" indicating an ACL-deficient knee.
Anatomical Footprint Identification
Preserve the peripheral margins of the native tibial and femoral footprints to serve as anatomical reference guides.
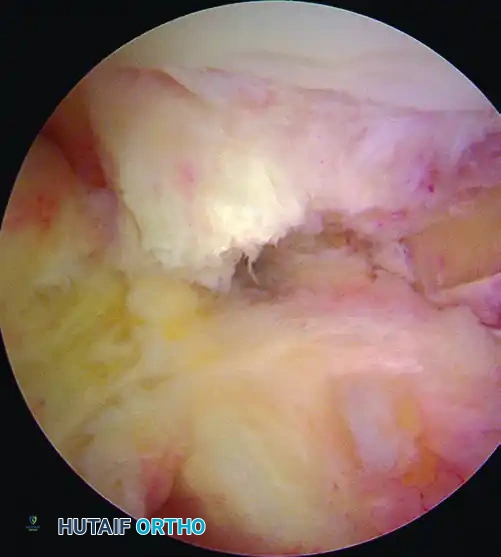
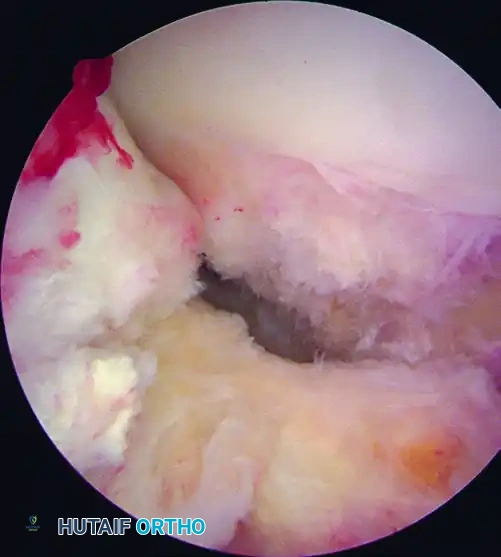
Figure 51-40 (A): View of the ACL footprint using a 30-degree scope through a lateral parapatellar portal.
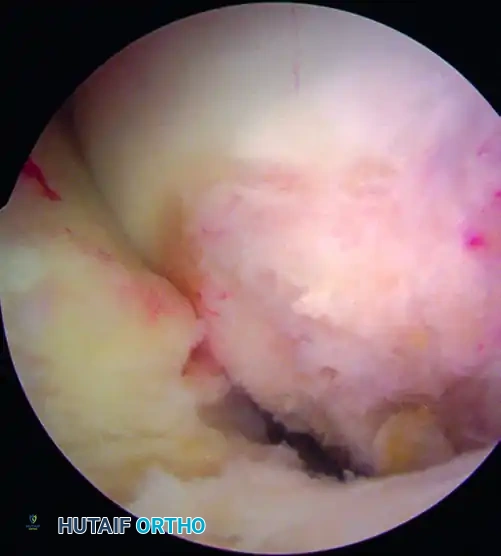
Figure 51-40 (B): The same footprint visualized from the medial parapatellar portal, offering a comprehensive view of the footprint's extent.
- Identify the lateral intercondylar ridge (Resident's ridge) and the lateral bifurcate ridge on the medial wall of the lateral femoral condyle.
- Use an arthroscopic awl to mark the center of the femoral footprint. The ideal starting point is slightly posterior to the center of the native footprint, ensuring a 1 to 2-mm posterior cortical wall remains after reaming.
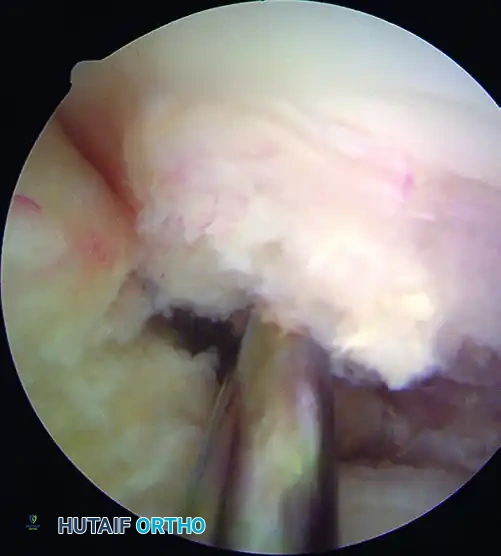
Figure 51-40 (C): The femoral footprint is marked with an awl just posterior to the center of the native footprint.
Notchplasty
With the knee in 30 degrees of flexion, evaluate the intercondylar notch architecture. If stenosis is present, perform a conservative wallplasty using a 5.5-mm burr. The goal is to create an inverted "U" shape, removing 2 to 3 mm of bone superiorly and laterally to prevent graft impingement in full extension. Avoid excessive superior resection, which can violate the patellofemoral articulation.
TIBIAL TUNNEL PREPARATION
The tibial tunnel dictates the sagittal and coronal trajectory of the graft. Precise placement is paramount to avoid roof impingement and PCL impingement.
Guide Placement and Landmarks
- Introduce the tibial drill guide through the AM portal.
- The extra-articular starting point should be approximately 1 cm proximal to the pes anserinus and 1.5 cm medial to the tibial tuberosity.
- Set the guide angle between 55 and 60 degrees relative to the tibial plateau to ensure adequate tunnel length (minimum 40 mm) and an anatomical graft trajectory.
- Intra-articularly, the guide pin should target the center of the native tibial footprint. Key landmarks include:
- The posterior margin of the anterior horn of the lateral meniscus.
- 7 mm anterior to the PCL.
- 2 to 3 mm anterior to the peak of the medial tibial spine.
- Advance the 2.4-mm guide pin. Evaluate its position in full extension to ensure it sits posterior to the intercondylar roof (Blumensaat's line), confirming the absence of roof impingement.
Reaming the Tibial Tunnel
- Once the pin position is verified, over-ream with a cannulated reamer matching the diameter of the tibial bone plug (e.g., 10 mm).
- Use a curette or rasp to chamfer the intra-articular aperture of the tibial tunnel, removing sharp bony edges that could abrade the tendinous portion of the graft.
FEMORAL TUNNEL PREPARATION
While traditional techniques utilized trans-tibial drilling, modern anatomical reconstruction strongly favors independent femoral drilling via an accessory anteromedial (AAM) portal to achieve true anatomical footprint restoration.
- Flex the knee to 120 degrees. This hyperflexion is critical to avoid posterior wall blowout during reaming.
- Introduce a femoral offset guide (e.g., 7 mm offset for a 10 mm tunnel) through the AAM portal. Hook the guide over the posterior cartilage margin of the lateral femoral condyle at the previously marked footprint center.
- Advance the guide pin through the lateral femoral cortex.
- Ream the femoral tunnel to a depth of 25 to 30 mm, depending on the length of the femoral bone plug. Ensure a 1 to 2-mm posterior cortical wall is maintained.
- Pass a passing suture (e.g., a looped PDS or specialized passing wire) through the femoral tunnel and retrieve it out of the tibial tunnel.
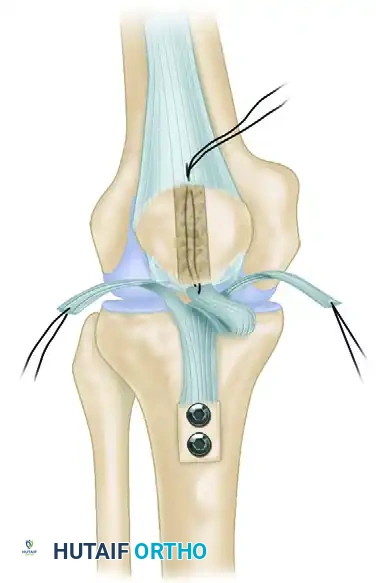
GRAFT PASSAGE AND FIXATION
Rigid aperture fixation is the hallmark of the BPTB graft, allowing for immediate postoperative weight-bearing and range of motion.
- Shuttle the graft into the joint by pulling the passing sutures proximally. Ensure the cancellous surface of the bone plugs faces anteriorly to facilitate optimal healing and screw placement.
- Advance the femoral bone plug into the femoral tunnel until the marked bone-tendon junction is flush with the intra-articular aperture.
Femoral Fixation
- Introduce a guidewire through the AAM portal, placing it parallel to the bone plug.
- Advance a titanium or bioabsorbable interference screw (typically 7x20 mm or 8x20 mm) over the wire. The screw should be placed on the cancellous side of the plug to compress the cortical side against the tunnel wall.
Tibial Fixation
- Cycle the knee through a full range of motion 20 to 30 times to pre-condition the graft and eliminate creep.
- With the knee in full extension (or 10 degrees of flexion, depending on surgeon preference) and maximum manual tension applied to the distal wire, insert a guidewire into the tibial tunnel anterior to the bone plug.
- Secure the tibial plug with an interference screw (typically 9x20 mm or 10x20 mm), ensuring the screw is flush with the anterior tibial cortex.
CLOSURE AND POSTOPERATIVE PROTOCOL
- Thoroughly irrigate the joint to remove all bone debris, which can contribute to postoperative arthrofibrosis or heterotopic ossification.
- Close the patellar tendon defect loosely with absorbable sutures. Close the peritenon meticulously to restore the gliding layer.
- Perform standard layered closure of the subcutaneous tissue and skin.
Rehabilitation
The presence of bone-to-bone healing allows for an accelerated rehabilitation protocol:
- Phase I (0-2 weeks): Focus on immediate full passive extension, reduction of effusion, and quadriceps activation. Weight-bearing as tolerated in a hinged knee brace locked in extension.
- Phase II (2-6 weeks): Progression of range of motion (goal: 0-120 degrees), closed kinetic chain exercises, and weaning off the brace.
- Phase III (6-12 weeks): Advanced strengthening, proprioception training, and initiation of straight-line jogging.
- Phase IV (3-6 months): Plyometrics, agility drills, and sport-specific training. Return to competitive pivoting sports is typically permitted between 6 to 9 months, contingent upon passing functional hop tests and achieving >90% limb symmetry index (LSI) on isokinetic testing.
You Might Also Like