Primary Tricompartmental Knee Replacement: Advanced Surgical Technique

Key Takeaway
Primary tricompartmental total knee arthroplasty (TKA) requires meticulous surgical technique, precise soft-tissue balancing, and accurate restoration of the mechanical axis. This comprehensive guide details the medial parapatellar, subvastus, and midvastus approaches, alongside advanced bone preparation principles. By mastering femoral rotational alignment and gap balancing techniques, orthopedic surgeons can optimize patellofemoral tracking, ensure joint stability, and significantly improve long-term functional outcomes for patients undergoing knee reconstruction.
SURGICAL TECHNIQUE FOR PRIMARY TRICOMPARTMENTAL KNEE REPLACEMENT
The following comprehensive description of surgical technique encompasses the foundational and advanced principles applicable to primary tricompartmental total knee arthroplasty (TKA). While this guide provides an exhaustive academic framework, it is not intended to replace the individual technique manuals specific to proprietary implant systems. A profound understanding of the biomechanical principles involved allows the orthopedic surgeon to exercise sound clinical judgment in any knee reconstruction, regardless of the particular type of implant or constraint level being utilized.
Preoperative Planning and Patient Positioning
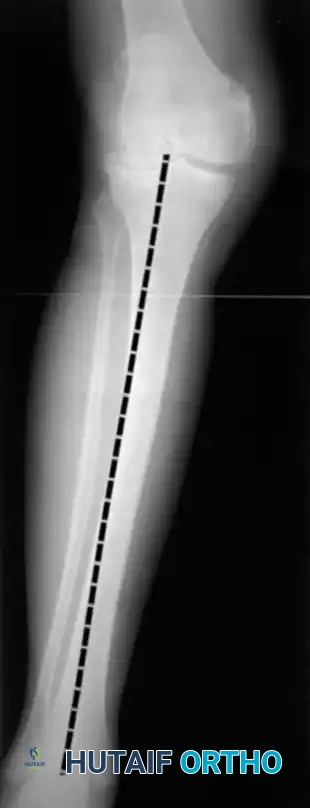
Successful TKA begins long before the first incision. Meticulous preoperative templating using weight-bearing full-length standing radiographs is mandatory to determine the mechanical axis, assess bone loss, and anticipate implant sizing.
The patient is positioned supine on the operating table. A well-padded tourniquet is applied to the proximal thigh. The leg is prepped and draped free to allow full, unhindered flexion to at least 120 degrees and complete extension. A lateral post or a dedicated knee positioner is often utilized to maintain the limb in flexion during critical stages of the procedure.
💡 Clinical Pearl: Tourniquet Management
While traditional TKA utilizes a tourniquet inflated to 250–300 mm Hg prior to incision, modern protocols often favor a "tourniquet-less" approach or delayed inflation (only during cementation) to reduce postoperative pain, minimize quadriceps inhibition, and lower the risk of deep vein thrombosis (DVT).
Surgical Approaches to the Knee
The most commonly used skin incision for primary TKA is an anterior midline incision. The choice of deep arthrotomy dictates the exposure of the joint and influences postoperative quadriceps recovery.
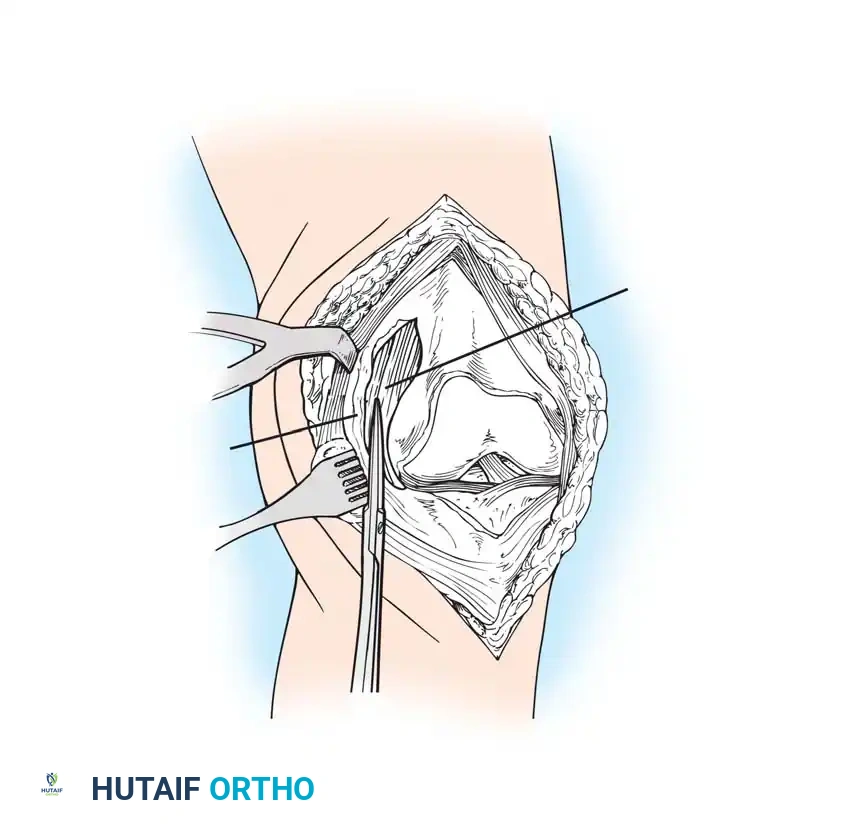
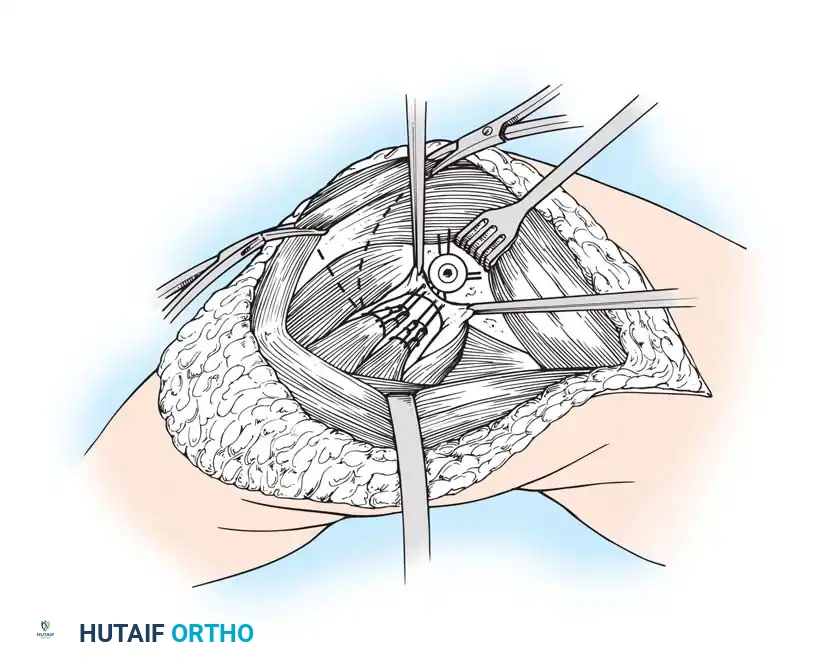
The Medial Parapatellar Retinacular Approach
The standard and most versatile retinacular incision in TKA is the medial parapatellar approach. It provides extensile exposure and is suitable for nearly all primary and revision scenarios.
- Make the skin incision with the knee in flexion. This allows the subcutaneous tissue to fall medially and laterally, naturally improving exposure.
- If a preexisting anterior scar is present in a usable position, incorporate it. If multiple previous incisions exist, choose the most lateral usable incision. The blood supply to the skin of the anterior knee predominantly arises from the medial side; violating this principle risks catastrophic skin necrosis.
- Ensure the skin incision is long enough to avoid excessive tension during retraction.
- Keep the medial skin flap as thick as possible by maintaining dissection just superficial to the extensor mechanism.
- Extend the retinacular incision proximally along the length of the quadriceps tendon, leaving a 3- to 4-mm cuff of tendon on the vastus medialis to facilitate robust closure.
- Continue the incision around the medial border of the patella, extending 3 to 4 cm onto the anteromedial surface of the tibia, parallel to the medial border of the patellar tendon.
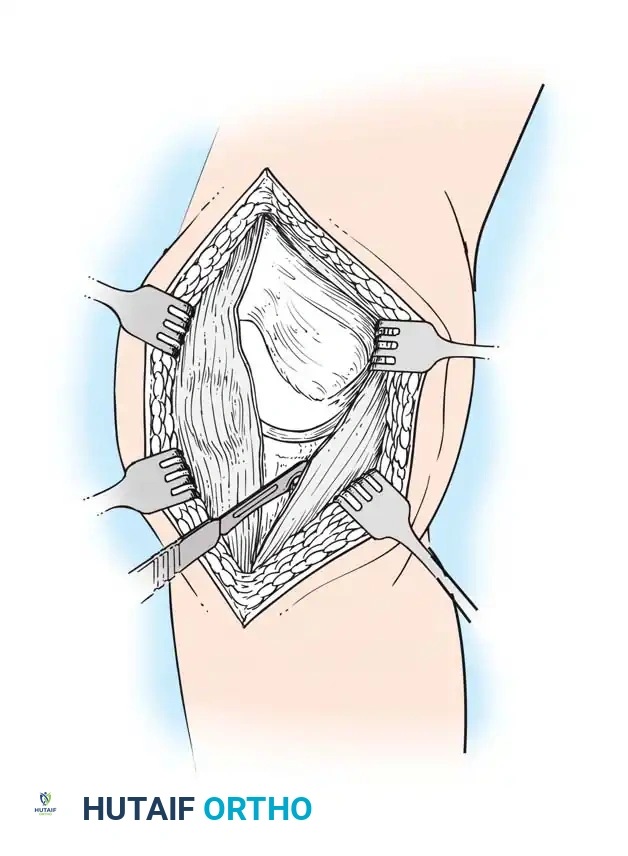
- Expose the medial side of the knee by subperiosteally elevating the anteromedial capsule and the deep medial collateral ligament (MCL) off the tibia, extending to the posteromedial corner of the knee.
- Extend the knee and evert the patella. This allows for a routine release of the lateral patellofemoral plicae. In obese patients, if eversion is difficult, develop the lateral subcutaneous flap further so the patella can be everted underneath this tissue without avulsing the patellar tendon.
⚠️ Surgical Warning: Patellar Tendon Avulsion
During all maneuvers that place tension on the extensor mechanism—especially knee flexion and patellar retraction—pay careful attention to the patellar tendon attachment at the tibial tubercle. Avulsion of the patellar tendon is a devastating complication that is notoriously difficult to repair.
The Subvastus ("Southern") Approach
In an effort to reduce patellofemoral complications and expedite the return of quadriceps function, alternative methods of exposure have been developed. The subvastus approach, advocated by Hofmann, Plaster, and Murdock, avoids violating the extensor mechanism.

- The same anterior midline skin incision is used.
- The proximal retinacular incision is performed by incising the superficial fascia overlying the vastus medialis.
- Bluntly mobilize the distal medial border of the vastus medialis posteriorly to the medial intermuscular septum.
- Lift the origin of the vastus medialis off the medial intermuscular septum to approximately 10 cm proximal to the adductor tubercle, staying distal to the aperture for the femoral vessels.
- Incise the synovium and dislocate the entire extensor mechanism laterally.
Advocates of the subvastus approach note that leaving the extensor mechanism intact results in a more rapid return of quadriceps strength, preserves the vascularity to the patella (specifically the supreme genicular artery), decreases postoperative pain, and reduces the need for lateral retinacular release. However, exposure can be severely limited in obese patients, highly muscular individuals, or those with previous knee surgeries.
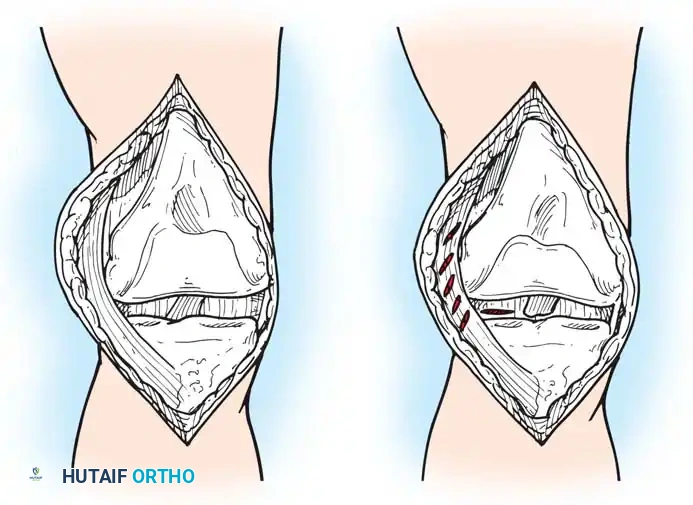
The Midvastus Approach
Engh and Parks described the midvastus approach, which serves as a compromise between the extensile nature of the medial parapatellar and the quadriceps-sparing nature of the subvastus approach.
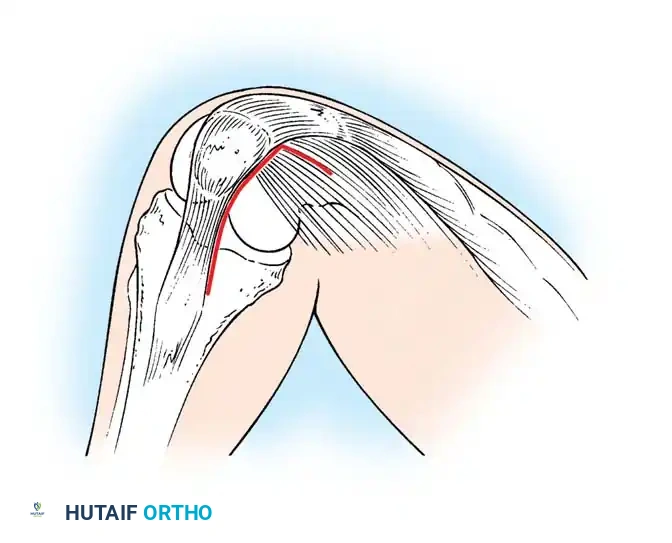
- The vastus medialis muscle is split in line with its fibers rather than subluxated laterally in its entirety.
- The split begins at the superomedial border of the patella and extends proximally and medially toward the intermuscular septum.
- A safe zone of 4.5 cm of the vastus medialis can be sharply split from the patellar margin; further blunt dissection can be performed if necessary.
This approach preserves the supreme genicular artery and the quadriceps tendon. Relative contraindications include severe obesity, previous upper tibial osteotomy, and preoperative flexion of less than 80 degrees. Careful hemostasis is mandatory, as postoperative hematomas are more frequently described with muscle-splitting approaches.
Initial Joint Preparation and Soft Tissue Management
Once the joint is exposed, systematic preparation of the intra-articular structures is required before bone resection.
- Flex the knee and excise the anterior cruciate ligament (ACL) and the anterior horns of the medial and lateral menisci.
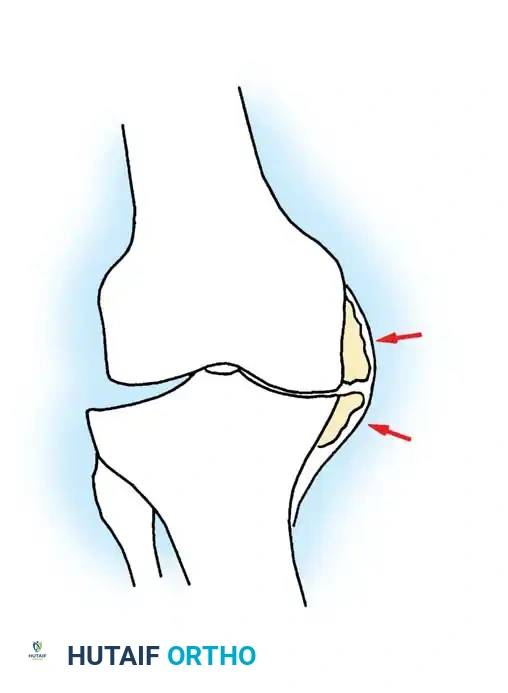
- Remove any prominent osteophytes (especially in the intercondylar notch and medial/lateral gutters) that may lead to component malposition, impinge on soft tissues, or create artificial soft-tissue tension.
- The posterior horns of the menisci are often easier to excise after the initial femoral and tibial bone cuts have been made.
- If a Posterior Cruciate Ligament (PCL)-substituting (Posterior Stabilized, PS) prosthesis is planned, the PCL can be resected now or removed later during the intercondylar box cut.
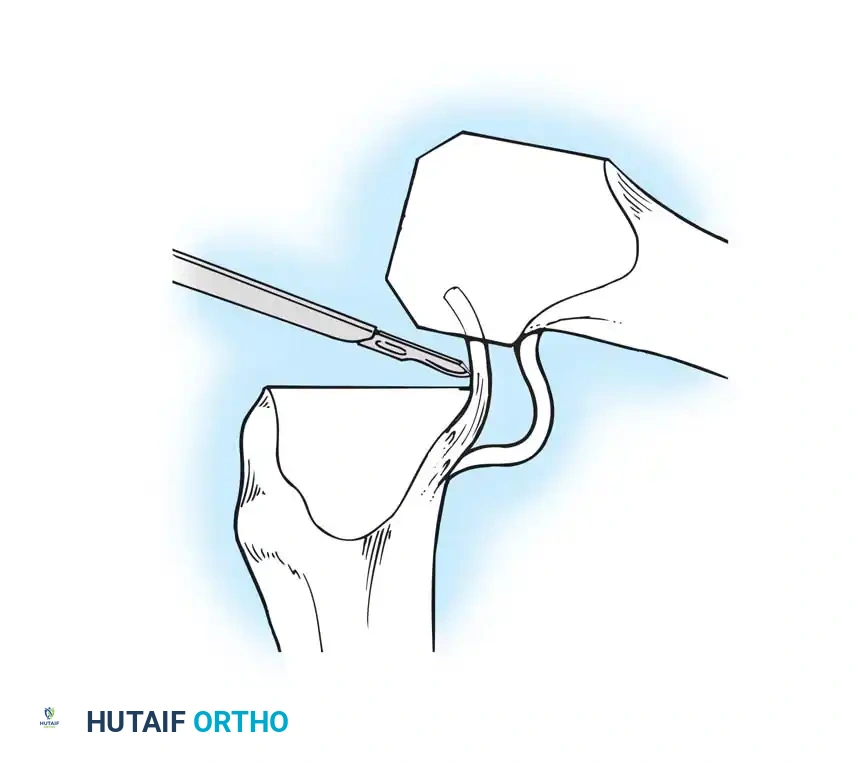
- With both PCL-substituting and PCL-retaining procedures, subluxate and externally rotate the tibia. External rotation relaxes the extensor mechanism, decreases the risk of patellar tendon avulsion, and dramatically improves exposure of the lateral compartment.
- Expose the lateral tibial plateau by partially excising the infrapatellar fat pad and carefully placing a levering-type retractor adjacent to the lateral tibial plateau.
Principles of Bone Preparation
Bone surface preparation is governed by four non-negotiable principles:
1. Appropriate sizing of the individual components.
2. Alignment of the components to restore the neutral mechanical axis.
3. Recreation of equally balanced soft-tissue gaps in both flexion and extension.
4. Optimization of patellofemoral tracking.
Distal Femoral Resection
The distal femoral cut sets the extension gap and determines the coronal alignment of the femoral component.
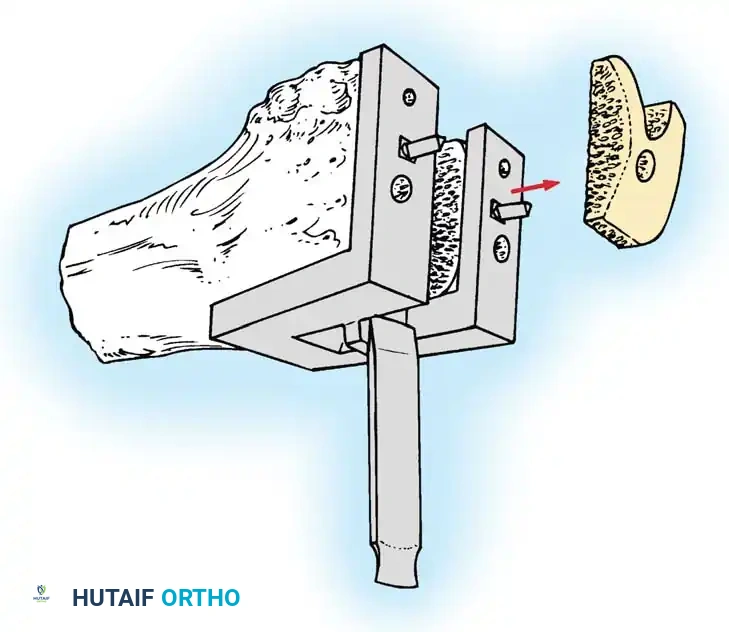
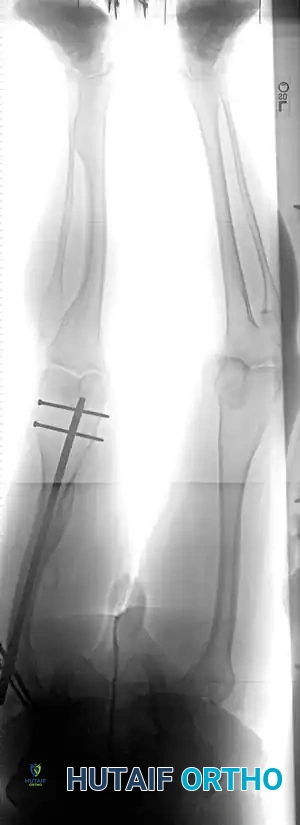
- Make the distal femoral cut at a valgus angle (usually 5 to 7 degrees) perpendicular to the predetermined mechanical axis of the femur. This is typically achieved using an intramedullary alignment guide.
- The thickness of the bone removed should generally equal the thickness of the distal flange of the femoral component (typically 9 to 10 mm).
- If a significant preoperative flexion contracture is present, removing an additional 2 to 3 mm of distal femoral bone will widen the extension gap, aiding in contracture correction.
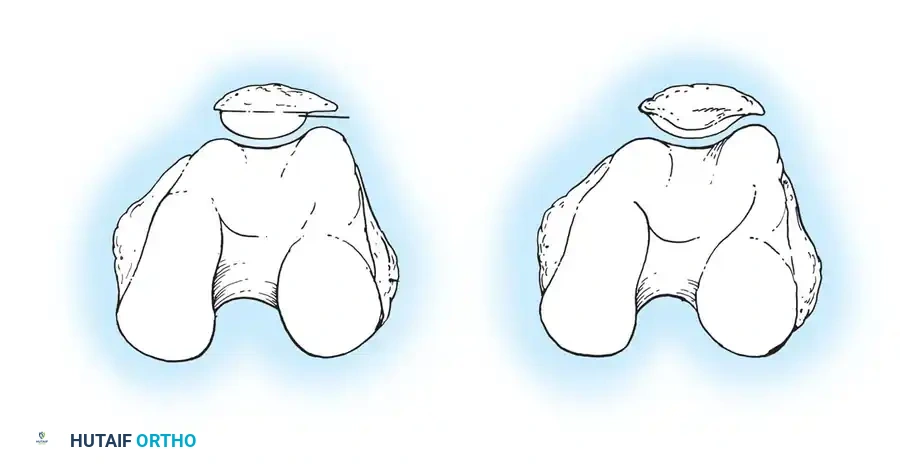
Femoral Rotational Alignment
The anterior and posterior femoral cuts determine the rotation of the femoral component and the shape of the flexion gap. This is arguably the most critical step in TKA.
* Excessive external rotation widens the flexion gap medially, potentially resulting in medial flexion instability.
* Internal rotation of the femoral component is a primary cause of lateral patellar tilt, patellofemoral instability, and anterior knee pain.
Femoral component rotation can be determined using several anatomical and kinematic reference axes:
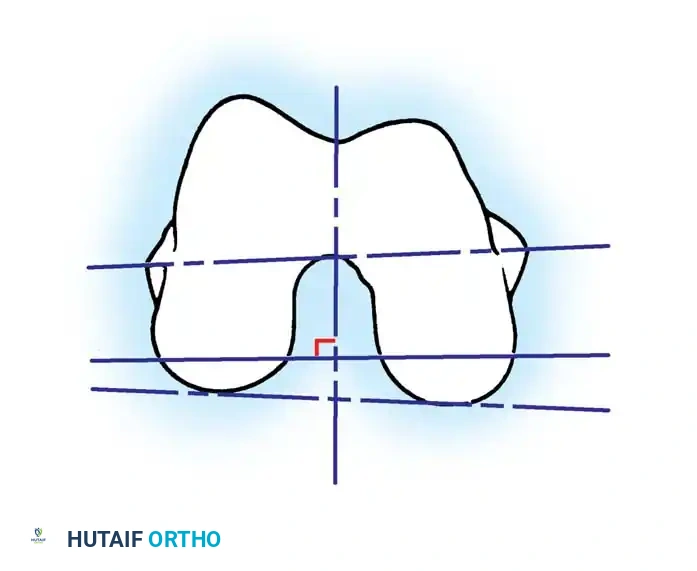
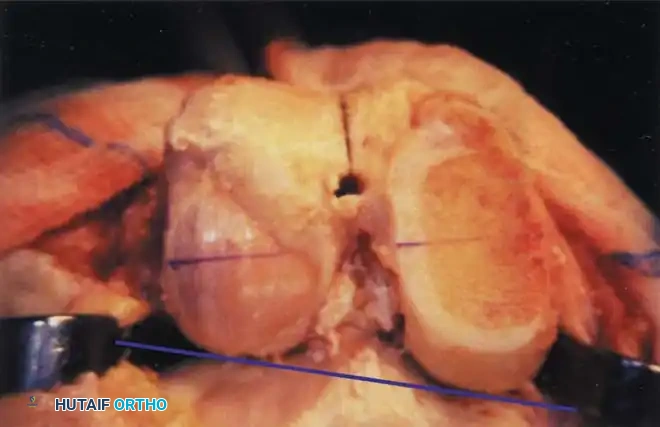
- The Surgical Transepicondylar Axis (TEA): Make the posterior femoral cut parallel to a line drawn between the prominence of the lateral epicondyle and the sulcus of the medial epicondyle.
- The Anteroposterior (AP) Axis (Whiteside's Line): Draw a line from the deepest part of the trochlear groove to the center of the intercondylar notch. The posterior femoral cut is made perpendicular to this axis.
- The Posterior Condylar Axis (PCA): When referencing the posterior condyles, the cut is typically made in 3 degrees of external rotation relative to a line connecting the most posterior aspects of the medial and lateral condyles.
⚠️ Pitfall: The Hypoplastic Lateral Condyle
In the valgus knee, the lateral femoral condyle is frequently hypoplastic. Relying solely on the posterior condylar axis in a valgus knee will lead to an internally rotated femoral component. In these cases, the TEA or AP axis must be prioritized.
- The Gap Technique: Using the cut surface of the proximal tibia, the posterior femoral cut is made parallel to the proximal tibial cut after the soft tissues have been balanced in extension.

Caution must be exercised when using the gap technique; reliance on ligaments that have stretched or contracted to nonanatomical lengths can lead to severe femoral component malrotation. The master surgeon cross-references multiple axes to ensure perfect rotational alignment.
Anterior vs. Posterior Referencing
Regardless of the rotational alignment method, the sizing of the femoral component dictates the flexion space.
* Posterior Referencing: Instruments measure from the posterior condyles. This method accurately recreates the original posterior condylar offset, optimizing the flexion gap. However, if the femur is between sizes, sizing up can overstuff the patellofemoral joint, while sizing down risks notching the anterior femoral cortex.
* Anterior Referencing: Instruments measure from the anterior cortex. This method reliably places the anterior flange flush against the bone, virtually eliminating the risk of anterior notching. However, sizing down may increase the flexion gap (leading to instability), while sizing up may tighten the flexion gap.
Femoral Chamfer Cuts and Intercondylar Preparation
Once sizing and rotation are established, the cutting block is pinned in place.
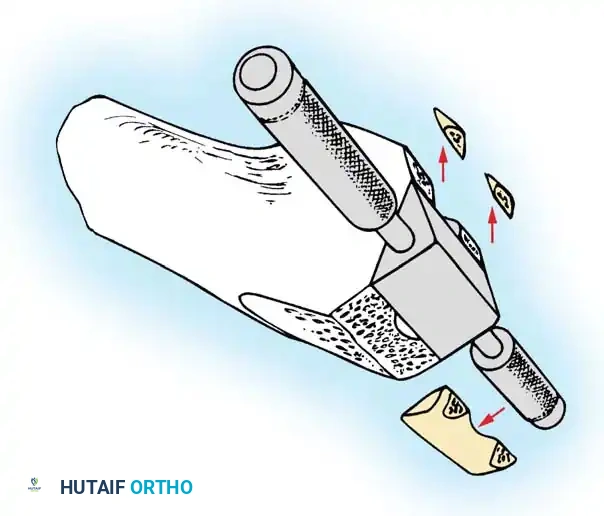
- Complete the distal femoral preparation by making the anterior, posterior, and chamfer cuts.
- If a PCL-retaining (CR) prosthesis is used, the intercondylar notch is left intact.
- If a PCL-substituting (PS) design is chosen, an intercondylar box cut is performed to accommodate the housing for the post-and-cam mechanism.
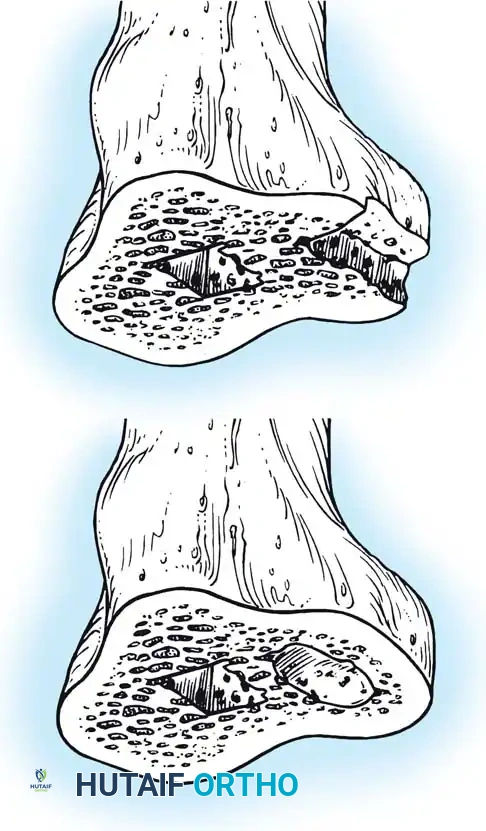
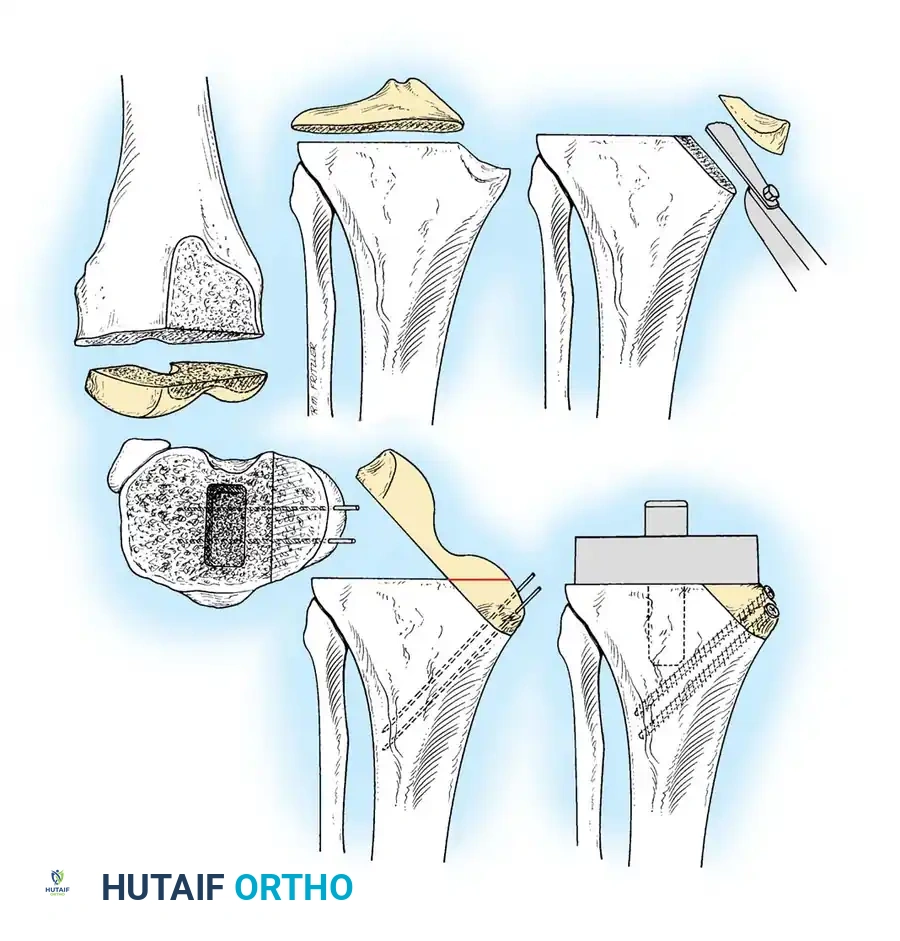
Proximal Tibial Preparation
The goal of the tibial resection is to create a flat, stable platform perpendicular to the mechanical axis of the tibia in the coronal plane, while recreating the appropriate posterior slope in the sagittal plane.
- Cut the tibia perpendicular to its mechanical axis. Extramedullary alignment guides are most commonly used, referencing the center of the tibial tubercle proximally and the center of the talus distally.
- Incorporate 0 to 5 degrees of posterior slope, depending on the implant design and the patient's native anatomy.
- Cruciate-Retaining (CR) implants typically require more posterior slope (3–7 degrees) to prevent PCL tightness in flexion.
- Posterior-Stabilized (PS) implants generally require less slope (0–3 degrees) to prevent early impingement of the tibial post against the femoral cam.
- The depth of resection is typically 8 to 10 mm from the intact lateral tibial plateau, ensuring adequate thickness for the polyethylene insert without excessively raising the joint line.

You Might Also Like