Arthroscopic Management of Knee Loose Bodies, Plicae, and Osteochondritis Dissecans
Key Takeaway
Arthroscopic removal of loose bodies requires a systematic diagnostic approach and precise triangulation techniques. Surgeons must navigate complex joint compartments, utilizing specialized extraction methods such as needle stabilization and morcellization for larger fragments. Concurrently, identifying and managing associated pathologies, including pathological medial plicae and osteochondritis dissecans, is critical for restoring joint biomechanics and preventing progressive chondral degradation.
Introduction to Intra-Articular Knee Pathologies
The presence of intra-articular loose bodies, pathological synovial plicae, and osteochondritis dissecans (OCD) represents a triad of interconnected mechanical and biological disruptions within the knee joint. For the orthopedic surgeon, mastering the arthroscopic management of these entities is paramount. Loose bodies, whether chondral, osteochondral, or fibrous, act as abrasive third bodies within the articulation, accelerating chondral wear and precipitating early-onset osteoarthritis.
This comprehensive masterclass delineates the evidence-based surgical techniques, biomechanical considerations, and postoperative protocols required to successfully navigate and treat these complex intra-articular pathologies.
Arthroscopic Removal of Loose Bodies
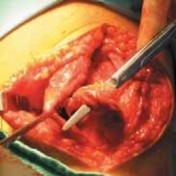
The extraction of loose bodies from the knee joint is a fundamental arthroscopic skill that demands meticulous spatial awareness, mastery of fluid dynamics, and advanced triangulation capabilities. The surgical approach is dictated by the size, location, and composition of the loose body. Generally, two primary techniques are employed:
1. Suction and Lavage: Utilized for micro-fragments and small cartilaginous debris.
2. Triangulation and Extraction: Reserved for larger, discrete osteochondral or fibrous bodies requiring mechanical grasping.
Patient Positioning and Initial Setup
The patient is positioned supine with the operative leg secured in a standard leg holder or lateral post to allow for dynamic valgus and varus stressing. A tourniquet is applied to the proximal thigh; however, it is rarely necessary to inflate it during isolated loose body removal. Maintaining a deflated tourniquet minimizes the risk of postoperative tourniquet paresis and deep vein thrombosis, as intra-articular bleeding is typically negligible during this procedure.
Systematic Diagnostic Arthroscopy
A standard 30-degree viewing arthroscope is introduced through the anterolateral portal. Before initiating the hunt for the loose body, the surgeon must perform a rigorous, systematic diagnostic arthroscopy. Preoperative radiographs or MRI may indicate the location of a radiopaque body; however, these fragments are highly mobile and frequently migrate between the time of imaging and the surgical intervention.
The systematic search must sequentially evaluate:
* The suprapatellar pouch and superior plical folds.
* The medial and lateral gutters.
* The medial and lateral tibiofemoral compartments.
* The intercondylar notch.
* The popliteal hiatus.
* The posteromedial and posterolateral compartments.
Fluid Dynamics and the Needle Stabilization Technique
The suprapatellar pouch is a common reservoir for loose bodies. However, extracting them from this expansive space presents a unique hydrodynamic challenge. The loose body frequently floats away from the arthroscope or grasping instrument due to the turbulence created by irrigation fluid.
SURGICAL PEARL: The slightest turbulence in the irrigation fluid or inadvertent contact with a grasper will propel a loose body into an inaccessible recess. To mitigate this, immediately turn off the outflow of the irrigating solution. Insert a small suction tip through the working portal; the loose body will frequently be drawn directly to the suction tip, where it can be stabilized.
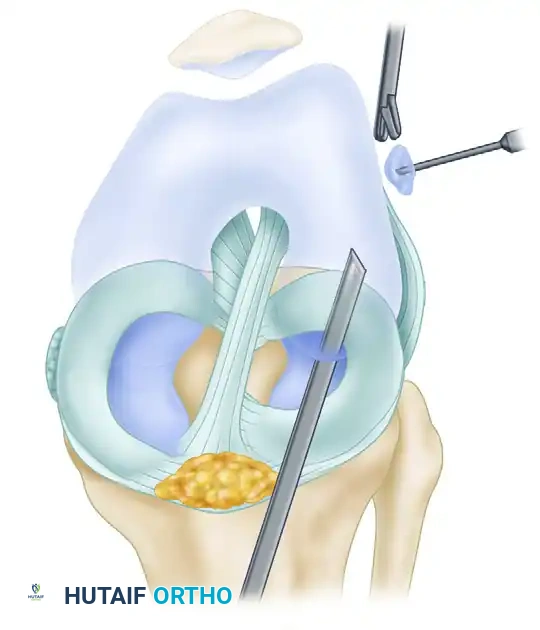
If suction stabilization is insufficient, the Spinal Needle Technique is highly effective. The loose body is trapped against the synovial wall, and a spinal needle is triangulated percutaneously to pierce and impale the fragment. This holds the body rigidly in place until a grasper can be introduced, typically through a superolateral or superomedial portal.
Once secured within the jaws of a toothed grasper, the loose body is slowly withdrawn to the portal entrance.
SURGICAL WARNING: If the loose body is larger than the capsular incision, do not force its extraction. Forcing the instrument will strip the loose body from the grasper, dropping it back into the joint or losing it within the infrapatellar fat pad. Always use a scalpel to enlarge the portal entrance over the instrument shaft to allow smooth extraction.
Managing Multiple and Giant Loose Bodies
When multiple loose bodies are present, a strict hierarchy of removal must be followed: remove the smallest fragments first. Extracting the largest bodies initially often requires portal enlargement, which subsequently leads to significant extravasation and leakage of irrigation fluid. This loss of joint distension makes finding and removing the remaining smaller bodies exceedingly difficult.
For giant loose bodies that would otherwise require a mini-arthrotomy, morcellization is the preferred arthroscopic technique.
PITFALL: Never use delicate arthroscopic basket forceps to crush or morcellize large, ossified loose bodies. This will inevitably cause catastrophic instrument failure, leaving broken metallic jaws within the joint.
Instead, utilize a heavy-duty Kerrison rongeur or an aggressive arthroscopic burr to fragment the large body into manageable pieces that can be extracted through standard portals or evacuated via suction.
Navigating the Posterior Compartments
Loose bodies frequently gravitate into the dependent posterior compartments. Visualizing these areas requires passing the arthroscope through the intercondylar notch (the trans-notch view). A 70-degree oblique viewing arthroscope is often necessary to look "around the corner" of the posterior femoral condyles.
Triangulating a grasping instrument into the posteromedial or posterolateral compartment can be technically demanding due to the crowding of instruments and the tight capsular confines. The surgeon must establish a dedicated posteromedial or posterolateral portal under direct intra-articular trans-illumination to safely introduce the grasper and retrieve the fragment.
Protocol for Broken Arthroscopic Instruments
Instrument breakage is a dreaded complication during arthroscopy. If a portion of an instrument breaks and drops into the joint, the surgeon must adhere to a strict protocol:
1. Remain Calm and Freeze: Do not move the knee or the arthroscope.
2. Halt Fluid Flow: Immediately turn off the irrigating solution to prevent the fragment from being flushed into a hidden recess.
3. Maintain Visualization: Keep the broken fragment in the center of the visual field at all times.
4. Retrieve: Introduce a magnetic retriever or a strong grasper through a secondary portal to extract the fragment before proceeding with any other aspect of the surgery.
Synovial Plicae of the Knee
Embryology and Pathoanatomy
Embryologically, the knee joint develops from three distinct mesenchymal compartments. By the third to fourth month of fetal gestation, these compartments normally fuse into a single synovial cavity, with the intervening synovial partitions resorbing. Synovial plicae represent the unresolved remnants of these embryological partitions.
Plicae are classified by their anatomical relationship to the patella:
* Suprapatellar Plica: Partially divides the suprapatellar pouch. Rarely symptomatic.
* Infrapatellar Plica (Ligamentum Mucosum): Runs from the infrapatellar fat pad to the intercondylar notch. While it does not produce pain, it can obscure visualization of the anterior cruciate ligament (ACL) and impede the passage of the arthroscope between compartments.
* Lateral Patellar Plica: Exceedingly rare.
* Medial Patellar Plica: The most common plica to achieve clinical significance and cause anterior knee pain.
The Pathological Medial Patellar Plica
The medial patellar plica originates superior to the patella, running distally along the medial sidewall of the joint, crossing over the medial femoral condyle, and inserting into the infrapatellar fat pad. In a normal knee, this structure is thin, elastic, and asymptomatic.
A plica transitions from a normal anatomical variant to a pathological plica when it becomes thickened, fibrotic, and inelastic. This is typically precipitated by a direct blow to the anteromedial knee or chronic repetitive microtrauma. The resulting inflammatory cascade leads to swelling, hyalinization, and a profound loss of elasticity.
Biomechanical Sequelae: As the knee flexes from extension to 90 degrees, a fibrotic medial plica acts as a rigid, abrasive bowstring. At approximately 30 to 40 degrees of flexion, this noncompliant band snaps firmly across the medial femoral condyle. Over time, this repetitive abrasive action shears the articular cartilage, resulting in localized chondromalacia of the medial femoral condyle.
Clinical Evaluation
Patients typically present with a history of blunt trauma to the anterior knee, followed by chronic, aching anteromedial discomfort exacerbated by activity. A mechanical "clicking" or "popping" sensation is frequently reported during active flexion and extension.
Physical examination reveals:
* Localized tenderness above the joint line on the anteromedial aspect.
* A palpable, thickened fibrotic band rolling under the examiner's fingers.
* A palpable pop over the medial femoral condyle at 30 to 40 degrees of flexion.
* Joint effusion is notably rare unless secondary chondral damage has occurred.
Management Strategies
Conservative Treatment: Initial management must be non-operative, particularly for plica syndromes of short duration.
* Activity Modification: Avoid repetitive flexion/extension and prolonged periods of knee flexion.
* Physical Therapy: Focus on isometric quadriceps strengthening and stiff-legged straight-leg raises.
* Contraindication: Progressive resistive isotonic quadriceps exercises (e.g., leg extensions) must be strictly avoided, as they exacerbate the abrasive friction of the plica against the condyle.
* Pharmacotherapy: A short course of NSAIDs or a localized intra-articular corticosteroid injection.
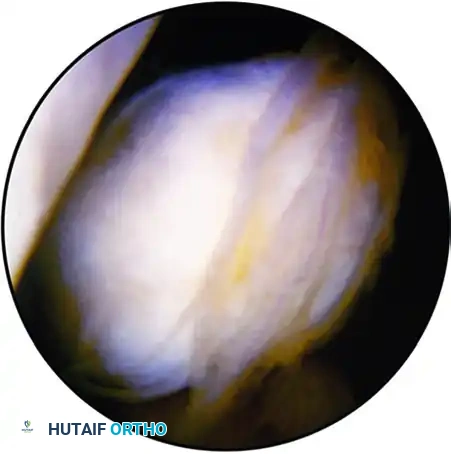
Surgical Intervention: If chronic symptoms persist despite exhaustive conservative measures, arthroscopic resection is indicated. The pathological plica will appear as a thickened, white, fibrotic band. Complete arthroscopic excision of the plica using a motorized shaver or radiofrequency ablation is highly successful in eradicating symptoms and halting the progression of condylar chondromalacia.
Osteochondritis Dissecans (OCD)
Osteochondritis dissecans is an acquired, potentially reversible idiopathic lesion of subchondral bone that can lead to delamination and sequestration of the overlying articular cartilage, ultimately creating a loose body.
Pathophysiology and Lesion Localization
While the exact etiology remains debated (ischemia, repetitive microtrauma, genetic predisposition), the mechanical result is a focal area of subchondral necrosis. If the lesion fails to heal, the osteochondral fragment destabilizes.
The anatomical distribution of OCD lesions in the knee is highly predictable:
* Medial Femoral Condyle (70-80%): The classic location is the lateral aspect of the medial femoral condyle (the "classic" or Harding's lesion).
* Lateral Femoral Condyle (15-20%): Typically located on the inferocentral or posterior aspect.
* Patella (5-10%): Usually on the inferior pole.
Imaging and Stability Assessment
Standard radiographs (AP, lateral, notch/tunnel, and skyline views) are essential for initial diagnosis. However, Magnetic Resonance Imaging (MRI) is the gold standard for assessing lesion stability and determining the integrity of the overlying cartilage.
CLINICAL PEARL: The hallmark MRI sign of an unstable OCD lesion is the presence of high T2 signal fluid interposing between the osteochondral fragment and the underlying crater, or the presence of extensive subchondral cysts and edema. A stable lesion will lack this fluid interface.
Treatment Algorithms
The management of OCD is heavily dictated by the patient's skeletal maturity and the stability of the lesion.
Skeletally Immature Patients (Juvenile OCD):
Symptomatic, stable lesions in patients with open physes have a high propensity for spontaneous healing.
* Protocol: Conservative management for a minimum of 3 months.
* Weight-Bearing: Lesions >1 cm in weight-bearing zones require strict immobilization and restricted weight-bearing. Small lesions in non-weight-bearing zones may only require activity restriction.
* Follow-up: Serial radiographs every 4 to 6 weeks. If healing is evident, partial weight-bearing is progressively advanced.
Surgical Indications:
Surgical intervention is mandated when conservative measures fail, or when specific high-risk criteria are met:
1. Skeletal Maturity: Patients 12 years of age or older (approaching or at physeal closure) have a drastically reduced capacity for spontaneous healing.
2. Lesion Size and Location: Lesions >1 cm located in primary weight-bearing areas.
3. Massive Lesions: Any lesion >3 cm in diameter.
4. Instability: MRI evidence of fluid behind the lesion, or the presence of an active loose body.
5. Clinical Failure: Persistent effusion and joint line pain despite 3 to 6 months of strict conservative management.
Surgical options range from arthroscopic subchondral drilling (to stimulate angiogenesis in stable lesions) to internal fixation of unstable flaps using bioabsorbable darts or headless compression screws. If the fragment is completely detached and non-viable, it must be removed (as a loose body), and the resulting defect treated with marrow stimulation techniques (microfracture), osteochondral autograft transfer (OATS), or autologous chondrocyte implantation (ACI).
Postoperative Rehabilitation Protocols
Following the arthroscopic removal of loose bodies or plica excision, the rehabilitation protocol is generally accelerated, provided no concurrent cartilage restoration procedures (like microfracture) were performed.
- Phase 1 (Weeks 0-2): Immediate weight-bearing as tolerated with crutches. Focus on reducing effusion with cryotherapy and restoring full passive extension. Isometric quadriceps activation is initiated immediately.
- Phase 2 (Weeks 2-4): Progression to full active range of motion. Closed kinetic chain exercises (mini-squats, leg presses) are introduced.
- Phase 3 (Weeks 4-6): Advanced strengthening, proprioceptive training, and gradual return to sport-specific activities.
Note: If an OCD lesion was drilled or fixed, the protocol is drastically altered, requiring 6 to 8 weeks of strict non-weight-bearing to protect the healing osteochondral interface.
You Might Also Like