INTRODUCTION TO ELBOW ARTHROSCOPY PORTAL PLACEMENT
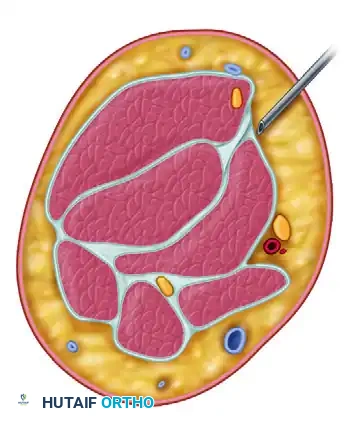
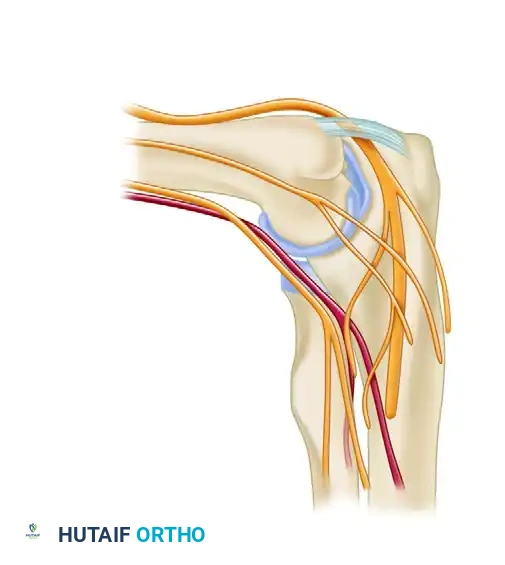
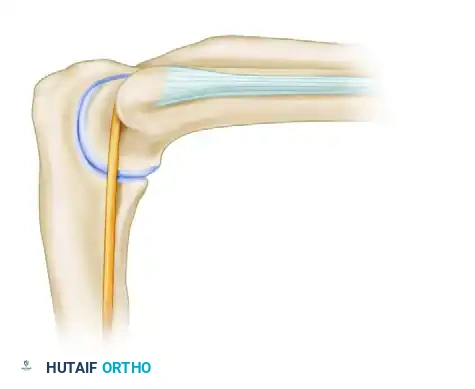
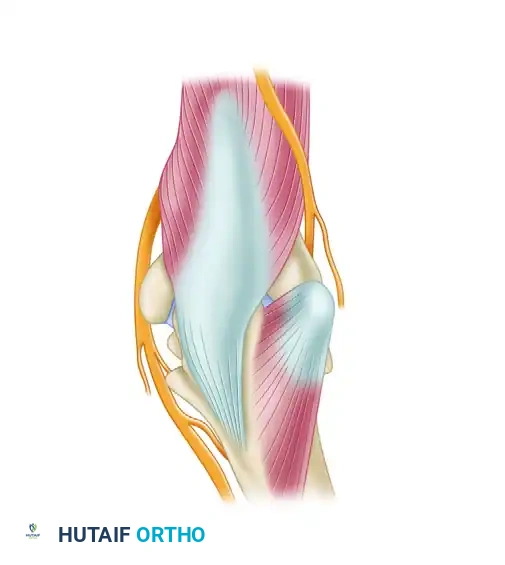
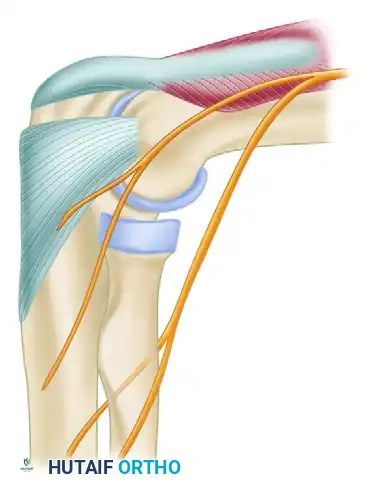
Elbow arthroscopy is a technically demanding procedure that requires a profound three-dimensional understanding of periarticular neurovascular anatomy. Unlike the knee or shoulder, the elbow joint is tightly encapsulated and surrounded by critical neurovascular structures—namely the radial, median, and ulnar nerves, as well as the brachial artery. The margin for error is measured in millimeters.
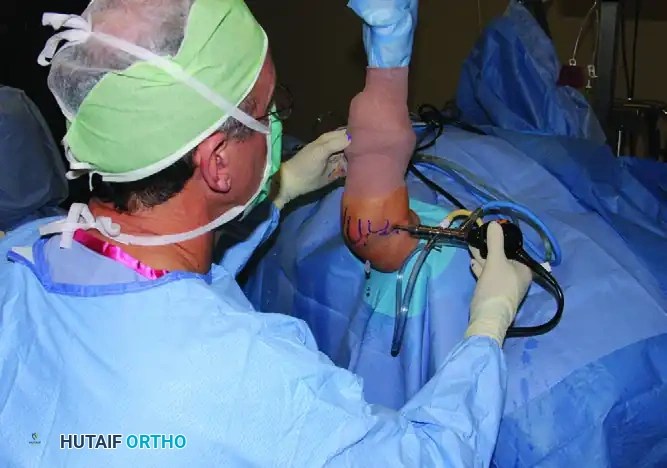
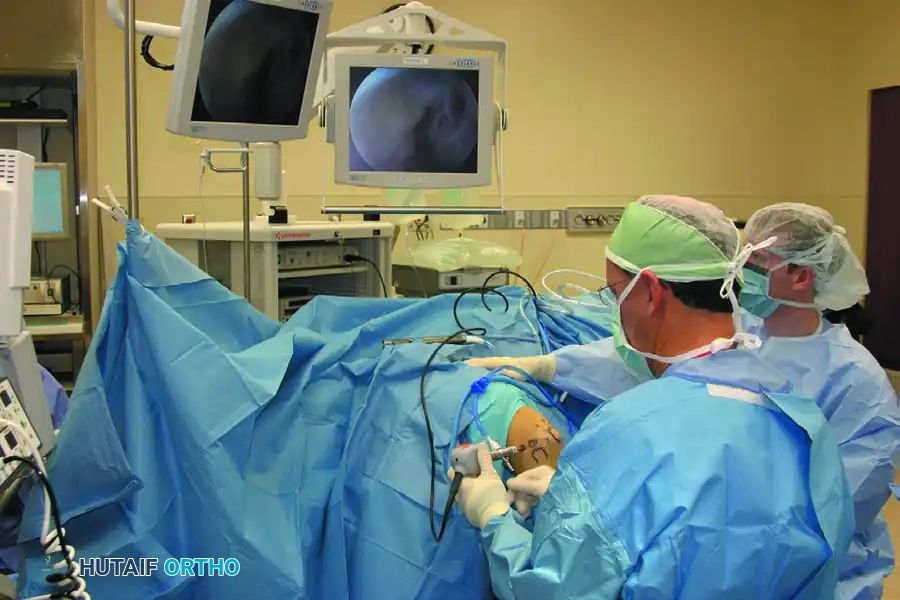
The safe establishment of arthroscopic portals is the most critical phase of the operation. Mastery of portal placement relies on three foundational pillars: precise patient positioning, maximal intraarticular distention, and meticulous superficial dissection techniques. This comprehensive guide details the evidence-based approaches to establishing lateral, medial, and posterior portals, tailored for the postgraduate orthopedic surgeon.
PATIENT POSITIONING AND SETUP
The choice of patient positioning—typically supine or prone—dictates the gravitational behavior of the neurovascular structures and influences the surgeon's ergonomic access to the joint.
The Supine Position
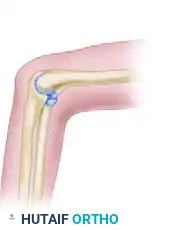
In the supine position, the patient's arm is typically suspended using overhead traction. The shoulder is maintained in 90 degrees of abduction, and the elbow is flexed to 90 degrees.
This position allows for excellent access to the anterior compartment and facilitates dynamic examination of the joint under anesthesia. The overhead traction assists in maintaining the elbow at the critical 90-degree flexion angle, which is biomechanically essential for anterior neurovascular displacement.
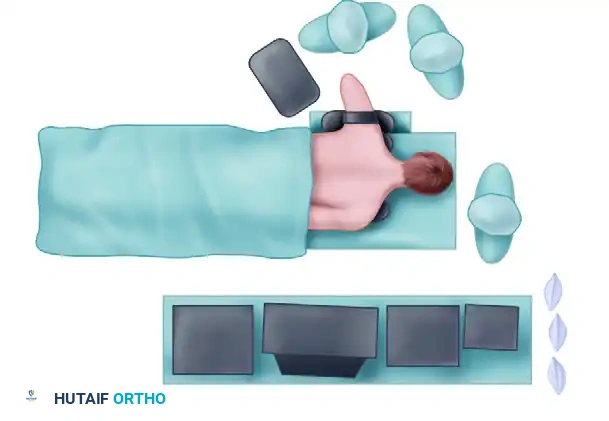
The Prone Position
Many advanced arthroscopists prefer the prone position, particularly when extensive posterior compartment work is anticipated. The patient is placed prone on chest rolls, with the shoulder and proximal arm elevated on a sandbag or specialized arm holder for added mobility. A tourniquet is placed on the proximal arm.
Clinical Pearl: In the prone position, gravity assists in allowing the anterior neurovascular structures (median nerve and brachial artery) to fall away from the anterior capsule, providing an added margin of safety when establishing anterior portals.
BIOMECHANICS OF NEUROVASCULAR DISPLACEMENT
The fundamental principle of safe anterior portal placement is the anterior displacement of the radial and median nerves. This is achieved through a combination of joint flexion and capsular distention.
- Elbow Flexion: Maintaining the elbow at exactly 90 degrees of flexion relaxes the anterior capsule and allows the neurovascular bundle to migrate anteriorly.
- Joint Distention: Injecting fluid into the joint balloons the capsule outward, further pushing the nerves away from the articular surface.
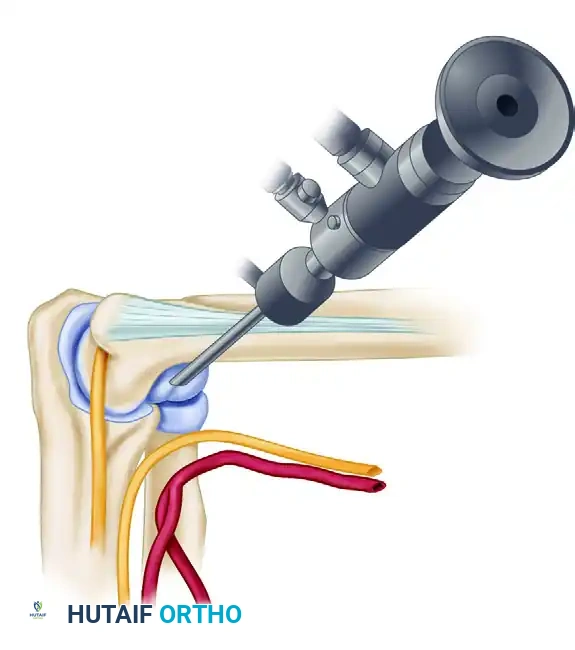
Surgical Warning: Lynch et al. demonstrated that if the elbow is not adequately distended, instruments passed through the anterolateral portal may come within a perilous 4 mm of the radial nerve. However, with 90 degrees of flexion and maximal distention, this safety margin increases to an average of 11 mm.
INITIAL JOINT DISTENTION TECHNIQUE
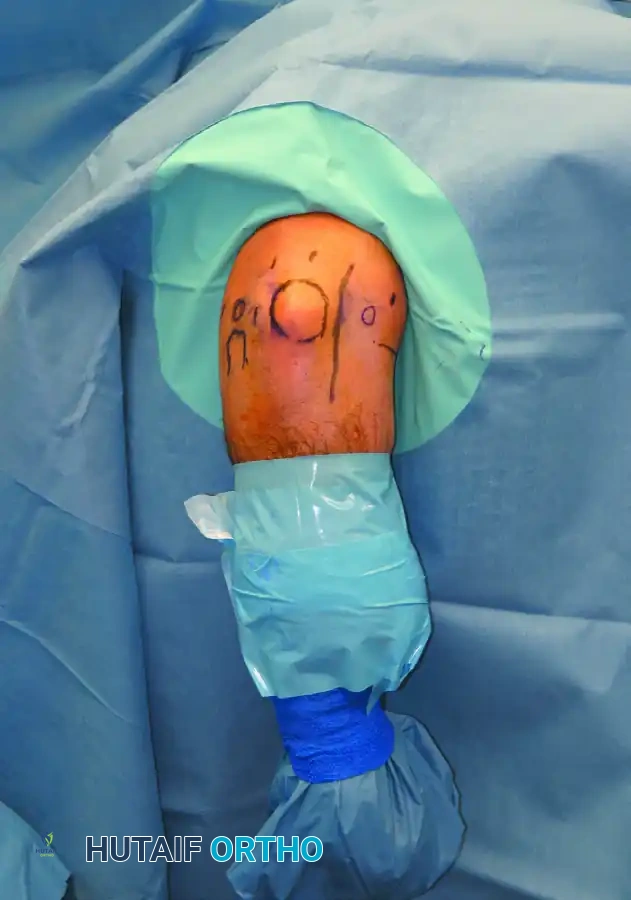
Before any scalpel touches the skin, the joint must be maximally distended. This is universally performed through the direct lateral "soft spot."
Step-by-Step Distention
- Identify the Soft Spot: Locate the center of the triangle formed by the lateral epicondyle, the radial head, and the tip of the olecranon. This is the site where elbow effusions are most visible and palpable.
- Needle Insertion: Insert an 18-gauge spinal needle into this soft spot, directing it toward the center of the joint (the radiocapitellar articulation).
- Confirm Placement: Use a 60-mL syringe with connective tubing. Free backflow of fluid confirms an intraarticular location.
- Maximal Distention: Inject approximately 20 to 30 mL of sterile normal saline or lactated Ringer's solution. The joint should feel tense.
- Avoid Extravasation: Do not extend the needle too far anteriorly into the antecubital fossa. Extraarticular fluid extravasation will collapse the anterior joint space, drastically increasing the risk of iatrogenic nerve injury.
LATERAL PORTALS
The lateral portals provide access to the anterior and posterior compartments and are typically the first operative portals established.
The Direct Lateral Portal
Located in the aforementioned "soft spot," this portal is made just posterior and proximal to the radiocapitellar joint.
* Anatomy Traversed: Instruments pass through the skin, a thin layer of subcutaneous tissue, the anconeus muscle, and the joint capsule.
* Indications: Initial joint distention, viewing the posterior radiocapitellar joint, and instrumentation of the posterior compartment.
The Anterolateral Portals
The anterolateral portal is traditionally the standard diagnostic portal and is usually the first established after distention. There are three described variations:
- Distal Anterolateral Portal: Located 2 to 3 cm distal and 1 cm anterior to the lateral epicondyle.
- Status: Abandoned by most modern surgeons. It places the radial nerve at extreme risk (average distance of only 7.2 mm even with distention).
- Mid-Anterolateral Portal: Located just proximal and approximately 1 cm anterior to the palpable radiocapitellar joint.
- Status: Highly preferred for its balance of safety (10.9 mm from the radial nerve) and excellent trajectory for medial compartment instrumentation.
- Proximal Anterolateral Portal: Located 2 cm proximal and 1 cm anterior to the lateral epicondyle.
- Status: Advocated by Field et al. as the safest portal. It provides the greatest distance from the radial nerve (averaging 13.7 mm with the elbow flexed). However, the proximal trajectory can make instrumentation of the deep medial compartment more challenging.
The "Nick and Spread" Technique
To safely establish any anterolateral portal:
1. Leave the initial distention needle in place.
2. Insert a second 18-gauge spinal needle at the planned portal site, aiming toward the center of the joint. Confirm backflow.
3. Remove the needle. Use a No. 11 blade to incise only the skin. Pull the skin against the cutting edge to avoid deep penetration, protecting the lateral and posterior antebrachial cutaneous nerves.
4. Use a small mosquito hemostat to bluntly spread the subcutaneous tissues and muscle fascia down to the capsule.
5. Introduce a blunt trocar and cannula into the joint.
MEDIAL PORTALS
Medial portals are essential for viewing the lateral gutter, the radiocapitellar joint, and addressing anterior pathology. Strict adherence to anatomical landmarks is required to protect the ulnar and median nerves.
The Anteromedial Portal
Located 2 cm distal and 2 cm anterior to the medial epicondyle, approximating the medial extension of the flexor crease of the elbow.
* Anatomy Traversed: Passes through the tendinous portions of the pronator teres and the radial aspect of the flexor digitorum sublimis before penetrating the medial capsule.
* Safety Profile: When the elbow is flexed 90 degrees and maximally distended, cannulas pass a mean distance of 14 mm posterior to the median nerve and 17 mm posterior to the brachial artery.
* Risks: The medial antebrachial cutaneous nerve and basilic vein are highly vulnerable.
Clinical Pearl: Before establishing the anteromedial portal, place the arthroscope in the anterolateral portal and direct the light medially. Dim the room lights. The basilic vein and cutaneous nerves can often be transilluminated and marked on the skin to avoid injury during incision.
The Proximal Medial (Supracondylar) Portal
Pioneered by Poehling et al., this portal is highly recommended, particularly when the patient is in the prone position. It is located 2 cm proximal and slightly anterior to the medial epicondyle.
- Technique: It is imperative to physically palpate and map the ulnar nerve before making this incision. Incise only the skin with a No. 11 blade.
- Insertion Trajectory: The sheath and blunt trocar must be inserted anterior to the medial intermuscular septum. The trocar must maintain direct contact with the anterior cortex of the humerus as it is directed distally and laterally toward the radial head.
- Advantages: By sliding down the anterior humerus, the surgeon stays posterior to the median nerve and brachial artery, utilizing the bone as a physical shield. It provides an unparalleled, panoramic view of the entire anterior joint.

POSTERIOR PORTALS
Posterior portals are utilized for addressing pathology in the olecranon fossa, posterior radiocapitellar joint, and for removing loose bodies in the posterior compartment.
Positioning for Posterior Access
- Supine: The elbow is extended to 45 to 60 degrees of flexion. This relaxes the triceps muscle complex and allows for adequate fluid distention of the posterior capsular space.
- Prone: The elbow is allowed to rest at approximately 90 degrees of flexion over the arm holder.
The Posterolateral Portal
Located 2 to 3 cm proximal to the tip of the olecranon, positioned just lateral to the border of the triceps tendon along the lateral supracondylar ridge.
* Utility: This is the primary viewing portal for the posterior compartment.
* Risks: Deep incisions risk injury to the posterior antebrachial and lateral brachial cutaneous nerves.
The Straight Posterior (Posterocentral) Portal
Located 2 to 3 cm proximal to the olecranon tip, directly in the midline, centered within the triceps tendon. It is approximately 2 cm medial to the posterolateral portal.
* Utility: Used primarily as a working portal for instrumentation while viewing from the posterolateral portal. It is established under direct intraarticular visualization.
* Risks: The ulnar nerve lies approximately 2.5 cm medial to the center of the elbow joint. If this portal is placed too far medially, or if the trocar slips medially off the olecranon, the ulnar nerve is at catastrophic risk.
Pitfall: In severely arthrofibrotic elbows, the posterior capsule may be scarred down, making the posterolateral portal difficult to establish. In such cases, the straight posterior portal can sometimes be established more easily. Utilizing a smaller 2.7-mm arthroscope can facilitate safer entry into a contracted posterior compartment.
Accessory Retractor Portals
In complex cases requiring extensive synovectomy, capsulectomy, or osteophyte resection, accessory portals may be required. A posterior "retractor" portal can be made 2 cm proximal to the standard posterior portals to place a Howorth elevator, keeping the capsule elevated away from the arthroscope. Similarly, anteromedial or anterolateral retractor portals can be established 2 to 3 cm proximal to their respective primary portals.
POSTOPERATIVE PROTOCOL AND REHABILITATION
Following successful arthroscopic intervention, the portal sites are typically closed with simple interrupted non-absorbable sutures or sterile adhesive strips, depending on the size of the cannula used.
- Immediate Postoperative Phase: A bulky, compressive soft dressing is applied to minimize postoperative hemarthrosis and extraarticular edema. The neurovascular status of the extremity must be documented immediately in the recovery room, specifically testing the motor and sensory distributions of the radial, median, ulnar, and anterior interosseous nerves.
- Rehabilitation: Unlike open elbow surgery, arthroscopy allows for accelerated rehabilitation. Unless a specific repair was performed (e.g., ligamentous plication or osteochondral fixation), early active and active-assisted range of motion (ROM) is initiated within 24 to 48 hours to prevent capsular adhesions and arthrofibrosis.
- Edema Control: Cryotherapy and strict elevation are paramount in the first 72 hours to manage swelling, which can otherwise limit ROM and increase pain.
