Introduction and Biomechanical Principles
The pelvic ring is a complex osteoligamentous structure that relies on both anterior and posterior elements for biomechanical stability. Disruptions of the pubic symphysis frequently occur in the context of high-energy trauma, presenting as part of rotationally unstable (Tile Type B / Young-Burgess APC II, LC II) or vertically unstable (Tile Type C / Young-Burgess APC III, LC III, Vertical Shear) pelvic ring injuries.
Open reduction and internal fixation (ORIF) of the pubic symphysis is the gold standard for restoring the anterior tension band of the pelvis. While external fixation can provide provisional stability and reduce pelvic volume in the acute resuscitation phase, it is biomechanically inferior to internal plating for definitive management, particularly in vertically unstable patterns where posterior instability cannot be controlled by anterior external fixation alone.
💡 Clinical Pearl
Anatomical reduction of the anterior ring often facilitates the indirect reduction of the posterior ring. However, in Tile Type C injuries, anterior fixation must always be coupled with definitive posterior stabilization to prevent vertical displacement and catastrophic fixation failure.
Preoperative Planning and Patient Positioning
Meticulous preoperative planning requires high-quality orthogonal radiographs (AP, Inlet, and Outlet views) and a fine-cut computed tomography (CT) scan with 3D reconstructions to fully delineate the fracture morphology, assess for occult sacral fractures, and evaluate the sacroiliac (SI) joints.
Positioning and Preparation
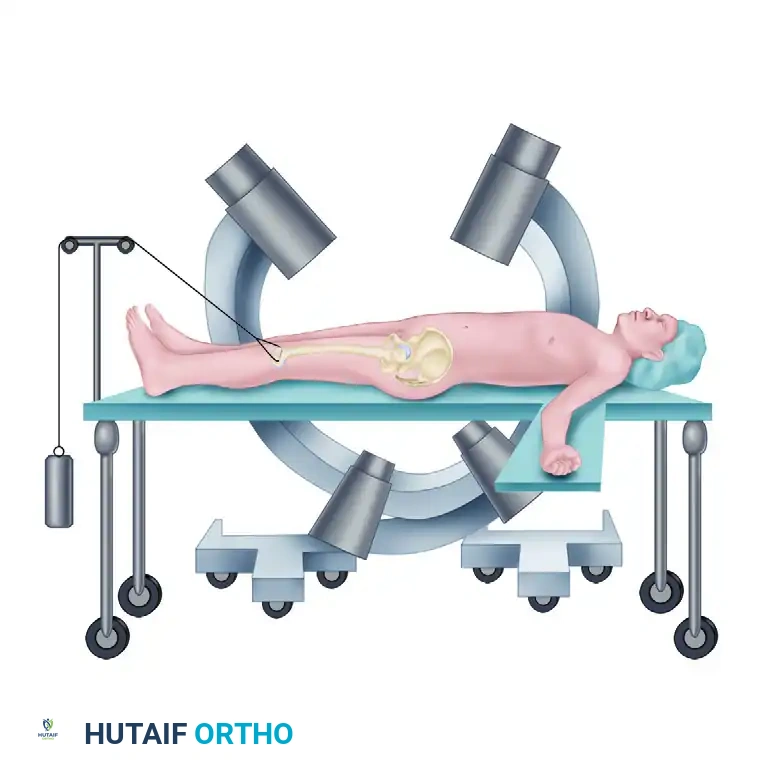
- Table Setup: Position the patient strictly supine on a fully radiolucent operating table. This allows for unimpeded intraoperative fluoroscopy, which is mandatory for confirming both anterior reduction and the safe trajectory of any posterior pelvic fixation.
- Limb Positioning: Maintain the bilateral lower extremities in internal rotation. This maneuver relaxes the iliopsoas musculature and the external rotators of the hip, significantly reducing the deforming forces on the hemipelvis and aiding in the provisional closure of the symphyseal diastasis.
- Draping: Prepare and drape the abdomen from the umbilicus down to the mid-thighs. Ensure the area distal to the pubic tubercles is widely accessible. A Foley catheter must be inserted prior to draping to decompress the bladder and aid in intraoperative identification of the urethra.
Surgical Approach: The Pfannenstiel Incision
The Pfannenstiel approach provides excellent, extensile exposure to the pubic symphysis and the superior pubic rami while minimizing morbidity to the abdominal wall musculature.
- Skin Incision: Make a transverse curvilinear incision approximately 2 cm superior to the pubic symphysis, extending laterally toward the external inguinal rings.
- Fascial Dissection: Divide the subcutaneous tissues to expose the rectus abdominis fascia. Incise the anterior rectus sheath transversely.
- Rectus Mobilization: Identify the linea alba. Incise the rectus abdominis longitudinally exactly at the decussation of the fibers.
- Preservation of Muscle: Do not transect the rectus heads from their insertion on the pubis, as this severely compromises the dynamic stability of the abdominal wall and increases the risk of postoperative hernia.
- Space of Retzius: Carefully mobilize the prevesical fat and retract the bladder posteriorly.
⚠️ Surgical Warning
The bladder and urethra are highly vulnerable during this exposure, particularly if a concomitant urologic injury is present. Always use a malleable retractor placed deep into the space of Retzius to physically shield the bladder during drilling and screw placement.
Reduction Techniques for the Pubic Symphysis
Achieving an anatomical reduction of the pubic symphysis requires a combination of manual traction, specialized clamps, and an understanding of the multiplanar deforming forces.
- Exposure: Place narrow, sharp Hohmann retractors underneath the rectus muscle bellies and over the superior pubic rami to fully expose the symphyseal articulation.
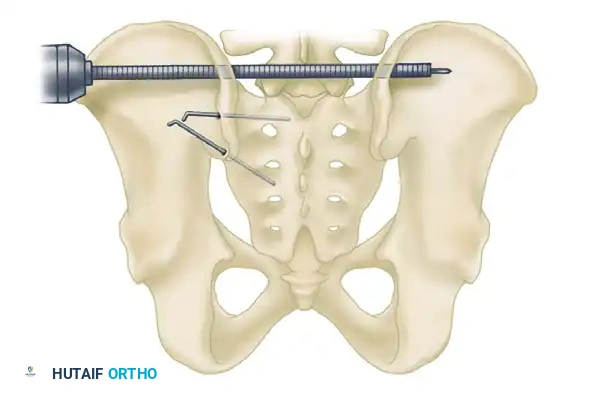
- Clamp Placement: Place a Weber pointed reduction clamp anteriorly onto the body of the pubis.
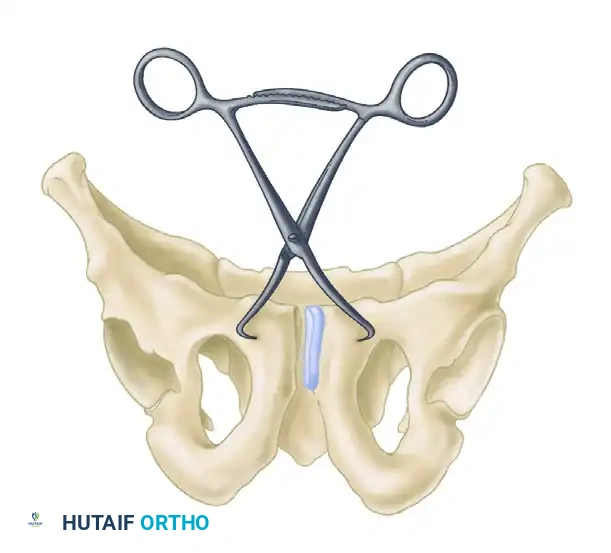

- Sagittal Plane Control: It is critical that the points of the reduction clamp are placed at the exact same horizontal level on the pubic body. As the clamp is closed, this symmetrical placement ensures that any sagittal plane rotation (flexion/extension of the hemipelvis) is simultaneously reduced.
Managing Severe Displacement
In fractures with severe cephalad displacement of the hemipelvis (vertical shear), simple clamp reduction is insufficient.
- Apply longitudinal skeletal traction to the ipsilateral distal femur to bring the hemipelvis down to the correct axial level.
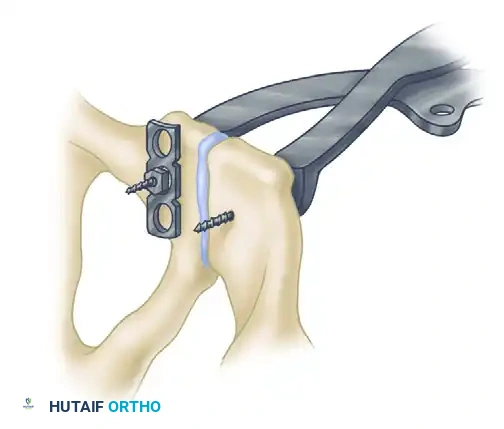
- The Jungbluth Technique: In severe cases or osteoporotic bone where pointed clamps may cut out, use pelvic reduction forceps by placing a 4.5-mm cortical screw anteriorly on each side of the symphysis.
- To prevent screw pull-out on the displaced side, utilize a small plate and nut construct over the screw head. This provides a massive mechanical advantage, allowing the surgeon to forcefully manipulate the hemipelvis into anatomical alignment.
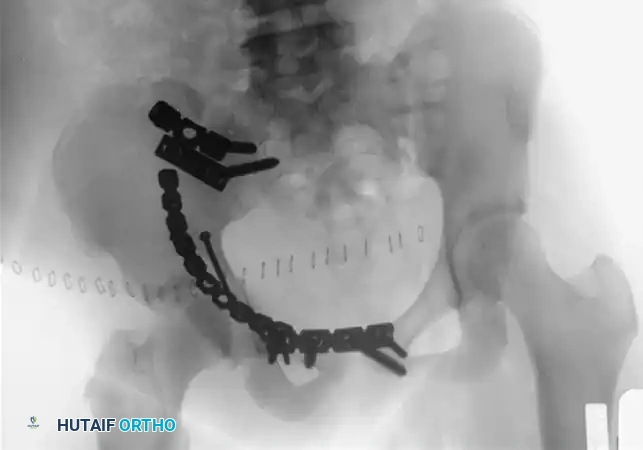
Internal Fixation of the Pubic Symphysis
Once satisfactory reduction is achieved and provisionally held, definitive fixation is applied.
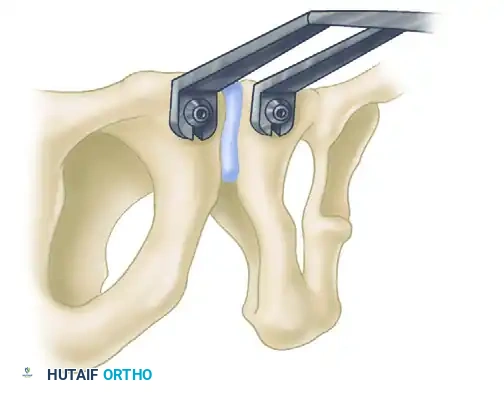
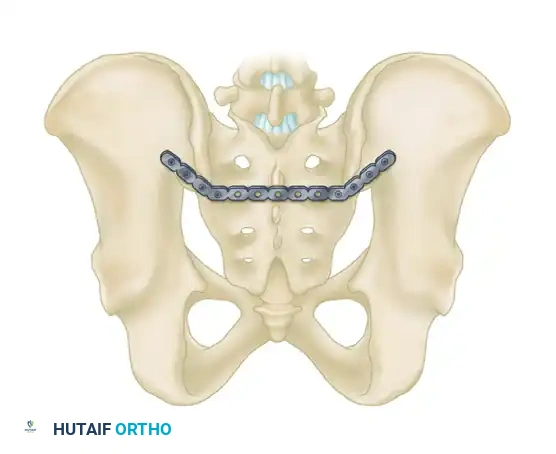
- Plate Selection: Select a multi-hole (typically a six-hole) curved 3.5-mm pelvic reconstruction plate. The curvature should match the superior surface of the pubic symphysis.
- Plate Application: Position the plate on the superior surface of the symphysis.
- Dynamic Compression: Drill the initial holes eccentrically away from the fracture line. As the screws are seated, this will yield a small amount of dynamic compression across the symphyseal fibrocartilage, enhancing stability.
- Double Plating: For highly unstable Tile Type C injuries where posterior fixation is anatomically impossible or medically contraindicated, apply a double plate construct (one superior, one anterior) to maximize stiffness.
- Alternative Approaches: In cases involving extensive pubic rami fractures where the Pfannenstiel approach provides insufficient lateral exposure, transition to a modified Stoppa or an ilioinguinal approach.
💡 Clinical Pearl
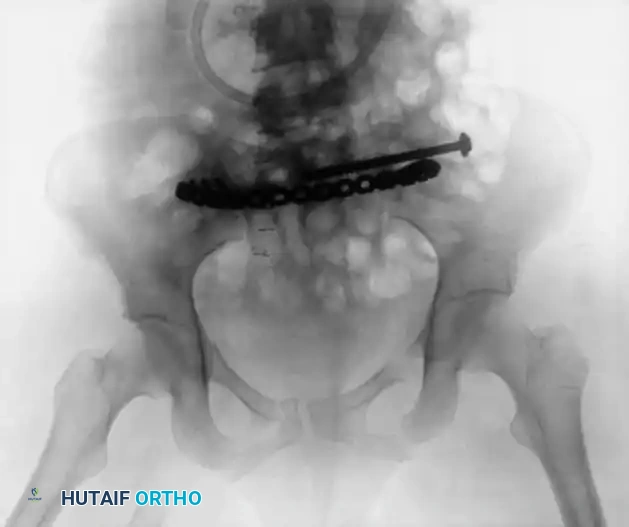
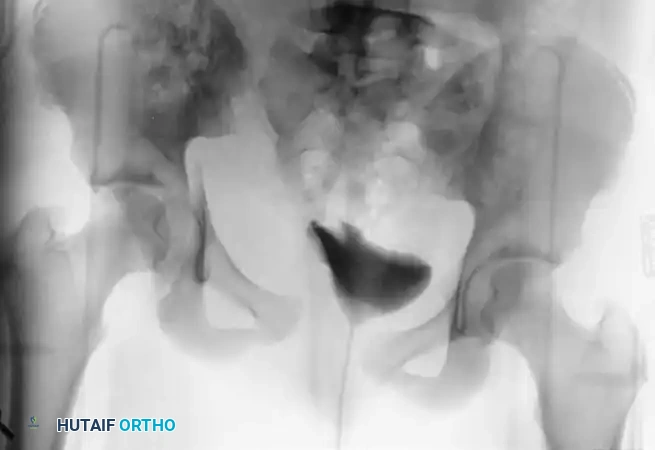
Always confirm the final reduction and hardware placement with intraoperative fluoroscopy (AP, Inlet, and Outlet views) before closure. Ensure no screws have penetrated the hip joint or the space of Retzius.
- Closure: Thoroughly irrigate the wound. Place a closed suction drain deep in the space of Retzius to prevent postoperative hematoma formation, which can lead to infection. Close the rectus fascia meticulously.
Management of the Posterior Pelvic Ring (Tile Type C Injuries)
Tile Type C injuries (Young and Burgess types AP III, LC III, and vertical shear) are characterized by complete disruption of the posterior osteoligamentous complex, resulting in both rotational and vertical instability.
Definitive posterior fixation is an absolute requirement to regain vertical stability. External fixation alone is strictly contraindicated as definitive treatment for vertically unstable pelvic fractures because it cannot control posterior translation or vertical shear forces.
Clinical Outcomes and the Importance of Reduction
The literature presents nuanced views on the necessity of perfect anatomical reduction for the posterior ring:
- Kellam’s Series: Demonstrated that after adequate reduction of Type C fractures, 50% of patients were pain-free with no lifestyle changes. Conversely, after inadequate reduction, only 33% returned to their previous occupations. Kellam strongly recommended anatomical reduction of the posterior injury and internal fixation (with or without fusion of the SI joint).
- Mullis and Sagi: Noted significantly poorer functional outcomes in patients with pure sacroiliac dislocations that were malreduced compared to those with anatomical reductions.
- Contrasting Views: Some authors remain skeptical that millimeter-perfect anatomical reduction drastically alters long-term outcomes. A comparative study of 80 patients found similar rates of return to previous occupation (75% to 81%) across Tile types A, B, and C, despite an average residual vertical hemipelvis displacement of 21 mm in the Type C group. Pain perception was similar regardless of the treatment modality.
Despite these debates, the modern orthopedic consensus mandates striving for anatomical reduction (<10 mm step-off) to minimize post-traumatic arthrosis and optimize pelvic biomechanics.
Posterior Fixation Techniques
The choice of posterior fixation is dictated by the specific anatomical location of the disruption (sacral fracture vs. SI joint dislocation vs. iliac wing fracture).
1. Iliosacral Screw Fixation
For sacral fractures and sacroiliac joint disruptions, fluoroscopically-directed percutaneous iliosacral screw fixation is the workhorse technique. Screws are passed from the outer table of the ilium, across the SI joint, and into the dense bone of the sacral body (S1 and occasionally S2).
Fluoroscopic Positioning:
Safe placement requires an intimate understanding of upper sacral anatomy and flawless radiographic technique. Graves and Routt quantified the exact sagittal plane tilt of the fluoroscope required to obtain true inlet and outlet views:
- Ideal Inlet View: Average tilt of 25 degrees.
- Ideal Outlet View: Average tilt of 42 degrees.
Complications of IS Screws:
- Neurological Injury: There is a high risk of iatrogenic damage to the L5 nerve root (anterior to the sacral ala) and the S1 nerve root (within the sacral foramina). Because neurological injury occurs in up to 30% of transforaminal sacral fractures (Denis Zone II), some surgeons advocate for open reduction and direct decompression of the neural foramina prior to fixation.
- Biomechanical Failure: Griffin et al. demonstrated a high failure rate (13%) when percutaneous iliosacral screws were used in isolation for vertical shear fractures through the sacrum.
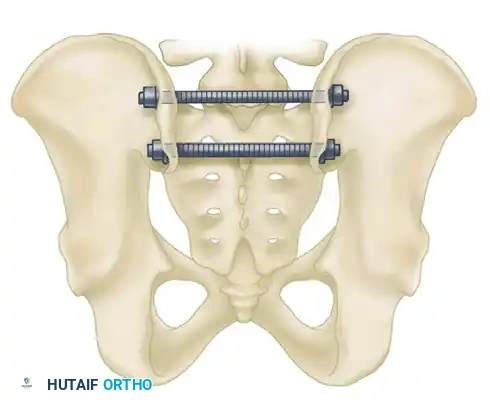
2. Transiliac Rod Fixation and Tension Band Plating
For highly unstable sacral disruptions or comminuted transforaminal fractures where IS screws lack purchase, transiliac fixation is utilized.
- Transiliac Rods: A large Steinmann pin or threaded rod (8 to 10 mm) is drilled from the outer aspect of one ilium, through the posterior elements of the sacrum, and out the opposite ilium. A second rod is often placed 1.5 cm distal and parallel to the first. Warning: Over-compression can cause iatrogenic sacral nerve root crush.
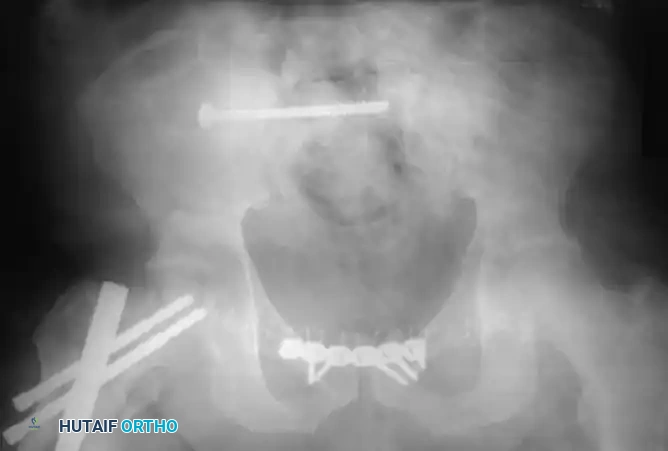
- Tension Band Plating: A reconstruction plate can be contoured and applied posteriorly between the two posterior superior iliac spines (PSIS), acting as a tension band against anterior pelvic opening.
3. Anterior Plating of the Sacroiliac Joint
For pure SI joint dislocations or crescent fractures (Young and Burgess LC II), anterior plating provides direct visualization of the joint.
- Approach: Accessed via an anterior retroperitoneal approach (e.g., the lateral window of the ilioinguinal approach).
- Fixation: Two or more orthogonal plates are placed across the anterior aspect of the SI joint. This avoids the neurological risks associated with posterior IS screws but requires extensive vascular mobilization (external iliac vessels, L5 nerve root).
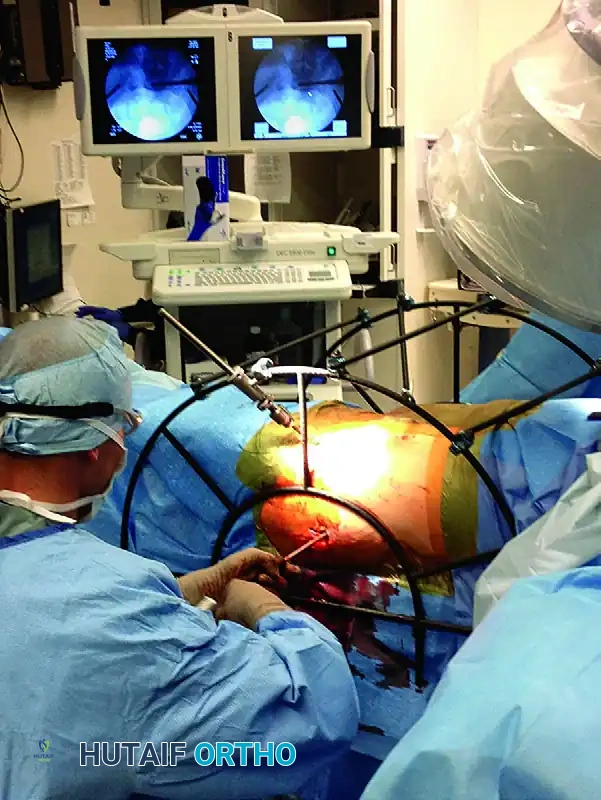
Advanced Posterior Reduction Aids
Obtaining a closed reduction of a vertically displaced posterior ring is notoriously difficult. Starr and Reinert developed a specialized percutaneous reduction frame that allows multi-vector, directed forces to be applied to the hemipelvis, facilitating precise alignment prior to percutaneous screw insertion.
Postoperative Protocol and Rehabilitation
The postoperative management of pelvic ring injuries is dictated by the overall stability of the construct and the patient's polytrauma status.
- Weight-Bearing: For isolated anterior ring injuries (Tile Type B), patients may often be mobilized touch-down weight-bearing (TDWB) or partial weight-bearing on the affected side. For Tile Type C injuries with combined anterior and posterior fixation, strict non-weight-bearing or TDWB on the affected side is maintained for 8 to 12 weeks to prevent vertical subsidence and hardware failure.
- DVT Prophylaxis: Pelvic trauma carries an exceptionally high risk of deep vein thrombosis (DVT) and pulmonary embolism (PE). Chemical prophylaxis (e.g., Low Molecular Weight Heparin) should be initiated as soon as it is deemed safe from a hemorrhagic standpoint, typically within 24-48 hours postoperatively, and continued for a minimum of 4 weeks.
- Radiographic Follow-up: Serial radiographs (AP, Inlet, Outlet) are obtained at 2 weeks, 6 weeks, 3 months, and 6 months to monitor for loss of reduction, hardware loosening, and progression of bony union.
By adhering to strict biomechanical principles, utilizing appropriate surgical approaches, and ensuring both anterior and posterior ring stability, orthopedic surgeons can maximize functional recovery and minimize the severe morbidity associated with complex pelvic ring disruptions.
