Masterclass in Shoulder Arthroscopy: Principles, Positioning, and Surgical Execution
Key Takeaway
Shoulder arthroscopy is a cornerstone of modern orthopedic surgery, offering diagnostic precision and therapeutic efficacy for complex glenohumeral and subacromial pathologies. This comprehensive guide details evidence-based indications, critical patient positioning techniques—including lateral decubitus and beach-chair setups—and advanced intraoperative fluid management. Mastery of these foundational principles minimizes neurovascular complications, optimizes visualization, and ensures superior clinical outcomes in the surgical management of shoulder instability, rotator cuff disease, and labral pathology.
SHOULDER ARTHROSCOPY: FOUNDATIONAL PRINCIPLES AND PATHOMECHANICS
Painful syndromes, altered kinematics, and signs of instability or internal derangement are ubiquitous in the shoulder joint. The precise etiology of such dysfunctions can frequently elude standard clinical detection. While the underlying cause can often be established through a meticulous history, provocative physical examination, and appropriate radiographic evaluation of the shoulder girdle, cervical spine, and thoracic cavity, diagnostic ambiguity remains a clinical reality.
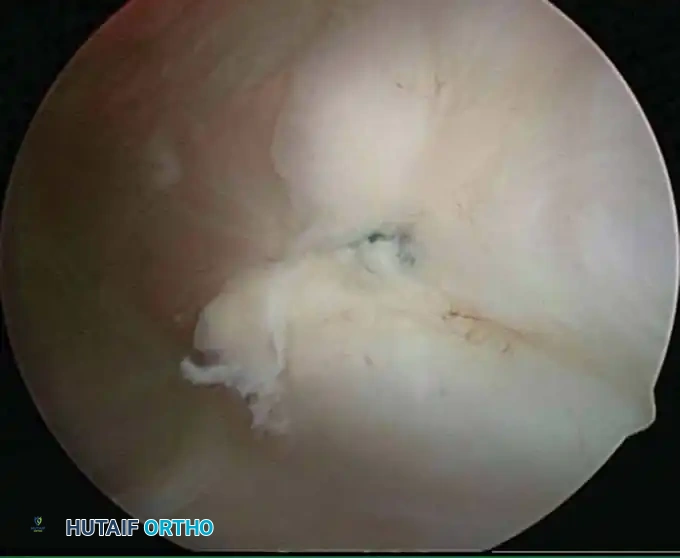
Special diagnostic modalities—including stress radiographs, computed tomography (CT), magnetic resonance imaging (MRI) with and without intra-articular gadolinium contrast, electromyography (EMG), and nerve conduction velocities (NCV)—are invaluable. However, when these non-invasive or minimally invasive studies remain inconclusive, diagnostic arthroscopy provides the ultimate direct, dynamic evaluation of the glenohumeral joint and subacromial space. Seminal research by Andrews, Carson, and Ortega demonstrated that arthroscopic examination of chronic, undiagnosed painful shoulders revealed one or more significant intra-articular abnormalities in 88% of patients.
Evidence-Based Indications
While there are few absolute indications for shoulder arthroscopy, the rapid expansion of our understanding regarding shoulder pathomechanics has broadened its application. Concomitant structural injuries that were historically missed or inadequately addressed via conventional open surgical techniques are now routinely identified and managed arthroscopically.
Early identification of micro-instability is paramount. Subtle instability often precipitates superior labral anterior and posterior (SLAP) lesions and secondary rotator cuff impingement. By identifying these lesions early, treatment can be directed at the root biomechanical cause rather than merely the secondary symptoms.
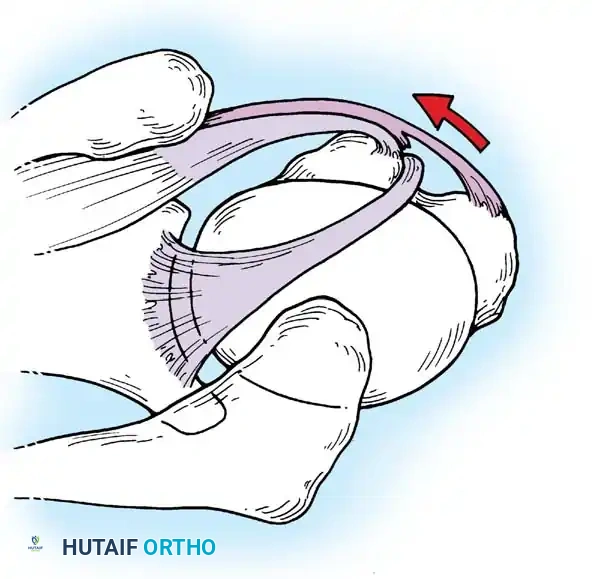
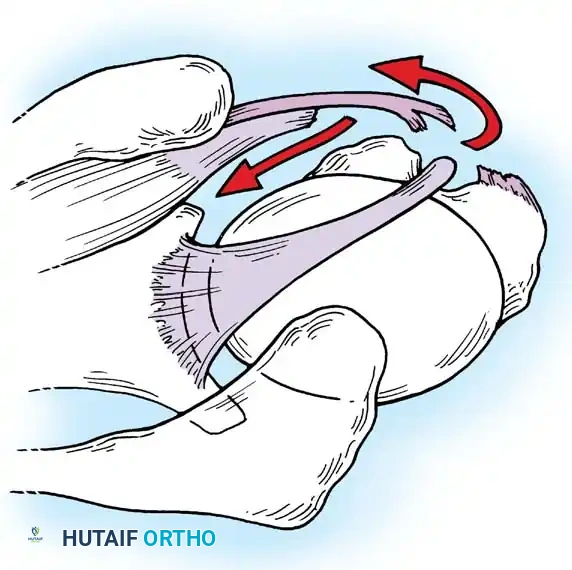
Clinical Pearl: The "Peel-Back" Mechanism
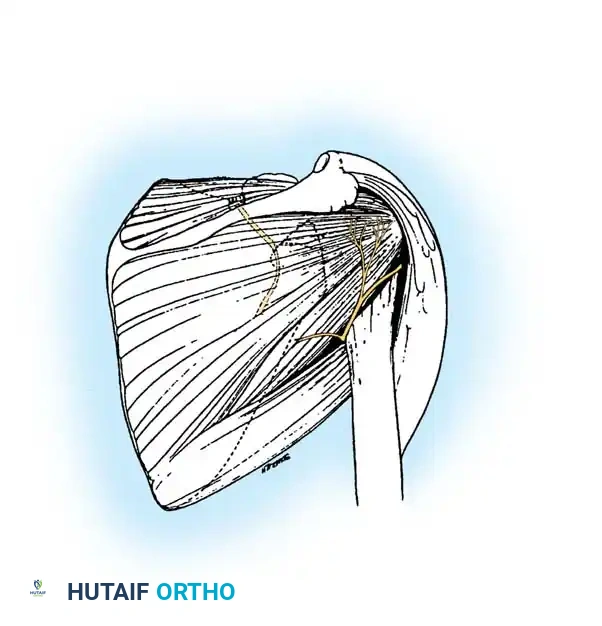
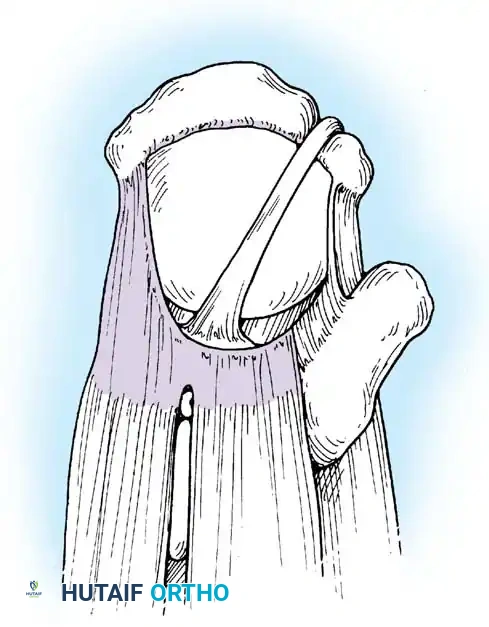
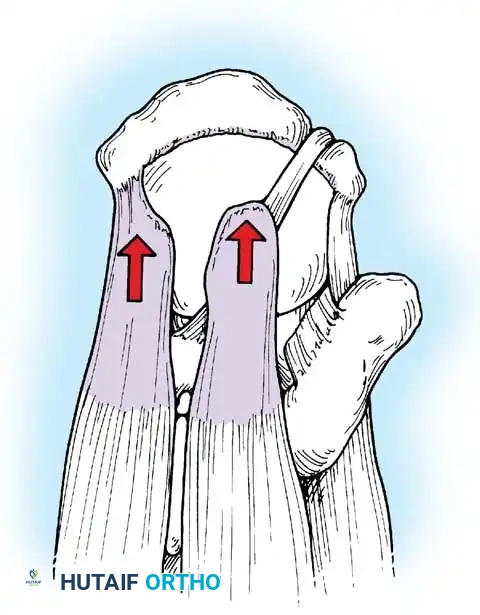
In the overhead throwing athlete, the shoulder is repeatedly placed in extreme abduction, hyperextension, and external rotation (the late cocking phase). This position forces the greater tuberosity and the undersurface of the rotator cuff to impinge against the posterosuperior glenoid rim and labrum. This internal impingement results in fraying of the cuff undersurface and the superior labrum. Repetitive microtrauma leads to anteroinferior ligamentous laxity and a "peel-back" of the posterosuperior capsular complex.
Appropriate surgical intervention relies on a thorough arthroscopic evaluation to decode these complex pathological findings. Diagnostic arthroscopy is also highly indicated for:
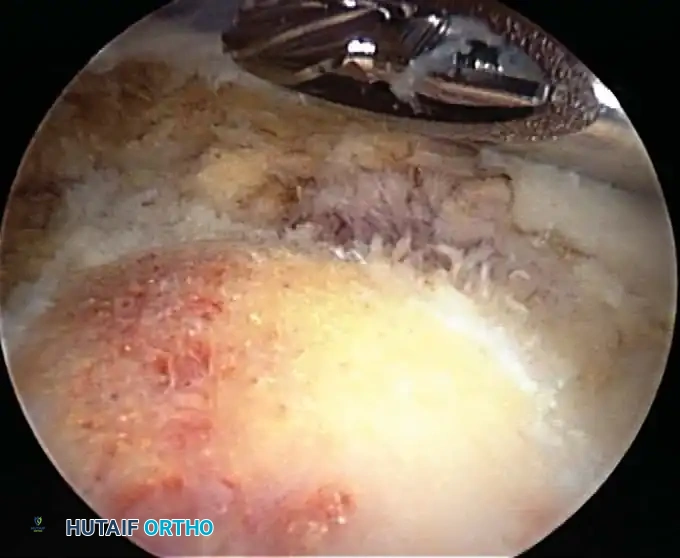
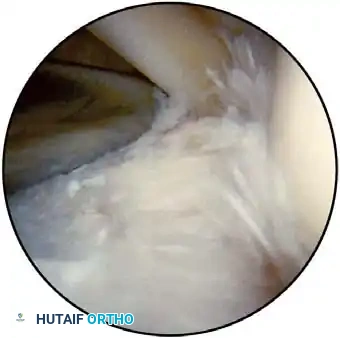
* Identification and extraction of loose bodies: Particularly those residing in the posterior recess, which are notoriously overlooked during open procedures.
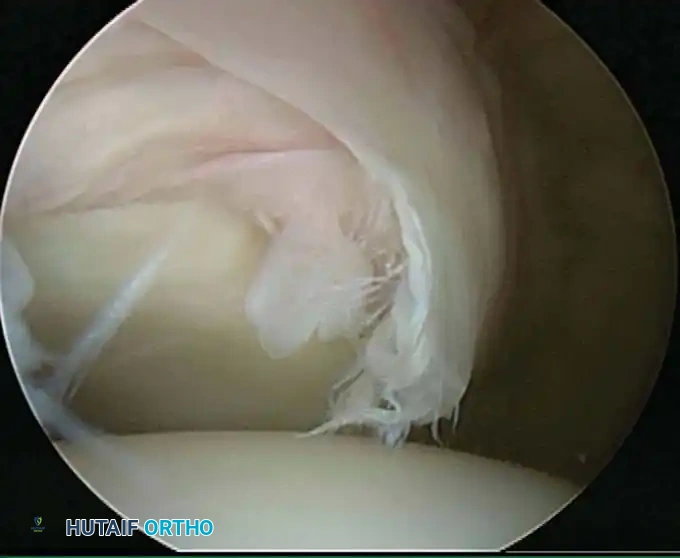
* Evaluation of primary rotator cuff impingement: Assessing the tissue quality of the rotator cuff to determine the feasibility of an all-arthroscopic repair versus an open or mini-open approach.
* Infectious and Inflammatory Conditions: Arthroscopic lavage and débridement for septic arthritis, or synovectomy for rheumatoid and other inflammatory arthropathies.
* Calcific Tendinitis: Precise localization and débridement of calcific deposits within the rotator cuff tendons.
* Adhesive Capsulitis (Frozen Shoulder): In recalcitrant cases, a gentle closed manipulation under anesthesia (MUA) followed by diagnostic arthroscopy allows for the evaluation of partial rotator cuff tears and targeted capsular release.
Surgical Warning: Adhesive Capsulitis
In patients with frozen shoulder syndrome, extensive and overly aggressive arthroscopic procedures (beyond necessary capsular release and mild débridement) should be avoided to minimize the profound risk of postoperative fibroblastic response and recurrence of severe adhesions.
Contraindications
Contraindications to shoulder arthroscopy are primarily absolute medical or localized anatomical barriers. These include:
* Active local dermatological conditions or superficial skin infections over the portal sites.
* Remote systemic infections that pose a risk of hematogenous seeding to the joint.
* Severe cardiopulmonary comorbidities precluding safe anesthesia.
* Altered local anatomy (e.g., massive tumor, severe distortion from prior trauma) that makes safe portal placement impossible.
Surgeons must strictly adhere to appropriate indications and maintain a low threshold for converting to an open procedure if arthroscopic findings or technical limitations warrant such a transition.
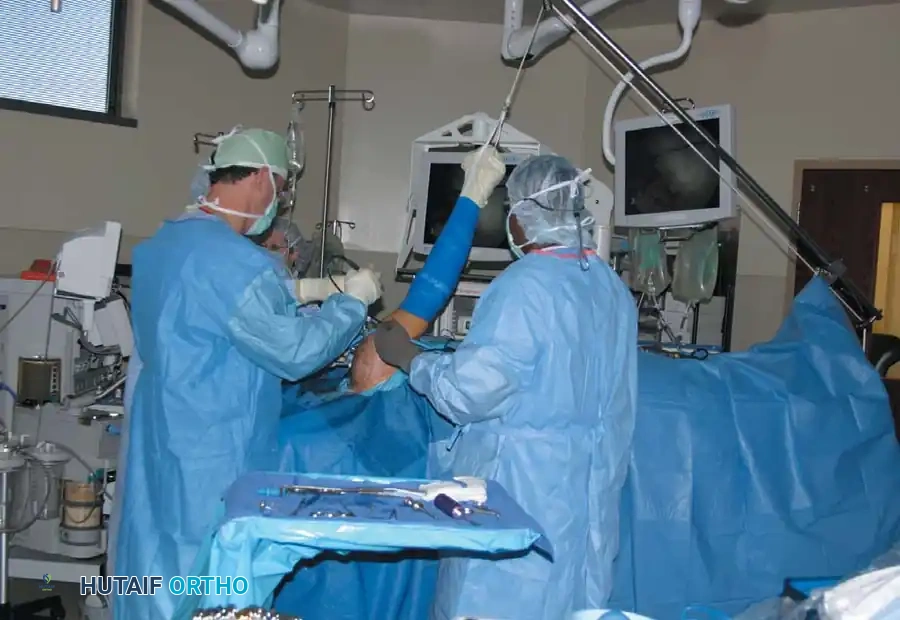
PATIENT POSITIONING AND ANESTHESIA
The success of shoulder arthroscopy is heavily dependent on optimal patient positioning. Two primary positions are universally utilized: the lateral decubitus position and the beach-chair (modified Fowler) position. The choice of position dictates the anesthetic approach, portal trajectory, and traction requirements.
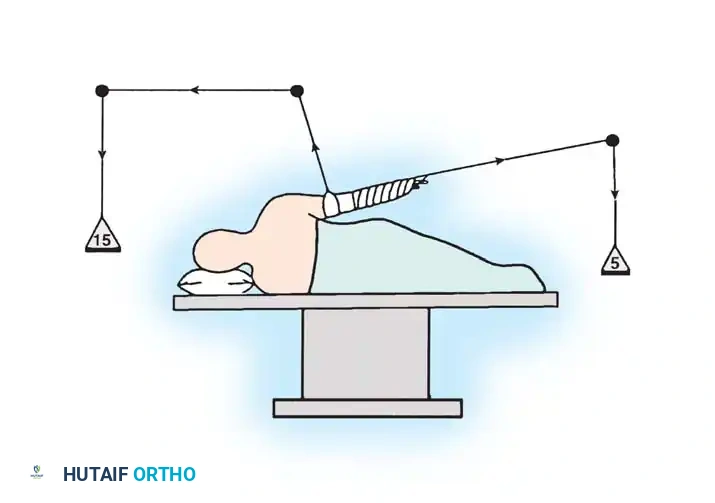
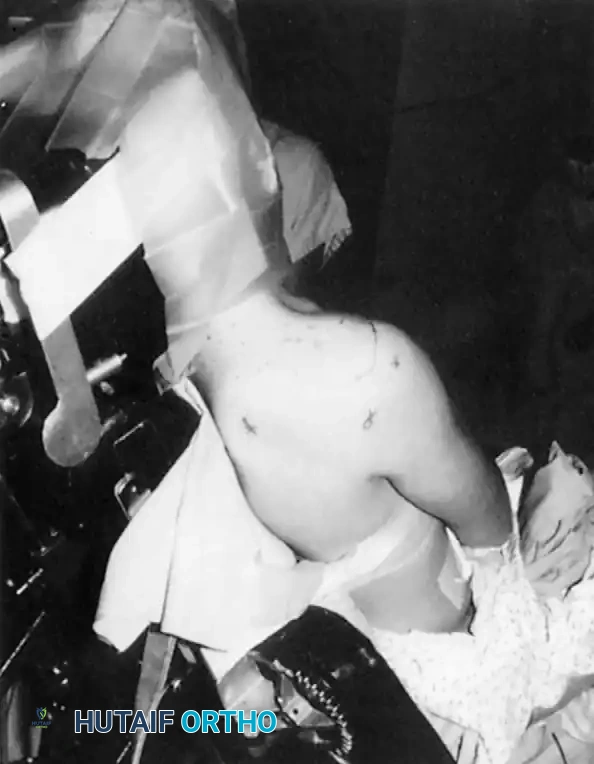
The Lateral Decubitus Position
The lateral decubitus position is arguably the most traditional setup, favored for its unparalleled access to the posterior and superior shoulder compartments, as well as the relative ease and safety of patient positioning. Furthermore, when hypotensive anesthesia is employed to control bleeding, cerebral perfusion is more reliably maintained in the lateral decubitus position compared to the upright beach-chair position.
Setup and Stabilization:
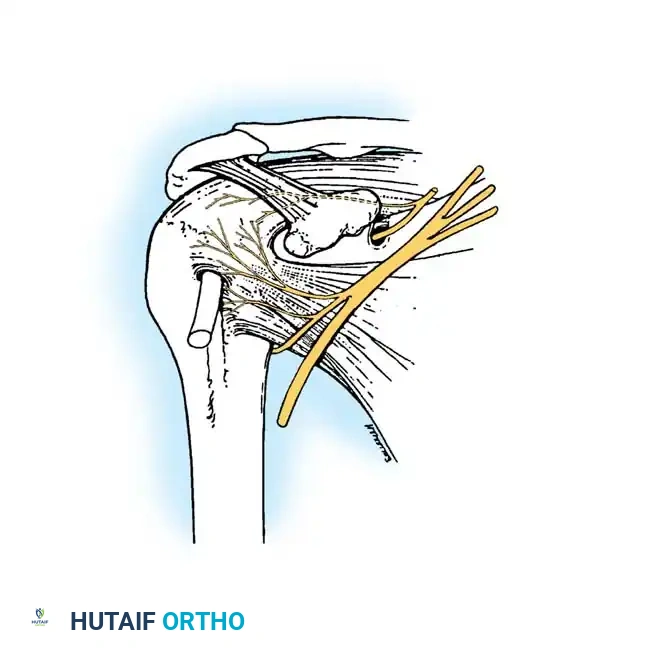
The patient is placed in the lateral decubitus position with the operative shoulder exposed superiorly. The torso is rigidly supported by a vacuum beanbag and a kidney rest, supplemented by a heavy chest strap to prevent intraoperative rolling. The head must be meticulously supported by a foam rest in a neutral cervical spine alignment, with strict attention paid to protecting the dependent eye and ear. An axillary roll is placed to protect the dependent brachial plexus and improve ventilation. All pressure points, particularly the dependent peroneal nerve and lateral malleolus, must be heavily padded.
The Gross and Fitzgibbons Modification:
Gross and Fitzgibbons revolutionized the straight lateral decubitus position by tilting the patient's torso 20 to 30 degrees posteriorly. This critical adjustment places the glenoid articular surface perfectly parallel to the operating room floor.
This modification offers three distinct biomechanical advantages:
1. It requires less absolute traction weight, thereby decreasing the risk of traction neurapraxia to the brachial plexus.
2. It accentuates tears of the glenoid labrum by allowing gravity to pull the torn tissue away from the glenoid bed, rather than compressing it in line with the joint.
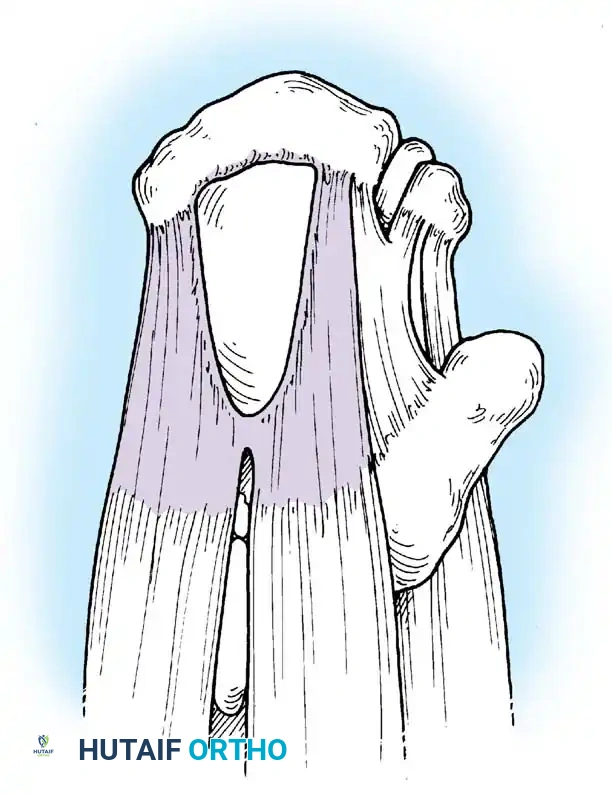
3. It significantly improves arthroscopic access to the notoriously difficult inferior third of the glenoid labrum and the inferior glenohumeral ligament (IGHL) complex.
Traction Mechanics and Neurological Safety:
Using a commercially available sterile arm traction device, approximately 10 to 13 lbs of traction is applied. The guiding principle is balanced suspension rather than brute distraction. Overdistraction must be strictly avoided; only the minimum weight required for clear intra-articular visualization should be utilized.
Historically, Paulos and Franklin reported a 30% incidence of transient paresthesias in the upper extremity following shoulder arthroscopy with traction, while Klein et al. reported a 10% incidence. To mitigate this, stopping the compressive wrap (e.g., Coban) proximal to the wrist is recommended to prevent compressive neurapraxia to the superficial radial nerve.
Klein et al. extensively studied the strain placed on the brachial plexus under varying degrees of abduction and flexion. They concluded that two specific arm positions provide maximal intra-articular visibility while placing minimal strain on the brachial plexus:
* 45 degrees of forward flexion with 90 degrees of abduction.
* 45 degrees of forward flexion with 0 degrees of abduction.
Despite this, many advanced arthroscopists utilize 45 to 70 degrees of abduction and 20 to 30 degrees of forward flexion, compensating for the position by strictly limiting the traction weight and the total duration of the procedure.
Dual Traction Systems:
Gross and Fitzgibbons also described the use of simultaneous vertical and longitudinal traction. By applying the majority of the traction vector vertically, the glenohumeral joint is distracted laterally without subluxating the humeral head inferiorly.
However, Hennrikus et al. evaluated the effect of this dual traction on extremity tissue perfusion using pulse oximetry. They found that adding vertical traction via a narrow 2-inch sling severely compromised oxygen saturation. If vertical traction is deemed necessary, a wide 4-inch sling must be used, and the extremity's perfusion and traction duration must be monitored obsessively.
For arthroscopy of the subacromial space, the traction vector is altered. The arm is lowered to 20 to 45 degrees of abduction and 0 degrees of flexion. This specific alignment permits mild inferior subluxation of the humeral head, effectively opening the subacromial space for acromioplasty or rotator cuff repair.
The Beach-Chair Position
Popularized by Skyhar, Altchek, and Warren, the beach-chair position has gained immense popularity, particularly for anterior stabilization and rotator cuff repairs.
Advantages:
1. Faster and highly intuitive patient positioning.
2. Virtual elimination of traction-induced neurapraxias, as the arm is freely manipulated rather than suspended.
3. Minimal distortion of the intra-articular capsular anatomy, allowing for a more physiological assessment of tissue tension.
4. Seamless conversion to an open deltopectoral or mini-open approach without the need for repositioning or reprepping.
Disadvantages:
The primary technical disadvantage is the increased difficulty in accessing and working through posterior portals. Medically, the upright posture introduces the risk of decreased cerebral perfusion, particularly when hypotensive anesthesia is induced. The Bezold-Jarisch reflex—a triad of profound bradycardia, hypotension, and peripheral vasodilation—can occur in awake patients undergoing interscalene block in the upright position, necessitating vigilant anesthetic monitoring.
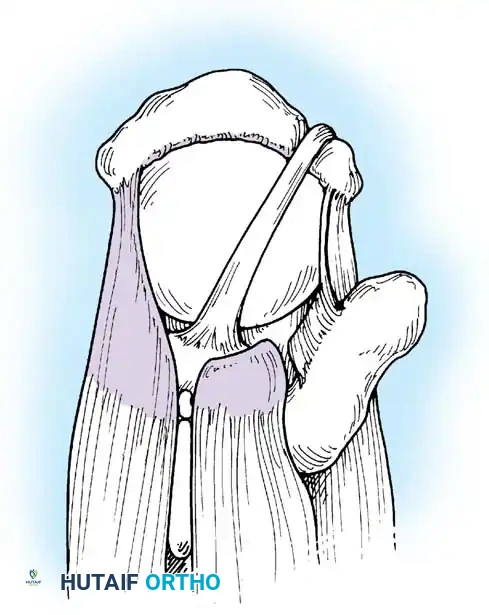
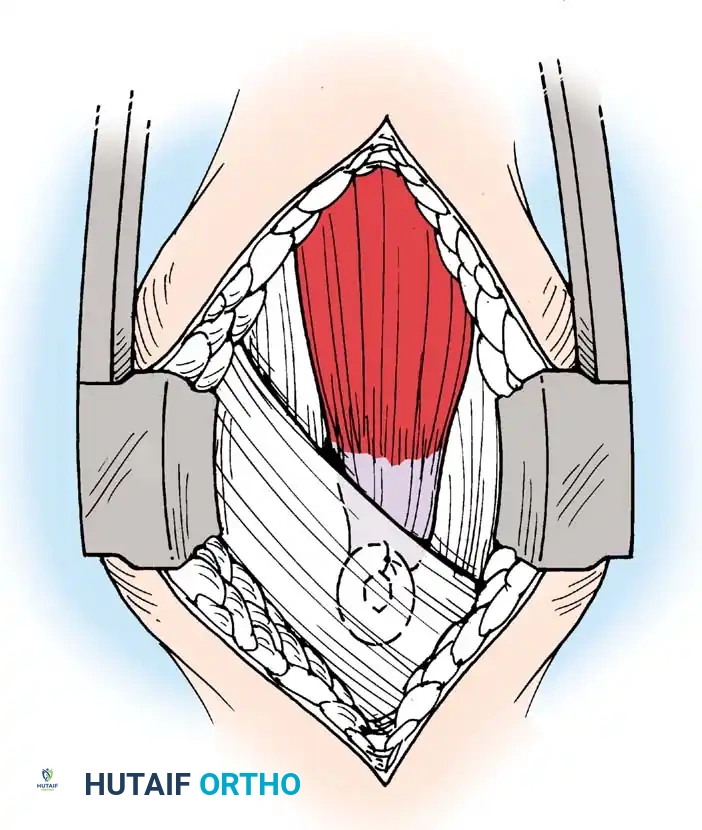
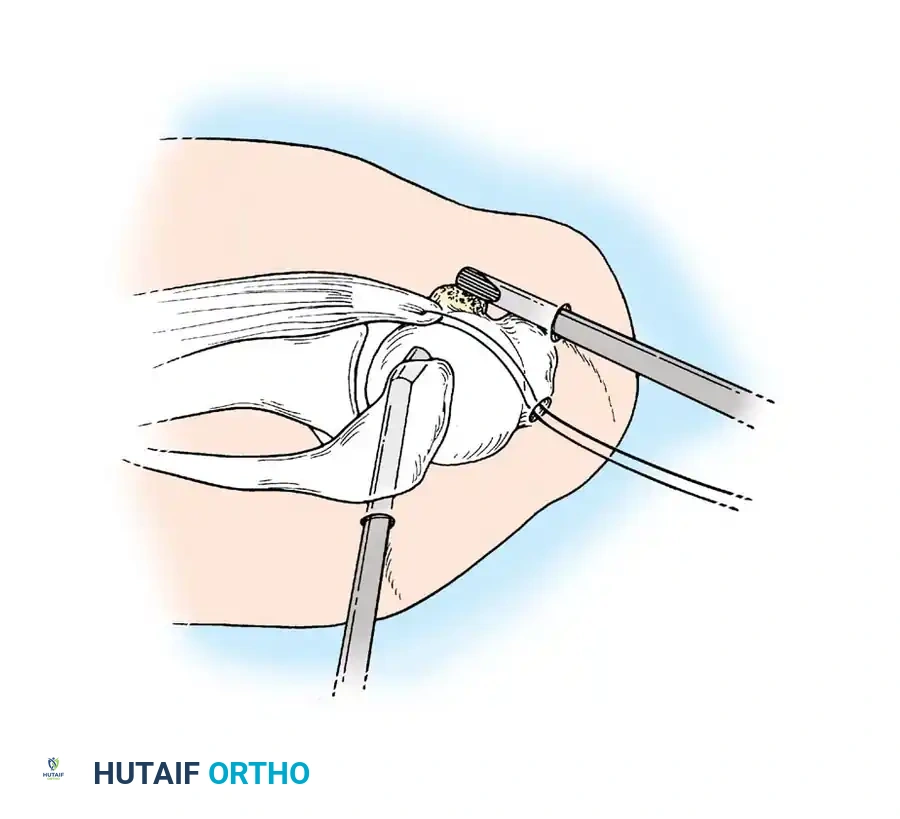
SURGICAL APPROACHES AND PORTAL PLACEMENT
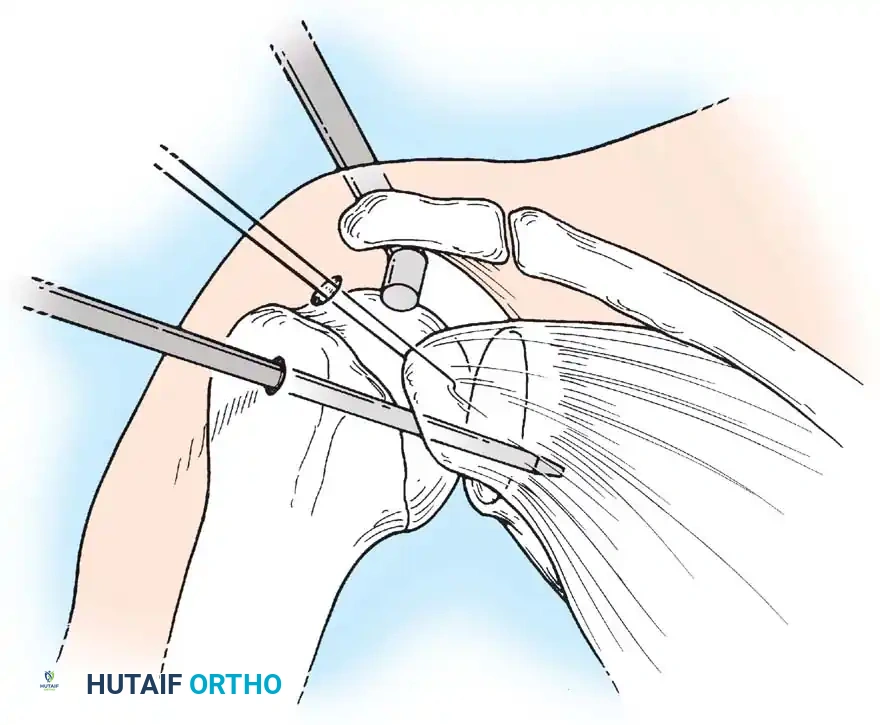
Regardless of the positioning chosen, meticulous identification of bony landmarks is the foundation of safe portal placement. Once the patient is prepped and draped, the anatomical landmarks are outlined with a sterile surgical marker.
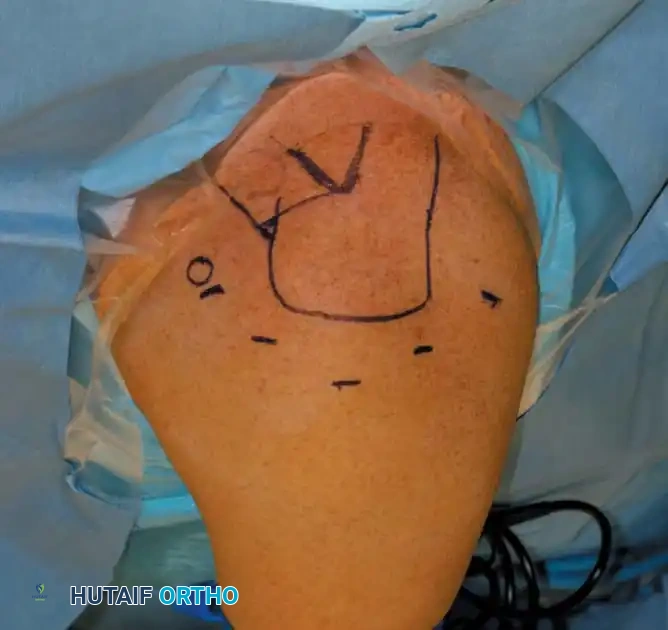
Key Landmarks:
* The anterior, lateral, and posterior borders of the acromion.
* The spine of the scapula.
* The distal clavicle and the acromioclavicular (AC) joint.
* The tip of the coracoid process.
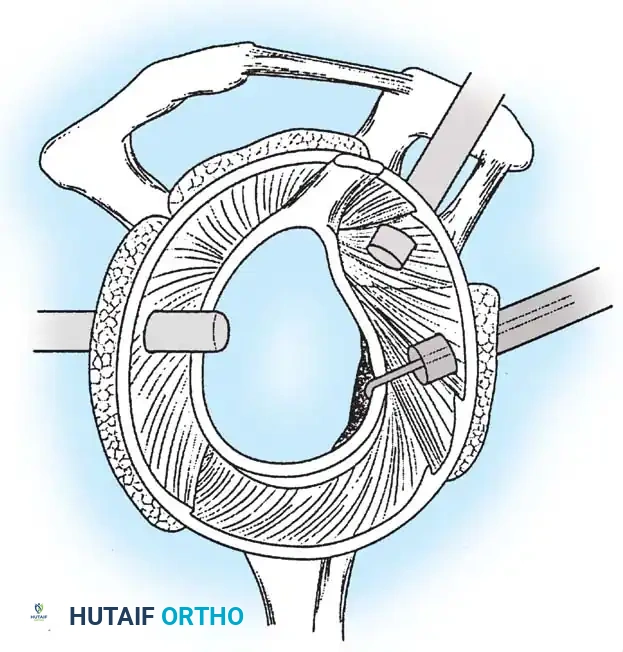
Standard Portals:
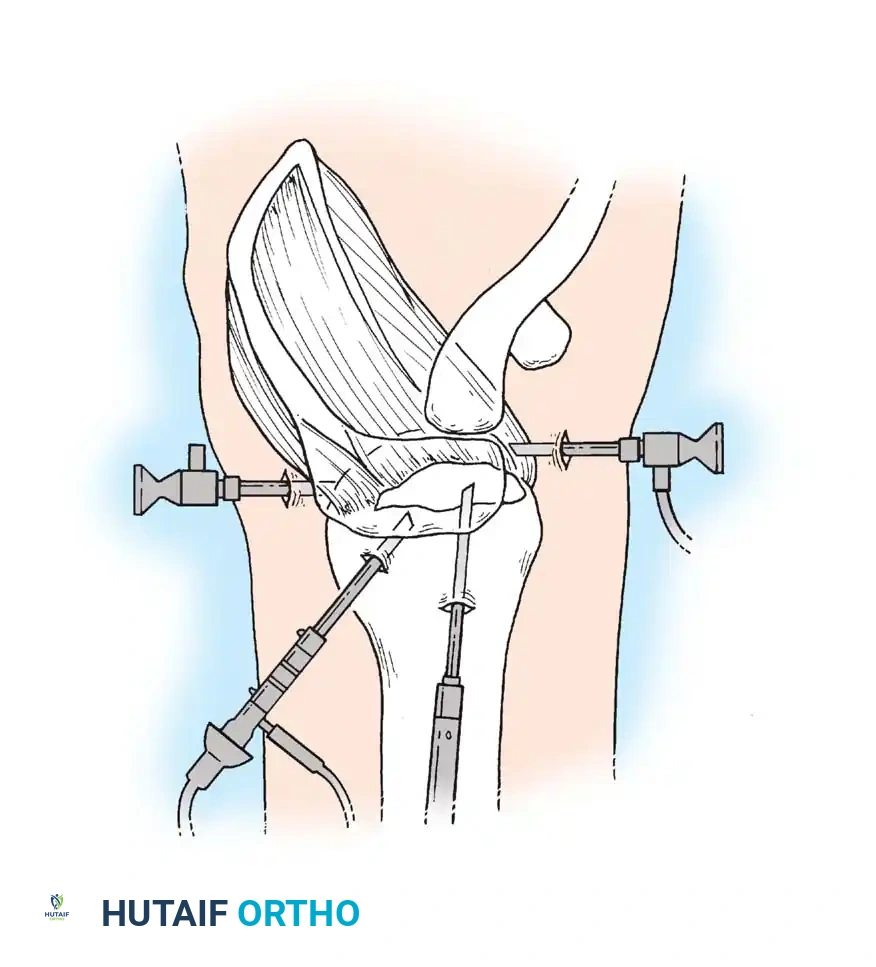
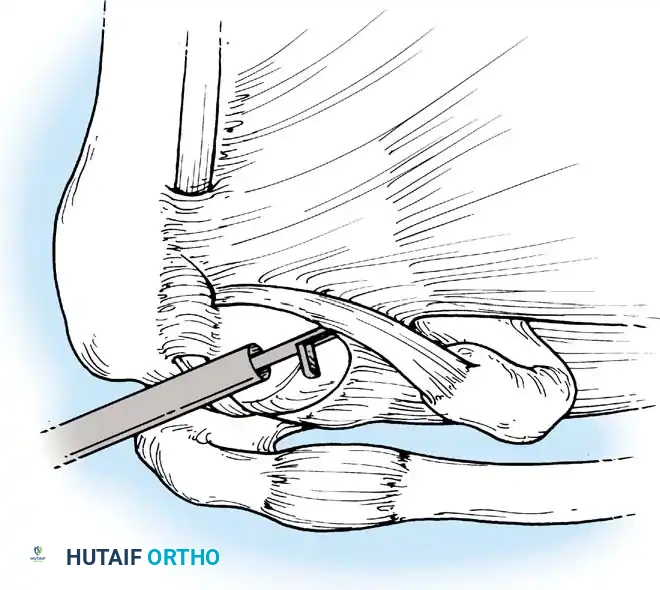
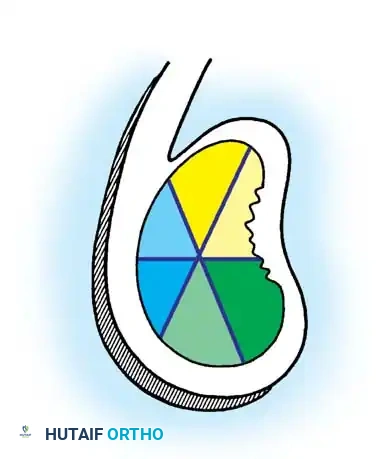
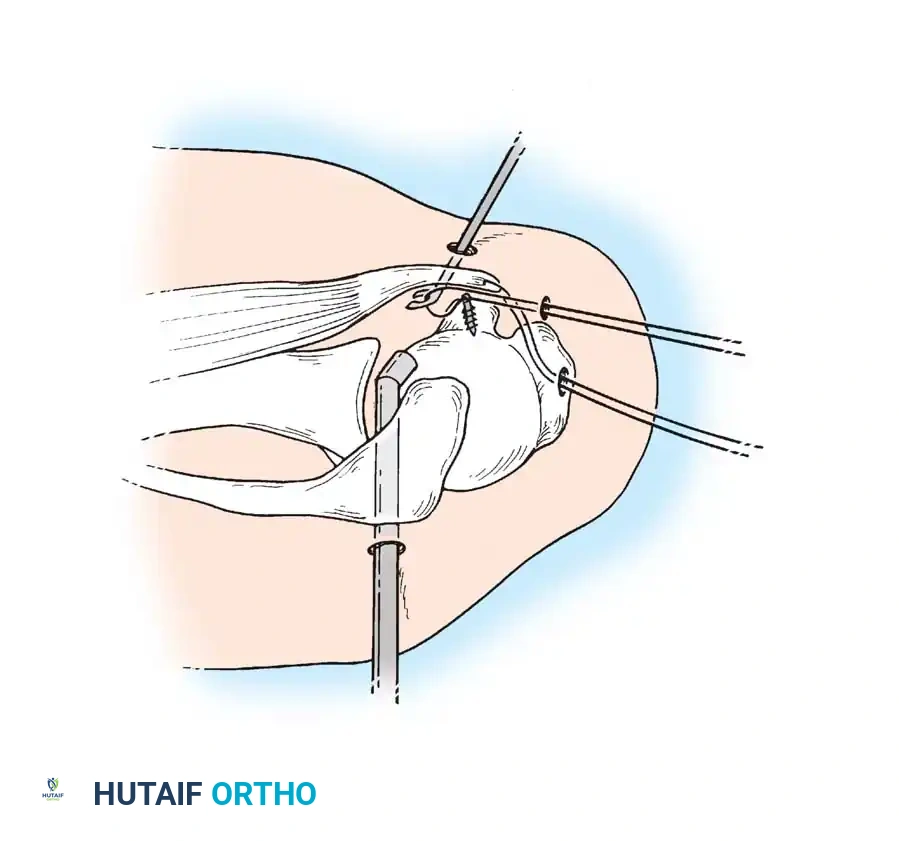
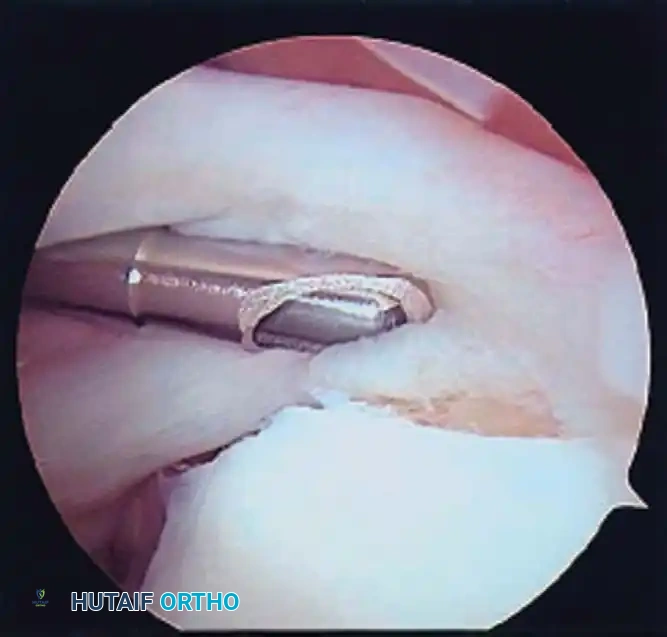
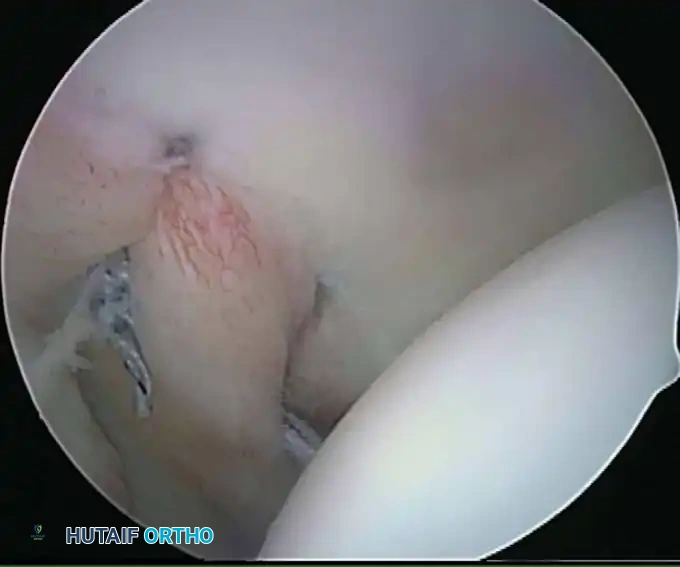
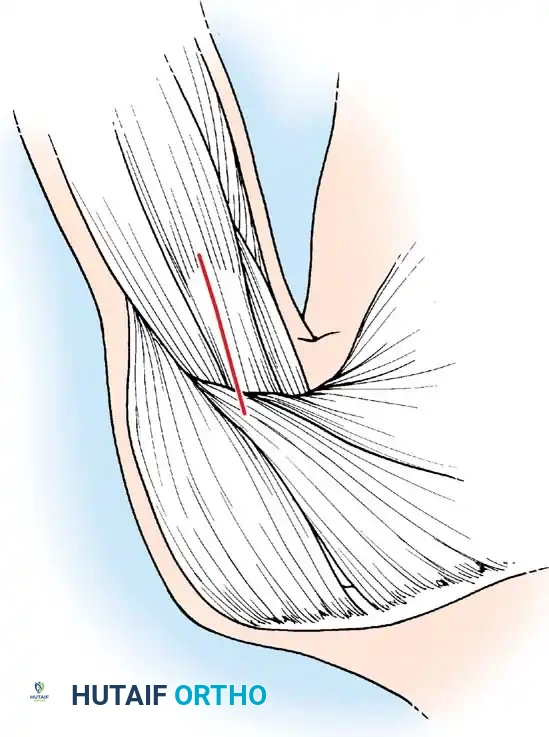
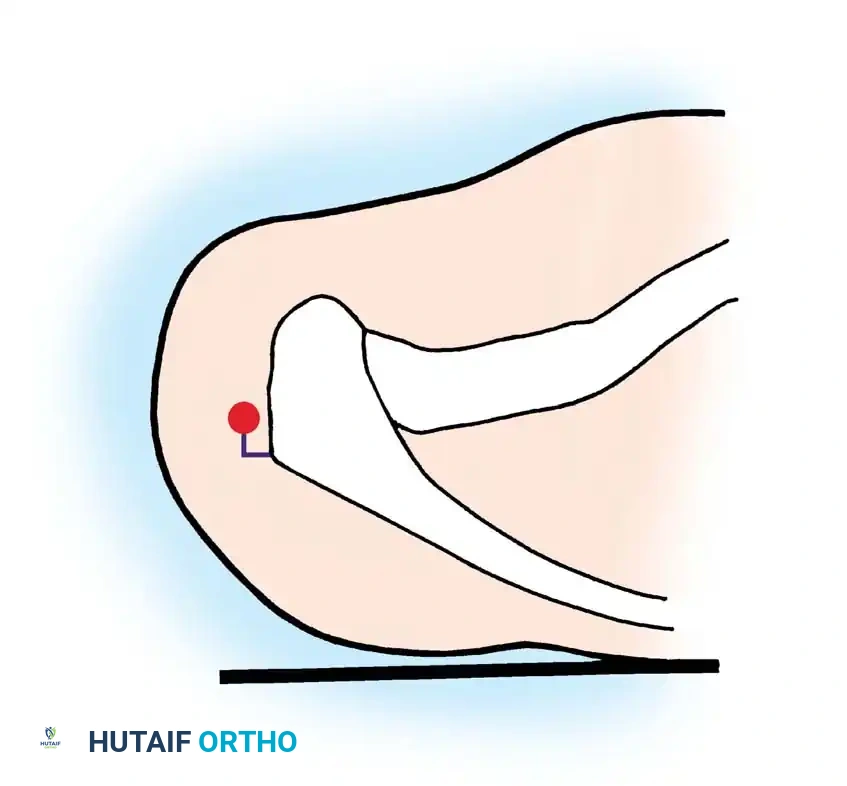
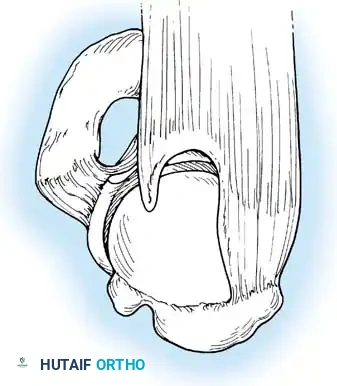
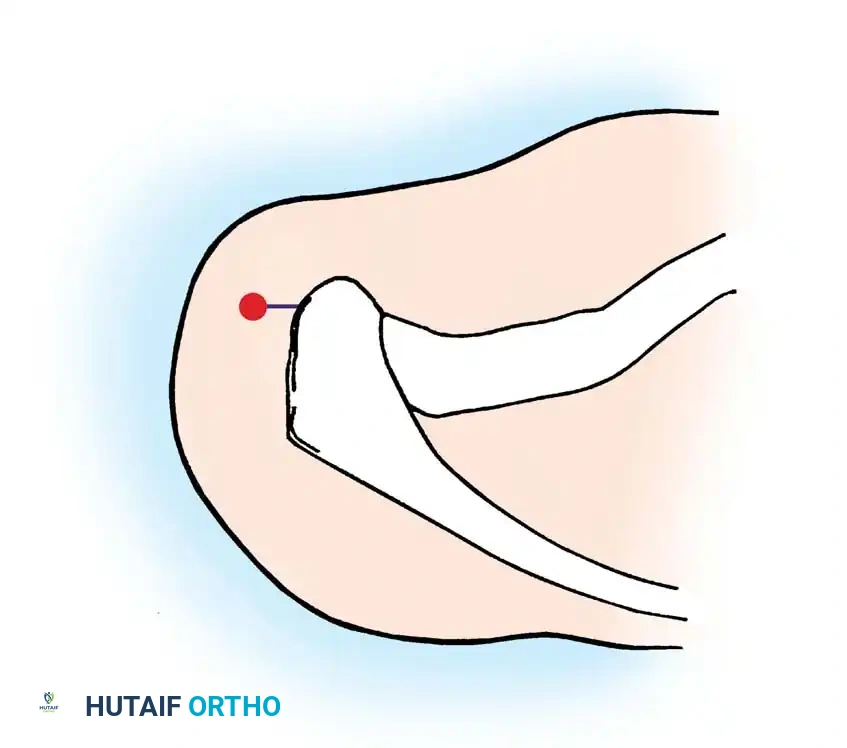
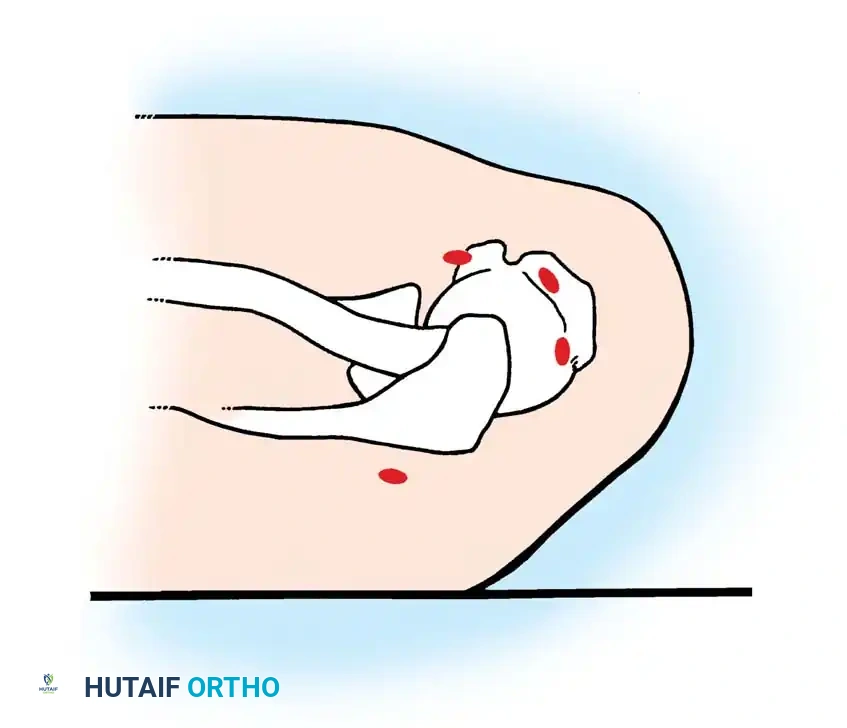
1. Posterior Portal: The primary viewing portal. Located approximately 2 cm inferior and 1 cm medial to the posterolateral corner of the acromion. It traverses the "soft spot" between the infraspinatus and teres minor.
2. Anterosuperior Portal: Placed just anterior to the AC joint, entering the joint through the rotator interval. Ideal for fluid inflow or superior labral management.
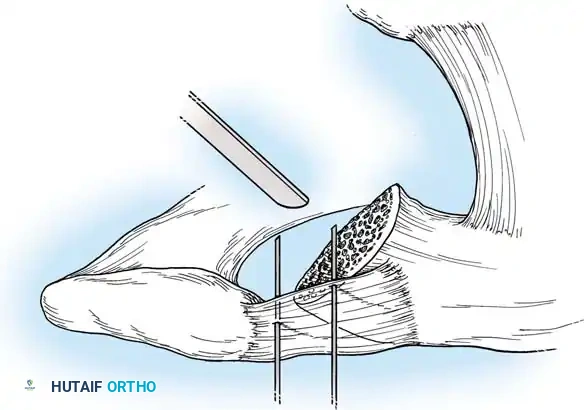
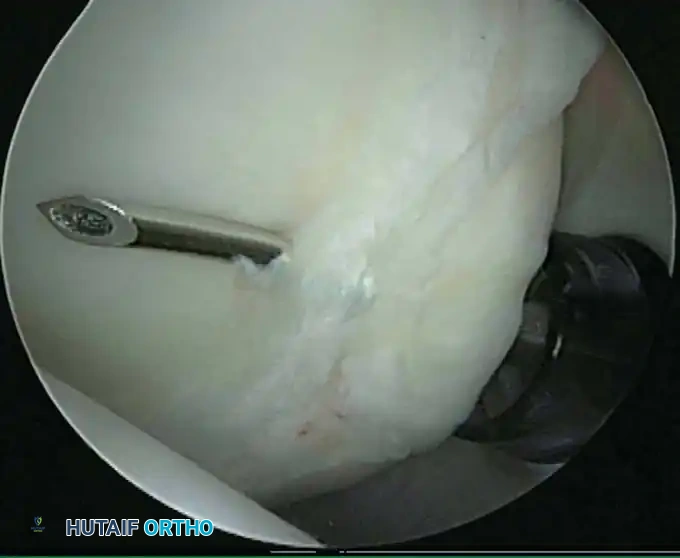
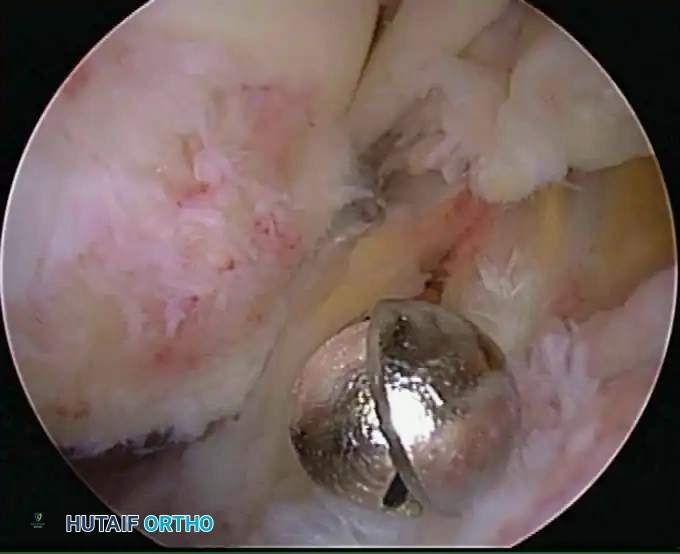
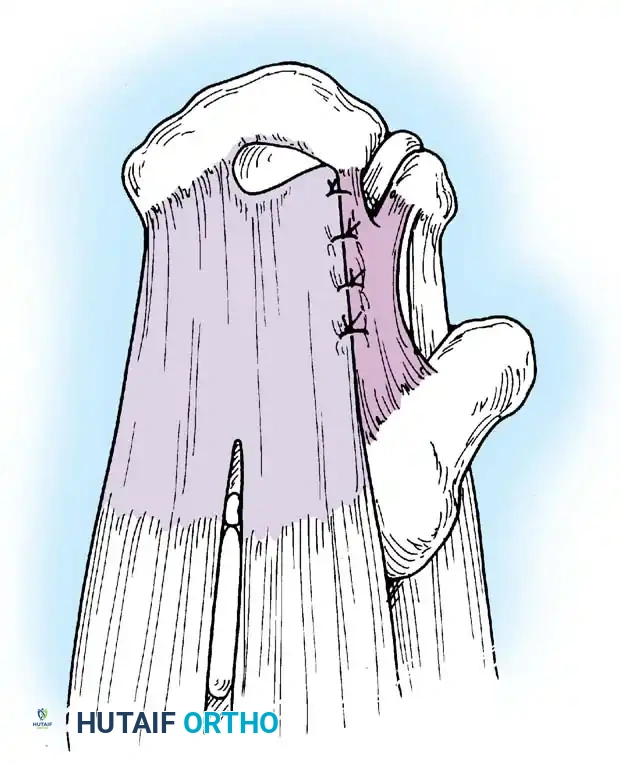
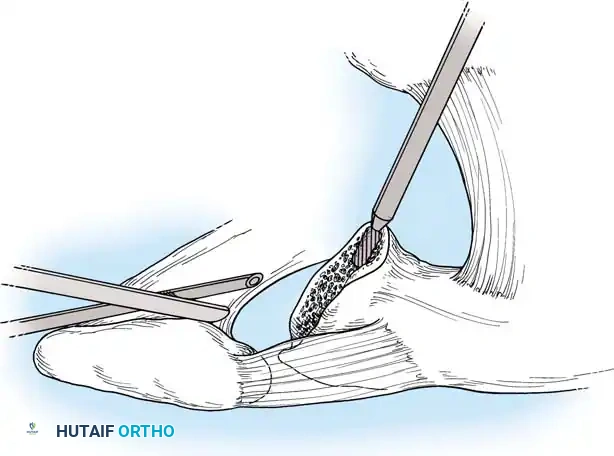
3. Anteroinferior Portal: Placed just superior to the upper border of the subscapularis tendon. Critical for anchor placement during Bankart repairs.
4. Lateral Portal: Located 2 to 3 cm lateral to the lateral edge of the acromion. Used primarily for subacromial work and rotator cuff repair.
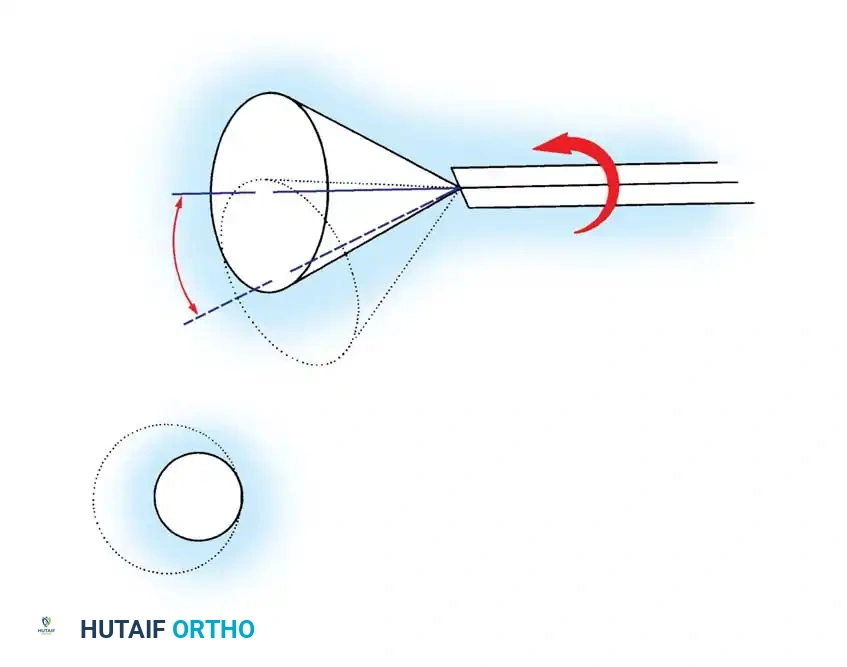
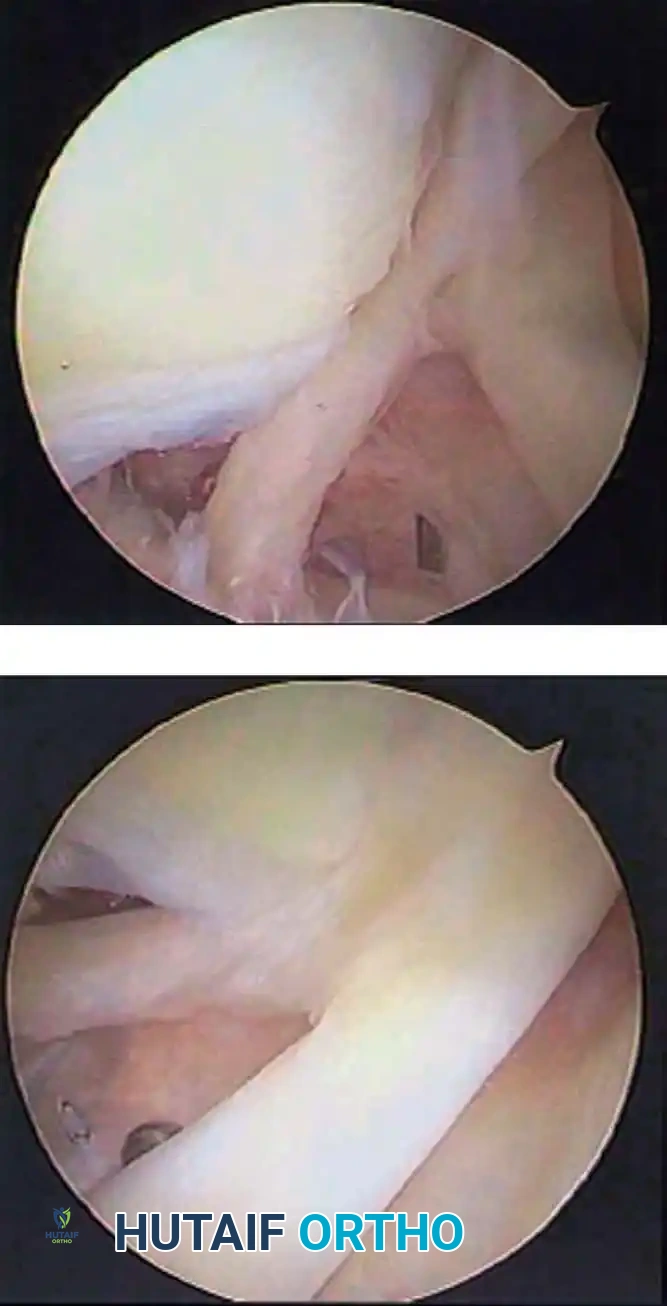
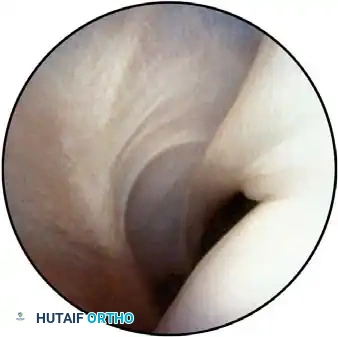
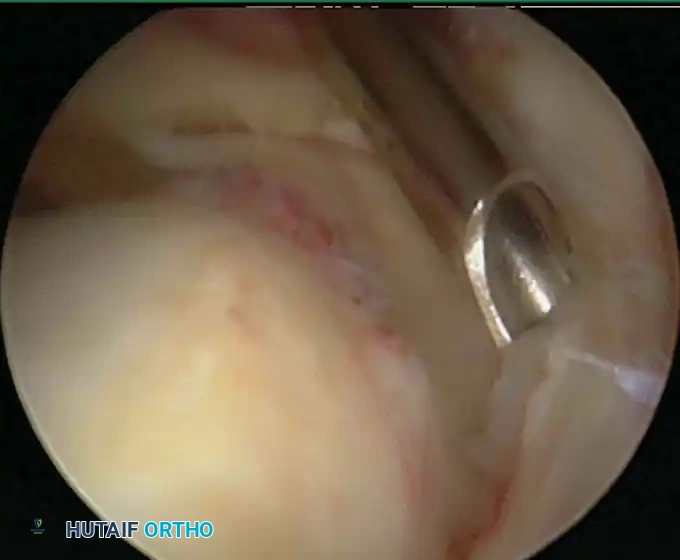
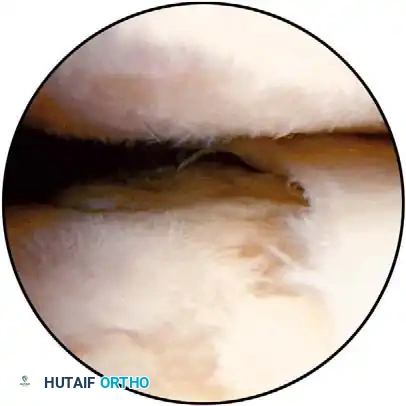
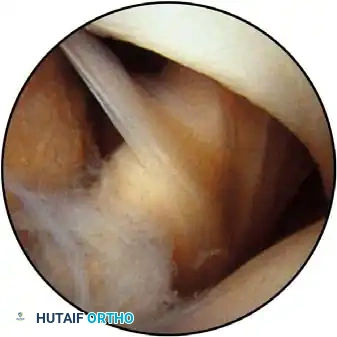
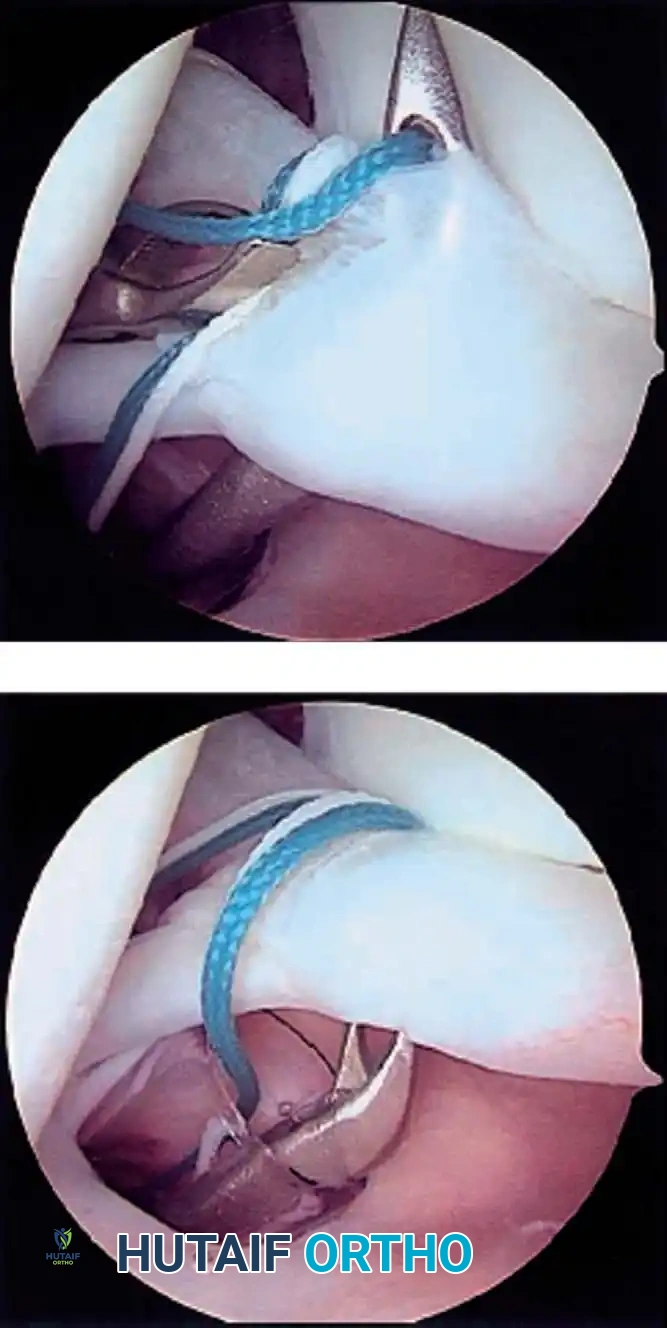
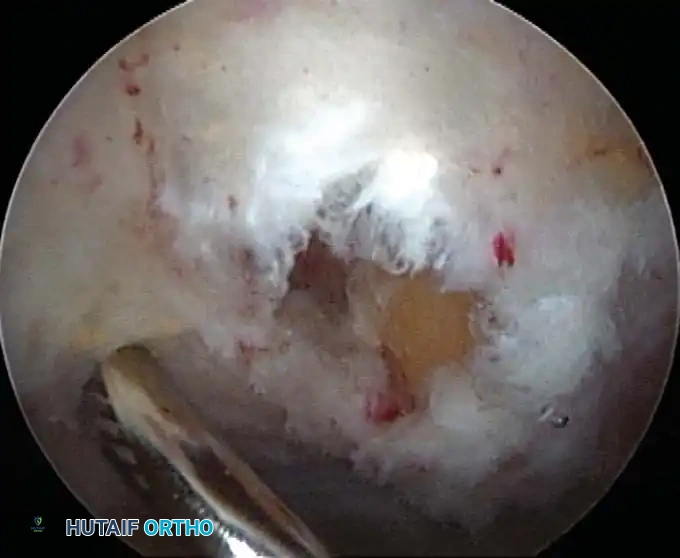
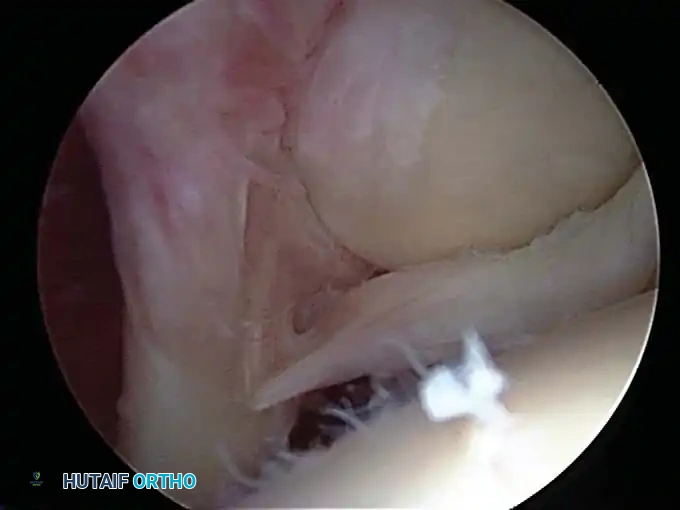
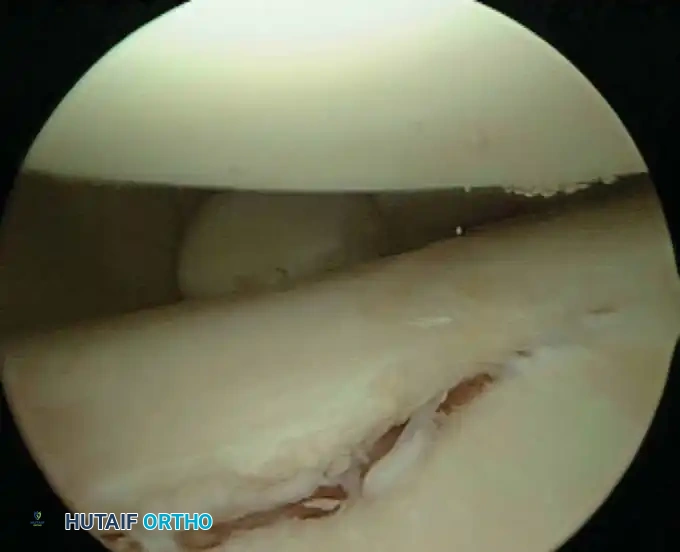
Routine diagnostic arthroscopy is performed using a 4-mm, 30-degree oblique arthroscope. This angle allows for comprehensive visualization of the entire joint through rotation of the lens and manipulation of the arm. In complex instability cases, switching to a 70-degree arthroscope dramatically improves visualization of the anterior glenoid neck and the inferior glenohumeral ligament, which is critical during arthroscopic capsulorrhaphy.
INTRAOPERATIVE HEMOSTASIS AND FLUID MANAGEMENT
Maintaining a clear visual field is one of the most significant technical challenges in shoulder arthroscopy. Unlike knee arthroscopy, where a pneumatic tourniquet can render the limb exsanguinated, the shoulder's thick, highly vascular muscular envelope (deltoid, rotator cuff) bleeds readily when penetrated by trocars and instruments.
Fluid Pump Systems
Gravity-fed fluid systems are generally insufficient for complex shoulder work. An automated arthroscopy infusion pump is essential for maintaining constant fluid flow and a stable intra-articular pressure, typically set between 60 to 70 mm Hg.
Clinical Pearl: Fluid Management
Inflow can be managed through the arthroscope sheath using a high-flow 6-mm cannula. However, during extensive subacromial work (e.g., aggressive acromioplasty or massive cuff repair), utilizing a dedicated, separate inflow cannula prevents visual turbulence and maintains optimal distension.
The safety of pressurized fluid pumps has been rigorously evaluated. Lee et al. utilized slit catheters to measure intramuscular deltoid pressures in patients undergoing pump-assisted shoulder arthroscopy. While pressures transiently spiked to 50 mm Hg, all pressures normalized within 30 minutes post-surgery, with no evidence of compartment syndrome. Similarly, Ogilvie-Harris and Boynton demonstrated that while baseline tissue pressures rose from 12 mm Hg to 120 mm Hg during acromioplasty, they returned to baseline within 4 minutes of pump deactivation, with zero electromyographic evidence of muscle necrosis.
Electrocautery and Radiofrequency Ablation
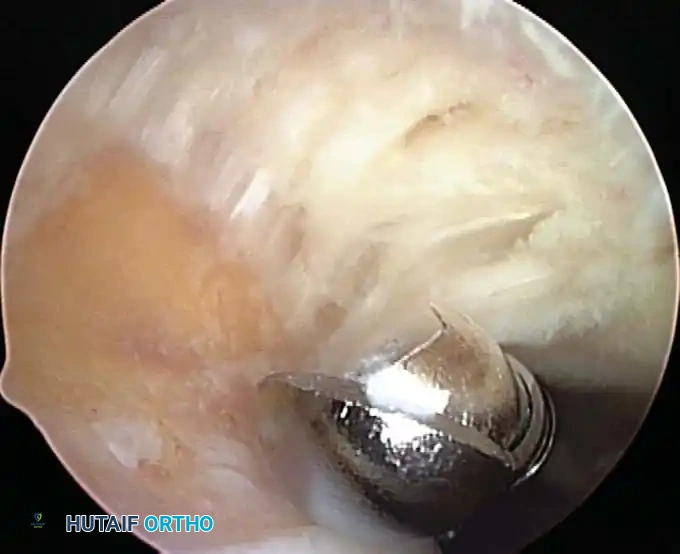
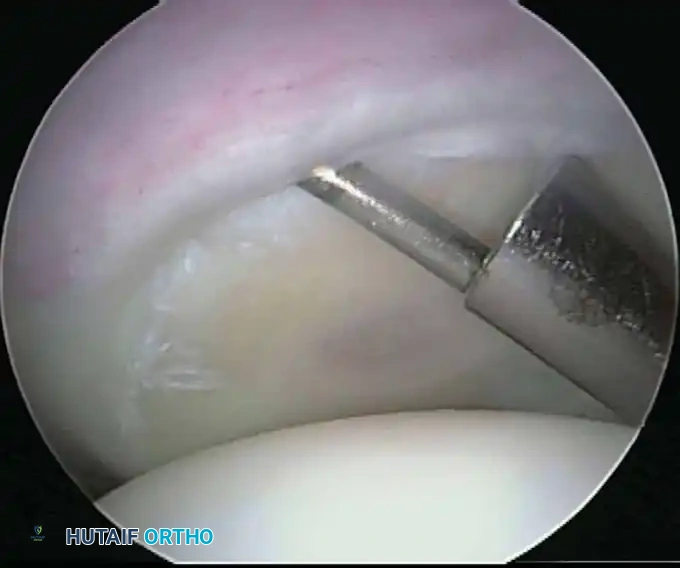
In addition to hydrostatic pressure, active hemostasis is achieved using arthroscopic electrocautery or bipolar radiofrequency (RF) ablation devices. These wands are indispensable for coagulating bleeding vessels in the subacromial bursa, releasing the coracoacromial ligament, and meticulously preparing the footprint for rotator cuff repair without obscuring the visual field with hemorrhage.
Furthermore, the addition of epinephrine (typically 1 mg per 3 liters of irrigation fluid) induces local vasoconstriction, significantly reducing capillary oozing. When combined with controlled hypotensive anesthesia (maintaining mean arterial pressure between 70-80 mm Hg), the surgeon is afforded a pristine, bloodless field, allowing for the precise execution of complex knot-tying and tissue mobilization.

SURGICAL EXECUTION AND POSTOPERATIVE PROTOCOLS
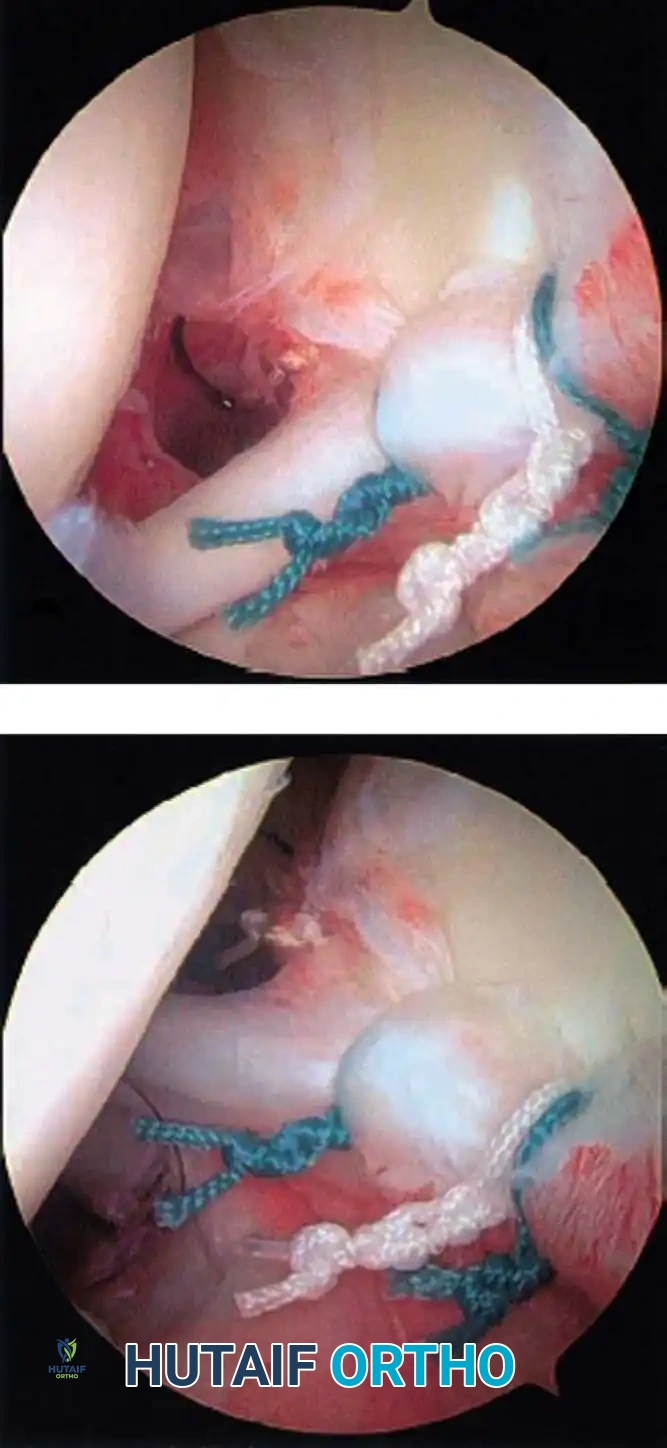
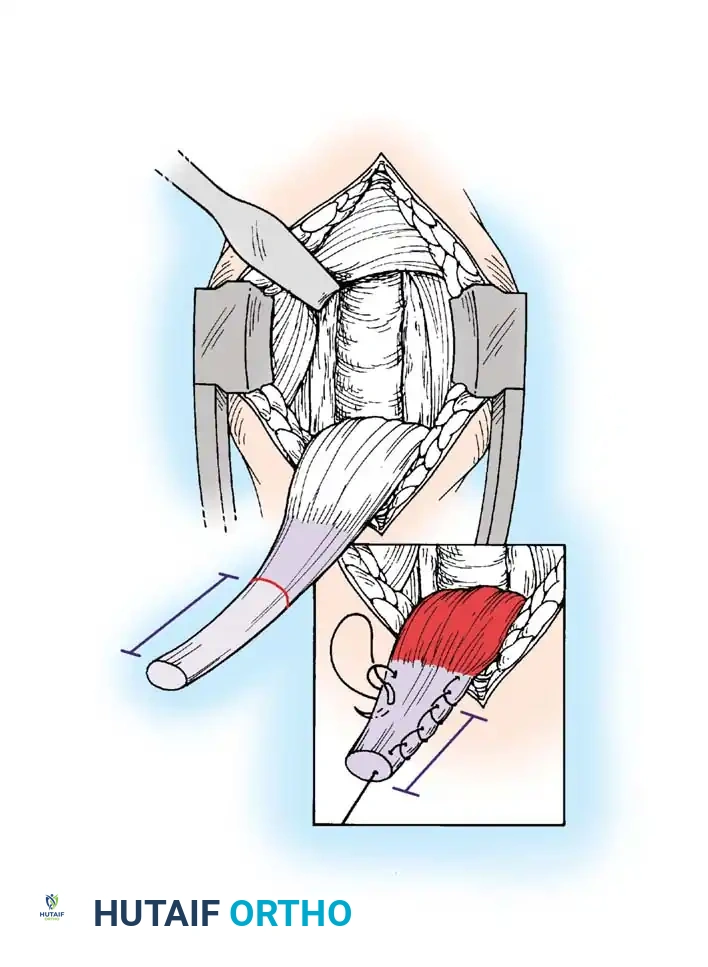
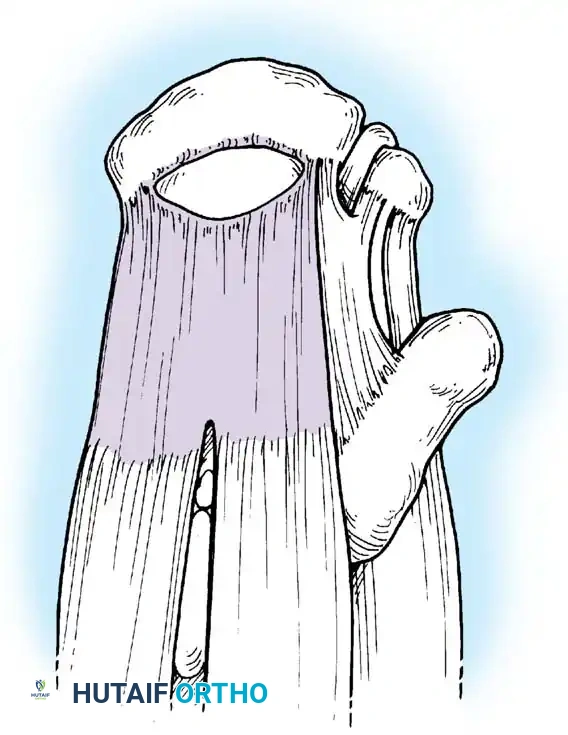
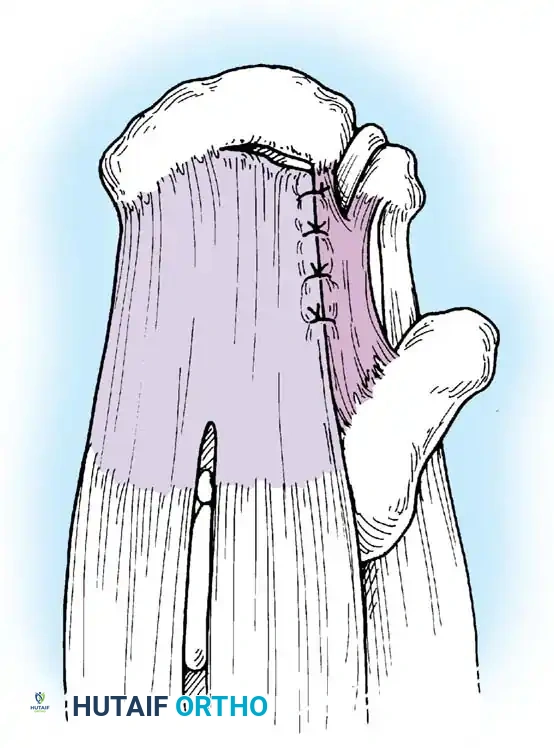
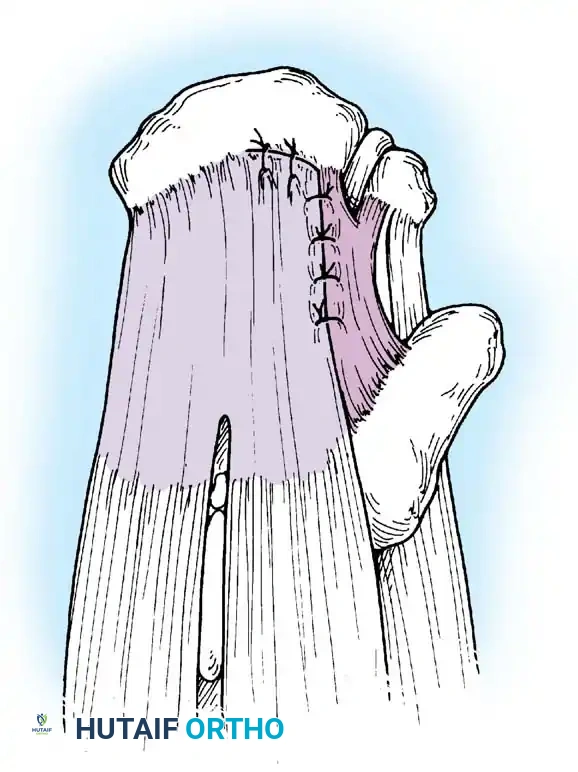
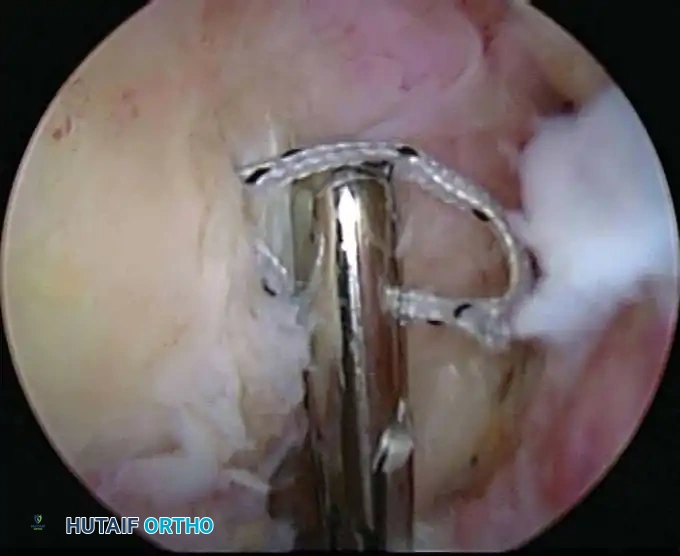
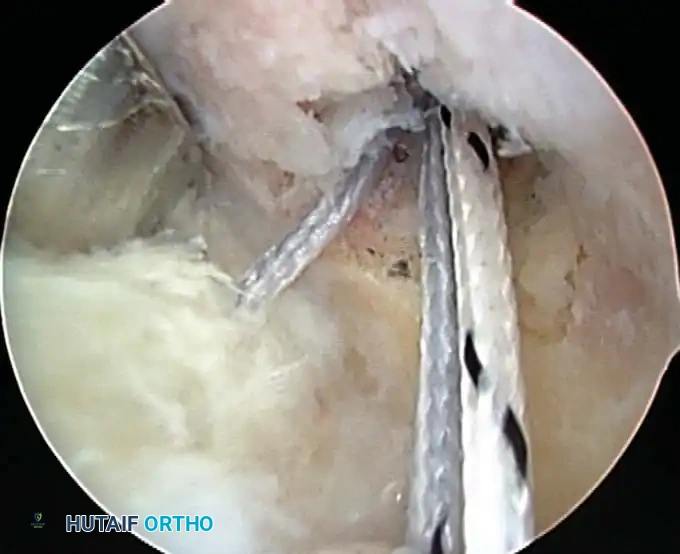
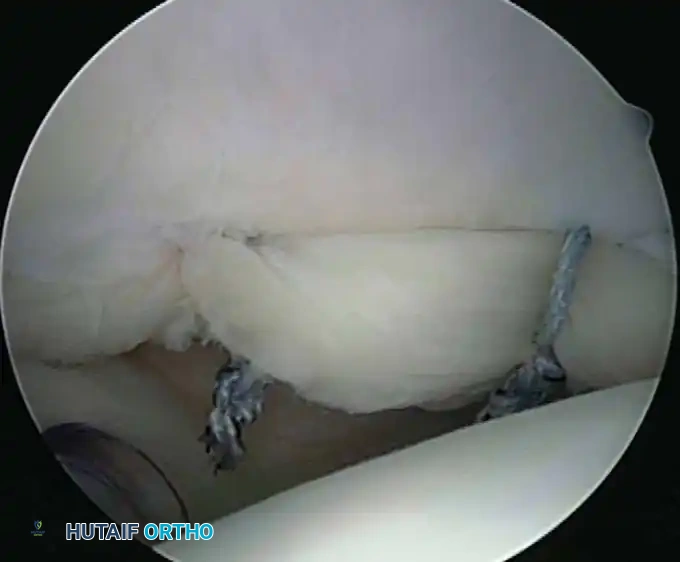
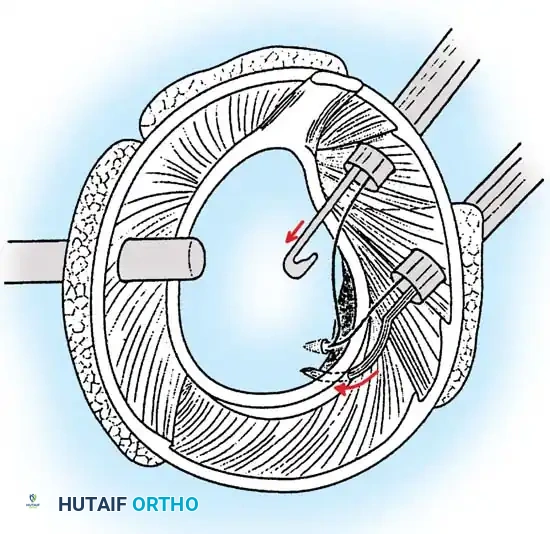
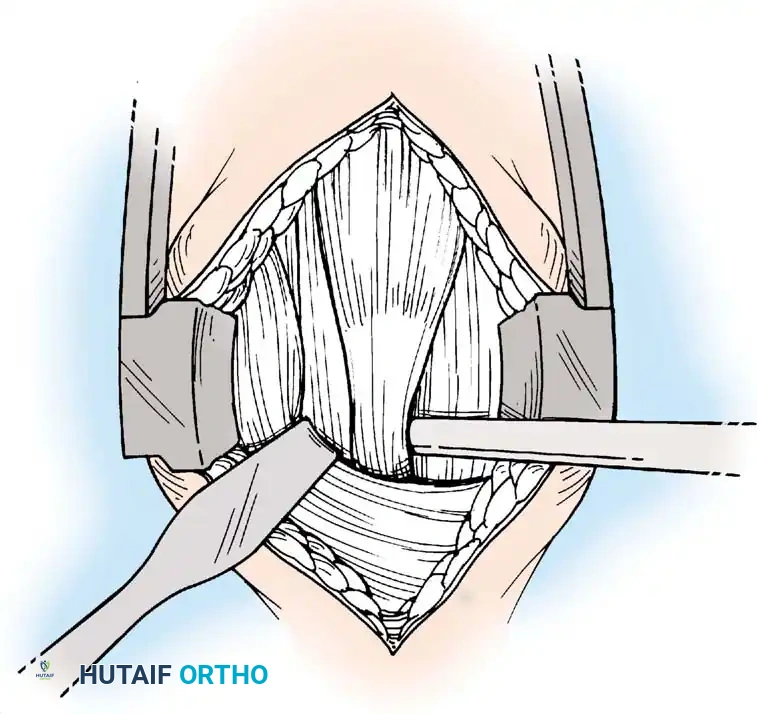
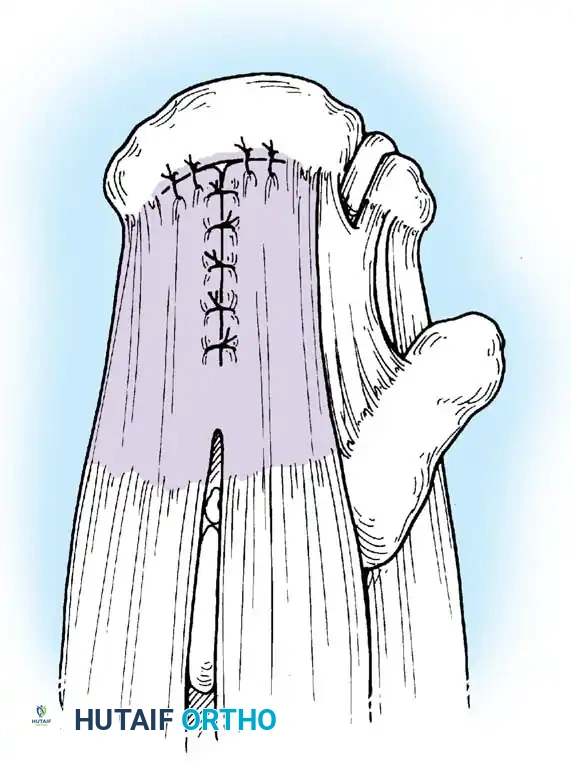
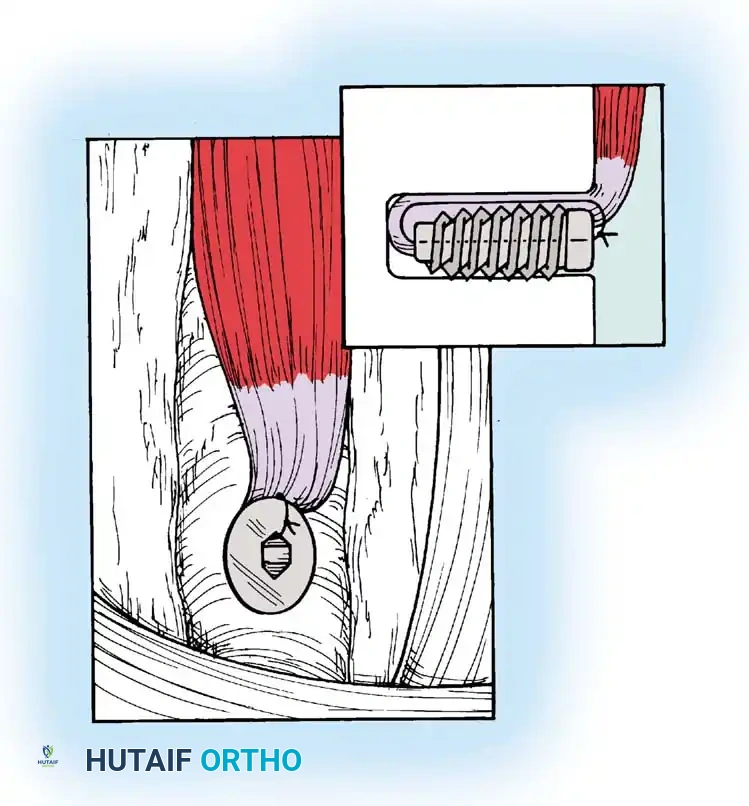
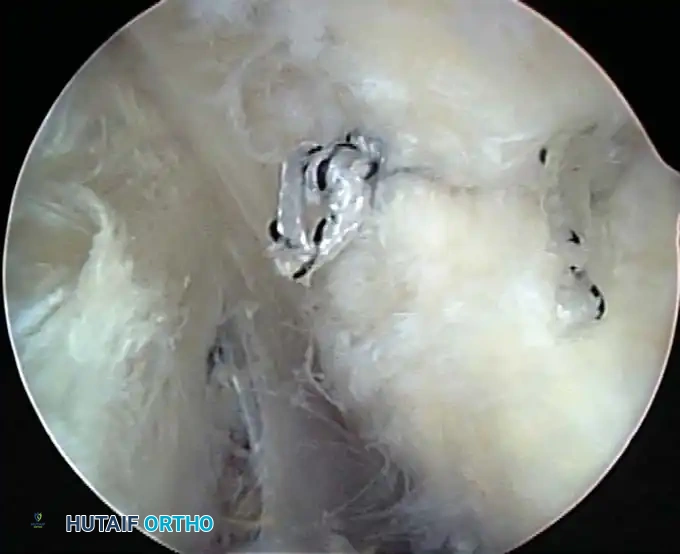
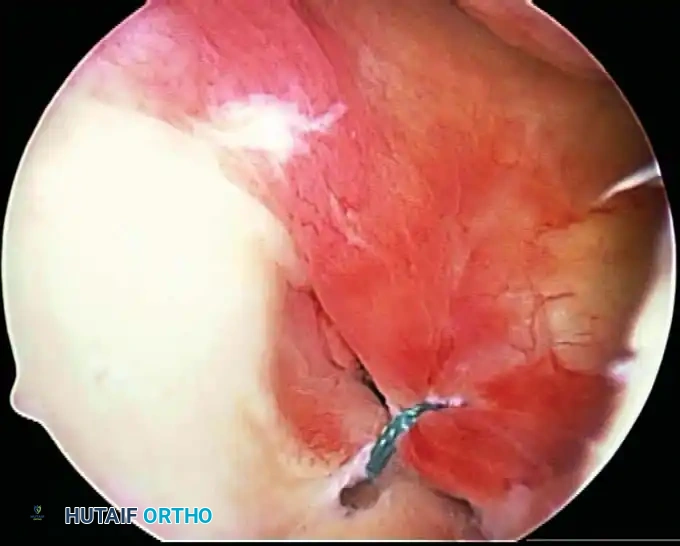
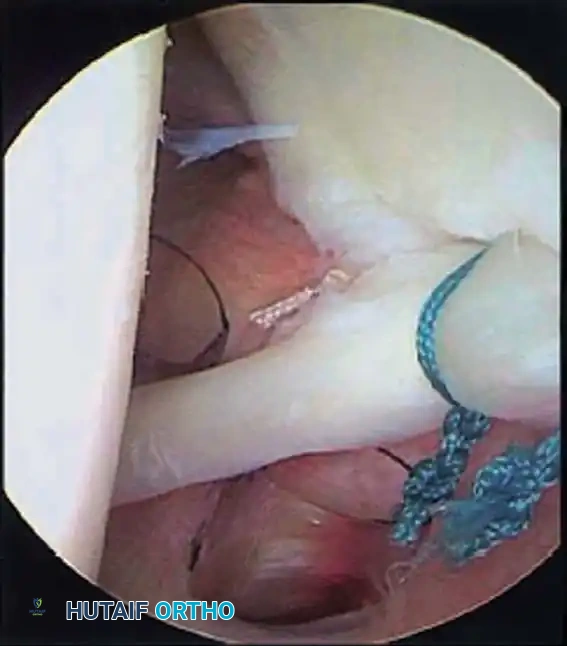
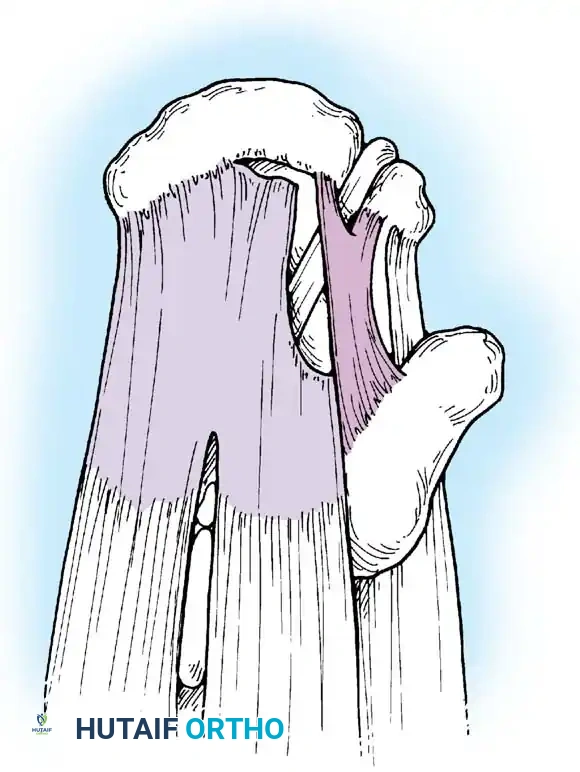
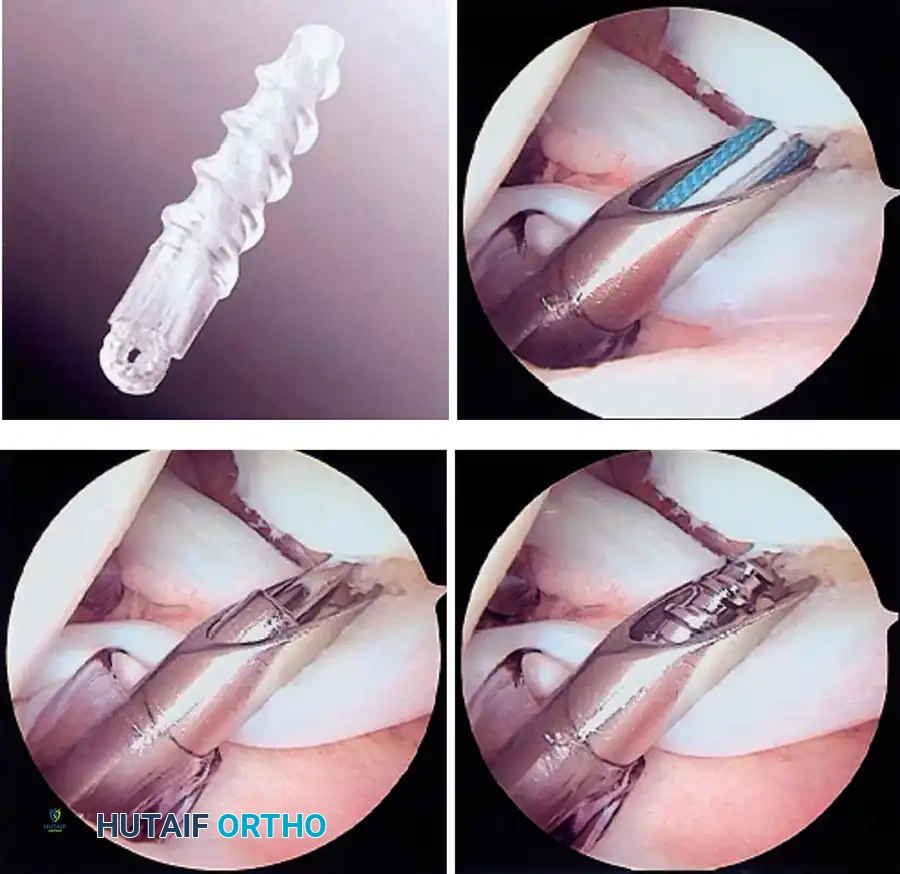
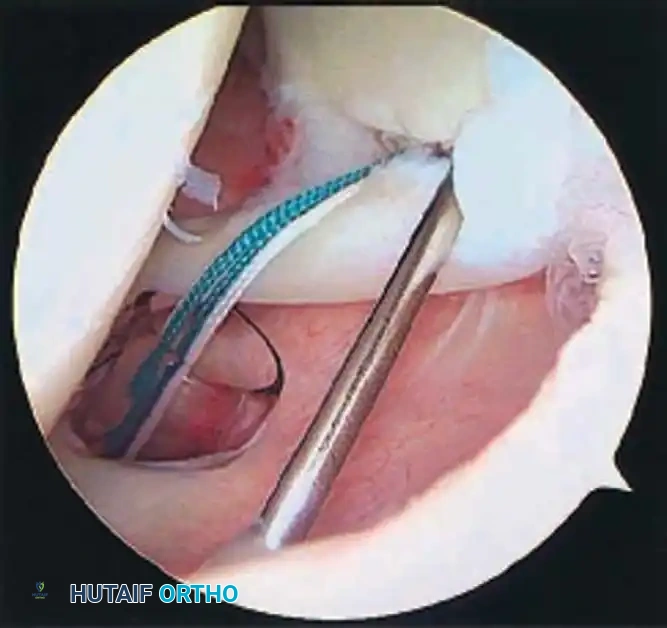
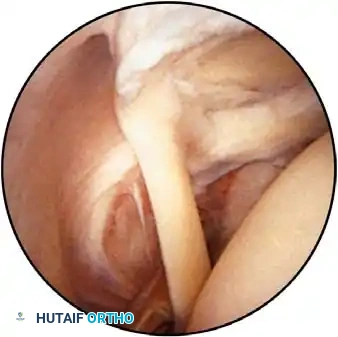
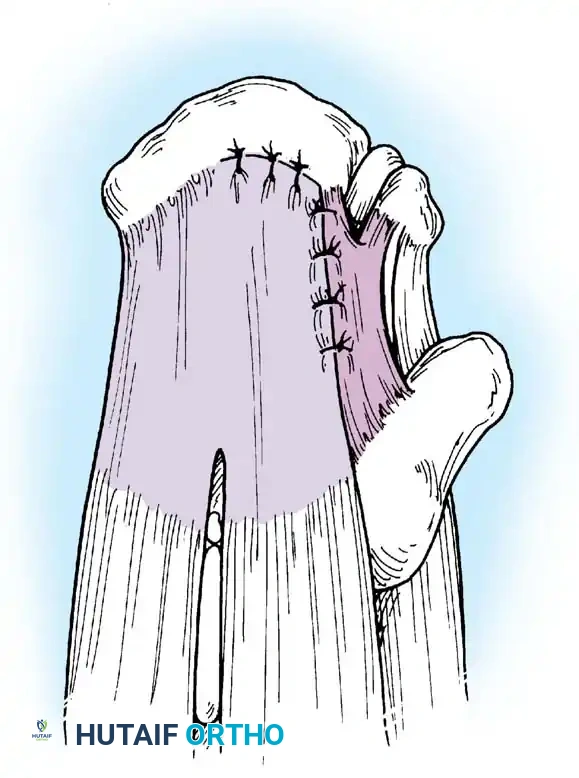
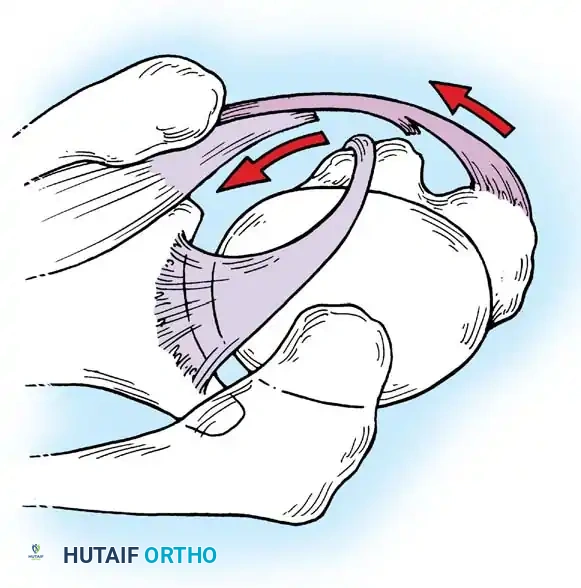
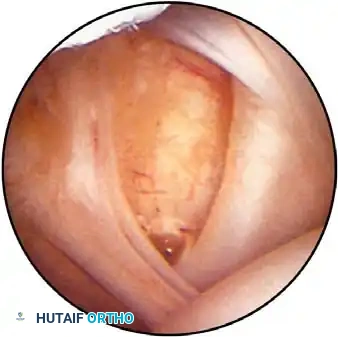
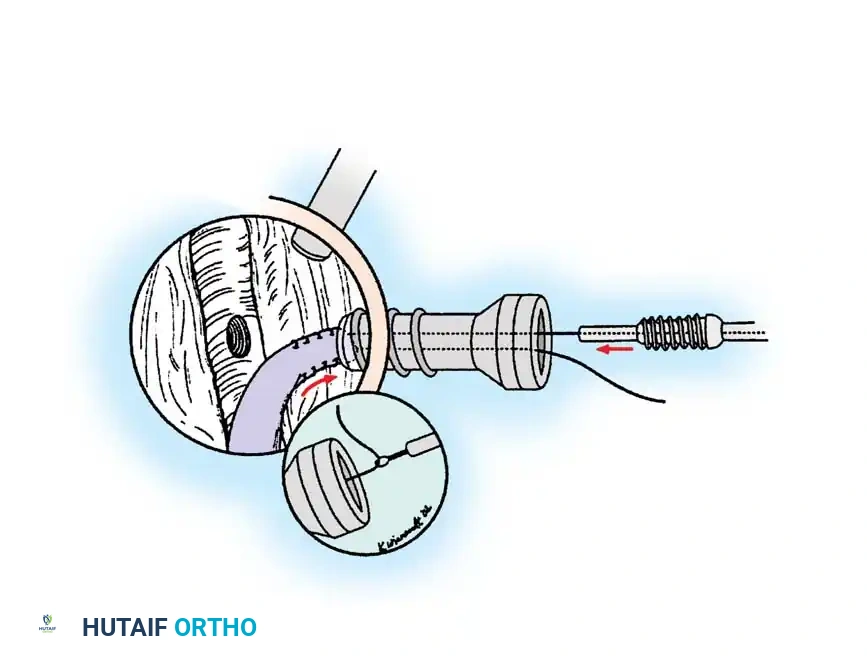
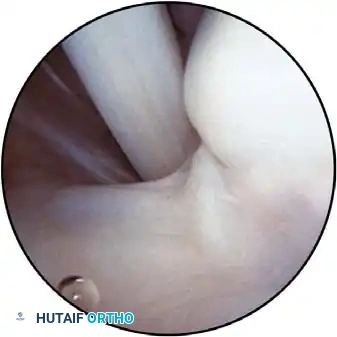
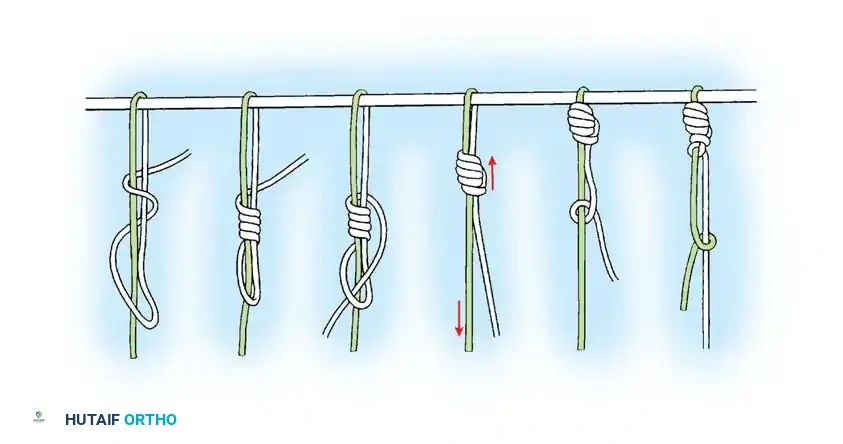
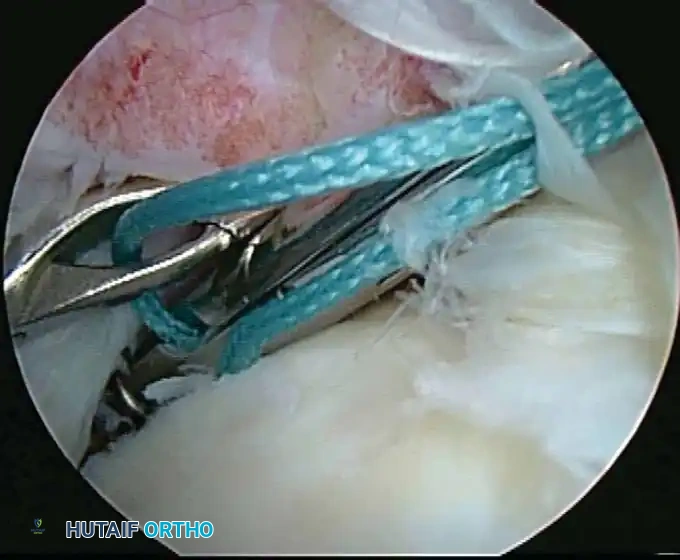
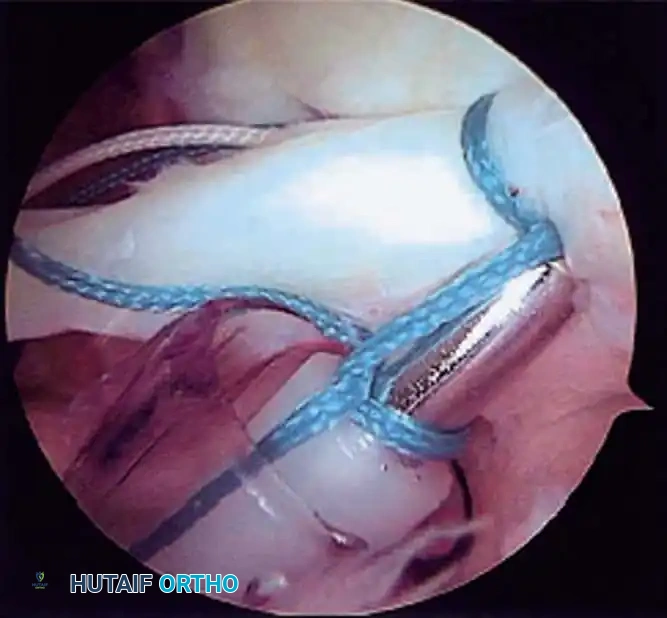
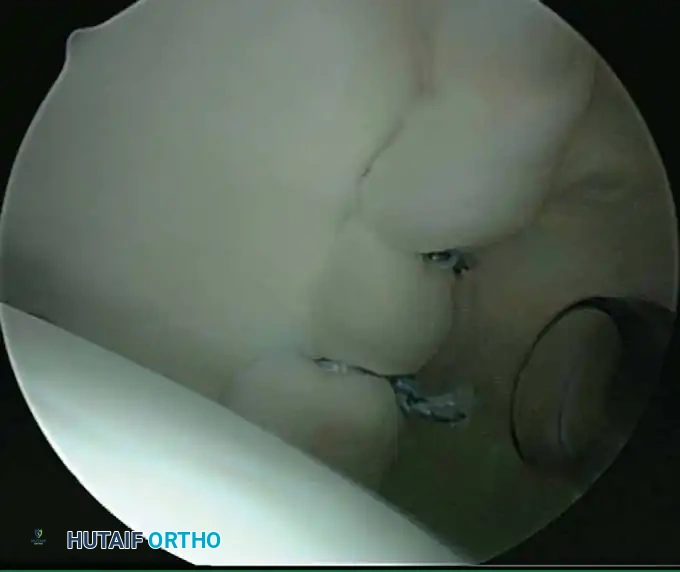
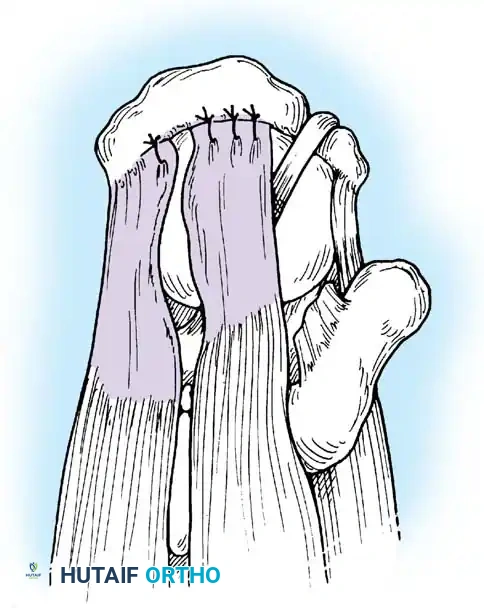
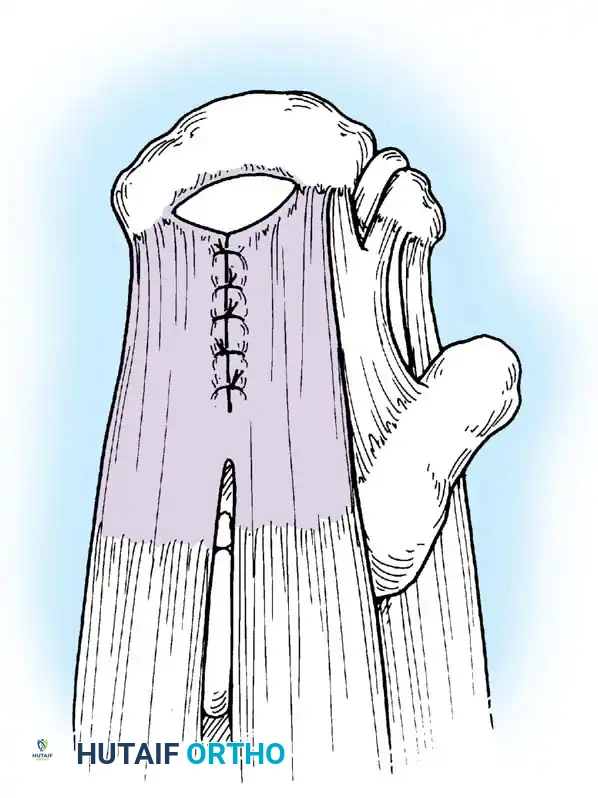
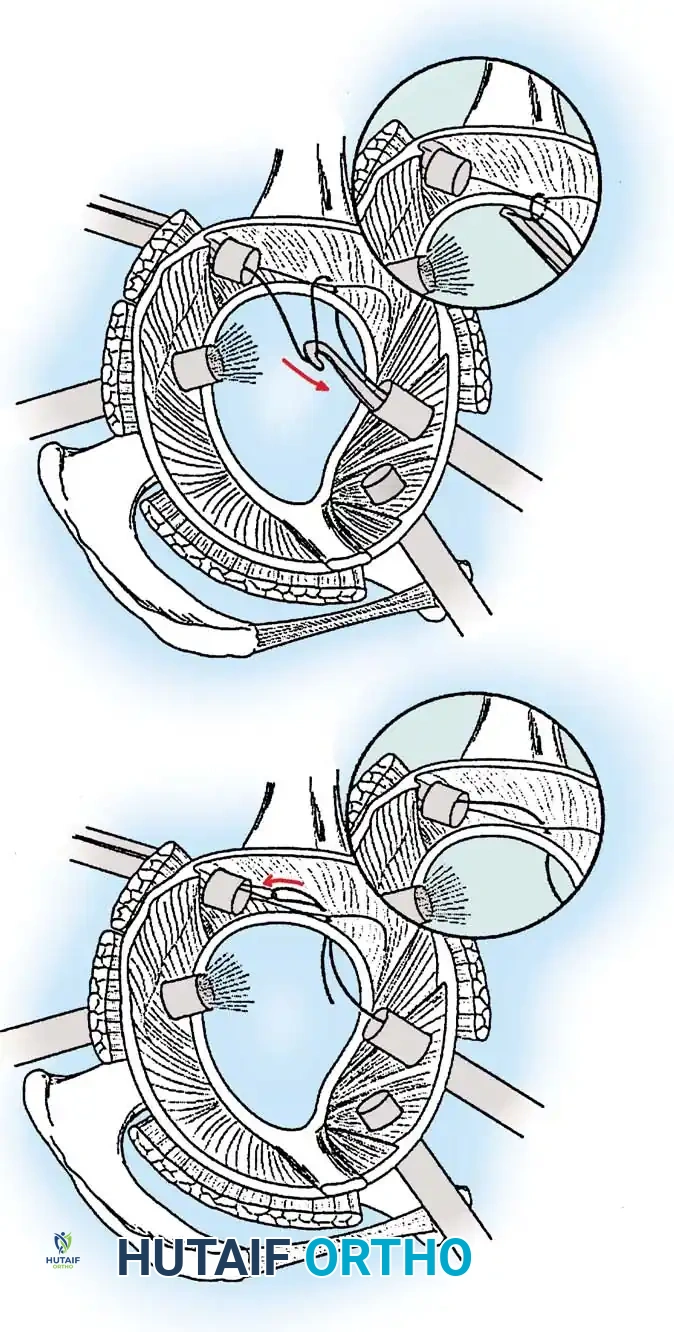
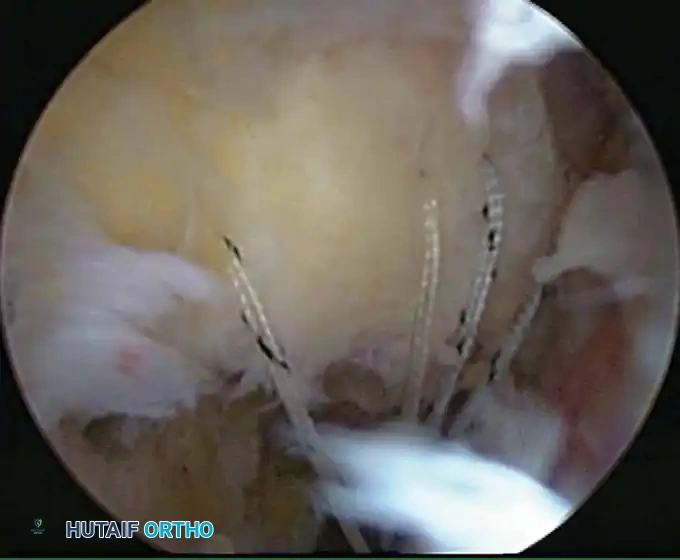
Once diagnostic evaluation is complete and hemostasis is secured, the therapeutic phase commences. Whether performing a SLAP repair, a Bankart stabilization, or a rotator cuff repair, the principles of tissue mobilization, anatomical footprint restoration, and secure biomechanical fixation remain paramount.
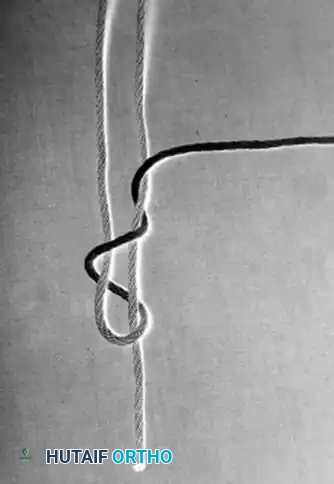
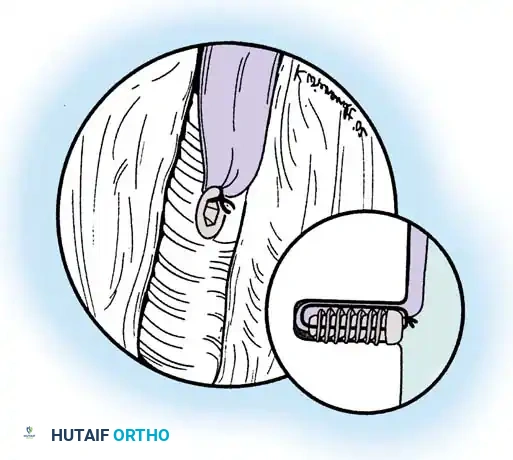
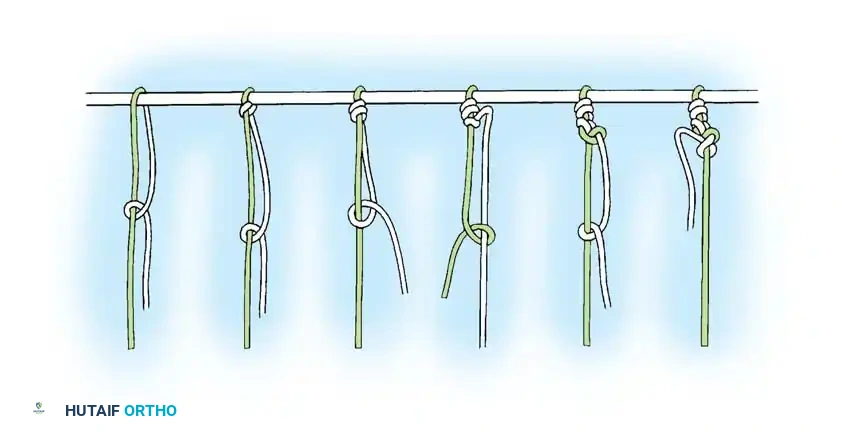
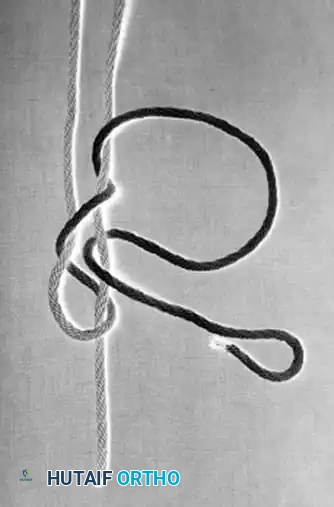
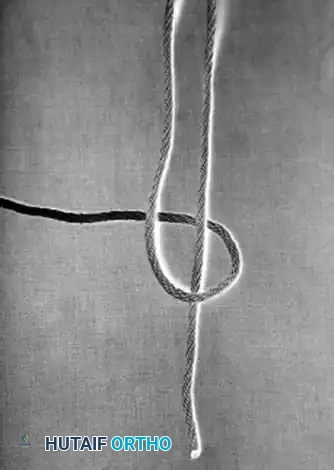
Modern arthroscopy relies heavily on suture anchors (biocomposite or all-suture constructs) and advanced arthroscopic knot-tying or knotless techniques. The ability to pass sutures through retracted, fibrotic tissue and secure them under appropriate tension without strangulating the microvascular supply is the hallmark of a master arthroscopist.
Postoperative Rehabilitation
The postoperative protocol is strictly dictated by the specific pathology addressed and the biomechanical security of the repair.
* Debridement/Acromioplasty: Immediate passive and active-assisted range of motion to prevent adhesive capsulitis.
* Instability/Labral Repairs: Immobilization in a sling (often with a small abduction pillow) for 4 to 6 weeks. External rotation is strictly limited to protect the anterior capsulolabral repair.
* Rotator Cuff Repairs: A phased approach beginning with 4 to 6 weeks of strict passive motion to protect the healing tendon-to-bone interface, followed by active-assisted motion, and finally, progressive resistance strengthening at 10 to 12 weeks.
By adhering to strict indications, optimizing patient positioning to protect neurovascular structures, and mastering intraoperative fluid and hemostatic dynamics, the orthopedic surgeon can leverage shoulder arthroscopy to deliver consistently excellent, reproducible clinical outcomes.
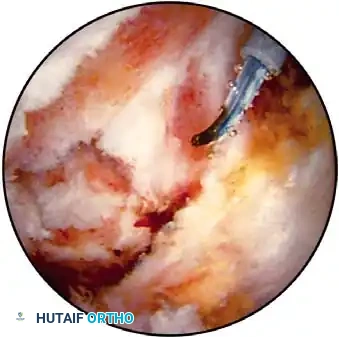
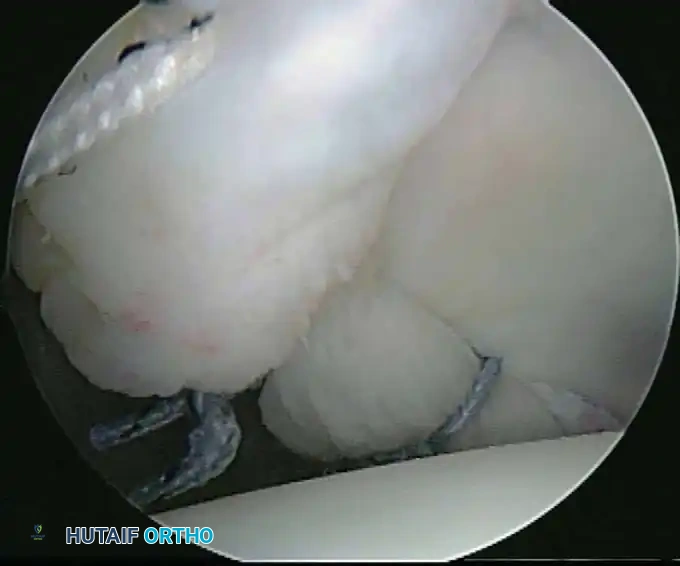
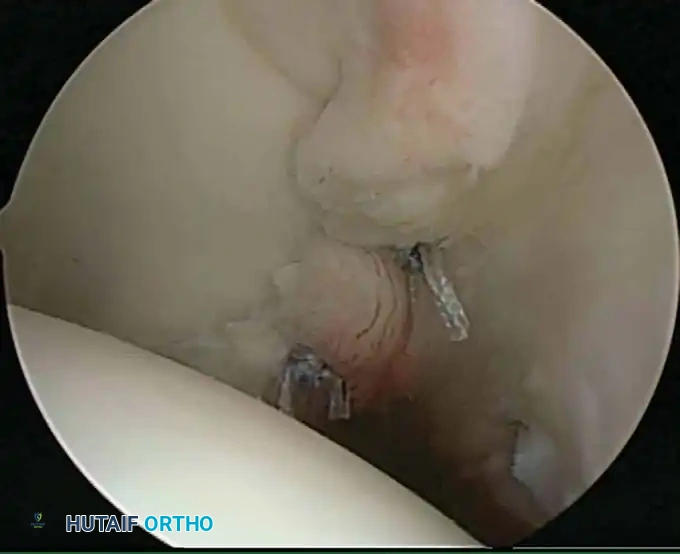
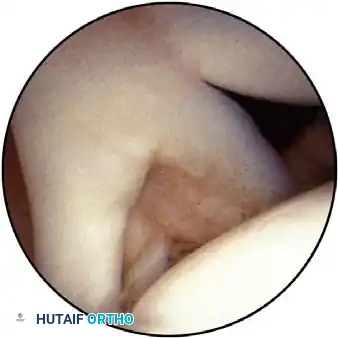
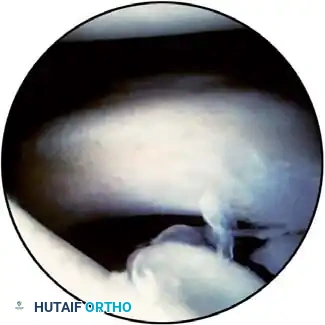
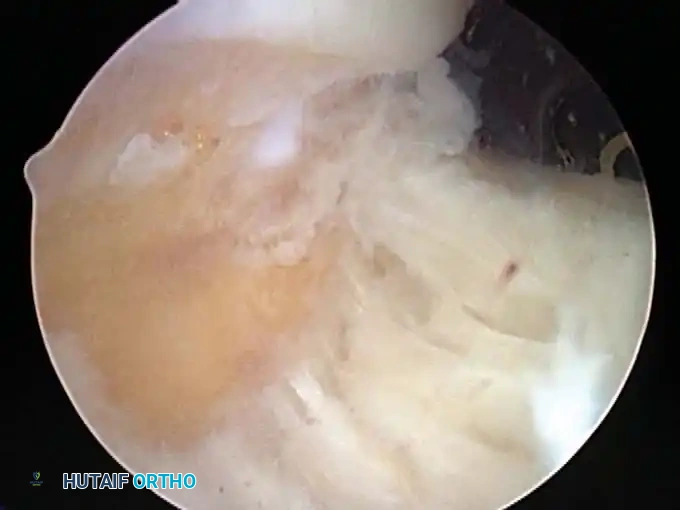
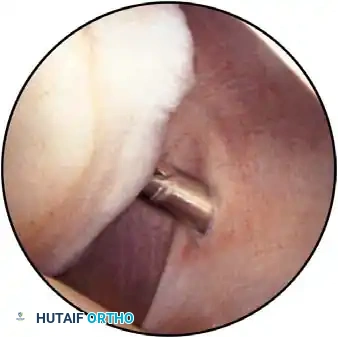
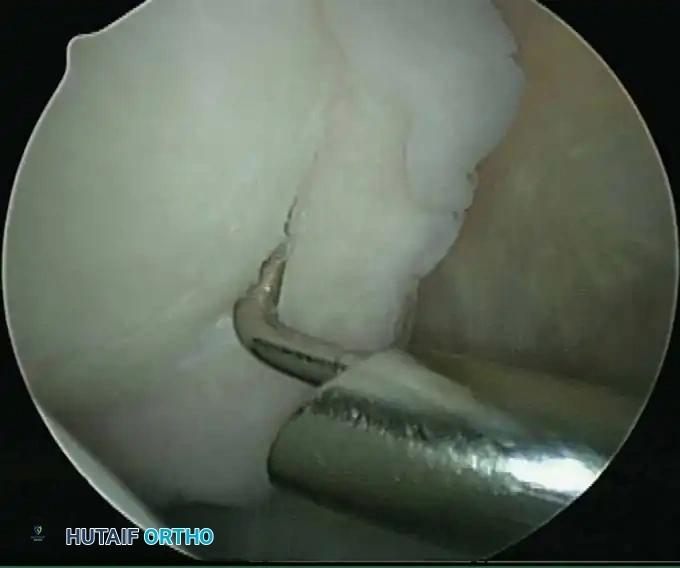
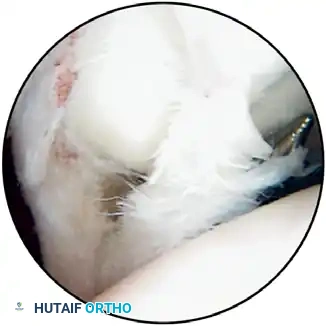
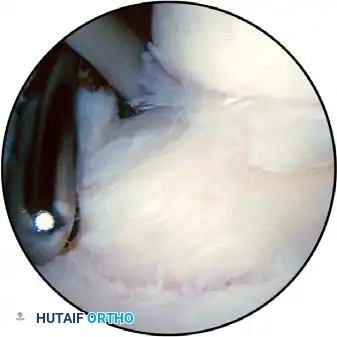
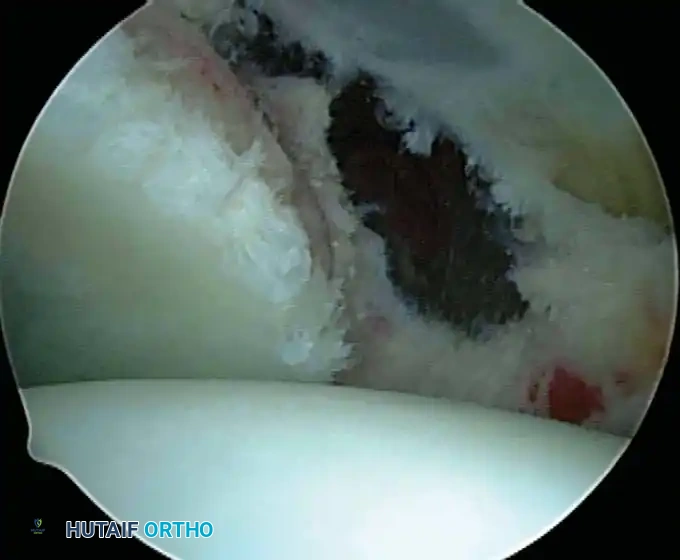
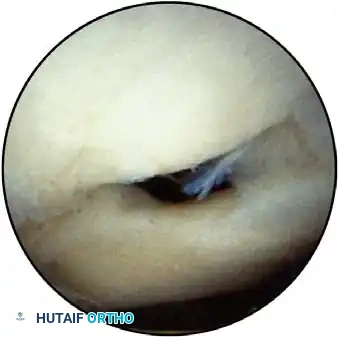
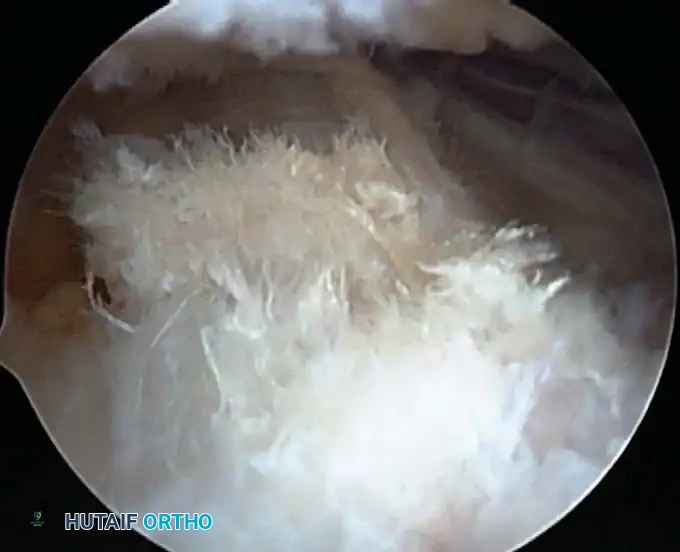
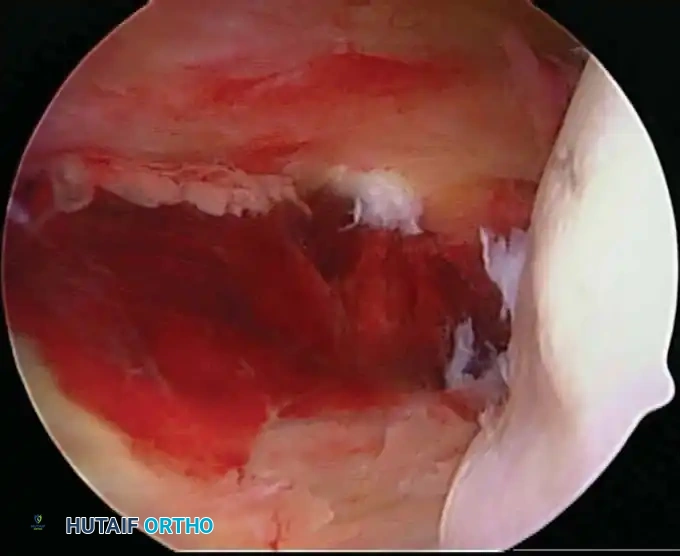
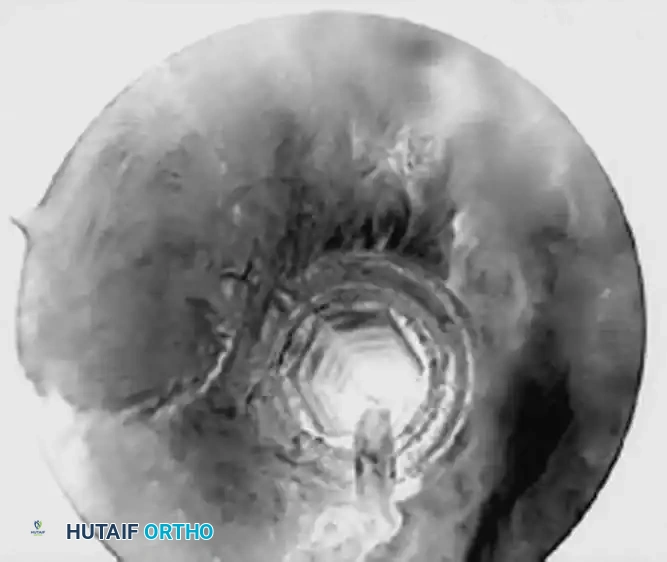
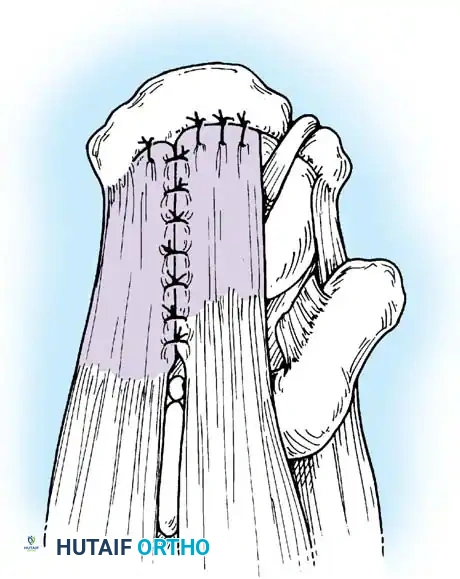
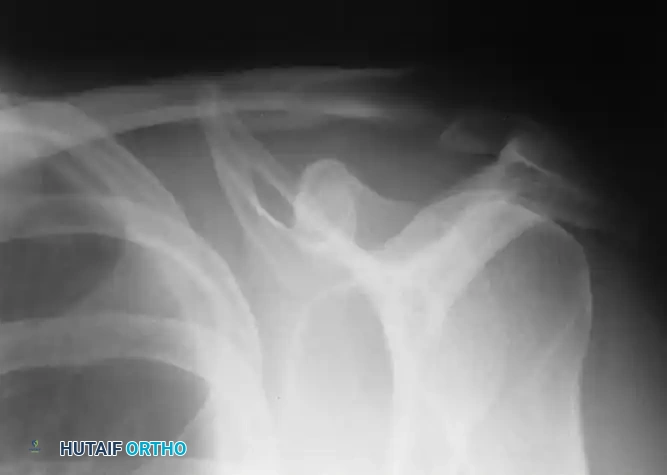
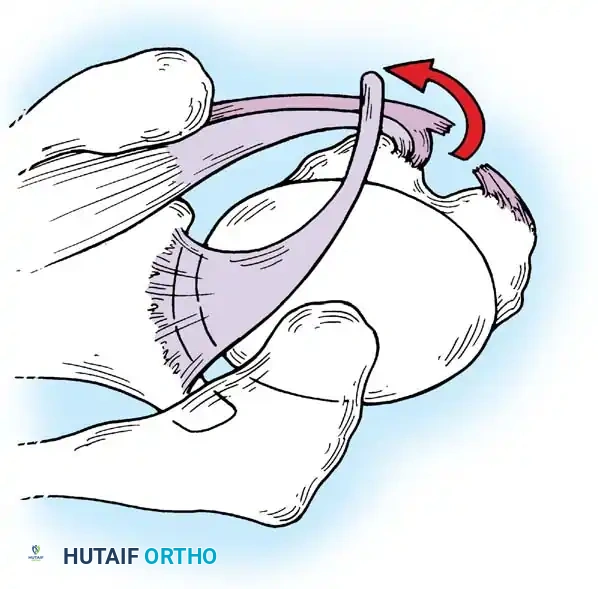
Associated Surgical & Radiographic Imaging


📚 Medical References
You Might Also Like