Arthroscopic Acromioplasty: A Comprehensive Surgical Guide
Key Takeaway
Arthroscopic acromioplasty is a cornerstone procedure for treating subacromial impingement syndrome. This technique involves the precise resection of the anteroinferior acromion and coracoacromial ligament release to decompress the subacromial space. Proper patient positioning, meticulous portal placement, and systematic bone resection are critical for optimal outcomes. This guide details the step-by-step surgical approach, biomechanical considerations, and postoperative rehabilitation protocols essential for orthopedic surgeons aiming to master this procedure.
Introduction to Arthroscopic Acromioplasty
Arthroscopic acromioplasty remains a fundamental procedure in the armamentarium of the orthopedic shoulder surgeon. Originally described as an open procedure by Charles Neer in 1972, the technique was revolutionized by the advent of arthroscopy, allowing for meticulous decompression of the subacromial space with minimal morbidity to the deltoid origin. The primary objective of this procedure is to alleviate mechanical impingement of the rotator cuff tendons—specifically the supraspinatus—against the anteroinferior aspect of the acromion, the coracoacromial (CA) ligament, and occasionally the acromioclavicular (AC) joint.
This comprehensive guide details the rigorous, evidence-based approach to arthroscopic acromioplasty, encompassing preoperative evaluation, precise patient positioning, systematic surgical execution, and postoperative rehabilitation.
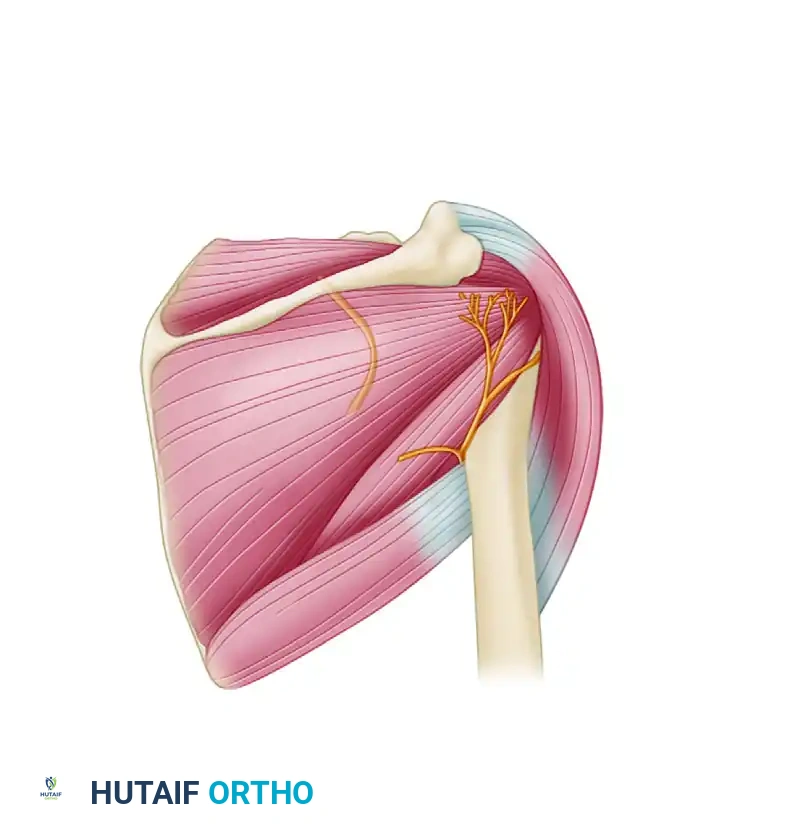
Pathoanatomy and Biomechanics
Subacromial impingement syndrome (SAIS) represents a continuum of pathology ranging from reversible edema and hemorrhage (Neer Stage I) to fibrosis and tendinitis (Neer Stage II), and ultimately to tendon rupture and osteophyte formation (Neer Stage III).
The morphology of the acromion plays a critical role in the pathogenesis of impingement. Bigliani and Morrison classified acromial morphology into three distinct types based on sagittal outlet radiographs:
* Type I (Flat): Minimal risk of impingement.
* Type II (Curved): Parallel to the curve of the humeral head, with a higher incidence of impingement.
* Type III (Hooked): Features an anteroinferior hook that significantly reduces the subacromial space, highly correlated with full-thickness rotator cuff tears.
Clinical Pearl: The surgical goal of an arthroscopic acromioplasty is not merely to resect bone, but to convert a Type II or Type III acromion into a Type I (flat) morphology, thereby restoring the acromiohumeral interval and allowing frictionless gliding of the rotator cuff during forward elevation and abduction.
Preoperative Evaluation and Indications
Indications
Arthroscopic acromioplasty is indicated for patients with symptomatic subacromial impingement who have failed a comprehensive conservative management program (typically 3 to 6 months of physical therapy, NSAIDs, and subacromial corticosteroid injections). It is frequently performed concomitantly with rotator cuff repair, biceps tenodesis, or distal clavicle excision.
Preoperative Imaging
A standard radiographic series must include:
* True Anteroposterior (Grashey) View: Evaluates the glenohumeral joint space and superior migration of the humeral head.
* Scapular Y View: Assesses acromial morphology and coracoacromial arch narrowing.
* Supraspinatus Outlet View: Optimal for identifying the Bigliani acromion type and anteroinferior spurring.
* Axillary View: Evaluates the AC joint and os acromiale.
Magnetic Resonance Imaging (MRI) is the gold standard for evaluating the integrity of the rotator cuff, the presence of subacromial bursitis, and the exact dimensions of acromial enthesophytes.
Anesthesia and Patient Positioning
Optimal patient positioning is paramount for visualization and instrument maneuverability. While the beach-chair position is popular, the lateral decubitus position offers superior joint distraction and is highly effective for subacromial work.
The Lateral Decubitus Setup
- Anesthesia: After general anesthesia is administered (often supplemented with an interscalene regional block for postoperative analgesia), evaluate the shoulder for range of motion. Gently regain any lost motion through careful manipulation before positioning.
- Positioning: Place the patient in a lateral decubitus position. Utilize a beanbag and a kidney rest under the torso to secure the patient. The torso should be angled approximately 20 degrees posteriorly to bring the glenoid parallel to the floor.
- Suspension: The operative arm is maintained in 20 to 40 degrees of abduction and 15 to 20 degrees of forward flexion using a balanced skeletal suspension device (e.g., STAR sleeve). Apply 10 to 15 pounds of longitudinal traction.
- Landmark Identification: Carefully outline the bony landmarks with a sterile marker. Delineate the anterior, lateral, and posterior borders of the acromion, the distal clavicle, the acromioclavicular (AC) joint, and the coracoid process.
Surgical Warning: Excessive traction (greater than 15-20 lbs) or prolonged operative times in the lateral decubitus position can lead to transient neuropraxias of the brachial plexus. Always ensure the neck is in a neutral position to avoid stretch injuries.
Diagnostic Glenohumeral Arthroscopy
Before addressing the subacromial space, a thorough diagnostic arthroscopy of the glenohumeral joint is mandatory.
- Establish a standard posterior viewing portal (approximately 2 cm inferior and 1 cm medial to the posterolateral corner of the acromion).
- Inspect the glenohumeral joint systematically for evidence of labral pathology, articular cartilage damage, and undersurface (articular-sided) rotator cuff tearing.
- Establish an anterior working portal via an outside-in technique using a spinal needle, entering through the rotator interval.
Evaluating Partial Rotator Cuff Tears
If a partial-thickness articular surface tear of the rotator cuff is identified, débride the area of the tear with a 4.0-mm or 5.5-mm full-radius resector. The goal is to leave a smooth surface and to incite petechial bleeding in the footprint to promote a healing response.
Gauge the depth of the tear by comparing it with the known size of the shaver blade (e.g., a 5.5-mm shaver acts as an intraoperative ruler). Normally, the supraspinatus insertion extends from the biceps tendon anteriorly to the bare area posteriorly, and from the articular cartilage margin medially to approximately 17 mm laterally onto the greater tuberosity.
Arthroscopic Acromioplasty: Step-by-Step Surgical Technique
1. Entering the Subacromial Space
- Position the arm in 20 to 30 degrees of abduction.
- Using a large 6.0-mm or 6.2-mm cannula, enter the subacromial space from the established posterior portal.
- Advance a blunt trocar to touch the posterior aspect of the scapular spine, then glide it anteriorly along the undersurface of the acromion to just beneath the anterolateral aspect.
- Break up bursal adhesions in the subacromial space with a gentle medial-to-lateral sweep of the cannula.
- Palpate the undersurface of the acromion with the trocar to ensure correct placement and to tactilely appreciate the area of impingement.
2. Establishing the Lateral Portal and Bursectomy
- Bring the arthroscope (with inflow connected) through the posterior portal. Orient the camera in an upright position and direct the lens laterally.
- Introduce a spinal needle through the potential midlateral portal site—approximately 3 cm distal to the lateral edge of the acromion, in line with the posterior aspect of the AC joint.
- Evaluate the needle's trajectory to ensure that instrument movement in the subacromial space will not be blocked by passing too close to the lateral acromial edge.
- Once the trajectory is confirmed, incise the skin and establish the midlateral portal.
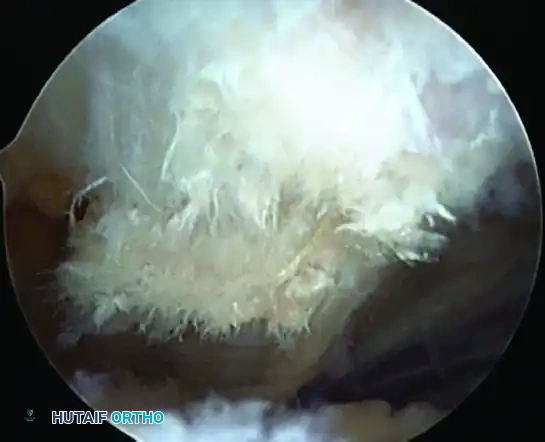
- Perform a comprehensive bursectomy using a 5.5-mm full-radius resector. Clear the bursa to view the superior surface of the rotator cuff out to its attachment on the greater tuberosity, and superiorly to view the undersurface of the acromion and AC joint.
3. Coracoacromial Ligament Release and Soft Tissue Clearance
- Use a radiofrequency (RF) thermal probe to morcellate the periosteum and soft tissue on the undersurface of the acromion.
- Release the coracoacromial (CA) ligament from its acromial attachment.
- Hemostasis Protocol: Maintain strict hemostasis at all times. Utilize electrocautery efficiently. Optimize the irrigation fluid by adding 1 mL of epinephrine (1:1000) per 3-L bag of normal saline. Maintain a systolic blood pressure to pump pressure differential of 30 mm Hg or less to minimize bleeding and optimize visualization.
- Place the 5.5-mm full-radius resector through the lateral portal to clear the remaining soft tissues from the acromial undersurface. Carefully identify the anterior, medial, and lateral edges of the acromion for a distance of approximately 1.5 cm posteriorly (this is approximately the position of the shaver when it is perpendicular to the acromion).
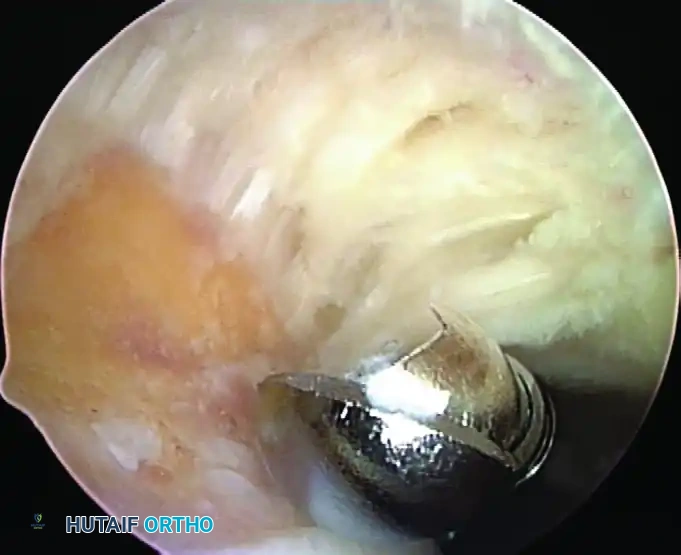
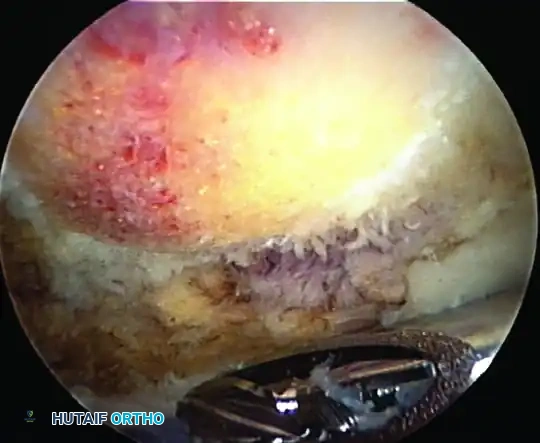
4. Bony Resection (The Acromioplasty)
The goal of the bony resection is to create a flat, smooth undersurface, eliminating the anterior hook without compromising the structural integrity of the acromion or the deltoid origin.
- Introduce a 5.5-mm acromionizer (barrel) burr through the lateral portal.
- Begin by resecting the lateral edge of the acromion just medial to the portal. Start at a depth of about 5 mm anteriorly and taper the resection posteriorly.
- After establishing the lateral margin, begin the anterior cut. Work from anteromedial (near the AC joint) to anterolateral.
- Deepen the cut through the anterior edge of the acromion to about 5 mm, aiming to resect the anterior aspect of the acromion back flush with the anterior border of the clavicle.
- Deltoid Protection: Leave the superior periosteal sleeve attached. Use it as a visual gauge for the amount of anterior acromion resected and to protect the overlying deltoid fascia from the burr.
- Using smooth, sweeping strokes from anterior to posterior, taper the acromioplasty. Resect approximately 5 mm of bone anteriorly, tapering to a smooth transition posteriorly, removing only minimal bone at the posterior margin.
Surgical Pitfall: Avoid aggressive posterior resection. The impingement lesion is almost exclusively anteroinferior. Over-resection posteriorly weakens the acromion and risks iatrogenic fracture, while aggressive superior resection risks catastrophic deltoid detachment.
5. Acromioclavicular (AC) Joint Evaluation and Coplaning
- Working medially, locate the AC joint using the previously placed spinal needle and by identifying the fatty tissue pad overlying the inferior capsule of the AC joint.
- Note: Because of the high vascularity and potential for bleeding from the acromial branch of the thoracoacromial artery, this area is resected at the end of the procedure.
- Use the thermal device to strip the soft tissue from the undersurface of the distal clavicle.
- Compare the resected undersurface of the acromion with the undersurface of the clavicle.
- If preoperative radiographs and intraoperative findings indicate a symptomatic bony spur at the AC joint, use the burr to resect the undersurface of the clavicle for approximately 8 mm medial to the joint. This "coplaning" ensures the clavicle is flush with the newly resected acromion.
- Do not resect the clavicle excessively unless a formal arthroscopic distal clavicle excision (Mumford procedure) is preoperatively planned and indicated.
6. Final Evaluation
- View the completed procedure by placing the arthroscope in the anterolateral portal. Look back anteriorly and laterally to evaluate the depth and smoothness of the cut.
- Ensure the transition from the anterior acromion to the posterior acromion is seamless, and that the undersurface of the AC joint is smooth and free of overhanging osteophytes.
Management of Concomitant Rotator Cuff Tears
If a partial-thickness tear was identified during the initial glenohumeral diagnostic phase, its management depends on the depth of the tear and the patient's demographic profile.
- Pass the arthroscope back into the anterior cannula (left in the glenohumeral joint).
- Pass a No. 2 PDS suture through an 18-gauge spinal needle inserted 3 cm lateral to the acromion, directing it toward the base of the cuff tear. The tear can be probed and visualized dynamically through the three established portals.
- Indications for Repair: Tears exceeding 50% of the tendon thickness should be repaired in active, healthy individuals. In high-demand overhead athletes, even tears approaching 70% thickness may require repair if conservative measures fail, though the threshold for repair versus debridement must be individualized.
- Repair Technique: A side-to-side or footprint repair can be performed arthroscopically. Use a spinal needle to pass the PDS suture on one side of the tear. Using a suture retriever passed through the tendon anterior to the spinal needle, retrieve the suture end out of the lateral 8-mm cannula.
- Tie an arthroscopic slipknot (e.g., Weston or SMC knot) in the subacromial space by passing both ends of the suture out the lateral cannula while viewing through the posterior portal.
- Confirm a secure, tension-free repair by switching the arthroscope back to the anterior glenohumeral portal to view the articular side of the footprint.
Postoperative Protocol and Rehabilitation
The rehabilitation protocol following an isolated arthroscopic acromioplasty is generally accelerated, as there is no structural tendon repair requiring protection (unless a concomitant rotator cuff repair was performed).
Phase I: Immediate Postoperative (Weeks 0-2)
- Immobilization: Sling for comfort only, typically discontinued within 3 to 7 days.
- Range of Motion (ROM): Immediate passive, active-assisted, and active ROM as tolerated. Pendulum exercises, pulley exercises, and supine forward elevation are encouraged to prevent adhesive capsulitis.
- Cryotherapy: Ice application for 20 minutes every 2-3 hours to manage edema and pain.
Phase II: Intermediate Phase (Weeks 2-6)
- Strengthening: Initiate isometric strengthening of the rotator cuff and periscapular stabilizers.
- ROM: Achieve full, painless active ROM by week 4.
- Scapular Dyskinesis: Focus on scapular retraction and depression exercises to correct compensatory movement patterns.
Phase III: Advanced Strengthening (Weeks 6-12)
- Resistance Training: Progress to isotonic strengthening using resistance bands and light weights.
- Functional Integration: Begin sport-specific or work-specific functional drills.
- Return to Play/Work: Most patients can return to full, unrestricted activities, including heavy lifting and overhead sports, between 8 to 12 weeks postoperatively, provided they have symmetric strength and no pain.
Conclusion
Arthroscopic acromioplasty is a highly successful intervention for refractory subacromial impingement syndrome. Mastery of this technique requires a profound understanding of acromial morphology, meticulous portal placement, and precise, controlled bony resection. By adhering to the systematic approach outlined in this guide—prioritizing hemostasis, protecting the deltoid origin, and ensuring a flat, decompressed coracoacromial arch—the orthopedic surgeon can reliably achieve excellent clinical outcomes and restore pain-free shoulder kinematics.
You Might Also Like