Masterclass in Peroneal Tendon Surgery: Synovectomy, Repair, and Stabilization

Key Takeaway
Peroneal tendon pathology, including tenosynovitis, longitudinal tears, and subluxation, frequently requires surgical intervention when conservative measures fail. This comprehensive guide details the operative techniques for peroneal tendon synovectomy, primary repair of the peroneus brevis and longus, and stabilization via fibular groove deepening. Mastery of the superior peroneal retinaculum anatomy and sural nerve preservation is critical for restoring lateral hindfoot biomechanics and ensuring optimal patient outcomes.
INTRODUCTION TO PERONEAL TENDON PATHOLOGY
Peroneal tendon disorders encompass a spectrum of pathologies ranging from acute tenosynovitis and tendinosis to longitudinal interstitial tears and chronic frank subluxation. Because the peroneus brevis and peroneus longus tendons share a common synovial sheath as they pass posterior to the lateral malleolus, inflammatory and mechanical conditions frequently affect both structures simultaneously.
The retromalleolar groove of the fibula serves as a critical anatomical pulley. The peroneus brevis lies anterior and medial, directly against the fibular sulcus, making it highly susceptible to mechanical attrition, particularly when the superior peroneal retinaculum (SPR) is incompetent or the fibular groove is morphologically shallow or convex.
Surgical intervention is indicated when exhaustive conservative management—including immobilization, nonsteroidal anti-inflammatory drugs (NSAIDs), and physical therapy—fails to relieve symptoms, or in the presence of acute high-grade tears and chronic instability. This guide details the comprehensive surgical management of peroneal tendon pathology, including synovectomy, primary repair, tenodesis, and fibular groove deepening.
SURGICAL ANATOMY AND BIOMECHANICS
A profound understanding of the lateral ankle anatomy is mandatory for safe surgical exposure and biomechanical restoration.
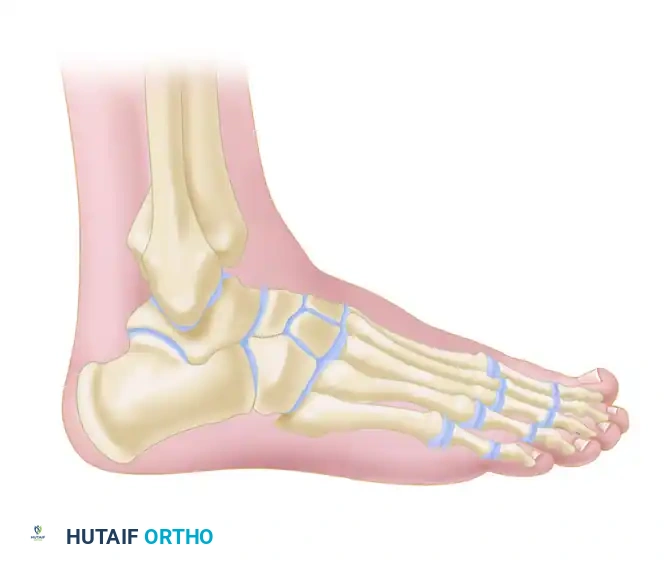
The Peroneal Tendons
The peroneus brevis (PB) originates from the distal two-thirds of the lateral fibula and inserts onto the base of the fifth metatarsal. It is the primary evertor of the foot.
The peroneus longus (PL) originates more proximally, runs posterior and lateral to the brevis in the retromalleolar groove, and traverses the plantar aspect of the foot to insert on the base of the first metatarsal and medial cuneiform. It acts to plantarflex the first ray and evert the foot.
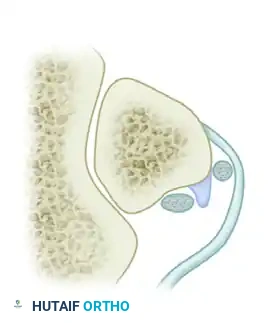
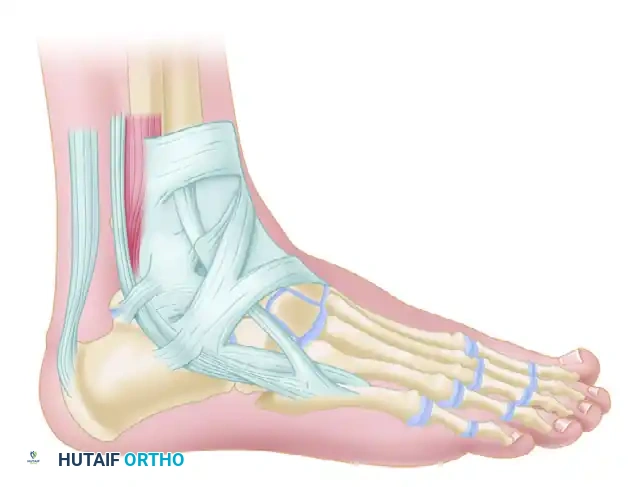
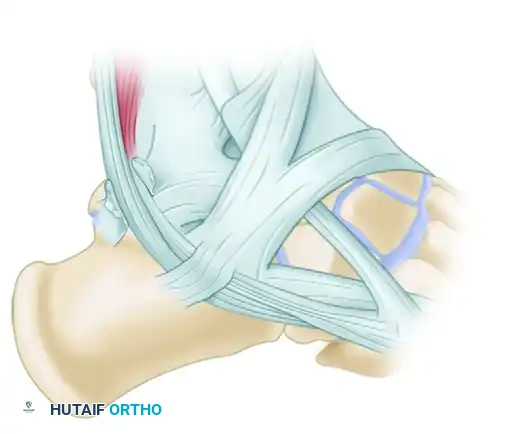
The Superior Peroneal Retinaculum (SPR)
The SPR is the primary restraint against peroneal tendon subluxation. It originates from the posterolateral ridge of the distal fibula and inserts onto the lateral wall of the calcaneus.
Clinical Pearl: Anomalous anatomy is a frequent contributor to peroneal pathology. Always inspect the retromalleolar space for a peroneus quartus tendon or a low-lying muscle belly of the peroneus brevis. These structures crowd the fibro-osseous tunnel, increasing intrasheath pressure, which precipitates tenosynovitis, longitudinal fissuring of the peroneus brevis, and eventual subluxation.
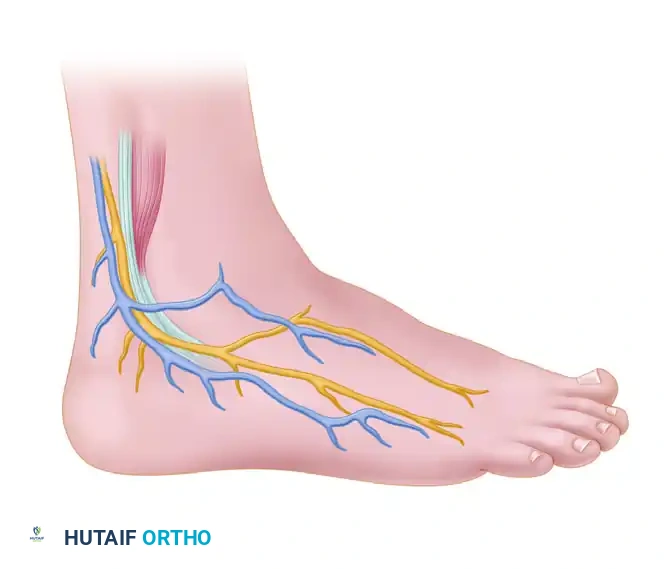
The Sural Nerve
The sural nerve courses distally along the posterolateral aspect of the calf, running in close proximity to the small saphenous vein. As it approaches the lateral malleolus, it divides into lateral and medial branches, providing sensation to the lateral hindfoot and midfoot.
Surgical Warning: The sural nerve is highly vulnerable during the standard posterolateral approach to the peroneal tendons. Meticulous blunt dissection in the subcutaneous tissues is imperative to prevent debilitating postoperative neuromas.
CLINICAL EVALUATION AND IMAGING
Patients typically present with posterolateral ankle pain, swelling, and a sensation of "giving way." In cases of subluxation, patients may report a palpable or audible "snap" during resisted eversion and dorsiflexion.
Imaging Modalities
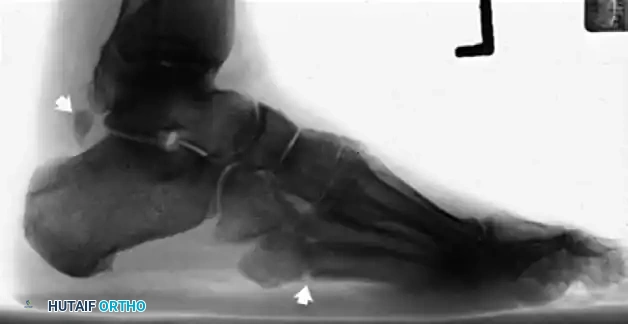
- Plain Radiographs: Weight-bearing anteroposterior, lateral, and mortise views of the ankle and foot are obtained to rule out fractures (e.g., "fleck sign" indicating SPR avulsion), os peroneum pathology, or varus hindfoot alignment.
- Magnetic Resonance Imaging (MRI): The gold standard for evaluating tendon integrity, fluid within the tendon sheath (tenosynovitis), and the morphology of the retromalleolar groove.
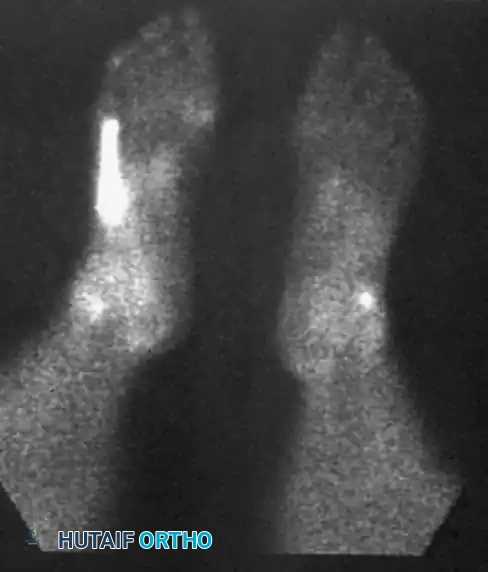
MRI appearance of peroneal tendon rupture with extensive tenosynovitis.
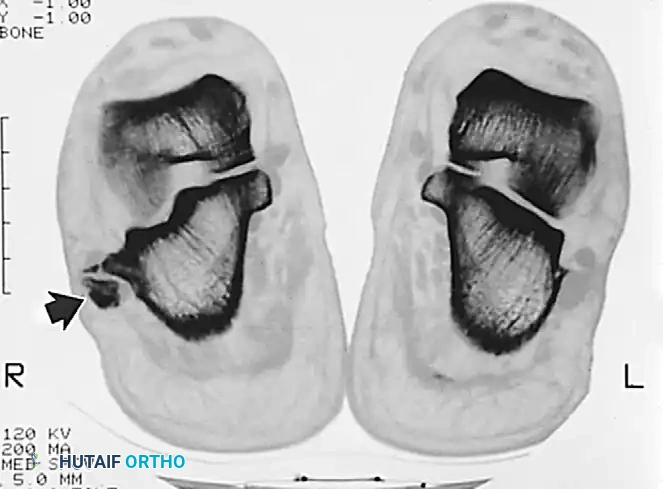
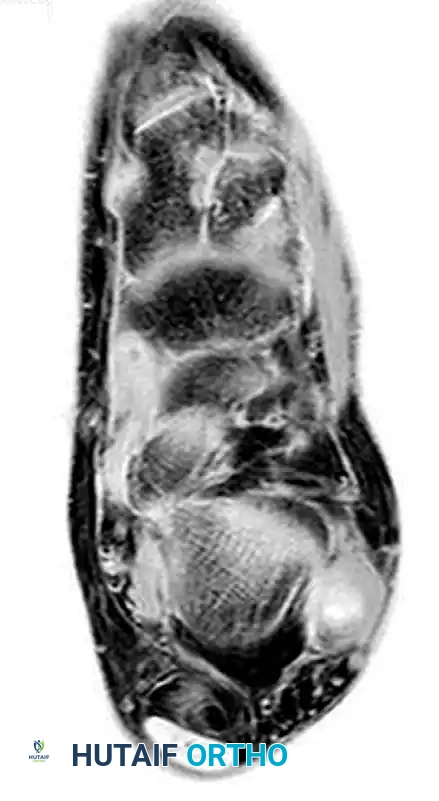
Axial imaging demonstrating the relationship of the peroneal tendons within the retromalleolar groove.
Advanced axial imaging highlighting the peroneus longus and brevis pathology.
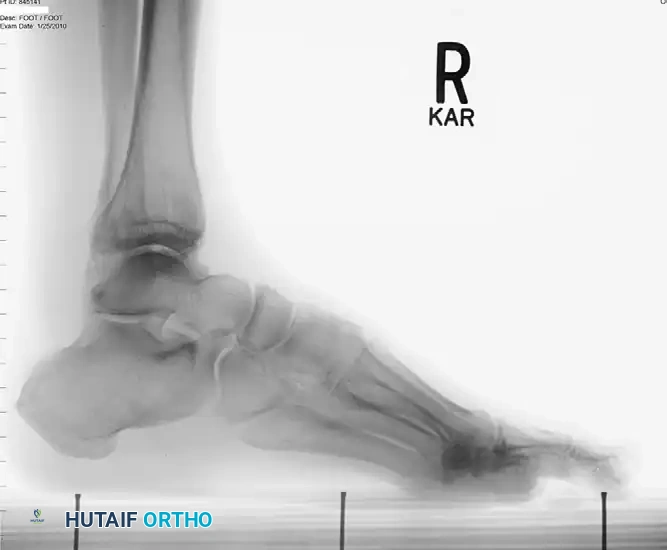
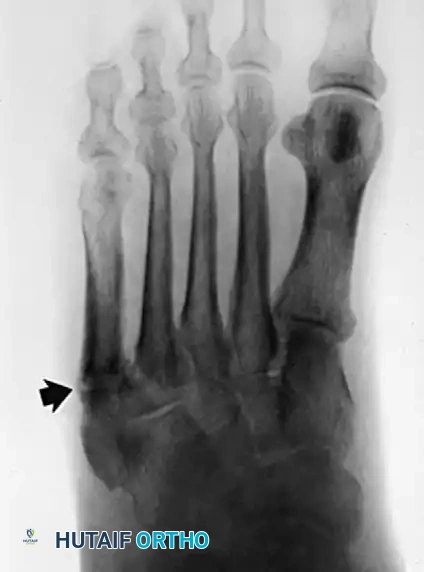
Lateral radiographic view of the ankle.
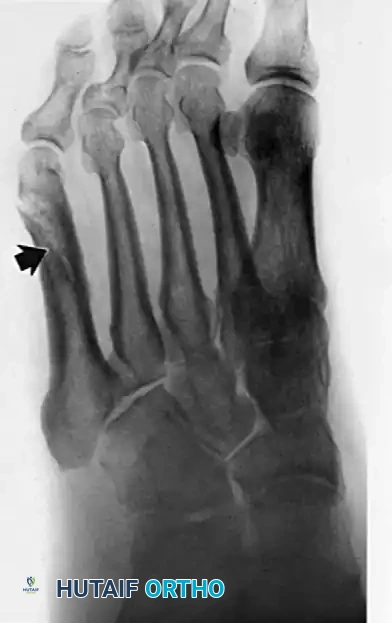
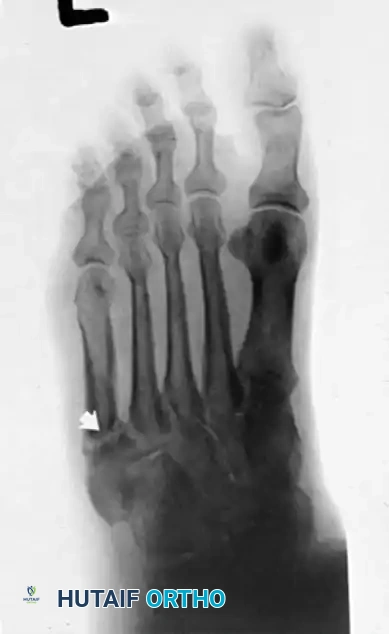
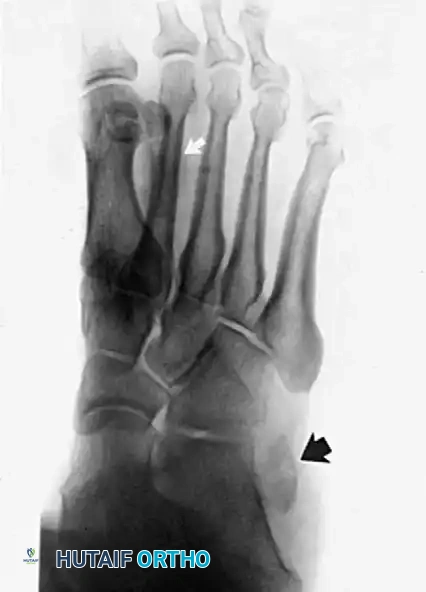
Radiographic evaluation of the foot and lateral column.
OPERATIVE TECHNIQUE: SYNOVECTOMY AND TENDON REPAIR
When conservative treatment fails, tenosynovectomy and primary repair of longitudinal tears are indicated.
1. Patient Positioning and Anesthesia
- Anesthesia: General or regional anesthesia with a popliteal block for postoperative pain control.
- Positioning: The patient is placed in the lateral decubitus position, or supine with a large bump under the ipsilateral hip to internally rotate the leg, providing clear access to the posterolateral ankle.
- Tourniquet: A thigh or proximal calf tourniquet is applied and inflated after exsanguination.
2. Surgical Incision and Exposure
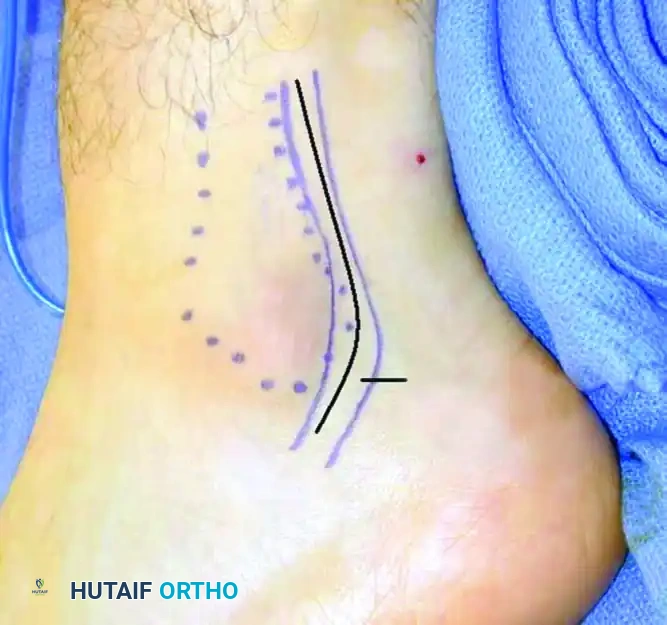
- Make a curvilinear incision following the course of the peroneal tendons, starting 3 to 4 cm proximal to the tip of the lateral malleolus, extending distally along the posterior border of the fibula, and curving gently toward the base of the fifth metatarsal.
Preoperative marking of the curvilinear incision over the peroneal tendons.
Incision for tenosynovectomy and repair of peroneal tendon tears.
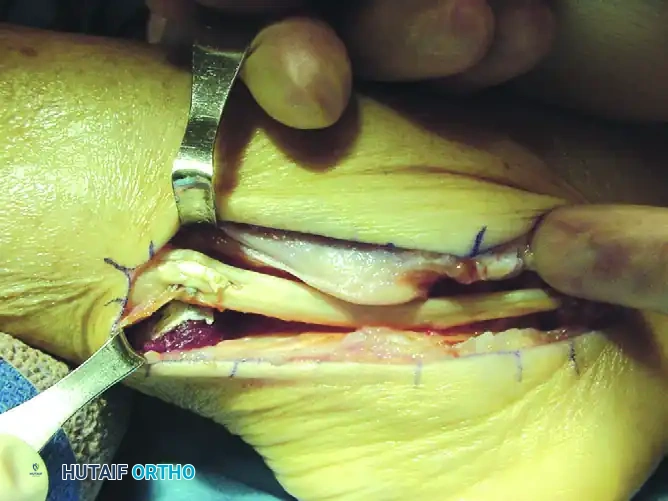
- Deepen the incision through the subcutaneous tissue. Identify and carefully retract the sural nerve and the short saphenous vein.
- Expose the superior peroneal retinaculum (SPR).
Surgical exposure of the peroneal tendon sheath prior to opening the retinaculum.
3. Retinaculum Incision and Synovectomy
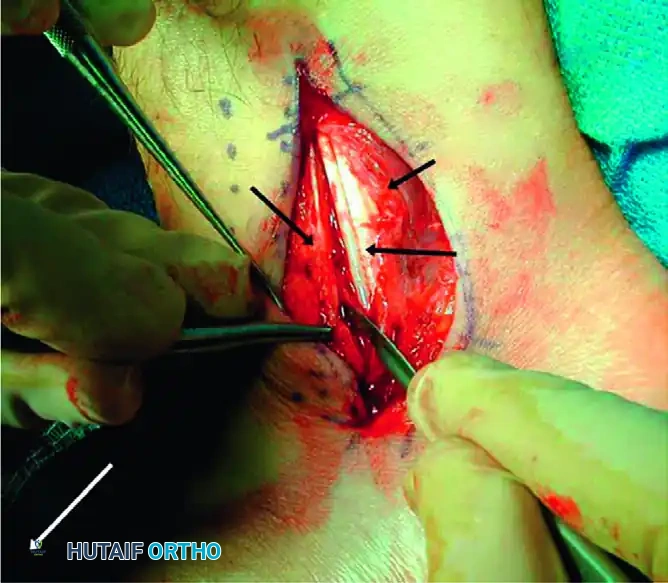
- Incise the SPR longitudinally, leaving a 1- to 2-mm cuff of tissue attached to the posterior border of the fibula to facilitate later repair.
- Open the common peroneal tendon sheath. In cases of chronic tenosynovitis, hypertrophic, inflamed synovium will be immediately evident.
- Perform a meticulous tenosynovectomy, excising all inflammatory tissue while preserving the mesotenon (the vascular supply to the tendons) where possible.
Diagrammatic representation of the Superior Peroneal Retinaculum (SPR) and Superior Extensor Retinaculum (SER) anatomy during exposure.
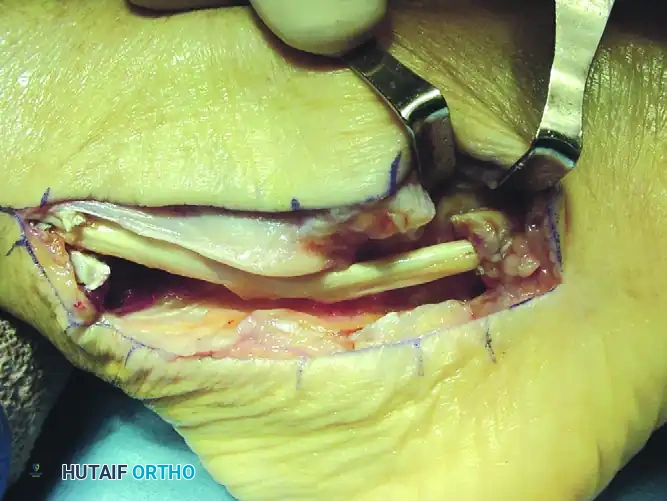
4. Tendon Inspection and Repair
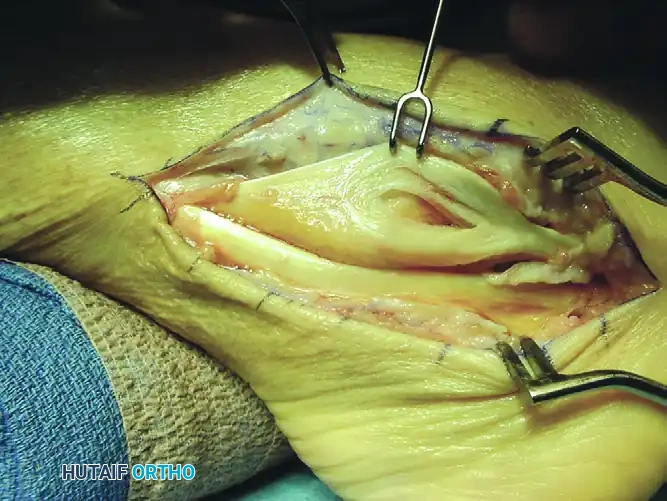
- Deliver both the peroneus brevis and peroneus longus tendons from the wound using blunt retractors or Penrose drains.
- Inspect the tendons for longitudinal fissuring, which most commonly affects the peroneus brevis as it is compressed against the fibula by the peroneus longus.
Intraoperative view demonstrating a longitudinal split tear of the peroneus brevis tendon.
- For tears involving <50% of the tendon cross-sectional area: Excise the degenerative margins of the split. Tubularize the remaining tendon using a running 2-0 or 3-0 nonabsorbable braided suture (e.g., Ethibond or FiberWire) with buried knots to minimize friction.
- For tears involving >50% of the tendon: The remaining tendon is often non-viable. Excise the diseased segment of the peroneus brevis. Perform a side-to-side tenodesis of the proximal and distal stumps of the peroneus brevis to the intact peroneus longus tendon using interrupted 2-0 nonabsorbable sutures.
Surgical Pearl: When performing a tenodesis, ensure the foot is held in neutral dorsiflexion and slight eversion to establish the correct resting tension of the musculotendinous units.
5. Closure
- Distally, the tendon sheaths for both the brevis and longus may be left open to decompress the space.
- Repair the superior peroneal retinaculum securely to the fibular rim. While some authors advocate for 2-0 absorbable sutures for the sheath, robust repair of the SPR itself often requires 2-0 nonabsorbable sutures to prevent postoperative subluxation.
- Close the subcutaneous tissue and skin in a standard layered fashion.
OPERATIVE TECHNIQUE: SUBLUXATION OF THE PERONEAL TENDONS
Peroneal tendon instability often coexists with tendinitis and tears. Chronic laxity of the SPR creates a false pouch lateral to the fibula, allowing the tendons to subluxate anteriorly. Furthermore, morphological studies indicate that a shallow or convex posterior fibular sulcus predisposes patients to this instability.
When conservative management (e.g., non-weight-bearing casting in slight inversion) fails, surgical reconstruction is required. The most reliable method involves deepening the fibular groove combined with SPR imbrication.
1. Exposure and Preparation
- Approach the peroneal tendons through the standard curvilinear incision described above.
- Inspect for and excise any peroneus quartus tendon or low-lying peroneus brevis muscle belly that may be overcrowding the retromalleolar space.
- Perform tenosynovectomy and repair any tendon tears as indicated.
2. Fibular Groove Deepening (Osteocartilaginous Flap Technique)
- Retract the peroneal tendons anteriorly to expose the posterior aspect of the fibula.
- Using a sharp scalpel or a small, thin osteotome, create a rectangular osteocartilaginous flap. Elevate the cartilaginous surface of the sulcus from its lateral margin, hinging it carefully on its medial periosteal attachment.
Incision into the retinaculum, leaving a 1-mm rim of tissue attached to the fibula for repair.
- Elevate the flap out of its bed for a total length of 1.5 to 2.0 cm.
- Using a high-speed burr, curette, or small gouge, excavate the underlying cancellous bone of the fibula to a depth of 4 to 5 mm.
Surgical diagram illustrating the elevation of the osteocartilaginous flap.
Surgical diagram showing the excavation of the underlying cancellous bone.
- Once the trough is created, gently tamp the osteocartilaginous flap back into the deepened groove. The flap should sit flush, creating a deep, concave sulcus.
- Apply bone wax generously to any exposed cancellous bone edges to prevent postoperative adhesions between the bone and the tendons.
Surgical diagram demonstrating the flap tamped back into place, creating a deepened sulcus.
3. Tendon Relocation and Retinaculum Repair
- Recess the peroneus longus and brevis tendons back into the newly deepened groove.
- Roughen the posterolateral ridge of the fibula with a small rasp to promote biological healing of the retinaculum.
- Imbricate and suture the posterior flap of the SPR tightly to the fibular ridge using 2-0 nonabsorbable sutures through drill holes or suture anchors.
Final repair of the Superior Peroneal Retinaculum over the relocated tendons.
Alternative Techniques for Severe Instability:
If the SPR tissue is insufficient or severely attenuated, alternative reconstructive options must be considered:
* Tissue Transfer: Detachment of the calcaneofibular ligament (CFL) from its fibular or calcaneal attachment, rerouting the peroneal tendons beneath it, and reattaching the ligament.
* Bone Block Procedure: An osteotomy of the lateral fibula, rotating the bone block posteriorly to act as a physical buttress, secured with small fragment compression screws.
POSTOPERATIVE CARE AND REHABILITATION
The postoperative protocol must balance the need for tissue healing with the prevention of peritendinous adhesions.
Phase 1: Immediate Postoperative (Weeks 0-2)
- In the operating room, the patient is placed in a well-padded, bulky posterior plaster splint with the ankle in neutral dorsiflexion and slight eversion to remove tension from the repair.
- Strict non-weight-bearing (NWB) with crutches or a knee scooter.
- Elevation is critical to minimize edema and protect the incision.
Phase 2: Early Healing (Weeks 2-6)
- At 2 weeks, the splint is removed, and sutures are extracted.
- If the wound is fully healed, the patient is transitioned to a controlled ankle motion (CAM) boot.
- Motion: Early active range of motion (AROM) without resistance is initiated. This is a critical step to prevent adhesions of the tendons within the newly repaired sheath.
- Weight-Bearing: Partial weight-bearing is allowed, progressing slowly based on the severity of the tendinopathy and the extent of the surgical repair (e.g., simple synovectomy progresses faster than a massive tenodesis or groove deepening).
Phase 3: Strengthening and Return to Activity (Weeks 6-12+)
- At 6 weeks, the CAM boot is gradually weaned, and the patient transitions to a supportive athletic shoe, often with an ankle brace (e.g., ASO brace) for lateral support.
- Physical therapy intensifies, focusing on isometric, concentric, and eventually eccentric strengthening of the peroneal musculature.
- Proprioceptive training (e.g., balance board) is instituted to restore dynamic ankle stability.
- Return to Play: A planned return to full, unrestricted activities and sports is typically allowed at 3 to 4 months, contingent upon the complete return of pain-free range of motion and symmetric calf/evertor strength.
COMPLICATIONS AND PITFALLS
- Sural Nerve Injury: The most common complication. Can result in painful neuromas or lateral foot numbness. Prevention via meticulous superficial dissection is paramount.
- Recurrent Subluxation: Often due to inadequate deepening of the fibular groove or failure to address a peroneus quartus muscle. Ensure the SPR is repaired under appropriate tension.
- Tendon Adhesions and Stiffness: Prolonged immobilization leads to scarring within the fibro-osseous tunnel. Early, protected active motion is the best preventative measure.
- Over-tightening of the SPR: Can lead to stenosis of the peroneal tunnel, resulting in secondary tenosynovitis and restricted inversion. Ensure the tendons glide freely after the retinaculum is repaired.
You Might Also Like