Ankle Arthroscopy: Advanced Principles, Approaches, and Surgical Techniques
Key Takeaway
Ankle arthroscopy is a highly effective, minimally invasive surgical intervention indicated for the management of soft tissue impingement, bony impingement, and osteochondral lesions of the talus. This comprehensive guide details the critical steps of the procedure, including precise portal placement, joint distraction techniques, and systematic intraarticular débridement. Mastery of these techniques ensures optimal visualization while minimizing iatrogenic neurovascular injury, ultimately facilitating superior functional recovery in patients with chronic ankle pathology.
INTRODUCTION TO ANKLE ARTHROSCOPY
Ankle arthroscopy has evolved from a purely diagnostic modality into a highly sophisticated, therapeutic cornerstone of modern operative orthopedics. Driven by advancements in fiber-optic technology, specialized instrumentation, and a deeper understanding of ankle biomechanics, arthroscopic intervention now offers a minimally invasive solution to a broad spectrum of intraarticular pathologies. By minimizing soft tissue dissection, preserving the capsular envelope, and accelerating postoperative rehabilitation, ankle arthroscopy provides significant advantages over traditional open arthrotomy.
This comprehensive masterclass details the indications, preoperative evaluation, precise portal anatomy, and step-by-step surgical techniques required to execute safe and effective ankle arthroscopy.
INDICATIONS AND PATIENT SELECTION
The success of ankle arthroscopy is intrinsically linked to meticulous patient selection and precise preoperative diagnosis. Patients typically present with chronic, recalcitrant ankle pain—often following a traumatic event such as an inversion sprain—that has failed to respond to an exhaustive course of conservative management (e.g., physical therapy, bracing, nonsteroidal anti-inflammatory drugs).
Primary Indications
- Soft Tissue Impingement: Including anterolateral impingement syndrome (often involving the Bassett’s ligament or hypertrophic synovial tissue) and syndesmotic impingement.
- Bony Impingement: Anterior tibial osteophytes ("kissing lesions" of the tibia and talus) commonly seen in athletes (e.g., "footballer's ankle").
- Osteochondral Lesions of the Talus (OCLs): Arthroscopy allows for direct visualization, staging, débridement, and marrow stimulation techniques (e.g., microfracture) for symptomatic OCLs.
Secondary and Emerging Indications
- Ankle Instability: Arthroscopic-assisted lateral ligament stabilization (e.g., arthroscopic Broström-Gould procedure).
- Septic Arthritis: For urgent joint lavage, synovectomy, and targeted antibiotic delivery.
- Arthrofibrosis: Lysis of adhesions in the stiff, post-traumatic, or post-surgical ankle.
- Loose Bodies: Extraction of chondral or osteochondral fragments.
- Unexplained Chronic Pain: Used judiciously when advanced imaging and diagnostic injections suggest an intraarticular source.
Clinical Pearl: A definite diagnosis must be established prior to surgical intervention. Purely diagnostic ankle arthroscopy yields a notoriously low success rate. If magnetic resonance imaging (MRI) is equivocal, a diagnostic intraarticular injection of a local anesthetic (e.g., lidocaine or bupivacaine) should be administered. Significant, albeit temporary, pain relief strongly suggests an intraarticular pathological process amenable to arthroscopic débridement.
SURGICAL ANATOMY AND PORTAL PLACEMENT
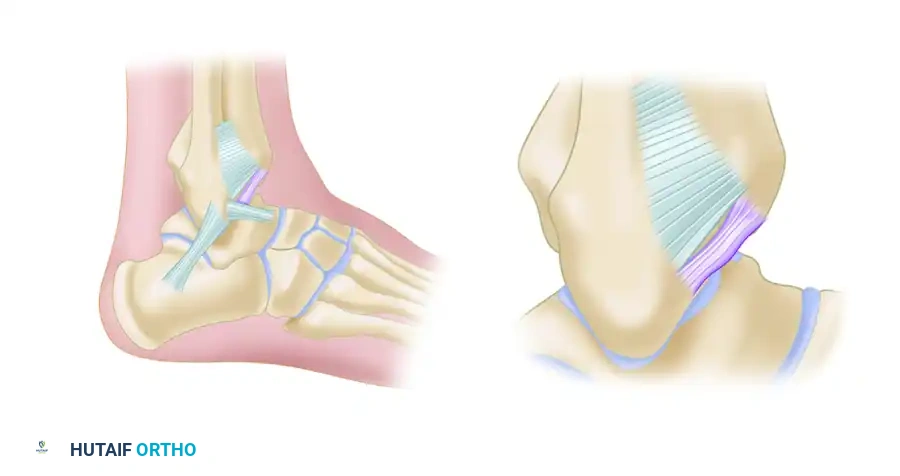
A profound three-dimensional understanding of the neurovascular anatomy surrounding the ankle joint is non-negotiable. The ankle is a tightly constrained, highly congruent hinge joint, surrounded by superficial neurovascular structures that are exquisitely vulnerable during portal placement.
The Anteromedial (AM) Portal
- Location: Situated medial to the tibialis anterior tendon, precisely at the level of the anterior joint line.
- Structures at Risk: The saphenous nerve and the long saphenous vein.
- Utility: This is the primary viewing portal. It is established first because the medial anatomical "safe zone" is larger and more predictable than the lateral side.
The Anterolateral (AL) Portal
- Location: Situated lateral to the peroneus tertius tendon (or the extensor digitorum longus if the tertius is absent), at the level of the joint line.
- Structures at Risk: The superficial peroneal nerve (SPN) and its branches (medial and intermediate dorsal cutaneous nerves).
- Utility: The primary working portal for anterior and lateral pathology.
Surgical Warning: The superficial peroneal nerve is highly variable in its arborization. It must be actively identified and marked preoperatively. Plantar flexion and forced inversion of the foot, combined with active fourth toe extension, will often make the nerve visible or palpable subcutaneously.
The Posterolateral (PL) Portal
- Location: Located just lateral to the Achilles tendon, approximately 1.2 cm proximal to the tip of the lateral malleolus.
- Structures at Risk: The sural nerve and the small saphenous vein.
- Utility: Utilized for posterior compartment pathology, posterior impingement, or when anterior distraction is insufficient to reach the posterior aspect of the joint.
OPERATING ROOM SETUP AND PATIENT POSITIONING
Optimal positioning is critical for adequate joint distraction, which is the key to safe instrument insertion and comprehensive visualization of the articular surfaces.
The Supine Gravity-Assisted Technique
- Positioning: Place the patient supine on the operating table.
- Leg Holder: Secure the proximal thigh of the operative extremity in a well-padded leg holder.
- Flexion: Drop the end of the bed so that the hip is flexed to approximately 45 degrees and the knee is flexed to 90 degrees.
- Gravity Distraction: Allow the foot and lower leg to hang free. The weight of the leg provides a natural, gravity-assisted distraction of the tibiotalar joint.
- Dynamic Assessment: This setup allows the surgeon to freely manipulate the ankle through a full range of motion (dorsiflexion, plantarflexion, inversion, eversion), dynamically assessing impingement and facilitating access to the posterior recesses of the joint.
Noninvasive Mechanical Distraction
When gravity alone is insufficient to open the tightly constrained tibiotalar joint, noninvasive mechanical distraction is employed.
* Apply a sterile, noninvasive distraction strap (e.g., a soft ankle hitch) around the hindfoot and midfoot.
* Connect the strap to a tensioning device attached to the operating table.
* Apply controlled traction (typically 15 to 30 lbs).
Pitfall: Prolonged or excessive mechanical distraction can lead to neuropraxia of the superficial peroneal or sural nerves. Distraction time should be strictly monitored and released periodically if the procedure extends beyond 45 to 60 minutes.
SURGICAL TECHNIQUE: STEP-BY-STEP ARTHROSCOPIC EXAMINATION AND DÉBRIDEMENT
The following protocol outlines the standardized approach for anterior ankle arthroscopy, ensuring maximum safety and therapeutic efficacy.
1. Preoperative Marking and Exsanguination
- Prior to inflation of the tourniquet, meticulously palpate and mark the anatomical landmarks: the medial and lateral malleoli, the anterior joint line, the tibialis anterior tendon, and the peroneus tertius.
- Elicit the "bowstring" sign of the superficial peroneal nerve via plantarflexion and inversion; mark its course with a surgical pen.
- Elevate the extremity, exsanguinate using an Esmarch bandage, and inflate the proximal thigh tourniquet to the standard pressure (typically 250–300 mm Hg).
2. Joint Insufflation (The "Dorsiflexion Sign")
- Introduce an 18-gauge spinal needle at the marked anteromedial portal site, directing it slightly proximally and centrally toward the anatomic center of the tibiotalar joint.
- Inject 15 to 20 mL of sterile normal saline.
- Confirmation of Intraarticular Placement: Successful insufflation is confirmed by three distinct signs:
- Minimal resistance to the injection of fluid.
- Spontaneous dorsiflexion of the foot as the anterior capsule becomes distended and tight.
- Immediate backflow (egress) of saline into the syringe when pressure on the plunger is released.
3. Establishing the Anteromedial (AM) Portal
- Once the joint is maximally distended, remove the spinal needle.
- Make a precise, superficial skin incision using a #11 scalpel blade.
- Crucial Step: The incision must be just large enough to accommodate the arthroscopic cannula.
Pitfall: Creating an excessively large skin incision allows massive extravasation of irrigation fluid into the surrounding subcutaneous tissues. This rapidly obliterates anatomical landmarks, increases compartment pressures, and exponentially increases the difficulty of the procedure.
- Use a blunt, straight hemostat to spread the subcutaneous tissues down to the capsule. This "nick and spread" technique pushes the saphenous nerve and vein out of harm's way.
- Introduce the arthroscopic cannula with a blunt trocar through the capsule. A distinct "pop" is felt as the capsule is breached.
- Insert a 2.7-mm or 4.0-mm, 30-degree arthroscope. (A 2.7-mm scope is preferred for tight joints, while a 4.0-mm scope provides superior optics and fluid flow if space permits).
4. Establishing the Anterolateral (AL) Portal Under Direct Vision
- With the arthroscope in the AM portal, illuminate the lateral joint capsule.
- Insert an 18-gauge spinal needle at the anticipated AL portal site.
- Visualize the needle entering the joint intraarticularly. Adjust the trajectory to ensure it is parallel to the joint surface and avoids iatrogenic scuffing of the talar dome cartilage.
- Once the optimal trajectory is confirmed, make a superficial skin incision.
- Again, use a blunt hemostat to dissect down to the capsule, protecting the superficial peroneal nerve.
- Introduce the working cannula and blunt trocar under direct intraarticular visualization.
5. Systematic Diagnostic Examination
Perform a systematic, 21-point diagnostic sweep of the ankle joint to ensure no pathology is missed. Evaluate the following regions:
* Anterior Gutter: Assess for synovitis, loose bodies, and anterior tibial osteophytes.
* Medial Gutter: Evaluate the deep deltoid ligament and the medial malleolar articular facet.
* Central Joint: Inspect the talar dome and tibial plafond for chondral wear, OCLs, or kissing lesions.
* Lateral Gutter: Assess the anterior talofibular ligament (ATFL), the calcaneofibular ligament (CFL), and look for anterolateral soft tissue impingement (Bassett's ligament).
6. Arthroscopic Débridement and Intervention
- Introduce an arthroscopic shaver (typically 2.9-mm or 3.5-mm) through the AL portal.
- Resect hypertrophic synovium, fibrotic bands, and impinging soft tissues in the lateral and anterior compartments.
- For bony impingement, utilize an arthroscopic burr or osteotome to resect anterior tibial or talar neck osteophytes. Ensure the resection is flush with the native cortical bone to restore full, impingement-free dorsiflexion.
- Portal Switching: To address pathology in the medial aspect of the joint, switch the portals. Place the arthroscope in the AL portal and introduce the working instruments through the AM portal. This provides the optimal angle of attack for medial talar dome lesions or medial gutter débridement.
7. Managing the Posterior Compartment
- If posterior pathology (e.g., os trigonum syndrome, posterior impingement) cannot be accessed from the anterior portals despite maximal distraction, a posterolateral portal may be established.
- Alternatively, the patient may need to be repositioned prone for a dedicated posterior two-portal endoscopic approach, which provides superior access to the posterior subtalar and tibiotalar joints.
8. Closure and Dressing
- Thoroughly irrigate the joint to remove all cartilaginous and bony debris.
- Evacuate all fluid from the joint to minimize postoperative hemarthrosis and capsular distension.
- Close the portals meticulously using non-absorbable sutures (e.g., 4-0 nylon) in a simple interrupted or horizontal mattress fashion.
Surgical Warning: Failure to properly close arthroscopic portals in the ankle carries a high risk of developing a postoperative synovial fistula. The thin subcutaneous tissue envelope over the anterior ankle provides minimal barrier to synovial fluid egress if the skin is not securely approximated.
- Apply a sterile, bulky compressive dressing to control edema.
POSTOPERATIVE PROTOCOL AND REHABILITATION
The postoperative rehabilitation protocol is dictated by the specific pathology treated during the arthroscopy.
- Soft Tissue Débridement / Impingement Resection: Patients are typically allowed immediate weight-bearing as tolerated in a supportive walking boot or stiff-soled shoe. Early active range of motion (ROM) exercises are initiated within 48 to 72 hours to prevent arthrofibrosis and capsular adhesions.
- Microfracture for OCLs: If marrow stimulation was performed, patients are generally kept strictly non-weight-bearing for 4 to 6 weeks to allow the fragile superclot and fibrocartilage to organize and mature. Early, non-weight-bearing ROM is highly encouraged to stimulate chondrocyte differentiation.
- Physical Therapy: Focuses on restoring proprioception, peroneal and tibial strengthening, and Achilles tendon stretching. Return to competitive sports is typically achieved between 6 to 12 weeks, depending on the extent of the intraarticular intervention.
COMPLICATIONS
While ankle arthroscopy is generally safe, the complication rate is historically reported to be between 5% and 9%. The most common complications include:
* Neurological Injury: The most frequent complication, primarily involving neuropraxia or transection of the superficial peroneal nerve, saphenous nerve, or sural nerve. Strict adherence to blunt dissection techniques minimizes this risk.
* Synovial Fistula: Prevented by meticulous portal closure and compressive dressings.
* Iatrogenic Cartilage Damage: Scuffing of the talar dome can occur during blind insertion of trocars. Always use blunt trocars and establish the secondary portal under direct visualization.
* Infection: Superficial portal site infections or deep septic arthritis are rare but require prompt recognition and treatment.
* Instrument Breakage: The tight confines of the ankle joint place high stress on small-diameter instruments. Avoid levering shavers or burrs against the articular surfaces.
You Might Also Like