Midshaft Humerus Fractures: Epidemiology, Surgical Anatomy, Biomechanics & Management
Key Takeaway
Midshaft humerus fractures are managed based on fracture characteristics and patient factors. Non-operative care with functional bracing is common for stable fractures. Operative fixation (plates or nails) is reserved for open fractures, vascular injury, specific nerve compromise, or failure of conservative treatment, aiming to restore alignment and function.
Introduction & Epidemiology
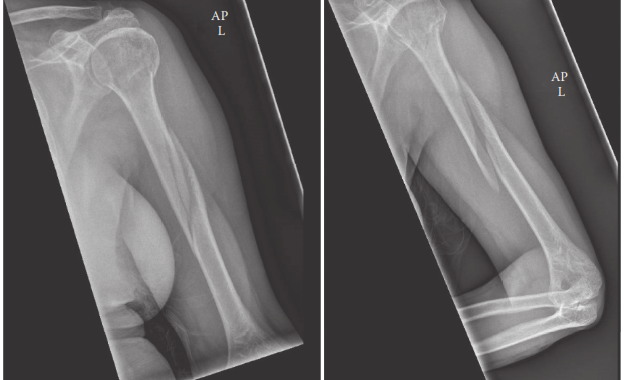
Midshaft humerus fractures represent approximately 3-5% of all fractures, with a bimodal distribution peaking in young males due to high-energy trauma and in elderly females due to low-energy falls associated with osteoporosis. Common mechanisms include direct trauma (e.g., motor vehicle accidents, falls directly onto the arm) and indirect forces (e.g., torsional stress from throwing or arm wrestling). The humerus midshaft is broadly defined as the segment between the surgical neck proximally and the supracondylar flare distally.
Classification typically follows the AO/OTA system, categorizing fractures by segment (12-), type (A, B, C for simple, wedge, and complex comminution, respectively), and subgroup. This system provides a standardized language for describing fracture morphology, guiding treatment decisions, and facilitating research. While this classification helps characterize fracture patterns, the choice between operative and non-operative management often hinges on patient factors, fracture stability, and associated injuries, particularly radial nerve involvement. The primary goal of treatment, irrespective of method, is to achieve union with acceptable alignment and restoration of functional range of motion of the shoulder and elbow.
Surgical Anatomy & Biomechanics
A thorough understanding of the regional anatomy is paramount for successful management of midshaft humerus fractures, particularly regarding safe surgical approaches and avoiding iatrogenic neurovascular injury.
The humerus shaft provides attachment for numerous muscles. Anteriorly, the deltoid inserts proximally, and the brachialis and biceps brachii muscles originate more distally. Posteriorly, the triceps brachii muscle has its medial and lateral heads originating from the posterior aspect of the humerus. These muscular attachments exert significant deforming forces on fracture fragments, influencing fracture patterns and stability.
The most critical neurovascular structure in relation to the midshaft humerus is the radial nerve . It spirals obliquely from posterior to lateral across the midshaft humerus within the spiral (radial) groove, accompanied by the profunda brachii artery. Proximally, it lies between the medial and lateral heads of the triceps. More distally, it pierces the lateral intermuscular septum to lie anterior to the lateral epicondyle, dividing into superficial (sensory) and deep (motor, posterior interosseous nerve) branches. The radial nerve is at risk in up to 10-18% of closed midshaft humerus fractures and almost invariably encountered during posterior surgical approaches. Other structures at risk, depending on the approach, include the axillary nerve (proximal approaches), musculocutaneous nerve (anterior approaches), and the brachial artery and median nerve (anterior approaches).
Biomechanical considerations dictate fixation strategies. The humerus is subjected to bending, torsional, and axial loads during daily activities.
*
Plate fixation
offers superior resistance to bending and torsional forces, especially with longer plates and more screws (increasing working length). The principle of relative stability (bridging plates) is often employed for comminuted fractures, while absolute stability (compression plates) is used for simple transverse or short oblique patterns. Plate placement (tension vs. compression side) influences construct stability.
*
Intramedullary nailing
resists bending and axial loads effectively but is less effective against rotational forces unless adequately locked proximally and distally. Nailing is considered a load-sharing device, promoting secondary bone healing. Antegrade nailing offers potential advantages for proximal fractures, while retrograde nailing may be preferred for distal fractures or concomitant ipsilateral shoulder pathology.
Fracture patterns influence biomechanics. Transverse fractures are inherently unstable to bending but amenable to compression. Oblique and spiral fractures are unstable to shear and rotation but can be compressed with lag screws. Comminuted fractures require bridging principles to restore length and alignment without direct compression of fragments.
Indications & Contraindications
The decision between non-operative and operative management is multifaceted, weighing patient factors, fracture characteristics, and associated injuries.
Non-Operative Indications
Historically, non-operative management with functional bracing has been the gold standard for most midshaft humerus fractures, with reported union rates exceeding 90%. Acceptable alignment criteria for non-operative treatment include:
* Less than 20 degrees of anterior angulation.
* Less than 30 degrees of varus angulation.
* Less than 3 cm of shortening.
* Less than 20-30 degrees of rotational deformity (less well tolerated).
Specific fracture patterns often amenable to non-operative care include spiral, oblique, and transverse fractures without significant displacement or comminution, particularly in compliant patients.
Operative Indications
Operative intervention is typically reserved for cases where non-operative treatment is unlikely to achieve satisfactory results or when specific complications necessitate surgical management.
Absolute Indications:
*
Open fractures:
Require urgent debridement and stabilization to prevent infection.
*
Vascular injury requiring repair:
Urgent surgical exploration and fixation to protect vascular repair.
*
Neurological compromise (transection or entrapment):
Especially radial nerve transection confirmed intraoperatively or evolving radial nerve palsy in the setting of increasing soft tissue compromise or an open fracture. Most radial nerve palsies are neuropraxic and resolve spontaneously, warranting observation for 3-6 months.
*
Polytrauma:
To facilitate early mobilization and rehabilitation of other injuries (damage control orthopedics).
*
Floating elbow:
Concomitant ipsilateral forearm fracture.
*
Pathologic fractures:
Often require more stable fixation and adjuvant oncologic treatment.
*
Imminent or established skin compromise:
Due to fracture fragment tenting.
Relative Indications:
*
Failed non-operative treatment:
Persistent unacceptable alignment, nonunion, or patient intolerance of brace.
*
Segmental fractures.
*
Fractures with significant soft tissue interposition.
*
Intra-articular extension
(though less common in midshaft fractures).
*
Morbid obesity or non-compliant patients:
Where functional bracing is challenging.
*
Associated ipsilateral shoulder or elbow injuries.
*
Bilateral humerus fractures.
*
Certain high-energy patterns:
Highly comminuted, unstable fractures where maintenance of reduction with a brace is difficult.
Table: Operative vs. Non-Operative Indications for Midshaft Humerus Fractures
| Feature / Indication | Non-Operative Management | Operative Management |
|---|---|---|
| Fracture Type | Closed, stable spiral, oblique, or transverse without significant displacement/comminution. | Open fractures, segmental fractures, highly comminuted/unstable fractures. |
| Acceptable Alignment | Angulation <20° (anterior), <30° (varus); Shortening <3 cm; Rotational <20-30°. | Failure to achieve or maintain acceptable alignment with non-operative treatment. |
| Associated Injuries | Isolated injury, neuropraxia of radial nerve (observe). | Open fracture, vascular injury requiring repair, compartment syndrome, evolving radial nerve palsy in closed fracture (rare). |
| Patient Factors | Compliant patient, good soft tissue envelope, able to tolerate brace. | Polytrauma, floating elbow, pathologic fractures, morbid obesity, non-compliance, bilateral humerus fractures. |
| Clinical Course | Progressing to union, stable reduction. | Failed non-operative treatment (nonunion, persistent malunion), impending skin compromise. |
Contraindications
Absolute contraindications to operative fixation are rare and generally relate to patient instability for anesthesia or severe local infection prohibiting implant placement. Relative contraindications may include severe comorbidities, extremely poor soft tissue envelopes, or prior infection in the operative field.
Pre-Operative Planning & Patient Positioning
Thorough pre-operative planning is crucial for optimizing outcomes and minimizing complications.
Pre-Operative Planning
-
Imaging:
- Standard radiographs: AP and lateral views of the entire humerus, including shoulder and elbow joints, are essential. Oblique views may be helpful for characterizing complex patterns.
- Computed Tomography (CT) scans: Reserved for complex comminuted fractures, articular involvement (though rare in midshaft), or when detailed fracture morphology is required for surgical planning (e.g., precise plate contouring, lag screw placement).
- Angiography: Indicated if vascular injury is suspected (e.g., diminished pulses, expanding hematoma).
-
Patient Assessment:
- Comprehensive history and physical examination, focusing on neurovascular status, particularly radial nerve function. Document any pre-existing radial nerve palsy, its character (complete vs. incomplete), and sensory deficits.
- Assess skin integrity and soft tissue envelope.
- Evaluate comorbidities, especially factors affecting bone healing (e.g., smoking, diabetes, malnutrition).
-
Implant Selection & Templating:
- Decide on the fixation method: plating (DCP, LC-DCP, LCP) or intramedullary nailing (antegrade vs. retrograde).
- Plate length, screw size, and number of screws are determined by fracture pattern and bone quality. For plate fixation, a minimum of 6 cortices (3 bicortical screws) proximally and distally is generally recommended, ensuring a working length appropriate for the fracture pattern. Bridging plates for comminuted fractures often extend over a longer segment.
- For intramedullary nailing, templating involves determining nail length and diameter from radiographs or CT scans.
- Ensure all necessary instruments, drills, reamers, and implants are available.
- Informed Consent: Discuss surgical risks, including radial nerve injury (intraoperative or worsening of pre-existing palsy), nonunion, infection, hardware prominence, and the potential need for revision surgery.
Patient Positioning
Patient positioning depends heavily on the chosen surgical approach and fixation method. Proper positioning ensures adequate exposure, ease of access for fluoroscopy, and patient safety.
-
Supine Position (Beach Chair or Semi-Fowler):
- Indications: Primarily for antegrade intramedullary nailing via the deltopectoral approach or anterior plating, also sometimes for anterolateral plating.
- Setup: Patient supine on the operating table. The torso is often elevated (beach chair position) with the backrest at 30-45 degrees, which can facilitate shoulder access for antegrade nailing. The arm is draped free over an arm board or surgical table extension, allowing for full range of motion, particularly internal and external rotation for reduction and hardware placement. A bump under the ipsilateral scapula can help protract the shoulder.
- Advantages: Excellent access to the shoulder joint for antegrade nail entry, comfortable for the patient, relatively easy for anesthesia.
- Disadvantages: Limited access to the posterior humerus, challenges with radial nerve visualization for posterior fractures.
-
Lateral Decubitus Position:
- Indications: Most commonly used for posterior plating approaches (Henry or triceps splitting).
- Setup: Patient positioned on the unaffected side with an axillary roll to protect the brachial plexus and a kidney rest or sandbag to stabilize the torso. The affected arm is typically draped free over a sterile drape attached to an overhead bar (often called a 'fracture table' or a Mayo stand with specific modifications), allowing for dynamic traction and positioning. The arm should be positioned to allow full pronation/supination, flexion/extension, and rotation.
- Advantages: Excellent access to the entire posterior and posterolateral aspects of the humerus, allowing for easy identification and protection of the radial nerve. Good visualization for direct reduction.
- Disadvantages: Requires careful positioning to avoid pressure points, potential for brachial plexus neuropraxia in the dependent arm, requires good assistance for retraction.
-
Prone Position:
- Indications: Less common but can be used for posterior plating, particularly for very proximal or very distal posterior fractures, or if lateral decubitus is contraindicated.
- Setup: Patient prone, carefully padded. The arm is draped free similar to lateral decubitus.
- Advantages: Direct posterior access.
- Disadvantages: Anesthetic challenges, difficult for the patient, increased risk of facial or ocular pressure injuries.
Regardless of position, ensure adequate padding of all pressure points, appropriate draping for sterility, and strategic placement of the fluoroscope to obtain optimal AP and lateral views without repeatedly repositioning the patient or C-arm.
Detailed Surgical Approach / Technique
The choice of surgical approach and fixation technique depends on fracture location, pattern, comminution, soft tissue status, associated injuries, surgeon preference, and available implants. The primary goal is stable fixation allowing for early functional rehabilitation.
General Principles
- Aseptic Technique: Strict adherence to sterile principles is paramount to prevent surgical site infection.
- Radial Nerve Protection: This is the cardinal rule for midshaft humerus fracture surgery. Regardless of the approach, the radial nerve must be identified and protected.
- Soft Tissue Preservation: Minimally invasive plate osteosynthesis (MIPO) or percutaneous techniques are preferred when feasible to preserve periosteal blood supply.
- Indirect Reduction: For comminuted fractures, indirect reduction techniques (e.g., distraction, ligamentotaxis) help maintain soft tissue attachments and periosteal vascularity. Direct reduction may be necessary for simple fracture patterns or challenging displacements.
- Working Length: For bridging plates, adequate working length (distance between inner screws of proximal and distal screw groups) promotes callus formation. For compression plates, short working length is desired to maximize compression.
Posterior Approach (Henry Approach / Triceps Split)
This is the most common approach for posterior plating of the humerus shaft, providing direct access to the radial nerve.
- Incision: A longitudinal incision centered over the posterior aspect of the humerus, extending from the deltoid insertion proximally to approximately 5 cm above the olecranon distally.
- Superficial Dissection: Incise skin and subcutaneous tissue. Identify and protect cutaneous nerves.
-
Deep Dissection & Internervous Plane:
- Incise the deep fascia.
- Identify the interval between the lateral and long heads of the triceps. The triceps can be split longitudinally or reflected. For more proximal fractures, the lateral head of the triceps can be detached from its origin and reflected medially.
- Crucially, identify the radial nerve. It typically lies within the spiral groove, deep to the lateral head of the triceps and medial to the lateral intermuscular septum. Trace the nerve proximally and distally, isolating it with vessel loops. Protect the profunda brachii artery accompanying the nerve. This step is critical and often performed first before further fracture exposure.
-
Image Integration:
The illustration of the anatomical dissection or plate placement would fit well here.

This image, showing the posterior aspect of the humerus with anatomical landmarks and perhaps a plate in situ, helps visualize the radial nerve's course and optimal plate placement.
-
Fracture Exposure & Reduction:
- Once the radial nerve is safely retracted (typically medially), expose the fracture site.
- Carefully débride hematoma and any interposed soft tissue.
- Reduce the fracture using traction, manipulation, or temporary fixation (e.g., K-wires, bone clamps). For comminuted fractures, prioritize length, alignment, and rotation using indirect techniques and a distractor if necessary.
-
Fixation (Plating):
- Apply a contoured locking compression plate (LCP) or dynamic compression plate (DCP) to the posterior or posterolateral aspect of the humerus. Positioning the plate slightly lateral (posterolateral) can provide better purchase and avoid direct impingement on the radial nerve.
- Plate length: Typically, use a plate that allows 3-4 bicortical screws on each side of the fracture, respecting the working length principle for comminuted fractures.
- Screws: Secure the plate with appropriate screws. For simple fractures, lag screws can be used through the plate or independently prior to plate application to achieve interfragmentary compression. Cortical screws are generally used for DCPs, while locking screws are employed for LCPs, particularly in osteoporotic bone or comminuted fractures where traditional screw purchase is limited.
- Ensure appropriate contouring of the plate to match the humeral anatomy.
- Closure: Meticulous hemostasis. Layered closure of muscle, fascia, subcutaneous tissue, and skin. Ensure the radial nerve is free and not compressed by the plate or soft tissues.
Anterolateral Approach (Modified Deltopectoral)
This approach is useful for distal or middle third fractures, particularly for MIPO techniques, and when a posterior approach is unfavorable. It avoids direct dissection of the radial nerve but requires careful attention to its more distal course.
- Incision: A longitudinal incision along the anterior aspect of the humerus, between the deltoid and biceps.
- Superficial Dissection: Incise skin and subcutaneous tissue.
-
Internervous Plane:
- The interval is between the deltoid (supplied by axillary nerve) laterally and the pectoralis major (supplied by medial and lateral pectoral nerves) proximally, then between the deltoid and biceps (musculocutaneous nerve) more distally.
- Deep to the deltoid, reflect the biceps brachii and brachialis medially.
- Radial nerve caution: The radial nerve lies deep to the brachialis and brachioradialis in the distal third of the arm. While not directly exposed in the midshaft by this approach, its proximity requires careful retraction. The musculocutaneous nerve runs along the medial border of the biceps and can be seen with medial retraction.
- Fixation: Apply an LCP or DCP to the anterolateral surface of the humerus. MIPO techniques involve subcutaneous tunneling for plate insertion.
Intramedullary Nailing
Intramedullary nailing offers the advantage of load-sharing fixation and minimal soft tissue stripping. Both antegrade and retrograde techniques are used.
Antegrade Nailing
- Patient Position: Supine or beach chair position, allowing shoulder access.
-
Entry Portal:
- Proximal Tip: Through the rotator cuff, usually just medial to the greater tuberosity in line with the humeral shaft axis. Requires incision of the deltoid and supraspinatus.
- Lateral Tip: Through the deltoid splitting approach, lateral to the greater tuberosity.
- Reaming/Non-Reaming: Reaming can increase nail diameter and cortical contact, potentially enhancing stability, but carries a theoretical risk of thermal necrosis or fat embolism. Non-reamed nails are often used in polytrauma or open fractures.
- Nail Insertion: Insert the chosen nail (typically titanium, often cannulated) down the medullary canal. Ensure proper length determined pre-operatively.
- Reduction: Reduce the fracture under fluoroscopic guidance during nail insertion, using traction, manipulation, or joysticks.
- Locking Screws: Place distal locking screws first (static or dynamic, depending on fracture pattern and nail design), then proximal locking screws. Ensure at least two locking screws in each fragment.
- Closure: Layered closure.
Retrograde Nailing
- Patient Position: Lateral decubitus or supine with the arm draped over the chest.
-
Entry Portal:
- Through the olecranon fossa, usually 2-3 cm proximal to the olecranon tip, avoiding the articular surface. Incision through the triceps fascia.
- Radial nerve caution: While the radial nerve is more proximal, care is taken with distal dissection and hardware prominence in the olecranon fossa.
- Reaming/Non-Reaming: Similar considerations to antegrade nailing.
- Nail Insertion: Insert the nail proximally.
- Reduction & Locking Screws: Similar to antegrade nailing, locking screws placed proximally first, then distally.
- Closure: Layered closure.
Advantages of Nailing:
Load-sharing, minimal soft tissue disruption (MIPO capability), early mobilization potential, reduced risk of plate prominence.
Disadvantages of Nailing:
Potential for shoulder or elbow pain from entry portals, rotational instability without adequate locking, reaming risks, greater difficulty in achieving anatomical reduction for complex patterns.
Complications & Management
Despite meticulous surgical technique, complications can arise following operative fixation of midshaft humerus fractures. Proactive recognition and appropriate management are critical.
Radial Nerve Palsy
- Incidence: Occurs in 10-18% of closed midshaft humerus fractures. Most are neuropraxias and recover spontaneously within 3-6 months. Iatrogenic injury during surgery (transection, traction, entrapment) occurs in 2-5% of cases.
- Clinical Presentation: Wrist drop, finger drop, thumb abduction weakness, sensory loss in the dorsoradial hand.
-
Management:
- Pre-existing Palsy (Closed Fracture): Typically observed for 3-6 months. Electromyography (EMG) and nerve conduction studies (NCS) at 6-8 weeks can help prognosticate. If no signs of recovery, exploration may be indicated.
- Acute Post-Operative Palsy (New or Worsening): Immediate surgical exploration is indicated if a radial nerve injury is suspected to be due to surgical error (e.g., nerve transection, entrapment by hardware). If non-iatrogenic (e.g., traction neuropraxia during reduction), observation is often appropriate.
- Chronic Palsy/Non-Recovery: Tendon transfers (e.g., pronator teres to ECRB, FDS to EDC) are often performed if recovery does not occur after 9-12 months.
Nonunion
- Incidence: Ranges from 2-10% in operative cases, but can be higher in specific patient populations (e.g., smokers, open fractures, severe comminution).
- Definition: Failure of radiographic healing by 6-9 months post-fracture, often accompanied by pain or instability.
- Risk Factors: Smoking, poor soft tissue envelope, infection, significant comminution, inadequate fixation, large fracture gap, malnutrition, systemic diseases.
-
Management:
- Biological Enhancement: Bone grafting (autogenous cancellous bone graft from iliac crest or distal femur, or allograft) to stimulate healing.
- Mechanical Enhancement: Revision surgery with more rigid fixation (e.g., exchange nailing, conversion from plate to nail, or vice versa, addition of a second plate, larger diameter nail) to improve stability.
- Debridement: For atrophic nonunions, debridement of fibrous tissue from the fracture site is essential prior to bone grafting and re-fixation.
- Infection Control: Rule out infection prior to definitive nonunion surgery.
Infection
- Incidence: <1% for closed fractures treated operatively, but significantly higher for open fractures.
- Clinical Presentation: Pain, redness, swelling, warmth, purulent discharge, fever, elevated inflammatory markers.
-
Management:
- Acute Infection: Urgent surgical debridement, thorough irrigation, and intravenous antibiotics guided by cultures. Hardware retention may be considered if fixation is stable and symptoms controlled, but removal is often necessary.
- Chronic Infection: May require serial debridements, prolonged antibiotic courses, and potential hardware removal or exchange. Bone defects may require reconstruction with bone grafting or vascularized flaps once infection is cleared.
Hardware Failure
- Incidence: Rare but can occur due to inadequate fixation, premature weight-bearing, or stress risers.
- Types: Plate breakage, screw pullout, nail bending/breakage.
- Management: Revision surgery with stronger fixation, addressing underlying issues (e.g., nonunion, infection).
Shoulder/Elbow Stiffness
- Incidence: Common, particularly if immobilization is prolonged or rehabilitation is delayed.
- Pathophysiology: Scar tissue formation, capsular contracture.
- Prevention: Early range of motion exercises as dictated by fixation stability.
- Management: Aggressive physical therapy, potentially supervised by an occupational therapist. Manipulation under anesthesia or surgical release may be considered for refractory cases.
Table: Common Complications, Incidence, and Salvage Strategies
| Complication | Incidence (Approx.) | Salvage / Management Strategy |
|---|---|---|
| Radial Nerve Palsy | 10-18% (closed fx) | Observation (3-6 mo), EMG/NCS, surgical exploration (if new post-op or non-recovering), tendon transfers. |
| Nonunion | 2-10% (operative) | Revision fixation (exchange nail/plate), bone grafting (autograft/allograft), debridement, infection rule-out. |
| Infection | <1% (closed fx) | Urgent surgical debridement, irrigation, targeted IV antibiotics, hardware removal/exchange. |
| Hardware Failure | <1% | Revision surgery with stronger fixation, address nonunion/infection if present. |
| Shoulder/Elbow Stiffness | Common | Early ROM, aggressive physical therapy, MUA, surgical release. |
| Malunion | Varies | Corrective osteotomy (if symptomatic and functional deficit). |
| Vascular Injury | Rare | Urgent surgical exploration, vascular repair. |
Post-Operative Rehabilitation Protocols
Post-operative rehabilitation is integral to achieving optimal functional outcomes and varies based on the stability of fixation and individual patient factors. The general principle is to initiate early motion while protecting the healing fracture.
Phase 1: Immediate Post-Operative (Weeks 0-6)
- Goals: Control pain and swelling, protect fixation, initiate early range of motion (ROM) to prevent stiffness.
-
Immobilization:
- Initially, a sling or shoulder immobilizer for comfort and protection, especially for the first 1-2 weeks.
- For highly stable fixation (e.g., well-locked plate, IM nail with good purchase), early gentle active-assisted and passive ROM can begin within days.
- Unstable fixation or concerns about patient compliance may warrant longer immobilization (e.g., 3-4 weeks in a sling).
-
Exercises:
- Pendulum exercises: Gentle, gravity-assisted shoulder movements.
- Passive and active-assisted ROM (shoulder & elbow): Flexion, extension, abduction, external/internal rotation within pain limits. Caution is advised with rotation, especially in early IM nailing where rotational stability may be limited.
- Hand and wrist ROM: To prevent stiffness and swelling in distal joints.
- Scapular stabilization exercises: Gentle contractions.
- Weight-Bearing: No weight-bearing or lifting with the affected arm.
- Radiographic Follow-up: Initial post-operative radiographs, then at 2 and 6 weeks to assess alignment and early signs of union.
Phase 2: Early Healing & Strengthening (Weeks 6-12)
- Goals: Gradually increase ROM, initiate gentle strengthening, improve muscle endurance.
- Progression: Dependent on radiographic evidence of early callus formation and clinical stability (minimal pain at fracture site).
-
Exercises:
- Active ROM: Full active range of motion for shoulder and elbow.
- Isometric strengthening: Gentle, pain-free isometric contractions of shoulder and elbow musculature (deltoid, biceps, triceps).
- Theraband exercises: Light resistance band exercises for all planes of motion.
- Proprioceptive exercises: To improve joint awareness and control.
- Weight-Bearing: Still no lifting heavy objects. Gradual increase in activities of daily living.
- Radiographic Follow-up: At 10-12 weeks to assess progressive union.
Phase 3: Advanced Strengthening & Return to Activity (Weeks 12+)
- Goals: Maximize strength, power, and endurance; restore full functional capacity; prepare for return to sport or demanding work.
- Progression: Based on confirmed radiographic union and pain-free ROM.
-
Exercises:
- Progressive resistance exercises: Using weights, resistance bands, and machines, gradually increasing load.
- Plyometric exercises: For athletes, to develop power and explosive movements (e.g., throwing, pushing).
- Sport-specific drills: Gradually introduce activities relevant to the patient's desired level of function.
- Return to Activity: Full return to unrestricted activities, including contact sports or heavy labor, is typically allowed only after radiographic union is confirmed and full strength and ROM are achieved (often 4-6 months, sometimes longer for high-demand activities).
- Hardware Removal: Elective hardware removal may be considered 12-18 months post-op for symptomatic hardware (e.g., pain, bursitis, impingement). This is a secondary procedure with its own risks.
Special Considerations:
*
Radial Nerve Palsy:
If a radial nerve palsy is present, rehabilitation focuses on maintaining passive ROM of wrist and fingers to prevent contractures, while awaiting nerve recovery. Orthotics (e.g., dynamic wrist extension splint) can assist function.
*
Nonunion:
If nonunion is suspected or confirmed, rehabilitation protocols will be adjusted, and typically, more restricted activity will be enforced until definitive treatment is rendered.
Summary of Key Literature / Guidelines
Current evidence and guidelines for midshaft humerus fractures reflect a shift towards individualized treatment based on patient and fracture characteristics, rather than a universal protocol.
-
Non-Operative vs. Operative: For the vast majority of closed, non-comminuted midshaft humerus fractures, functional bracing remains a highly effective initial treatment , with union rates often exceeding 90% and functional outcomes comparable to operative treatment in many studies. A meta-analysis by Ma et al. (2014) highlighted similar union rates between operative and non-operative groups, but noted a higher complication rate in the operative group, reinforcing the role of non-operative care for suitable fractures.
-
Timing of Surgery for Radial Nerve Palsy: The prevailing consensus, supported by multiple series and reviews (e.g., by Ring and Jupiter), is that radial nerve palsy in closed humerus fractures should initially be observed . Spontaneous recovery occurs in 70-90% of cases within 3-6 months. Surgical exploration is indicated if there is no clinical or electrophysiological evidence of recovery after 3-6 months, or if a definitive nerve transection is suspected (e.g., from an open fracture or a severe, angulated fracture with sharp fragments). Immediate exploration is usually reserved for open fractures with nerve deficits or evolving palsy with increasing soft tissue compromise.
-
Plate Fixation vs. Intramedullary Nailing:
- Plate Fixation (ORIF with LCPs): Offers superior rotational stability and the ability to achieve anatomical reduction, making it preferred for complex patterns, articular involvement (rare in midshaft), and nonunions. Studies like those by Lin et al. (2014) and Mahabir et al. (2018) have shown high union rates and good functional outcomes with plating. Advantages include direct reduction, precise fixation, and avoidance of shoulder/elbow joint violation. Disadvantages include larger incisions, potential for greater soft tissue stripping, and increased risk of radial nerve injury due to direct exposure.
- Intramedullary Nailing: Preferred for segmental fractures, polytrauma patients, or those with significant osteoporosis, as it is a load-sharing device and offers a less invasive approach if performed percutaneously (MIPO). Both antegrade and retrograde techniques are widely used. Retrograde nailing may be favored for more distal fractures to avoid shoulder entry portal issues, while antegrade nailing is useful for more proximal fractures. A systematic review by Heineman et al. (2017) found that both plating and nailing are effective, with similar union rates, but intramedullary nailing was associated with higher rates of shoulder pain, while plating had higher rates of re-operation for nonunion or infection.
- Current Trend: For comminuted midshaft fractures, MIPO plating techniques using LCPs are gaining popularity due to their potential to preserve soft tissue and provide stable fixation with relative stability principles, bridging the gap between traditional ORIF and IM nailing.
-
Minimally Invasive Approaches: The development of MIPO techniques for plating aims to reduce soft tissue morbidity, blood loss, and infection rates. Studies by various authors (e.g., Jianfeng et al., 2017) demonstrate good outcomes with MIPO, emphasizing careful radial nerve protection through indirect reduction and tunneling.
-
Nonunion Management: For established nonunions, revision surgery often involves combining mechanical stabilization (e.g., exchange nailing, conversion from plate to nail, or vice versa, dual plating) with biological augmentation (autogenous bone grafting). Addressing underlying risk factors (e.g., smoking cessation, nutritional optimization) is also crucial.
In summary, the treatment of midshaft humerus fractures requires a nuanced, individualized approach. While non-operative treatment remains highly successful for a significant proportion of these injuries, operative fixation provides predictable outcomes for those with specific indications, with ongoing refinements in techniques and implant designs aiming to further improve patient recovery and minimize complications.
