Reconstruction of the Posterior Cruciate Ligament with Patellar Tendon Graft: Comprehensive Surgical Guide
Key Takeaway
Posterior cruciate ligament (PCL) reconstruction using a bone-patellar tendon-bone (BTB) autograft remains a highly reliable technique for restoring knee stability. Originally described by Clancy, this procedure demands precise anatomical tunnel placement to achieve isometry and avoid the "killer turn" at the tibial aperture. This comprehensive guide details the biomechanical principles, step-by-step surgical execution, and critical pearls for optimizing graft tensioning and fixation in PCL-deficient knees.
Introduction to Posterior Cruciate Ligament Reconstruction
Reconstruction of the posterior cruciate ligament (PCL) presents unique biomechanical and surgical challenges compared to anterior cruciate ligament (ACL) reconstruction. The PCL is the primary restraint to posterior tibial translation, and its complex anatomy—comprising the larger anterolateral (AL) bundle and the smaller posteromedial (PM) bundle—dictates a highly precise surgical approach.
The technique utilizing a bone-patellar tendon-bone (BTB) autograft, originally described by Clancy in 1983, remains a foundational procedure in operative orthopedics. The BTB graft offers the distinct advantage of rigid bone-to-bone healing within the osseous tunnels. However, the procedure requires meticulous attention to tunnel placement, graft length management, and the mitigation of high-stress areas such as the acute angle at the tibial aperture, commonly referred to as the "killer turn."
Biomechanics and Isometry in PCL Reconstruction
Achieving isometry—or near-isometry—is the cornerstone of a successful PCL reconstruction. Isometric tibial and femoral attachment sites ensure that the graft does not stretch or become excessively lax throughout the knee's range of motion.
The Femoral Attachment Site
The femoral attachment site is the most critical variable in PCL isometry. Errors in femoral tunnel placement profoundly affect graft tension. Any deviation should be in the anteroposterior direction rather than the proximal-distal direction.
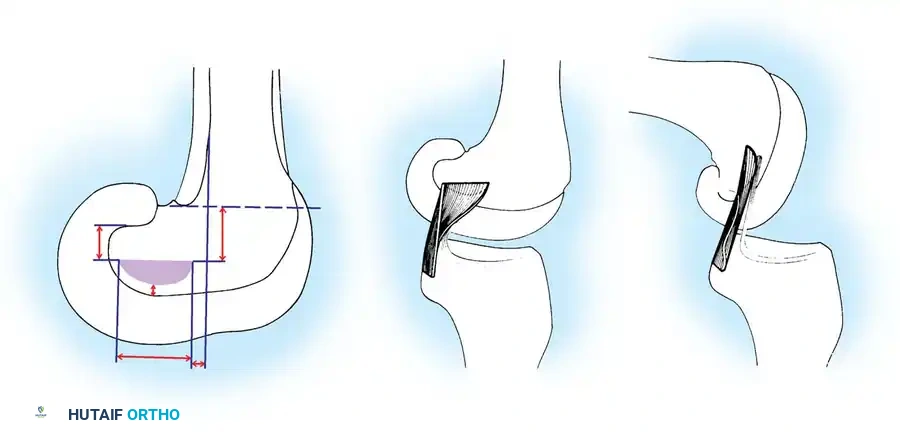
If no femoral stump is present to reference the anatomical footprint, the most isometric region is located toward the roof of the intercondylar notch, averaging 11 mm from the junction of the notch and the trochlear groove. This isometric area extends approximately 1 cm from the roof in a posterior and slightly distal direction.
Clinical Pearl: Isometry Testing
A strong suture or wire should be passed through holes drilled in the selected tibial and femoral condyles and attached to an isometer device. A length change of 2 mm or less is acceptable. If the length increases with flexion, the selected site is too distal; if it decreases with flexion, the site is too proximal.
Morgan et al. defined the anatomical origins of the PCL bundles to reproducibly position femoral tunnels:
* Anterolateral Band: 13 mm ± 0.5 mm posterior to the medial articular cartilage–intercondylar wall interface, and 13 mm ± 0.5 mm inferior to the articular cartilage–intercondylar roof interface.
* Posteromedial Band: 8 mm ± 0.5 mm posterior to the medial articular cartilage–intercondylar wall interface, and 20 mm ± 0.5 mm inferior to the articular cartilage–intercondylar roof interface.
The Tibial Attachment Site
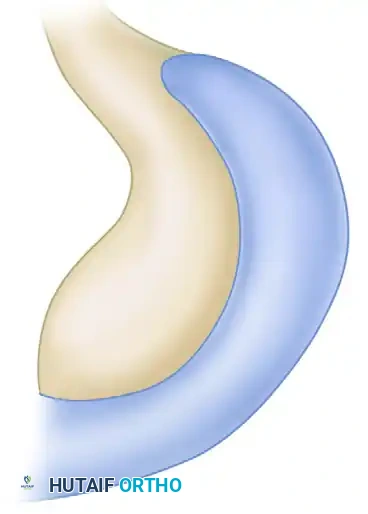
Unlike the femoral site, the tibial attachment is relatively insensitive to proximal-distal or medial-lateral variations regarding length patterns. The anatomical center is located in the PCL fovea, just inferior to the articular margin of the posterior tibia and slightly lateral to the midline.
Preoperative Planning and Diagnostic Considerations
The Meniscofemoral Ligaments
During diagnostic arthroscopy or arthrotomy, the surgeon must carefully evaluate the meniscofemoral ligaments.
* Ligament of Humphry: Passes anterior to the PCL. In isolated PCL injuries, this ligament is often intact and can be mistaken for an intact PCL. Careful dissection reveals its course to the posterior horn of the lateral meniscus.
* Ligament of Wrisberg: Passes posterior to the PCL, also traveling laterally toward the posterior horn of the lateral meniscus.
Surgical Warning: Misdiagnosis of Posterolateral Corner Injury
If either the ligament of Humphry or Wrisberg is intact, the tibia will move only slightly backward during a posterior drawer test with the tibia in marked internal rotation. This can mask a complete PCL tear and lead to a mistaken diagnosis of pure posterolateral rotary instability.
Surgical Technique: The Clancy Procedure
The following details the open and arthroscopically assisted modifications of the Clancy technique using a patellar tendon graft.
1. Patient Positioning and Initial Exposure
- Prepare and drape the leg in the standard sterile fashion and inflate the tourniquet.
- Make a standard medial parapatellar incision. Curve the superior aspect posteriorly in line with the medial femoral epicondyle, approximately two fingerbreadths proximal.
- Perform a medial arthrotomy close to the medial aspect of the patellar tendon.
- Inspect the joint. Excise or repair any meniscal tears. If the PCL tear is acute, place tagging sutures through the larger remnant to aid in anatomical footprint identification.
2. Graft Harvest
Harvesting the BTB graft requires precision to ensure adequate length, especially for the tibial tunnel, which is longer in PCL reconstruction than in ACL reconstruction.
- Free the medial third of the patellar tendon, leaving a 5-mm intact border from the remaining tendon.
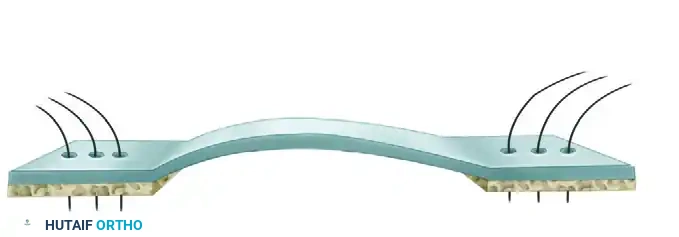
- Use an oscillating saw to remove a patellar bone block measuring 10 mm wide, 4 mm deep, and 25 mm long. Do not include any quadriceps tendon.
- Drill three holes through the patellar bone block using a 0.062-inch Kirschner wire and pass a No. 5 nonabsorbable suture through each.
- Remove a corresponding bone block from the tibial tuberosity insertion. Note: A longer plug of bone from the tibial tuberosity is advised to facilitate interference screw fixation in the long tibial tunnel.
- Drill three holes through the tibial bone block and pass No. 5 nonabsorbable sutures through each.
3. Posteromedial Exposure
- Flex the knee to 90 degrees. Sharply dissect the subcutaneous tissue to expose the anteromedial aspect of the medial gastrocnemius and semimembranosus tendons.
- Make a posterior capsular incision just anterior to the medial gastrocnemius tendon. Keep the incision posteromedial to the medial meniscus to preserve it.
- If necessary for adequate exposure, release the medial third of the medial gastrocnemius tendon distal to its femoral insertion.
- Use a curved retractor to protect the posterior capsule and neurovascular structures, exposing the native PCL tibial insertion.
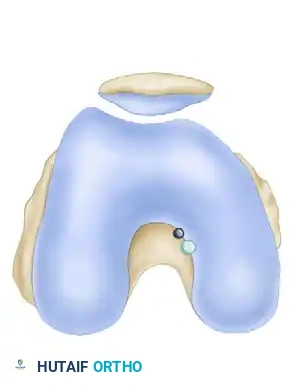
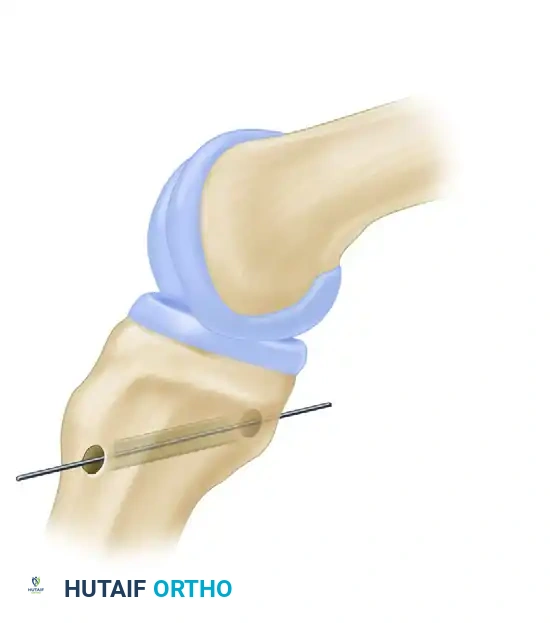
4. Tibial Tunnel Preparation
The tibial tunnel must be drilled with extreme caution due to the proximity of the popliteal artery. An anterolateral starting point is highly recommended to reduce the acute angle ("killer turn") as the graft emerges from the posterior tibia.
- Place a drill guide (or a gloved finger) posterolateral to the anatomical center of the PCL attachment on the tibia.
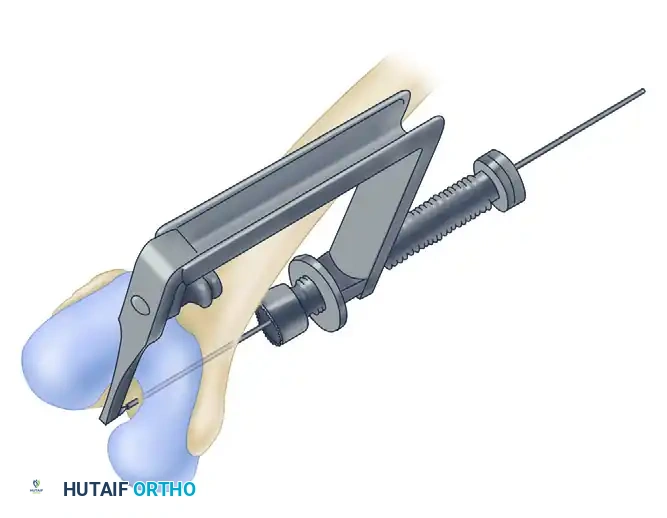
- Place the anterior part of the drill guide distal and medial to the tibial insertion of the patellar tendon.
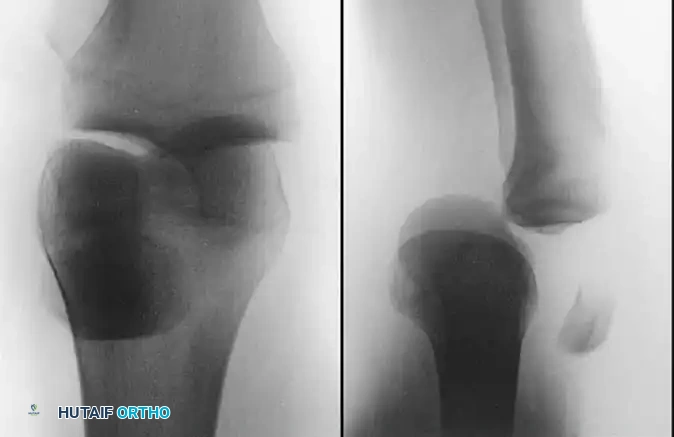
- Drill a guide pin from distal to proximal through the tibia at an angle of approximately 45 degrees. Radiographs or fluoroscopy should confirm the guidewire exits in the fovea just inferior to the articular margin.
- Overdrill the Kirschner wire with a 10-mm reamer, ensuring the posterior neurovascular structures are protected with a curette or specialized retractor.
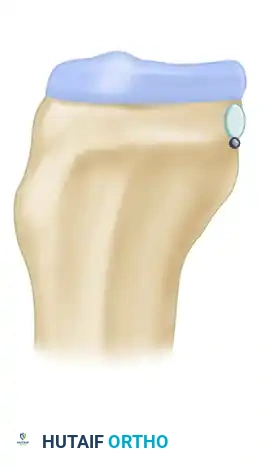
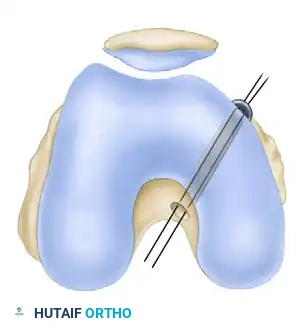
5. Femoral Tunnel Preparation
- Use the drill guide to insert a Kirschner wire through the medial femoral condyle. It should exit anterosuperior to the anatomical center of the original PCL attachment, typically at the edge of the osteochondral junction.
- Ensure the entry point is posterosuperior to the femoral epicondyle. Overdrill the wire with a 10-mm reamer.
- Undermine the vastus medialis inferiorly and retract it to expose the exit tunnel.

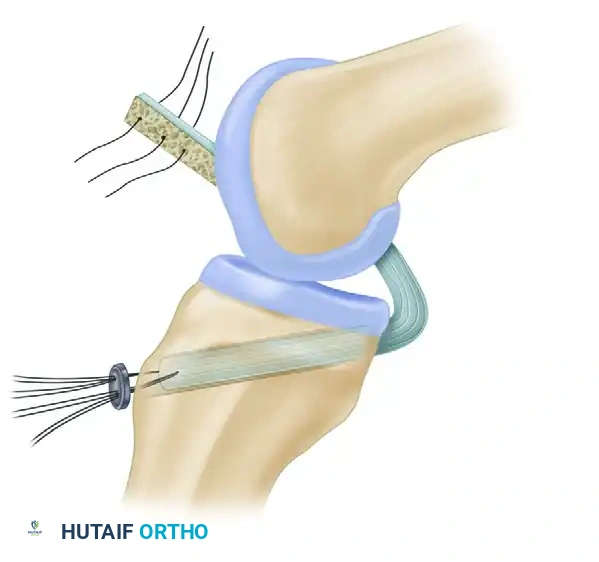
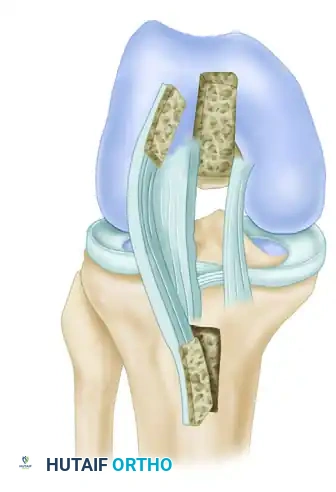
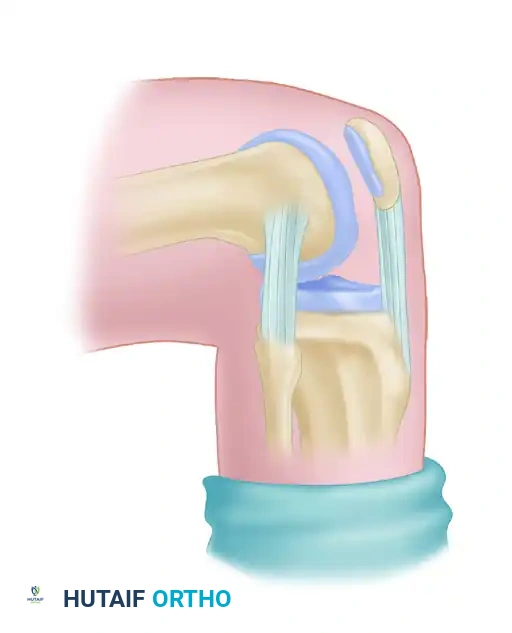
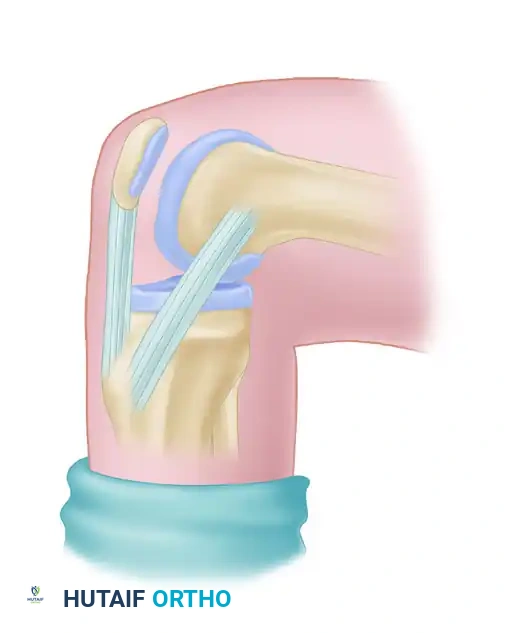
6. Graft Passage
Passing the BTB graft can be challenging due to the rigid bone blocks.
- Place the patellar bone block into the femoral tunnel so that it lies entirely within the medial femoral condyle.
- Pass a suture passer into the posteromedial capsular incision and advance it into the intercondylar notch.
- Shuttle the tibial graft sutures through the notch and out the posteromedial incision.
- Pass the suture passer into the anterior tibial tunnel and curve it out through the posteromedial incision.
- Pull the tibial bone block into the tibial tunnel.
Surgical Pearl: Navigating the Tibial Tunnel
Tilt the tibial bone graft so its inferior tip is angled anteriorly. This facilitates passage into the posterior aperture of the tibial tunnel. If passage is blocked, check for soft tissue impingement, excessive graft length, or a tunnel that was drilled too low. If too low, enlarge the tunnel by reaming with gentle anterosuperior pressure.
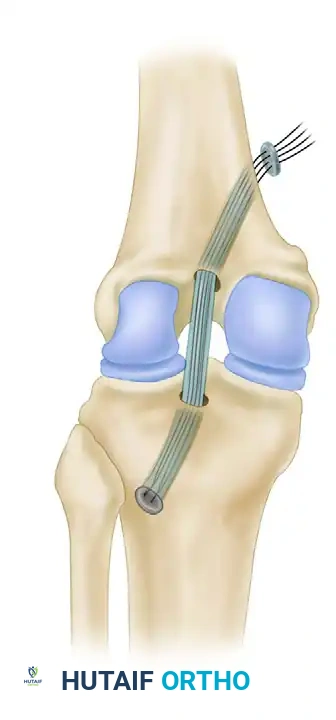
7. Graft Fixation and Tensioning
While interference screws are preferred by many surgeons, the depth of the tibial tunnel often makes visualization difficult. The Clancy technique utilizes suspensory and post-fixation methods.
- At the femoral tunnel, tie the patellar bone sutures over a fixation button.
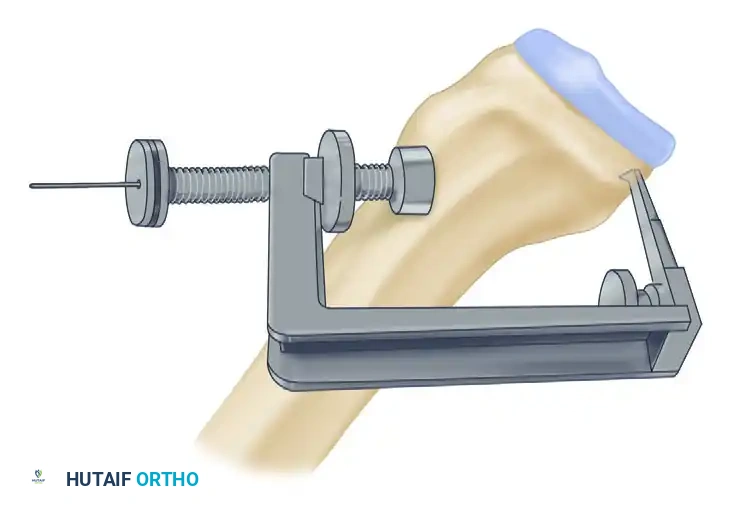
- Insert an AO malleolar screw and washer at the inferior edge of the tibial tunnel. The screw should be 5 mm longer than the measured depth.
- Tensioning Protocol: With the knee flexed to 90 degrees, apply a strong anterior drawer force to the tibia to restore the normal step-off. Tie the tibial bone sutures around the AO screw and washer.
- Tighten one suture at 90 degrees of flexion. Bring the knee to 30 degrees of flexion and retighten the suture while maintaining the anterior drawer.
- Secure all remaining ties and fully tighten the screw.
- Perform a posterior drawer test to confirm the restoration of the normal medial and lateral femoral condyle step-off. Cycle the knee through a full range of motion to ensure graft stability and absence of impingement.
Arthroscopic Modifications
Modern advancements allow the intraarticular portion of this procedure to be performed arthroscopically. As described by Sallay and McCarroll, the intercondylar notch and menisci can be accessed through the defect in the patellar tendon following graft harvest.
The infrapatellar fat pad is incised vertically, and retractors are used to visualize the notch. Flexing the knee to 90 degrees aligns the surgeon's line of sight parallel to the intercondylar roof, optimizing visualization of the femoral footprint.
Postoperative Rehabilitation Protocol
Rehabilitation following PCL reconstruction is generally more conservative than ACL protocols to protect the graft from early posterior tibial translation forces.
- Phase I (0-6 Weeks): The knee is immobilized in full extension using a dynamic PCL brace (which applies an anterior force to the proximal tibia). Weight-bearing is restricted (toe-touch or non-weight-bearing). Passive prone range of motion (ROM) is gradually introduced, strictly avoiding active hamstring contraction.
- Phase II (6-12 Weeks): Gradual progression to full weight-bearing. ROM is advanced to full flexion. Closed kinetic chain quadriceps strengthening begins. Hamstring exercises remain contraindicated to prevent posterior tibial sag.
- Phase III (3-6 Months): Introduction of light jogging, proprioceptive training, and advanced closed-chain exercises.
- Phase IV (6-9+ Months): Return to sport-specific drills. Full return to play is typically permitted when quadriceps strength reaches >90% of the contralateral limb and clinical stability is maintained.
Conclusion
Reconstruction of the posterior cruciate ligament using a patellar tendon autograft is a technically demanding but highly rewarding procedure. Success relies heavily on a deep understanding of PCL isometry, meticulous tunnel placement, and rigorous protection of the posterior neurovascular structures. By adhering to the anatomical principles outlined by Clancy and utilizing modern fixation and tensioning protocols, orthopedic surgeons can reliably restore knee kinematics and stability in the PCL-deficient patient.
You Might Also Like