Fasciocutaneous Flaps in Orthopaedic Reconstruction: Lateral Arm and Scapular Flap Techniques
Key Takeaway
The lateral arm and scapular flaps are highly versatile fasciocutaneous options for complex soft tissue reconstruction. The lateral arm flap, based on the posterior radial collateral artery, provides thin, sensate coverage. Conversely, the scapular flap offers a robust, larger surface area utilizing the circumflex scapular artery. This guide details the precise surgical techniques, vascular anatomy, and biomechanical considerations essential for successful microvascular free tissue transfer in orthopaedic surgery.
Introduction to Fasciocutaneous Free Tissue Transfer
In the armamentarium of the reconstructive orthopaedic surgeon, fasciocutaneous free flaps are indispensable for the management of complex soft tissue defects. Unlike muscle flaps, which may undergo significant atrophy over time and require skin grafting, fasciocutaneous flaps provide durable, pliable, and anatomically similar coverage for exposed bone, tendon, and neurovascular structures.
Two of the most reliable and frequently utilized donor sites in upper extremity and comprehensive orthopaedic reconstruction are the lateral arm flap and the scapular flap. While historically grouped together in operative texts due to their shared utility in extremity coverage, they possess distinct vascular anatomies, biomechanical properties, and harvest techniques. This masterclass delineates the precise surgical execution of both flaps, expanding upon the foundational techniques described by Gilbert, Urbaniak, and colleagues.
PART I: THE LATERAL ARM FLAP
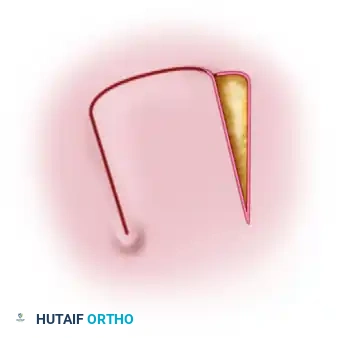
The lateral arm flap is a highly versatile fascial or fasciocutaneous flap. It is particularly revered for its ability to provide thin, pliable tissue that is ideal for covering shallow defects on the hand, wrist, foot, and ankle.
Vascular Anatomy and Innervation
The lateral arm flap is pedicled on the posterior radial collateral artery (PRCA), which is a direct terminal continuation of the profunda brachii artery.
* Arterial Supply: The profunda brachii travels through the spiral groove of the humerus alongside the radial nerve. As it pierces the lateral intermuscular septum, it bifurcates into the anterior and posterior radial collateral arteries. The PRCA descends within the lateral intermuscular septum, sending perforators to the overlying fascia and skin.
* Venous Drainage: Drainage is provided by the paired venae comitantes accompanying the PRCA, which drain into the profunda brachii veins.
* Innervation: A distinct advantage of the lateral arm flap is its potential for sensory reinnervation. The flap can be harvested as a sensate flap by incorporating the posterior cutaneous nerve of the arm (a branch of the radial nerve), allowing for the restoration of protective sensation at the recipient site.
Indications and Biomechanical Limitations
The lateral arm flap is indicated for small-to-medium defects requiring thin, sensate coverage. It is particularly useful in palmar and dorsal hand reconstruction, where bulky flaps would impede tendon excursion and joint mobility.
Clinical Pearl: The maximal dimension of the lateral arm flap is strictly limited to approximately 10 cm × 15 cm. Attempting to harvest a flap wider than 6 to 8 cm often precludes primary closure of the donor site, necessitating a split-thickness skin graft over the lateral arm, which can be cosmetically displeasing and prone to adherence to the triceps fascia.
Surgical Technique: Lateral Arm Flap Harvest
- Positioning and Preparation: Place the patient supine with the donor arm adducted across the chest or positioned on a hand table. A sterile tourniquet is applied high on the brachium.
- Marking the Flap: Draw a line from the deltoid insertion to the lateral epicondyle, representing the lateral intermuscular septum. The flap is designed as an ellipse centered over this axis, typically located in the distal third of the arm.
- Posterior Incision and Elevation: Incise the posterior border of the flap first. Dissect anteriorly in the subfascial plane over the triceps muscle until the lateral intermuscular septum is reached.
- Identifying the Pedicle: Carefully visualize the PRCA and its venae comitantes within the septum. The posterior cutaneous nerve of the arm will also be identified in this plane.
- Anterior Incision: Incise the anterior border of the flap, dissecting subfascially over the brachialis and brachioradialis muscles toward the septum.
- Septal Dissection: Release the septum from its humeral attachment. This is the most critical step; the dissection must stay directly on the periosteum of the humerus to avoid injuring the pedicle.
- Pedicle Mobilization: Trace the pedicle proximally toward the spiral groove. The radial nerve must be identified and meticulously protected as the profunda brachii vessels are mobilized to achieve adequate pedicle length (typically 6 to 8 cm).
PART II: THE SCAPULAR FLAP
When a defect exceeds the dimensional limits of the lateral arm flap, the scapular flap serves as an exceptional alternative. Based on the circumflex scapular artery, it provides a large, robust area of fasciocutaneous tissue. The following technique details the classic approach established by Gilbert and Urbaniak et al.
Vascular Anatomy of the Scapular System
The scapular flap is nourished by the circumflex scapular artery (CSA), a major branch of the subscapular artery.
* The subscapular artery arises from the third part of the axillary artery and divides into the thoracodorsal artery and the CSA.
* The CSA passes posteriorly through the triangular space, which is bounded by the teres minor (superiorly), teres major (inferiorly), and the long head of the triceps (laterally).
* Upon exiting the triangular space, the CSA divides into a transverse branch (supplying the scapular flap) and a descending branch (supplying the parascapular flap).
Preoperative Planning and the "Rule of Twos"
Proper design of the scapular flap is paramount to ensure adequate vascularity and to facilitate primary donor site closure. Urbaniak et al. pointed out the extreme usefulness of the “rule of twos” in outlining the scapular flap.
Surgical Guideline: The Rule of Twos
* Medial Border: Extends to within 2 cm of the vertebral spinous processes.
* Lateral Border: Extends to within 2 cm superior to the posterior axillary crease.
* Inferior Border: Extends to within 2 cm superior to the inferior angle of the scapula.
* Superior Border: Extends to within 2 cm inferior to the spine of the scapula.
Surgical Technique 63-15: Scapular Flap Harvest (Gilbert; Urbaniak et al.)
Step 1: Patient Positioning and Donor Site Selection
Place the patient prone or in the lateral decubitus position on an axillary pad. This positioning allows mobility of the chest so that the patient can be turned prone if needed during the procedure.
Donor site selection is dictated by the recipient site to optimize surgical ergonomics and two-team approaches:
* Upper Extremity Coverage: If the flap is to be used for upper extremity coverage, the contralateral shoulder serves as the donor.
* Lower Extremity (Posterior Tibial Artery): In situations in which the posterior tibial artery is the recipient vessel, the contralateral shoulder should serve as the donor site.
* Lower Extremity (Anterior Tibial-Dorsalis Pedis System): If the anterior tibial-dorsalis pedis system is to be used, the donor site is the ipsilateral scapular area.
Step 2: Draping and Limb Preparation
Drape the arm free so that it can be moved through a full range of motion. Unrestricted mobility—especially adduction and abduction—is critical to allow dynamic opening of the triangular space during the deep dissection of the vascular pedicle.
Step 3: Flap Marking
Place the patient’s arm at his or her side. Make an outline of the flap in a transversely oriented direction centered over the scapula, strictly adhering to the "rule of twos" described above. The maximum width that typically allows for primary closure is 10 to 12 cm, though the length can extend up to 24 cm.
Step 4: Incision and Medial Elevation
Make a skin incision and elevate the flap, beginning on the medial border approximately 2 cm lateral to the vertebral spinous processes. The dissection must proceed in the subfascial plane, directly superficial to the deep fascia of the infraspinatus muscle.
Step 5: Lateral Dissection and Pedicle Identification
Incise the lateral, superior, and inferior borders of the flap.
Surgical Warning: Use loupe magnification (minimum 2.5x to 3.5x) to aid in the dissection as you approach the lateral border. The transverse branch of the circumflex scapular artery is superficial and easily injured if the dissection plane strays too deep or too superficial near the triangular space.
As the flap is elevated from medial to lateral, the pedicle will be visualized emerging from the triangular space.
Step 6: Pedicle Mobilization
Once the transverse branch is identified, trace it proximally into the triangular space. Several muscular branches supplying the teres major and minor will be encountered; these must be meticulously ligated with hemoclips or bipolar electrocautery. Retract the teres minor superiorly and the teres major inferiorly to expose the main trunk of the circumflex scapular artery. Dissect the pedicle proximally to its origin at the subscapular artery to achieve a pedicle length of 6 to 9 cm.
Step 7: Donor Site Closure
Once the flap is isolated on its pedicle, verify perfusion. After pedicle division, the donor site is closed primarily. Wide undermining of the surrounding back skin is often necessary. Place a closed-suction drain deep to the closure to prevent hematoma and seroma formation.
PART III: RECIPIENT SITE PREPARATION AND MICROVASCULAR ANASTOMOSIS
The success of either the lateral arm or scapular flap relies heavily on meticulous recipient site preparation.
Debridement and Vessel Preparation
- Radical Debridement: The recipient bed must be radically debrided of all necrotic, infected, or devitalized tissue. "Pseudo-capsules" over exposed bone must be excised until punctate cortical bleeding is observed.
- Vessel Selection: Identify recipient vessels outside the zone of injury. In the lower extremity, the posterior tibial or anterior tibial vessels are commonly used. In the upper extremity, the radial or ulnar arteries are preferred.
- Perivascular Dissection: Strip the adventitia from the recipient artery and vein(s) under the operating microscope. Ensure robust pulsatile flow from the recipient artery before proceeding.
Anastomosis
- Ischemia Time: Minimize flap ischemia time. Once the flap is transferred, stabilize it with a few temporary tacking sutures.
- Arterial Anastomosis: Perform the arterial anastomosis using 8-0 or 9-0 nylon sutures in an interrupted fashion. End-to-end anastomosis is standard, though end-to-side may be utilized if preserving distal flow in a single-vessel extremity is paramount.
- Venous Anastomosis: Perform the venous anastomosis using a venous anastomotic coupling device or hand-sewn interrupted sutures. Two venous anastomoses are preferred if anatomically feasible to reduce the risk of venous congestion.
PART IV: POSTOPERATIVE PROTOCOL AND FLAP MONITORING
The postoperative management of fasciocutaneous free flaps requires a highly regimented protocol to ensure graft survival and early detection of vascular compromise.
Environmental and Systemic Management
- Temperature Control: The patient's room must be kept warm (ambient temperature > 75°F / 24°C) to prevent peripheral vasospasm.
- Hydration and Hemodynamics: Maintain euvolemia. Avoid vasopressors if possible, as they induce peripheral vasoconstriction which can compromise pedicle flow.
- Anticoagulation: While protocols vary by institution, a common regimen includes daily low-dose aspirin (81 mg) and prophylactic subcutaneous heparin to prevent deep vein thrombosis. The use of dextran is largely historical and currently discouraged due to the risk of systemic complications (e.g., pulmonary edema, anaphylaxis).
Flap Monitoring Protocol
Flap monitoring should be conducted by trained microsurgical nursing staff:
* Frequency: Every 1 hour for the first 24 hours; every 2 hours for the next 24 hours; then every 4 hours until postoperative day 5.
* Clinical Assessment: Evaluate flap color, capillary refill (normal is 1 to 3 seconds), and tissue turgor.
* Arterial Insufficiency: Flap appears pale, cool, with absent capillary refill and empty turgor.
* Venous Congestion: Flap appears violaceous/blue, swollen, with brisk (< 1 second) capillary refill and dark bleeding upon pinprick.
* Instrumental Monitoring: An implantable venous Doppler or handheld surface acoustic Doppler should be used to confirm pulsatile arterial flow and continuous venous hum.
Pitfall: If vascular compromise is suspected, there is no substitute for immediate operative re-exploration. Delaying re-exploration beyond 4 to 6 hours of thrombosis significantly decreases the salvage rate of the flap.
Rehabilitation
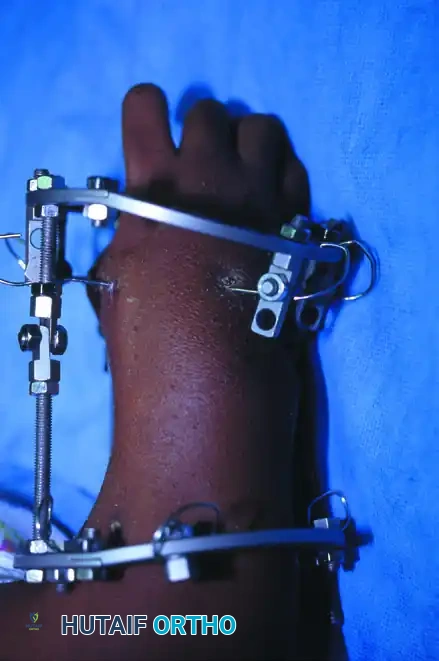
Immobilize the recipient limb in a bulky, non-compressive splint for the first 7 to 10 days. Once the flap is deemed stable and the incisions are healing, progressive range of motion may begin. For lower extremity flaps, a strict dangling protocol is initiated around postoperative day 14 to gradually acclimate the flap's microvasculature to dependent venous pressures.
You Might Also Like