Orthopaedic Skin Grafting and Local Flap Reconstruction
Key Takeaway
Skin grafting and local flap coverage are essential techniques in orthopaedic soft tissue reconstruction. Success dictates meticulous recipient bed preparation, ensuring a well-vascularized, infection-free environment. This guide details the surgical application of split-thickness and full-thickness grafts, alongside the biomechanical principles of local flaps and Z-plasties, providing orthopaedic surgeons with evidence-based protocols for optimal graft survival and functional recovery.
PRINCIPLES OF ORTHOPAEDIC SOFT TISSUE RECONSTRUCTION
In the realm of operative orthopaedics, the successful management of complex musculoskeletal trauma, tumor resection, and severe infections is inextricably linked to the quality of soft tissue coverage. A perfectly executed osteosynthesis or arthroplasty will ultimately fail if the overlying soft tissue envelope is compromised. The reconstructive ladder dictates that surgeons should employ the simplest, most reliable method of coverage that fulfills the functional and aesthetic requirements of the defect.
When primary closure is impossible due to excessive tension or tissue loss, orthopaedic surgeons must be highly proficient in the application of split-thickness skin grafts (STSGs), free full-thickness skin grafts (FTSGs), and the design of local random-pattern flaps. Understanding the biomechanics of tissue transfer, the physiology of graft incorporation, and the precise geometric principles of local flaps is mandatory for the practicing orthopaedic consultant.
APPLYING SPLIT-THICKNESS GRAFTS
Split-thickness skin grafts consist of the entire epidermis and a variable portion of the underlying dermis. They are the workhorse of orthopaedic soft tissue coverage for large, superficial defects. Because they require less robust revascularization than full-thickness grafts, STSGs have a higher rate of primary "take" in suboptimal beds, though they are subject to greater secondary contraction and offer less durability over weight-bearing areas or joints.
Recipient Bed Preparation and Physiology
The absolute prerequisite for a successful split-thickness graft is a highly vascularized recipient bed that is entirely free of active bleeding, necrotic debris, and gross infection. Grafts will not survive on bare cortical bone without periosteum, bare tendon without paratenon, or bare articular cartilage, as these tissues lack the capillary network necessary to initiate plasmatic imbibition and subsequent inosculation.
🛑 Surgical Warning: The Ischemic Bed
Attempting to graft over a poorly prepared, fibrotic, or heavily contaminated wound bed is the leading cause of graft failure. If the recipient area is unsuitable, the surgeon must commit to a rigorous preparatory phase. This may require several days of targeted enzymatic débridement, negative pressure wound therapy (NPWT), multiple wet-to-dry dressing changes, and aggressive sharp surgical débridement to excise all devitalized and infected material until healthy, punctate bleeding tissue is achieved.
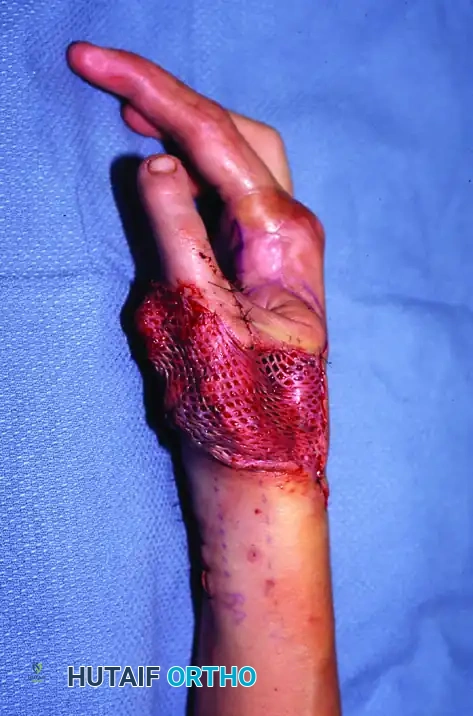
Graft Meshing and Fluid Drainage
For extensive orthopaedic defects, applying a mesh to the harvested graft is highly advantageous. Meshing serves two critical biomechanical and physiological functions:
1. Expansion: It allows a smaller donor graft to cover a significantly larger surface area (commonly utilizing expansion ratios of 1:1.5 to 1:3).
2. Drainage: It provides fenestrations that allow the free drainage of serum, blood, and exudate from beneath the graft.
Hematoma and seroma formation are the primary mechanical barriers to graft revascularization, as they physically separate the graft from the nutrient-rich capillary bed. Meshing effectively mitigates this risk.
Surgical Technique: STSG Application
The application of the graft requires meticulous tissue handling to prevent shearing and cellular damage.
- Placement: Transfer the graft to the recipient area directly from the dermatome or mesher. Place it on the defect without premature trimming or excessive handling. The dermal side (which is typically lighter and less reflective) must face the wound bed.
- Securing the Margins: The graft border must be meticulously attached to the surrounding native skin to secure it in its new position and prevent shear forces. This can be achieved using fine non-absorbable sutures (e.g., 4-0 or 5-0 nylon) or surgical skin staples.
- Suturing Mechanics: When suturing the graft in place, the trajectory of the needle is critical.
💡 Clinical Pearl: Needle Trajectory
It is mechanically much easier—and safer for the graft—to insert a small curved needle first through the graft edge and then through the native skin around the recipient area. Doing the reverse tends to lift the graft off the bed, risking tearing of the fragile split-thickness tissue and disrupting the critical graft-bed interface.
- Trimming: Once the graft is adequately secured at multiple cardinal points, carefully trim the redundant edges. Overlapping edges will become necrotic and can serve as a nidus for superficial infection.
Dressing Application and Immobilization
The dressing is as critical as the surgical application itself. The goal is to maintain uniform, gentle pressure to keep the graft intimately apposed to the vascular bed while preventing any shear forces.
- Apply a finely meshed, nonadherent gauze directly over the graft. Impregnated materials such as Xeroform (bismuth tribromophenate) or Adaptic are preferred to prevent the dressing from adhering to the newly forming capillary buds.
- Apply a stent dressing or a bulky, absorptive dressing over the nonadherent layer.
- Secure the entire construct with circumferential conforming gauze.
- Immobilization: If the graft crosses a joint or is in an area subject to movement, cover the dressing with a thin layer of plaster or fiberglass for rigid splinting. Shear forces will instantly shear the fragile neovascular network (inosculation phase), leading to total graft failure.
Postoperative Care and Graft Preservation
The initial dressing is typically left undisturbed for 5 to 7 days, provided there are no systemic signs of infection or excessive strike-through exudate.
During the first dressing change, the graft is carefully inspected. Any clearly necrotic or non-adherent graft material must be sharply removed to prevent secondary infection of the underlying bed, and a fresh nonadherent dressing is applied. If an area of necrosis is large, early regrafting may be necessary once the bed is re-optimized.
Graft Storage: When partial necrosis is anticipated due to a marginal wound bed, or when a staged orthopaedic procedure is planned requiring further coverage, a graft larger than initially needed may be harvested.
* Storage Protocol: The excess split-thickness graft can be folded in sterile gauze and refrigerated at strictly 0°C to 5°C.
* Medium: It should be submerged in lactated Ringer solution or a normal saline solution to which aqueous penicillin has been added.
* Viability: Under these precise conditions, the banked skin can be utilized at any time up to 21 days post-harvest.
FREE FULL-THICKNESS GRAFTS
Free full-thickness skin grafts (FTSGs) include the entire epidermis and the complete dermal layer. Because they contain more adnexal structures (hair follicles, sebaceous glands) and a thicker collagen matrix, they exhibit significantly less secondary contraction than STSGs. This makes them ideal for coverage over joints, the palmar surface of the hand, and areas requiring durable, pliable skin.
Indications and Bed Requirements
The metabolic demand of an FTSG is substantially higher than that of an STSG. Consequently, the recipient area must be absolutely pristine—free of any microscopic infection, with complete and meticulous hemostasis. Even a microscopic hematoma will block the critical early phase of plasmatic imbibition, leading to full-thickness necrosis.
Donor Site Selection and Harvesting
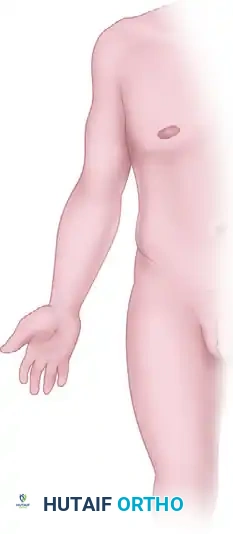
Preferred donor areas for orthopaedic applications include the groin or the medial aspect of the arm. These sites offer skin that is relatively thin, pliable, and aesthetically matched to many recipient sites. Furthermore, the elliptical defect created by removing the graft in these regions can typically be closed primarily by undermining the adjacent skin edges and suturing them under minimal tension.
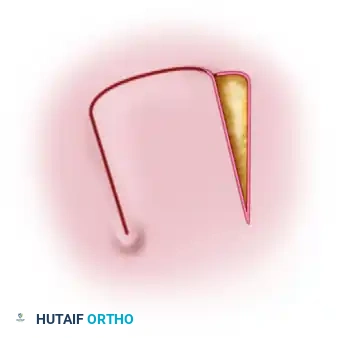
🛑 Pitfall: Inadequate Defatting
A critical step in FTSG preparation is the complete removal of subcutaneous fat from the dermal undersurface. Adipose tissue is poorly vascularized and acts as an impermeable barrier to the diffusion of nutrients from the recipient bed.
Occasionally, an associated severe orthopaedic injury (e.g., a degloving injury or traumatic amputation) makes a detached piece of native skin and underlying fat available. In this salvage scenario, the avulsed skin can be stabilized on a dermatome drum, and a precise full-thickness graft can be excised directly from the underlying traumatized fat, converting discarded tissue into a valuable reconstructive graft.
PRINCIPLES OF LOCAL FLAPS
When the recipient bed is unsuitable for a skin graft (e.g., exposed bone without periosteum, exposed hardware, or bare tendon), or when superior durability and padding are required, local flaps are indicated. Local flaps transfer skin and subcutaneous tissue with an intact, continuous blood supply (the pedicle) to an adjacent defect.
In orthopaedic reconstruction, local random-pattern flaps rely on the subdermal vascular plexus rather than a named axial blood vessel. To facilitate movement, the defect to be covered is typically converted into a geometric shape, most commonly a triangle.
Types of Local Flaps
-
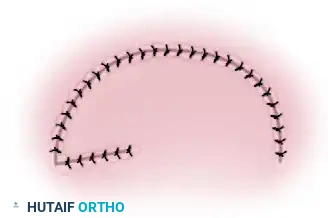
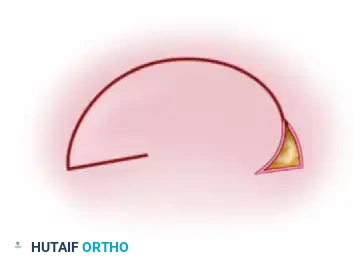
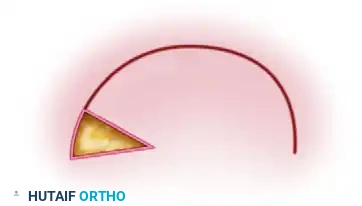
Rotation Flaps:
A rotation flap is a semicircular flap of skin and subcutaneous tissue that is rotated about a pivot point into the adjacent primary defect. The line of tension is distributed along the arc of the flap. This is highly effective for closing triangular defects where adjacent skin laxity allows for a sweeping rotational advancement. -
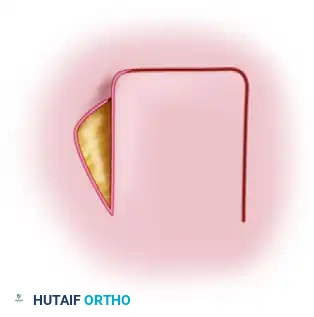
Transposition Flaps:
A transposition flap is a rectangular or geometrically designed flap that is lifted and moved laterally across an intervening bridge of intact skin to cover the primary defect. Because the flap is moved out of its original linear axis, a secondary defect is invariably created at the donor site.
Surgical Requirement: The secondary defect created by transposing the flap cannot usually be closed primarily without causing severe tension; therefore, it must be covered with a split-thickness skin graft. -
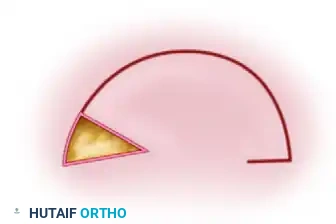
Combined Flaps and Back-Cuts:
In cases where a rotation or transposition flap cannot reach the distal extent of the defect due to tethering at the pedicle, a "back-cut" may be employed.
Biomechanics vs. Vascularity: A back-cut at the base of the flap significantly decreases the mechanical tension on the flap, allowing greater reach. However, this maneuver simultaneously narrows the pedicle, directly decreasing the blood supply to the flap. The surgeon must carefully balance the need for geometric advancement against the risk of ischemic tip necrosis. The small defect created by the back-cut is typically closed primarily.
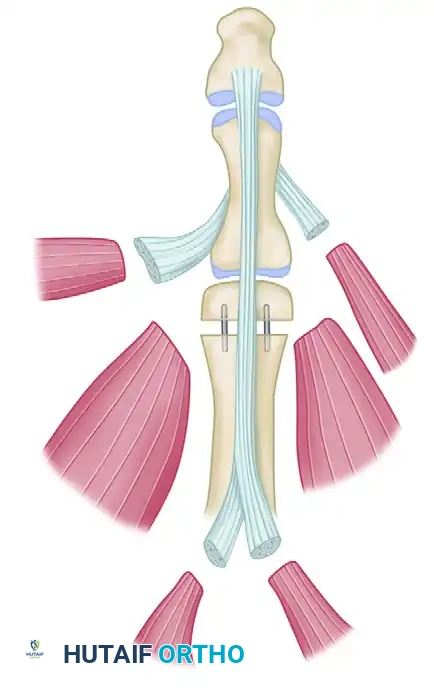
Z-PLASTY TECHNIQUES IN ORTHOPAEDICS
The Z-plasty is a highly versatile tissue-rearrangement technique used to lengthen a contracted scar, redirect tension lines, or deepen a web space. It involves the creation and transposition of two triangular flaps.
Geometric Design and Vascular Considerations
The classic Z-plasty consists of a central limb (usually positioned along the line of the scar or contracture) and two parallel peripheral limbs. The angles that the central limb makes with each of the other two limbs dictate both the biomechanical yield (increase in length) and the vascular safety of the flaps.
For optimal results in orthopaedic applications, these angles should be designed strictly between 45 and 60 degrees.
- Angles less than 45 degrees: While easier to transpose, narrow-angled flaps have a severely compromised subdermal vascular plexus at their tips, leading to a high risk of ischemic necrosis. They are generally considered impractical and unsafe.
- Angles greater than 60 degrees: While highly vascular, wide-angled flaps generate severe transverse tension when transposed. They are mechanically difficult to rotate into position and often result in wound dehiscence or dog-ear deformities.
Mathematical Yield of Z-Plasty Angles
The primary goal of a Z-plasty is to recruit lateral tissue laxity to provide longitudinal lengthening. The theoretical increase in length along the central limb is mathematically predictable based on the angle size chosen:
- 30° Angle: Yields a 25% increase in length. (High risk of tip necrosis; rarely used).
- 45° Angle: Yields a 50% increase in length. (Excellent balance of vascularity and lengthening).
- 60° Angle: Yields a 75% increase in length. (Maximum practical lengthening; requires significant lateral skin laxity).
By mastering the precise geometric execution of local flaps and Z-plasties, alongside the meticulous application of skin grafts, the orthopaedic surgeon can effectively manage complex soft tissue defects, ensuring the protection of underlying osseous and tendinous structures and optimizing ultimate functional recovery.
You Might Also Like