Orthopaedic Skin Grafts & Flaps: Surgical Techniques
Key Takeaway
Skin grafts and flaps are essential for orthopaedic soft tissue reconstruction. Success depends on meticulous bed preparation, precise graft harvesting, and secure fixation. While thin split-thickness grafts offer higher survival rates, full-thickness grafts provide superior durability and less contraction. This guide details evidence-based surgical techniques, biomechanical principles, and postoperative protocols for optimal soft tissue coverage in complex orthopaedic injuries.
GRAFTS AND FLAPS IN ORTHOPAEDIC SURGERY
The reconstruction of soft tissue defects is a foundational pillar of operative orthopaedics. Whether managing acute trauma, post-oncologic resections, or chronic wounds, the orthopaedic surgeon must possess a masterful understanding of the reconstructive ladder. This ranges from secondary intention and primary closure to the sophisticated application of free skin grafts, local flaps, and distant pedicled or free tissue transfers.
The fundamental axiom of skin grafting dictates: “The thinner the graft, the better the take; however, the thicker the graft, the better the function.” A thick graft is biomechanically superior, withstanding friction and constant use while contracting only about 10%. Conversely, a thin graft, while possessing a higher metabolic tolerance during the initial ischemic phase, may undergo secondary contraction of 50% to 75%.
💡 Clinical Pearl: The Biology of Graft Survival
For any free graft to survive, it must rapidly reestablish its nutrition before full-thickness cellular death occurs. This process occurs in three distinct phases:
1. Plasmatic Imbibition (Days 1-2): The graft absorbs wound exudate, swelling and surviving via passive diffusion.
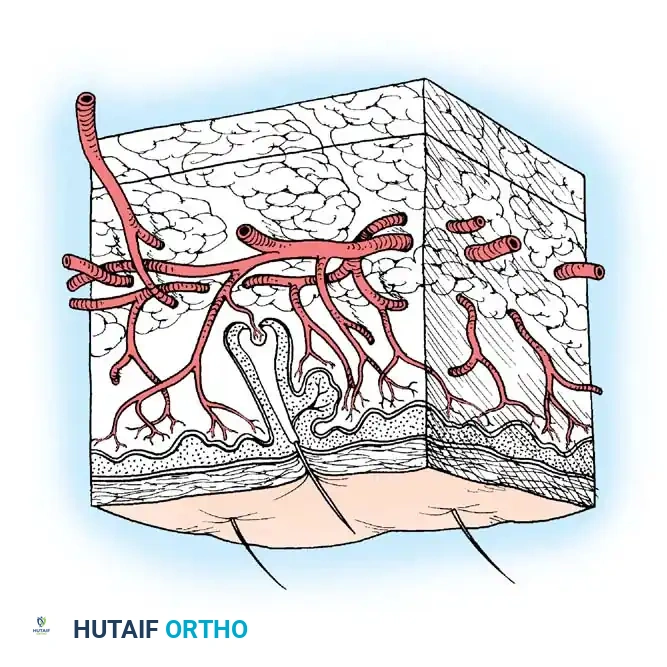
2. Inosculation (Days 3-4): Alignment and connection of the graft's severed capillary network with the recipient bed's vessels.
3. Neovascularization (Days 5+): Ingrowth of new blood vessels into the graft dermis.
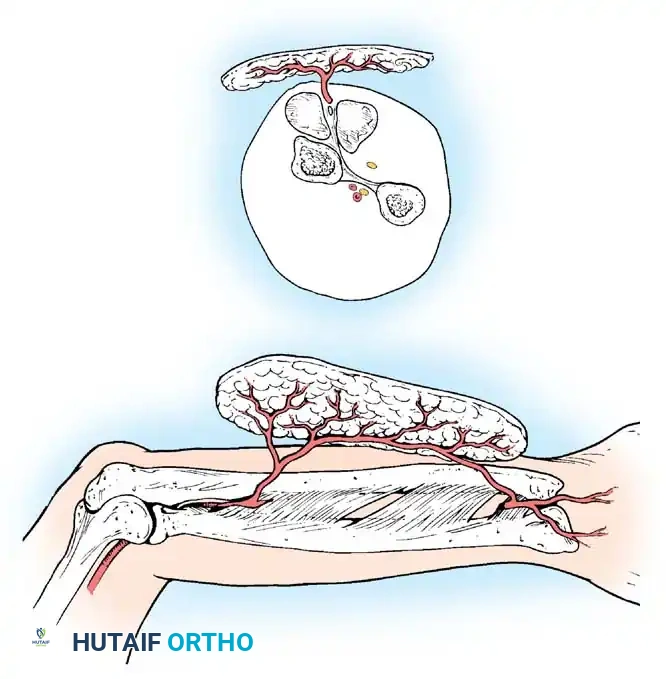
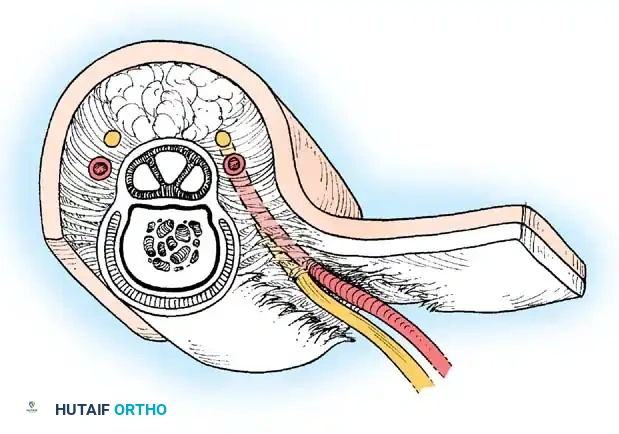
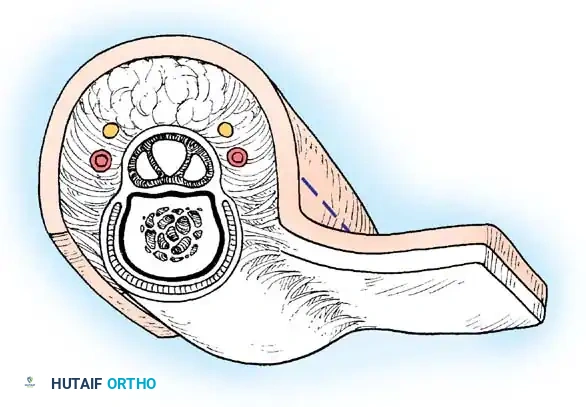
A graft cannot survive if a hematoma, seroma, or sheer force separates it from the underlying vascular bed. Furthermore, grafts will generally not survive on bare cortical bone devoid of periosteum, bare tendon devoid of paratenon, or bare cartilage devoid of perichondrium.
Recipient Bed Preparation
The sooner a graft can be applied to a clean, vascularized bed, the better. It is not necessary to wait for exuberant granulation tissue to form, provided there is no sepsis. Sepsis must be rigorously excluded; a quantitative wound biopsy yielding greater than $10^5$ colony-forming units (CFU) per gram of tissue, or the presence of beta-hemolytic Streptococcus, is an absolute contraindication to grafting.
If the recipient area is unsuitable, preparation may require several days of enzymatic or surgical débridement, negative pressure wound therapy (NPWT), and targeted antimicrobial therapy to remove necrotic and infected material.
SPLIT-THICKNESS SKIN GRAFTS (STSG)
For primary coverage of acute wounds, free skin grafts are usually of thin or medium split-thickness. Split-thickness skin grafts (STSGs) vary in thickness from 0.008 inches in infants to 0.015 inches in adults. In elderly individuals and children, the lower abdominal wall or buttock skin is preferred if the graft required is thicker than 0.010 inches.
Donor Site Selection
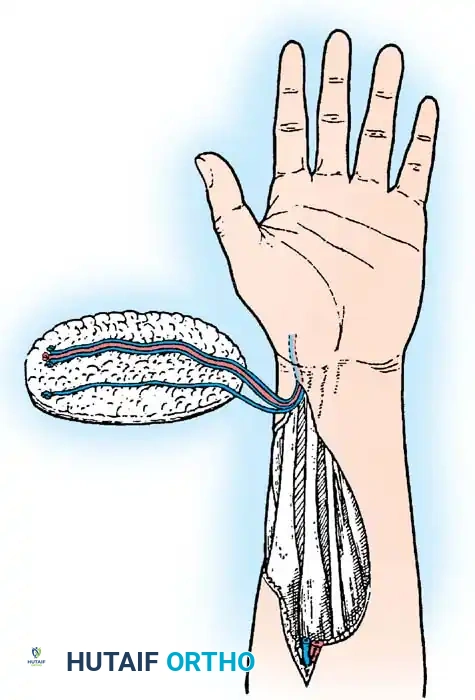
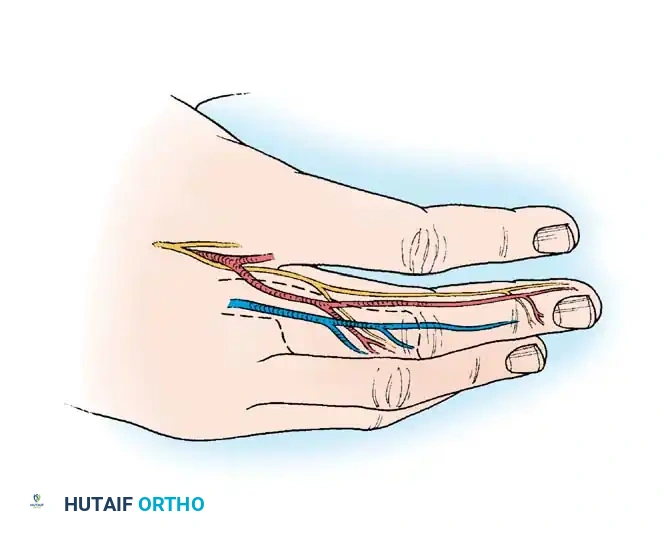
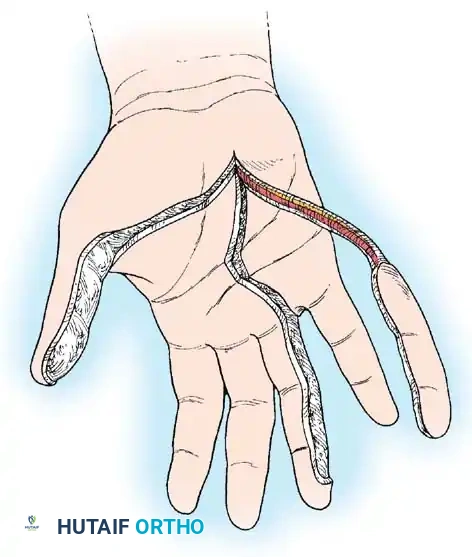
Frequently, only a small "postage stamp" graft is needed. While it can be obtained within the same operative field from the forearm, this is often undesirable due to visible scarring. The hypothenar area of the palm can yield satisfactory STSGs, particularly for fingertip skin loss.
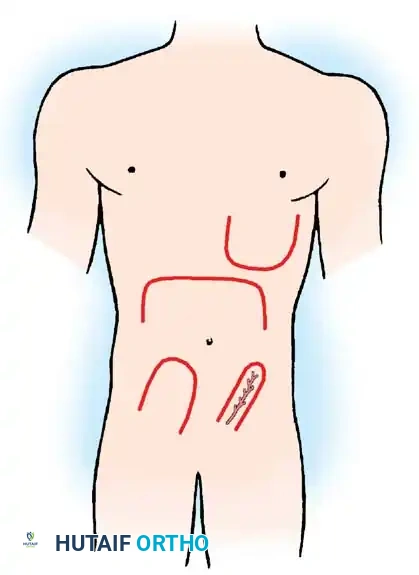
For larger grafts, the anterior and lateral aspects of the thigh, or the medial aspect of the arm just inferior to the axilla, are ideal. In older female patients, skin inferior to a pendulous breast can be harvested without leaving a readily visible scar.

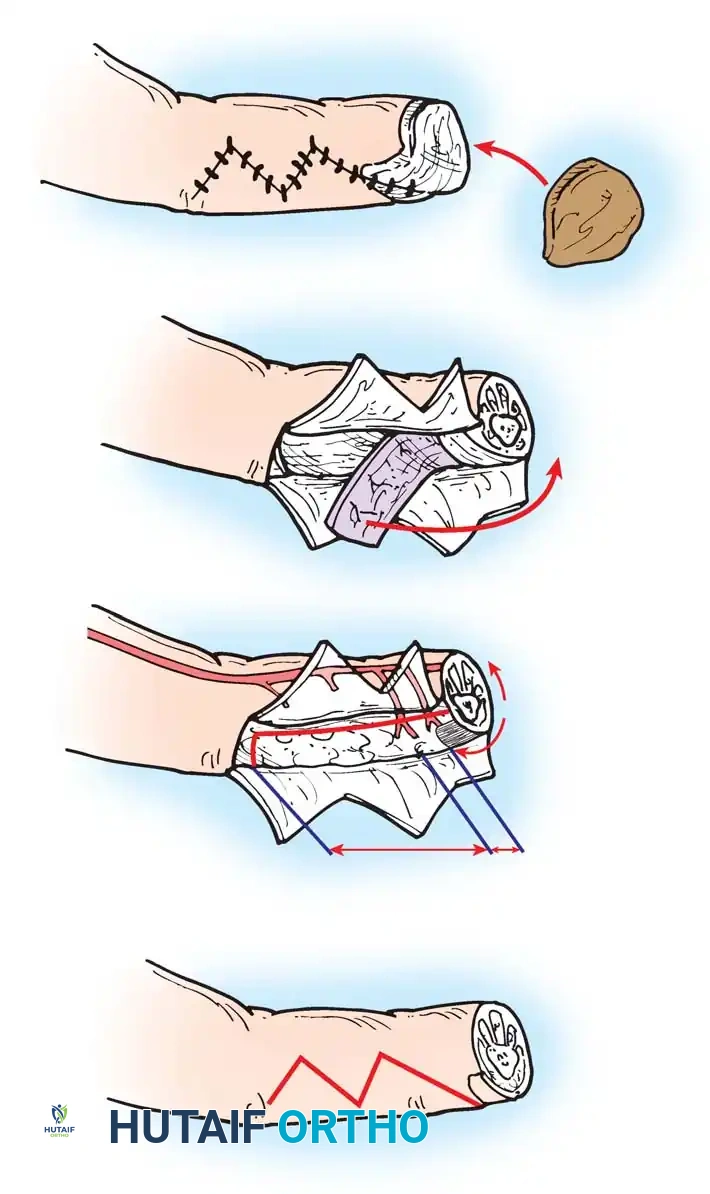
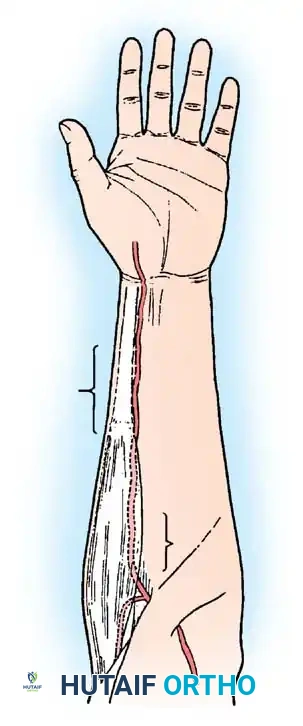
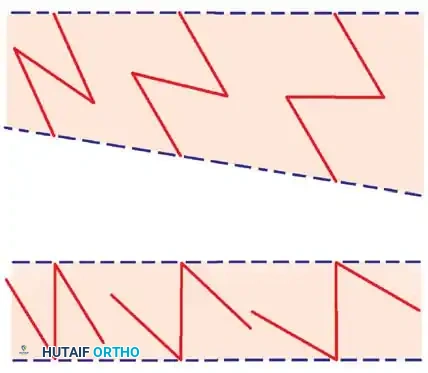
Fig. 62-4 Technique of removing split-thickness skin graft from the flexor surface above the elbow with a Weck knife. This permits hiding the scar at the donor site much more effectively than if extensor surfaces distal to the elbow were used.
Surgical Technique: Harvesting STSGs
Obtaining Skin Grafts with a Razor Blade or Weck Knife
For small defects, manual harvesting is highly effective and minimizes equipment setup.
🔪 Surgical Technique 62-1: Manual STSG Harvest
- A small skin graft can be cut easily with an ordinary new razor blade held in a hemostat, or preferably, a Weck knife.
- Lubricate the surface of the skin with a drop of mineral oil.
- Keep the skin strictly taut using a tongue blade or the edge of a sterile straight board.
- Hold the side of the blade almost parallel to the skin with the edge in direct contact.
- Cut the split graft with smooth, to-and-fro (sawing) motions of the blade.
- Surgical Warning: Take care not to force the blade forward consciously; it will automatically advance with the to-and-fro motions. Forcing it downward will result in an unintended full-thickness harvest.
Obtaining Skin Grafts with a Dermatome
Two types of mechanical dermatomes are in widespread use: powered (electrical/pneumatic) and manual (drum) dermatomes.
Electrically powered dermatomes (e.g., Stryker, Brown, Zimmer, Padgett) are user-friendly. An inexperienced operator can consistently cut excellent grafts up to 7.5 cm wide. Bony prominences are not satisfactory donor sites for powered dermatomes due to the risk of skipping or cutting too deeply.
The Reese drum dermatome requires skin glue and precise operation but is unparalleled for cutting grafts wider than 7.5 cm and offers exact thickness control.
Drum Dermatome Pearls:
1. Stretch the rubber tape tightly on the drum.
2. Wait at least 3 minutes for the glue to dry before applying the dermatome to the skin.
3. Rotate the drum slowly, lifting up gently while cutting.
4. Keep the blade from slipping around the drum to avoid striking the palmar side of the operator's wrist.
Surgical Technique: Applying Split-Thickness Grafts
The recipient bed must be meticulously hemostatic. Applying a mesh to the graft (typically 1.5:1 ratio) is highly recommended for large areas. Meshing not only expands the graft but critically allows for the free drainage of serum and blood, preventing hematoma-induced graft necrosis.
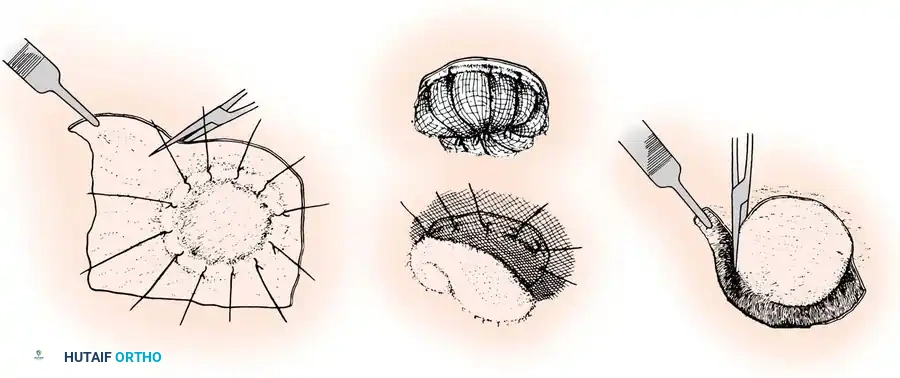
Fig. 62-5 Technique of applying split-thickness graft. A, Graft sutured over defect, redundant edges trimmed. B, Sheet of finely meshed gauze and moist cotton pack placed over graft. C, Sutures tied over pack (tie-over stent). D, Necrotic edges trimmed after healing.
🔪 Surgical Technique 62-2: STSG Application
- Place the graft on the recipient area without excessive handling or premature trimming.
- Secure the graft border with fine non-absorbable sutures (e.g., 5-0 nylon) or skin staples.
- Trim the redundant edges precisely to the wound margin.
- Suturing Pearl: It is mechanically easier to insert a small curved needle first through the graft and then through the recipient skin edge, rather than the reverse, to prevent lifting the graft off the bed.
- Apply a tie-over stent dressing or finely meshed nonadherent gauze (e.g., Xeroform, Adaptic).
- Hold in place with a bulky, mildly compressive dressing secured by circumferential conforming gauze. Splint the adjacent joints to eliminate shear forces.
Postoperative Care and Graft Storage
The initial dressing is typically left undisturbed for 5 to 7 days unless infection is suspected (indicated by systemic signs, increasing pain, or foul odor). At the first dressing change, any clearly necrotic graft is sharply debrided, and a fresh nonadherent dressing is applied.
If excess graft is harvested, it can be refrigerated at 0ºC to 5ºC in lactated Ringer solution or saline with added penicillin. It remains viable for up to 21 days. Advanced storage mediums, such as McCoy’s 5A, have been shown to prolong viability and improve subsequent take.
FREE FULL-THICKNESS GRAFTS (FTSG)
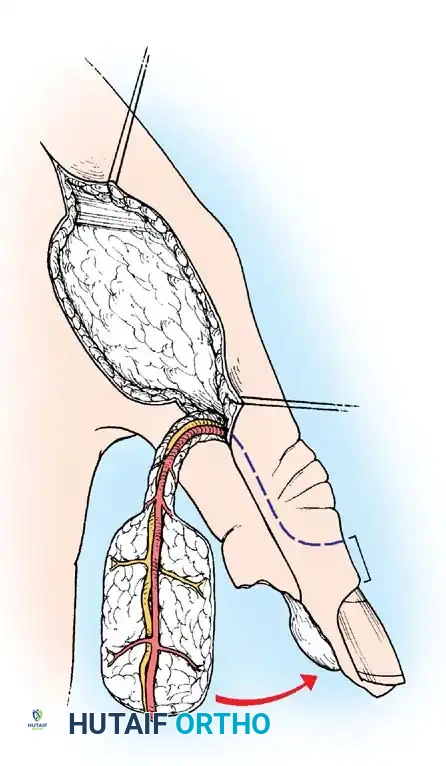
Full-thickness skin grafts (FTSGs) include the epidermis and the entire dermis. Because they contain elastic tissue, they contract significantly less than STSGs and tend to accommodate growth in children. They are highly durable and are preferred for the palmar surface of the hand.
However, because the survival of an FTSG is more precarious (requiring more robust revascularization), it is best reserved for elective reconstructive surgery rather than acute trauma, with the notable exception of fingertip amputations.

Fig. 62-6 Sites from which to obtain full-thickness skin grafts. The groin or medial aspect of the arm is preferable.
Donor Sites for FTSG
Preferred donor areas include the groin crease, the medial aspect of the arm, or the hypothenar eminence, where the skin is pliable and the secondary defect can be closed primarily by undermining and suturing the edges.

🔪 Surgical Technique 62-3: Applying Full-Thickness Grafts
- Create a precise template of the recipient defect using sterile foil, tape, or gauze.
- Outline the anticipated graft on the donor area with a surgical marker, making it slightly larger than the pattern to allow for suturing margins and primary shrinkage.
- Excise the graft with a scalpel.
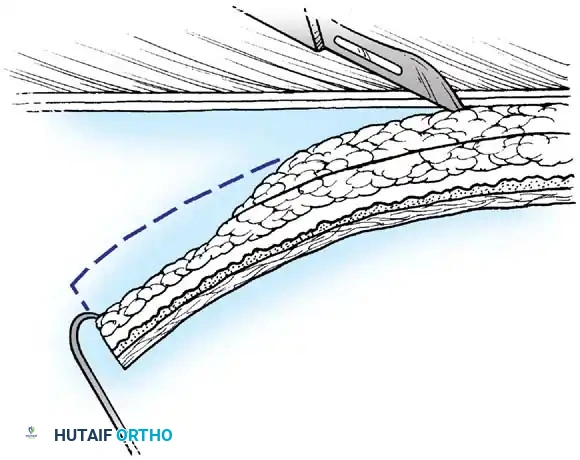
- Critical Step: Defat the graft completely. Place the graft epidermal-side down on a sterile finger or board and use curved tenotomy scissors to sharply excise all subcutaneous fat until the white, glistening undersurface of the dermis is exposed. Fat acts as a barrier to revascularization.
- Suture the graft into the defect and apply a tie-over stent dressing.
- Immobilize the extremity with a plaster splint for 7 to 10 days.
- Note: Upon first inspection, dark blistering of the superficial epidermal layer is common and represents desquamation, not necessarily deep dermal necrosis.
SKIN FLAPS: BIOMECHANICS AND INDICATIONS
When a wound features exposed bare bone, cartilage, tendon without paratenon, or joint capsules, a free skin graft will fail due to the lack of a vascularized bed. Furthermore, in areas requiring a flexible, mobile gliding surface (e.g., over tendons), the dense scarring beneath a skin graft will severely restrict motion.
In these scenarios, skin flaps—tissue transferred with its own intrinsic blood supply—are mandatory. Flaps provide a robust layer of subcutaneous tissue, restoring contour, durability, and a gliding plane.
Local Flaps
Local flaps mobilize adjacent tissue to cover a defect. They are broadly categorized by their method of movement: advancement, rotation, translation, and transposition.
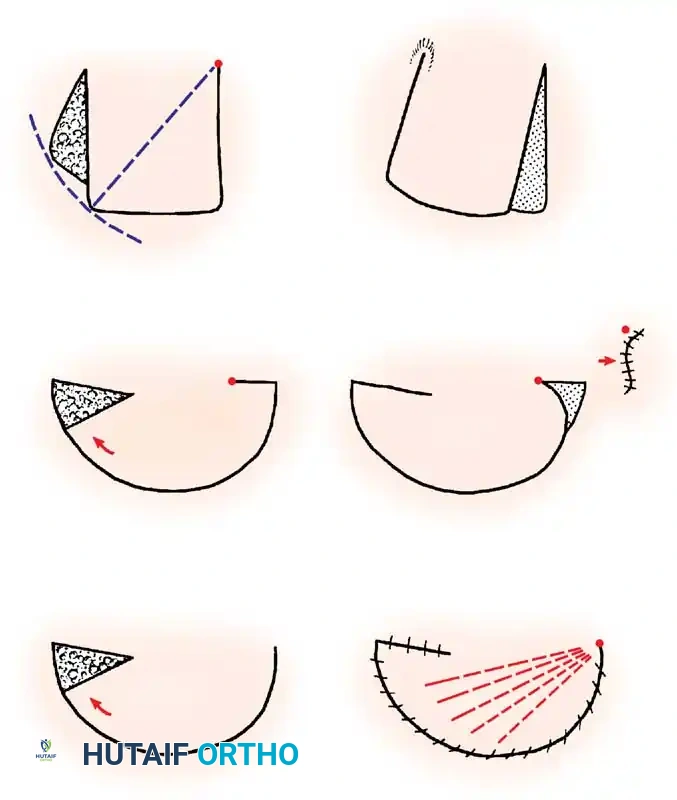
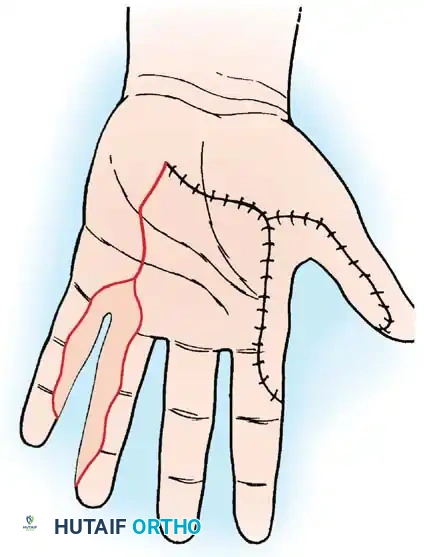
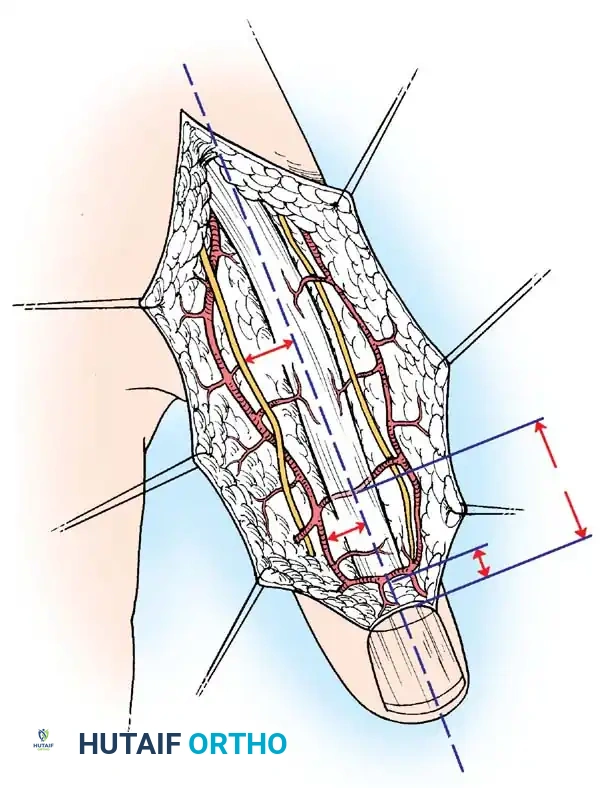
Fig. 62-7 Principles of local flaps. A, Rotation flap. B, Combined flap with a backcut to decrease tension (note: this decreases blood supply). C, Transposition flap requiring a split-thickness graft for the secondary defect.
1. Advancement Flaps
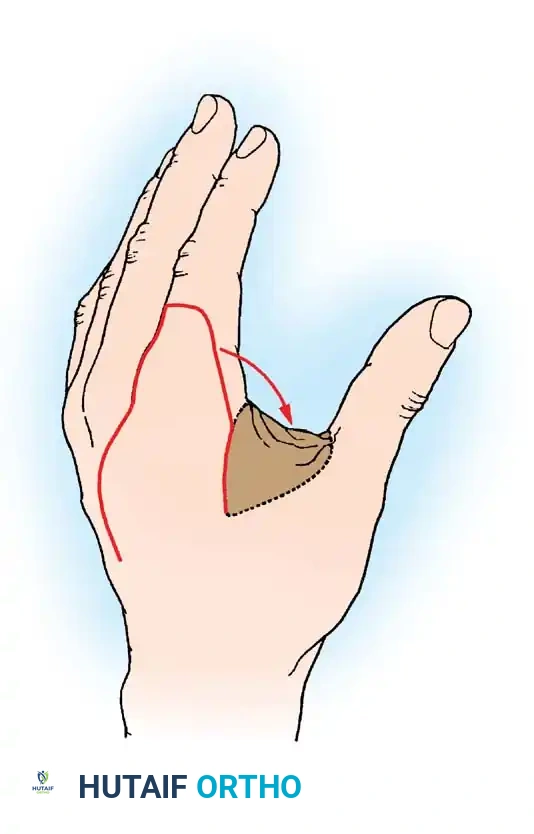
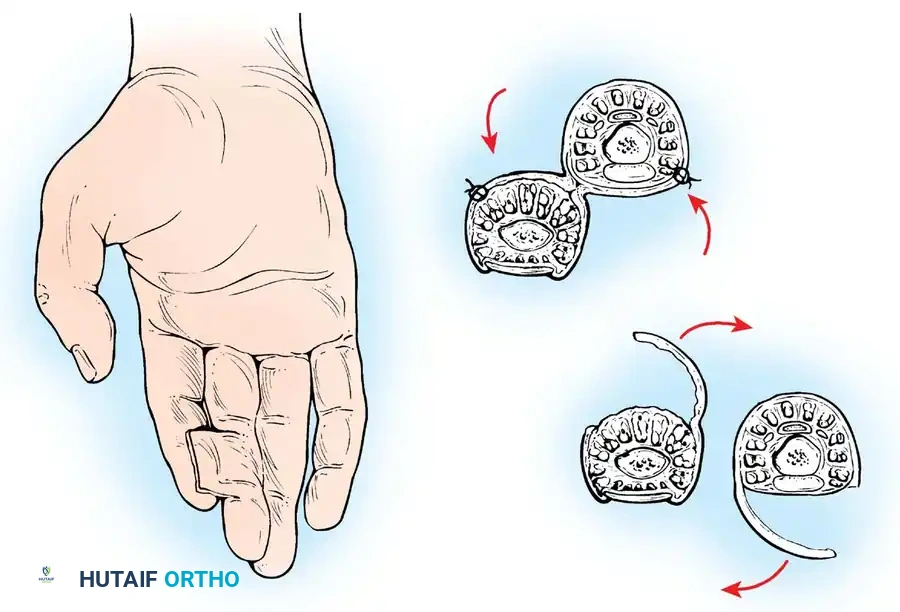
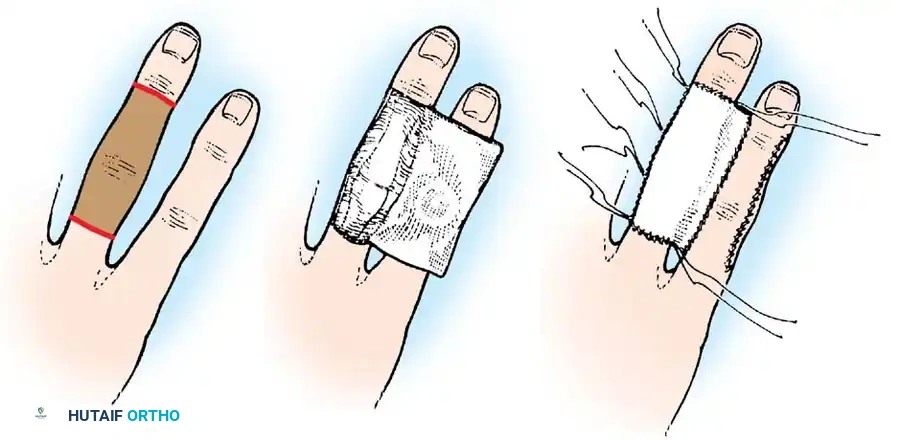
These involve mobilizing a flap of skin directly forward to cover an adjacent defect without lateral movement. They are frequently utilized in fingertip amputations (e.g., V-Y advancement flaps).
2. Rotation Flaps
Raised on a curved radius, these flaps are rotated around a pivot point into the defect. The donor site is often closed primarily under modest tension, distributing the tension along the arc of the curve.
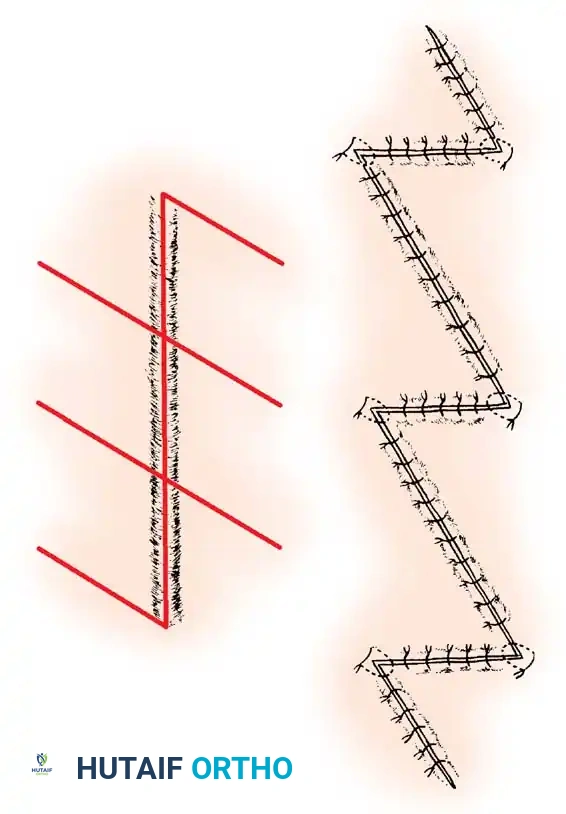
3. Translation Flaps
Typically rectangular, translation flaps are moved laterally around a pedicle base to close an adjacent defect without tension. The resulting secondary donor defect must be covered with a skin graft.
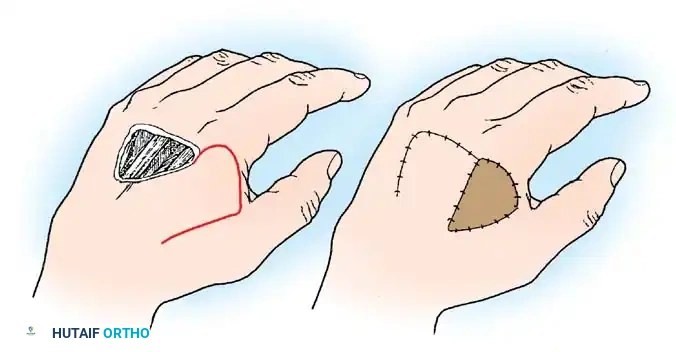
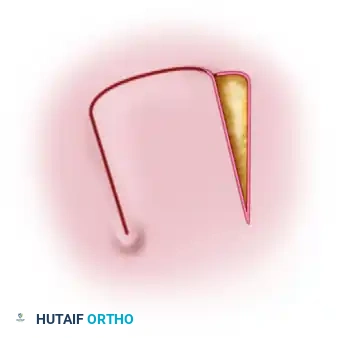
Fig. 62-11 Translation flap raised from skin in continuity with the area of skin loss. The donor area is covered by a graft.
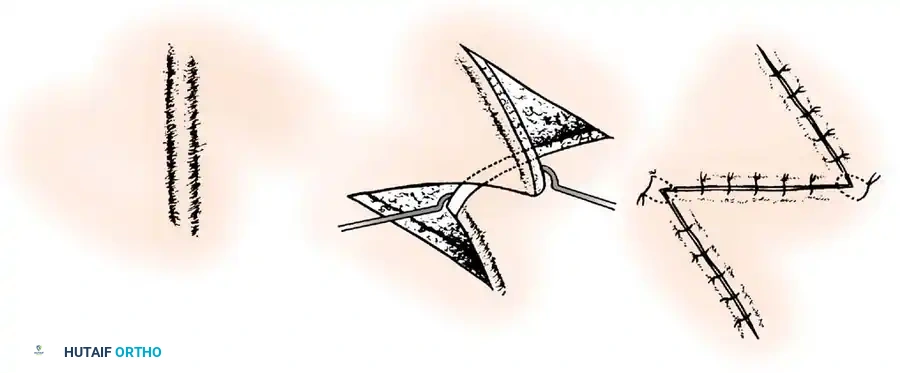
4. Transposition Flaps
These flaps are moved laterally across an intervening area of normal skin to reach the defect. The donor site invariably requires skin grafting.
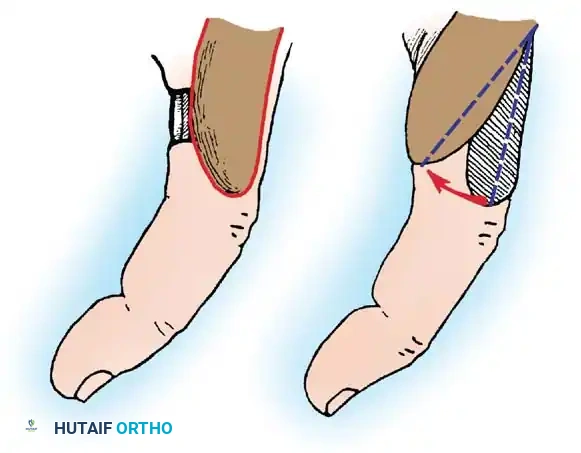
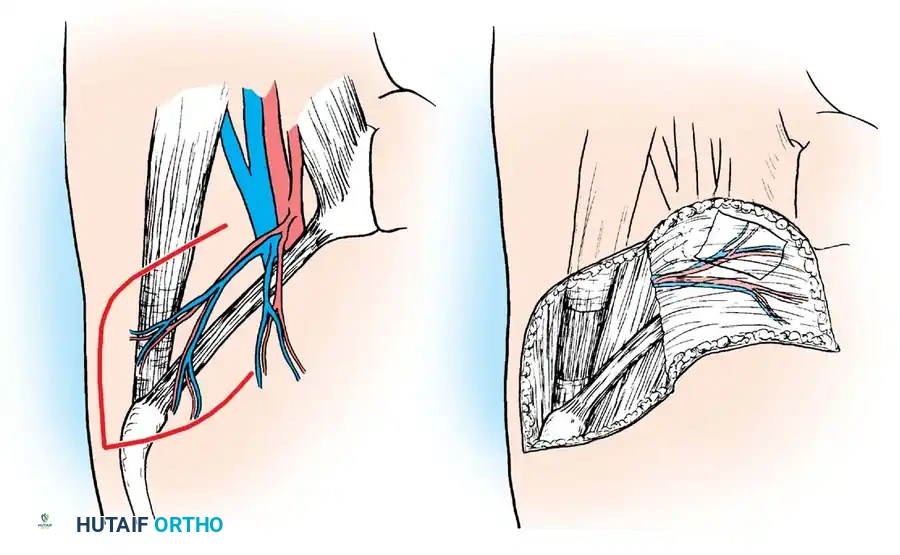
*Fig. 62-12 Simple transposition type of local flap. A, Deep structures exposed. B, Flap transposed, and the
Associated Surgical & Radiographic Imaging

You Might Also Like