Free Vascularized Bone Transplant: Advanced Surgical Techniques and Principles
Key Takeaway
Free vascularized bone transplantation is a microsurgical technique utilized for reconstructing massive osseous defects where conventional non-vascularized grafts would fail. By preserving the intrinsic medullary and periosteal blood supply, these grafts bypass creeping substitution, ensuring immediate cellular viability and accelerated union. The vascularized fibula remains the gold standard donor site, offering robust cortical strength and a reliable peroneal vascular pedicle for complex orthopedic reconstructions.
Introduction and Historical Context
The advent of the free vascularized bone transplant represents one of the most profound paradigm shifts in reconstructive orthopaedic surgery. Historically, the management of massive segmental bone defects relied on massive cortical allografts or non-vascularized autografts, both of which are entirely dependent on the slow, often incomplete process of "creeping substitution." In this traditional model, the graft acts merely as an osteoconductive scaffold, undergoing prolonged periods of avascular necrosis, structural weakening, and a high risk of fatigue fracture or infection before host bone can replace it.
Ostrup, Fredrickson, and Doi et al. were the first to report experimental success using microvascular techniques to transfer ribs as bone grafts to the mandibles of canine models. Their seminal work demonstrated that vascularized bone grafts, when transferred with their intrinsic medullary and periosteal circulation intact, remain immediately viable. They heal via primary osteogenesis rather than creeping substitution.
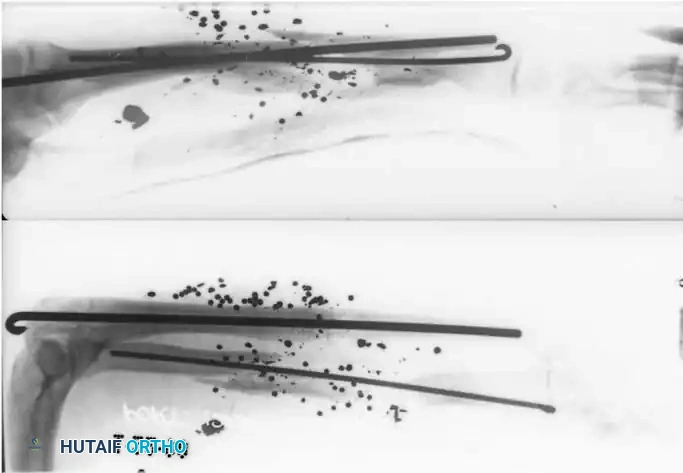
In 1975, Taylor, Miller, and Ham reported the first successful clinical case of a free vascularized bone graft to reconstruct a massive tibial defect where conventional bone grafting had repeatedly failed. Subsequently, pioneers such as Buncke, O’Brien, Daniel, Gilbert, Tamai, and Weiland expanded the applicability of this technique. Today, it is the gold standard for a myriad of complex orthopaedic challenges, including post-traumatic long bone defects, post-irradiation reconstruction, massive intercalary defects following tumor excision, congenital pseudarthrosis of the tibia, and severe acquired bony defects of the upper and lower extremities.
Biological and Biomechanical Principles
The primary biological advantage of a vascularized bone graft is the preservation of osteocytes and osteoblasts. Because the microvascular anastomosis restores immediate perfusion to the graft, the bone retains its structural integrity and mechanical strength from day one. It does not undergo the resorptive phase characteristic of non-vascularized grafts.
Furthermore, vascularized grafts possess the unique ability to undergo stress-induced hypertrophy. According to Wolff’s Law, as mechanical load is progressively applied to the reconstructed limb, a vascularized fibular graft (initially 1.5 cm in diameter) can hypertrophy to match the diameter and cortical thickness of a femur or tibia.
Donor Site Selection and Applied Anatomy
The selection of a donor site is dictated by the anatomical and biomechanical requirements of the recipient bed. The three primary sources for vascularized bone are the fibula, the iliac crest, and the rib.
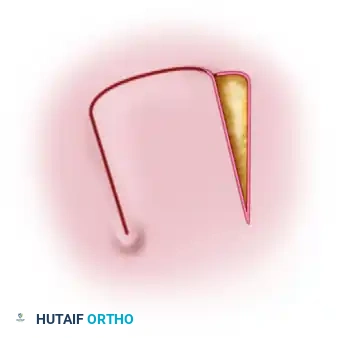
The Free Vascularized Rib Graft
The rib is a curved, membranous, and highly flexible bone. Up to 30 cm of bone can be harvested.
* Vascular Pedicle: Posterior intercostal artery (1.5 to 2 mm in diameter) and a single intercostal vein (1.2 to 2.5 mm in diameter). The pedicle length can range from 3 to 5 cm.
* Surgical Considerations: The dissection is deep and technically demanding. A tube thoracotomy may be required, and complications can include pneumothorax.
* Composite Potential: The intercostal nerve, overlying skin, muscle, and articular cartilage can be harvested as a composite flap. However, a viable physis is unavailable.
* Indications: Most applicable for mandibular reconstruction and upper extremity injuries requiring composite skin and bone coverage.
The Vascularized Iliac Crest
Based on the deep circumflex iliac artery and vein, the iliac crest provides a bulky, naturally curved corticocancellous graft. It is ideal for shorter segmental defects (less than 6-8 cm) requiring significant structural volume, such as pelvic reconstructions, complex nonunions of the humerus, or mandibular defects.
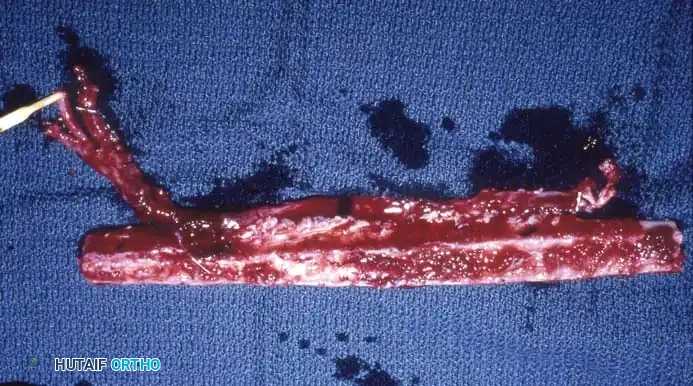
The Free Vascularized Fibular Transfer
The fibula is the undisputed workhorse for free vascularized osseous transfers. Its linear contour and dense cortical structure make it the preferred donor for long bone reconstruction.
* Biomechanical Strength: Its strong cortical bone allows for rigid internal fixation with plates and screws.
* Harvest Length: Up to 26 cm of bone can be harvested, making it suitable for massive intercalary defects.
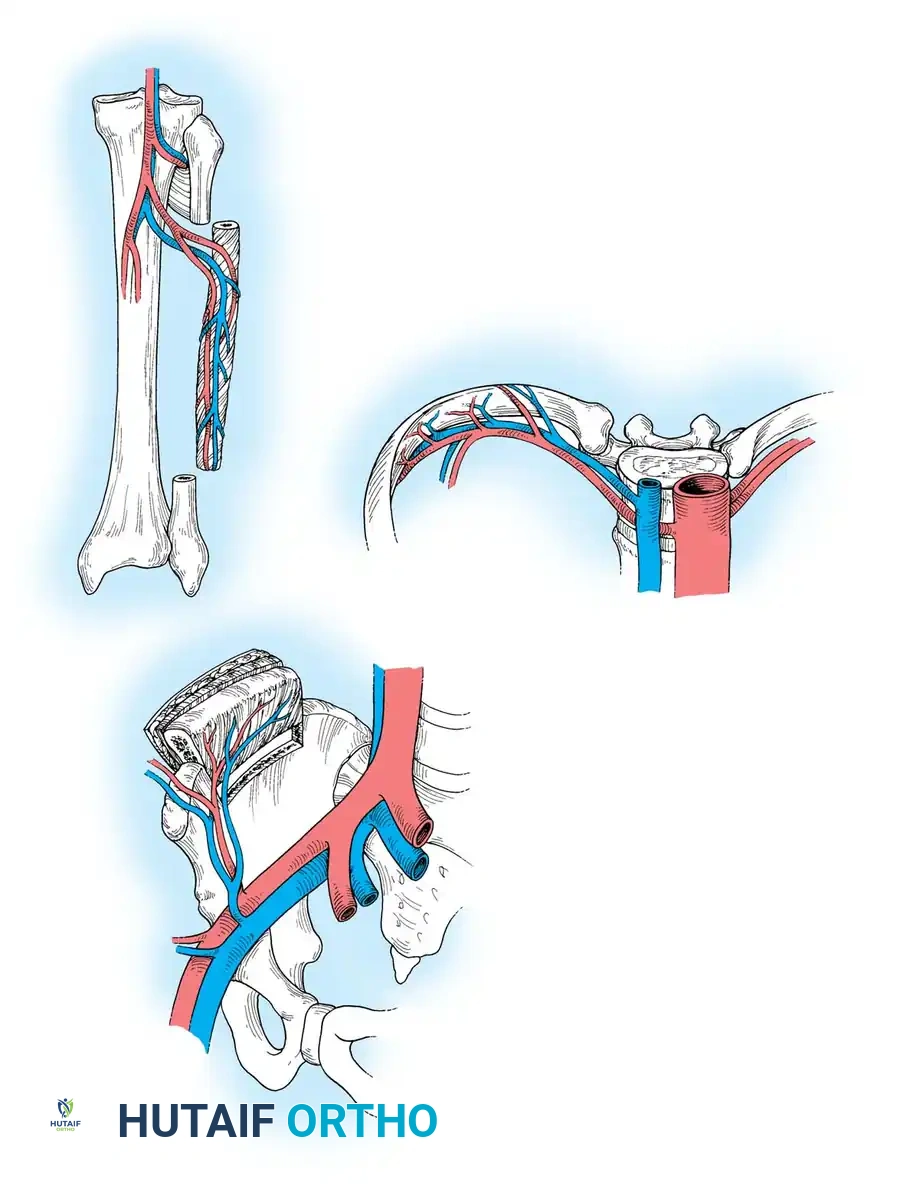
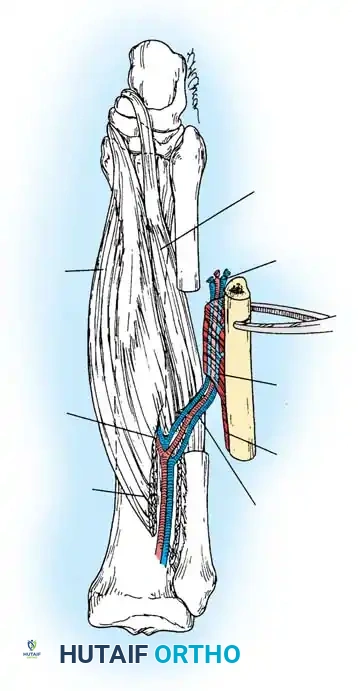
* Vascular Pedicle: The peroneal artery (1.5 to 3 mm in diameter) and its venae comitantes provide a robust pedicle measuring 6 to 8 cm in length. The nutrient artery typically enters the bone in the middle third.
* Composite Potential: It can be elevated as a bone-muscle complex (incorporating the flexor hallucis longus or soleus) or as an osteocutaneous flap by incorporating the overlying lateral leg skin based on septocutaneous perforators.
Clinical Pearl: The fibula is considered an expendable bone, provided the proximal 6 to 8 cm (to preserve the common peroneal nerve and lateral collateral ligament) and the distal 6 to 8 cm (to preserve the distal tibiofibular syndesmosis and ankle stability) are retained.
Indications for Vascularized Bone Transfer
The transfer of a vascularized bone graft is strictly indicated when traditional bone grafting techniques are biologically or mechanically destined to fail. Primary indications include:
1. Massive Segmental Defects: Bone gaps exceeding 6 cm, particularly in the lower extremity.
2. Hostile Soft Tissue Beds: Defects associated with severe soft-tissue loss, extensive scarring, or prior irradiation where the local vascularity cannot support a non-vascularized graft.
3. Recalcitrant Nonunions: Cases where traditional bone grafting techniques have repeatedly failed.
4. Congenital Pseudarthrosis of the Tibia (CPT): Based on the promising long-term results achieved by Chen, Yan, Gilbert, Tamai, and Weiland, vascularized fibular transfer is a primary reconstructive option for CPT.
5. Oncologic Reconstruction: Intercalary reconstruction following wide en bloc excision of primary bone tumors (e.g., osteosarcoma, Ewing sarcoma) or aggressive benign conditions like fibrous dysplasia.
Preoperative Planning
Meticulous preoperative planning is the cornerstone of microvascular success. For a segmental defect of 6 cm or less, traditional autogenous cancellous grafting may suffice. For defects between 6 and 10 cm, the iliac crest or fibula may be appropriate. For any defect greater than 10 cm, the vascularized fibula is the absolute graft of choice.
High-resolution angiography (CTA or MRA) of both the donor and recipient limbs is mandatory. This identifies anomalous vascularity, confirms the presence of a three-vessel runoff in the donor leg (ensuring the foot will not be rendered ischemic upon harvest of the peroneal artery), and maps the recipient vessels for anastomosis.
Surgical Planning Pearl: Taylor’s recommended technique involves superimposing the image of the fibula and its vascular pedicle from the donor leg angiogram directly onto the recipient leg radiograph. This allows the surgeon to precisely plan the osteotomy sites, estimate vessel size mismatches, and determine the exact geometry of the microvascular anastomoses.
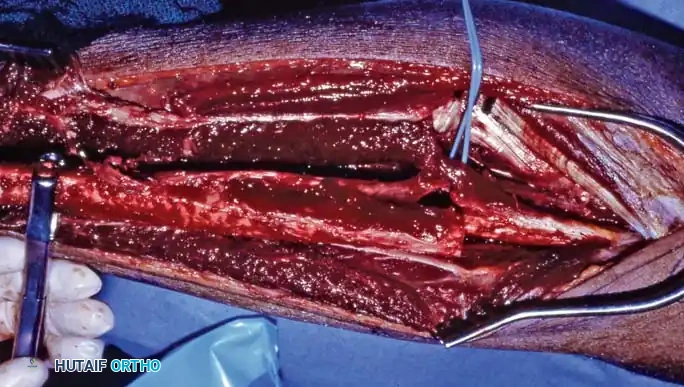
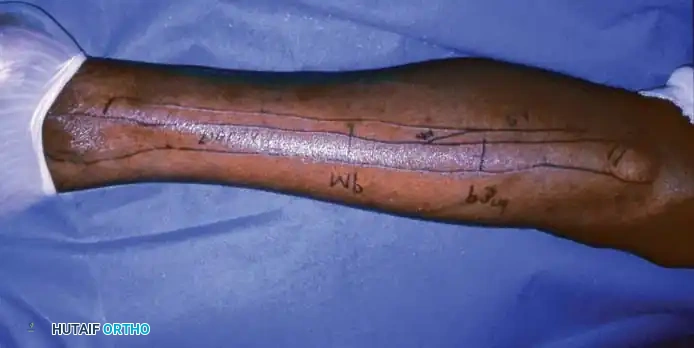
Surgical Techniques: Fibular Harvest
Two primary techniques for harvesting the fibula are described: the posterior approach and the lateral approach. The lateral approach is generally preferred by modern microsurgeons as it is more ergonomic, faster, and allows the patient to remain supine.
Posterior Approach for Harvesting Fibular Graft (Taylor)
Positioning and Preparation:
* Following the administration of epidural or general anesthesia, place the patient in the prone position.
* Abduct the legs onto separate tables to allow two surgical teams to operate simultaneously (one harvesting, one preparing the recipient site).
* Utilize pneumatic tourniquets to maintain a bloodless field.
Surgical Steps:
1. Start the incision in the popliteal fossa of the donor leg, extending it obliquely and laterally toward the fibula, then distally along the course of the bone.
2. Develop the interval between the soleus and peroneal muscles, extending the deep dissection medially into the popliteal fossa.
3. Reflect the skin flaps to expose the underlying musculature.
4. Carefully identify the lateral popliteal (common peroneal) nerve, preserving its tibial and peroneal branches.
5. Preserve the proximal peroneal and extensor muscle attachments to the tibia and the head of the fibula.
6. Identify the anterior tibial vessels to ensure they are protected.
7. Leave a 5- to 10-mm sleeve of muscle on the lateral and anterior aspects of the fibula to protect the periosteal blood supply.
8. Begin the posteromedial dissection by detaching the lateral head of the gastrocnemius and the plantaris muscle from the femur. Retract the popliteal vessels and medial popliteal nerve medially.
9. Divide the soleus muscle 1 to 2 cm parallel to the fibula. Follow the popliteal and posterior tibial vessels distally to identify the origin of the peroneal vessels.
10. Trace the peroneal vessels to the origin of the flexor hallucis longus (FHL) muscle. Ligate the large muscular branches to the soleus during this descent.
11. Using sharp dissection, divide the FHL muscle along the course of the peroneal artery, intentionally leaving a 1-cm sleeve of muscle on the fibula to protect the vascular pedicle.
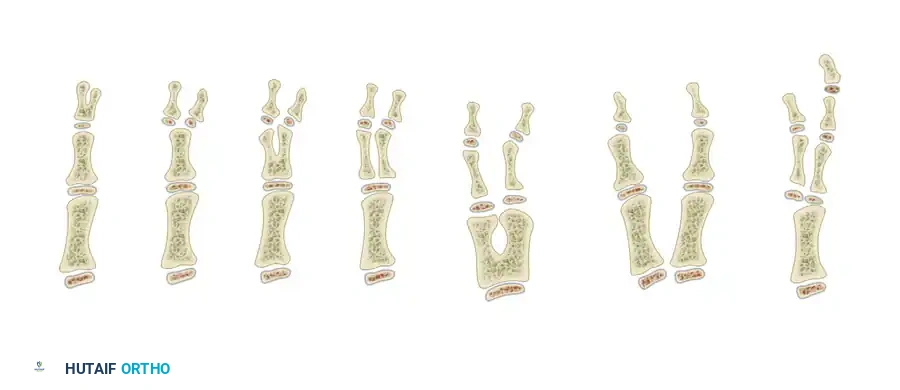
12. Perform the proximal and distal fibular osteotomies at the predetermined lengths.
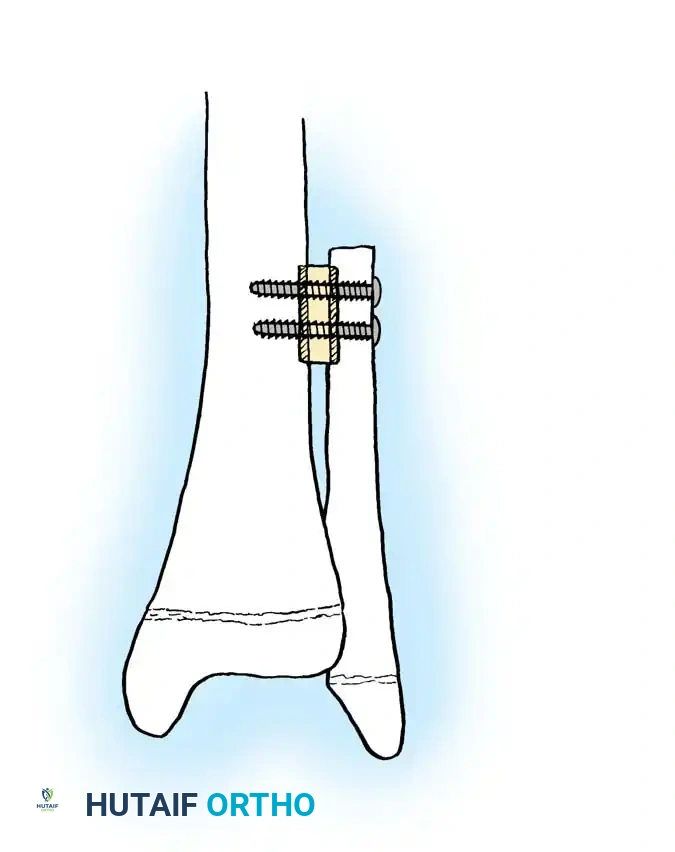
* Warning: Preserve the proximal fibula and the lateral collateral ligament for knee stability. Preserve the distal 25% (at least 6-8 cm) of the fibula to retain ankle syndesmotic stability. In pediatric patients, secure the distal fibular remnant to the tibia with a transverse syndesmotic screw to prevent progressive valgus deformity of the ankle.
13. Beginning distally, divide the interosseous membrane and the tibialis posterior muscle parallel to the fibula, isolating the bone entirely on its vascular pedicle.
14. Strip the periosteum from the proximal and distal 1 to 3 cm of the harvested fibula to facilitate insertion (dovetailing) into the recipient medullary canals.
15. Deflate the tourniquet to confirm hemostasis and verify robust perfusion to the fibular graft (observed as bleeding from the medullary canal and muscle sleeve).
16. Transect the vascular pedicle only when the recipient site is fully prepared for immediate transfer.
Lateral Approach for Harvesting Fibular Graft (Gilbert, Tamai, Weiland)
The lateral approach is highly favored due to the supine positioning, which greatly facilitates a two-team approach, especially when the recipient site is in the upper extremity, contralateral lower extremity, or mandible.
Positioning and Preparation:
* Place the patient supine with a large sandbag under the ipsilateral buttock to internally rotate the leg slightly. Flex the hip and knee.
* Exsanguinate the limb and inflate the pneumatic tourniquet.
Surgical Steps:
- Make a longitudinal incision centered over the lateral aspect of the fibula, extending from just distal to the fibular neck down toward the lateral malleolus.
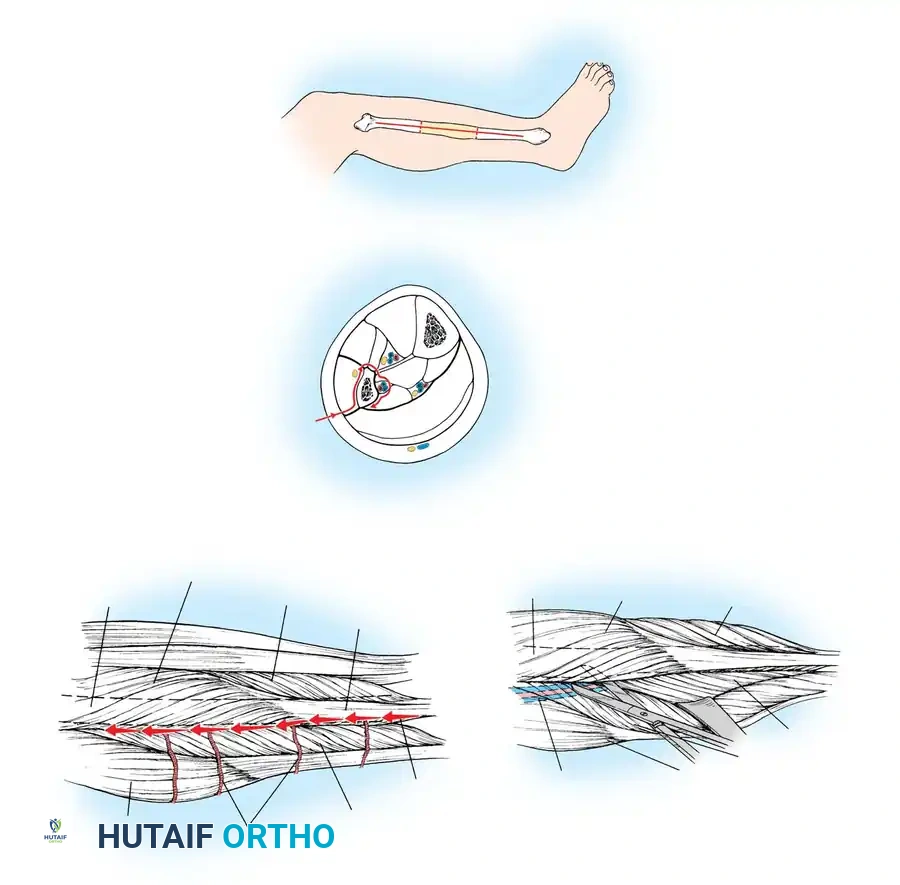
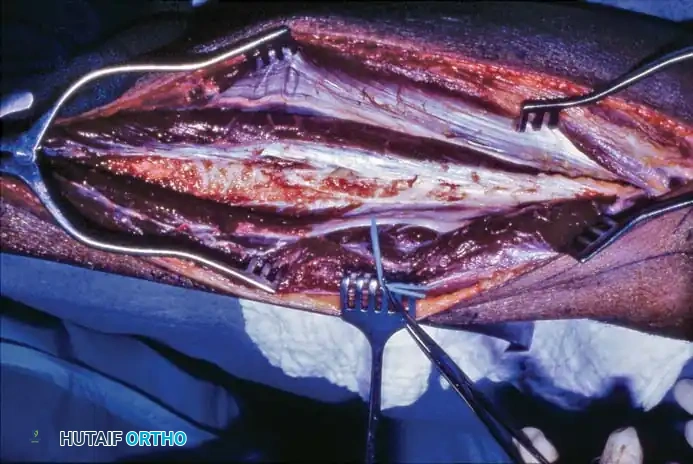
- Incise the skin and subcutaneous tissue down to the superficial fascia, identifying the interval between the peroneus longus and the soleus muscles.
- Incise the aponeurosis and dissect longitudinally, staying posterior to the peroneus longus and anterior to the soleus. Identify the peroneus longus tendon distally for orientation.
- Elevate the soleus muscle in the distal portion of the wound using blunt dissection. Proceed proximally until the origin of the soleus on the proximal fibula is encountered.
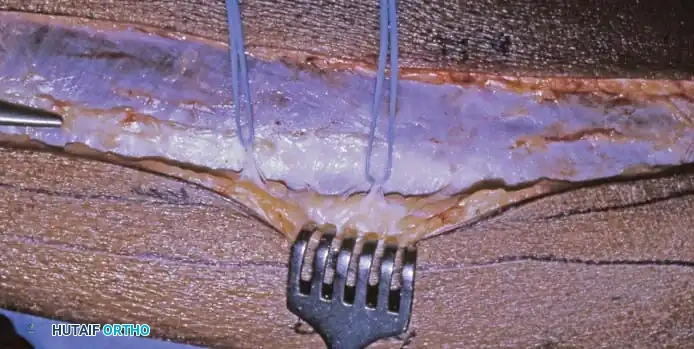
- Deep to the soleus, identify the peroneal vessels lying nearly in contact with the posterior aspect of the fibula.
- Sharply incise the fibular origin of the soleus to allow adequate posterior retraction, exposing the pedicle.
- Identify the interval between the peroneal muscles and the FHL distally. The FHL lies posterior to the peroneals and deep to the soleus, covering the posterolateral fibula. The peroneal vessels course safely within the FHL muscle belly.
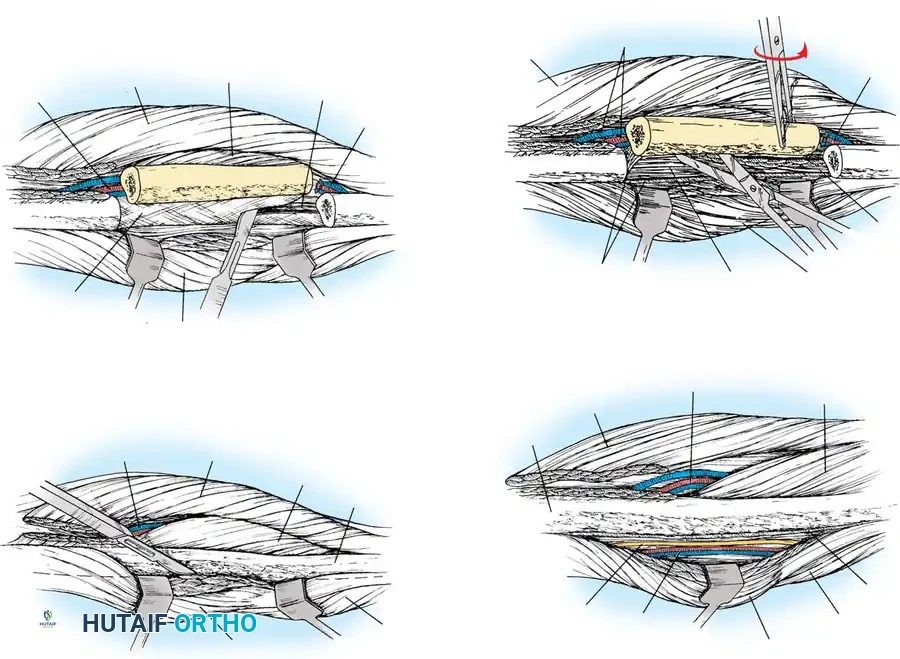
- Retract the peroneal muscles anteriorly and sharply dissect them off the fibula in an extraperiosteal fashion.
- Surgical Warning: Carefully identify and protect the superficial peroneal nerve in the proximal wound where it courses closely to the fibular neck.
- Continue anteriorly to the anterior intermuscular septum, incising it close to the bone. Elevate the anterior compartment extraperiosteally, strictly protecting the anterior tibial artery and deep peroneal nerve.
- Place a Gigli saw around the fibula at the planned proximal osteotomy site (ensuring it is distal enough to protect the common peroneal nerve, but proximal enough to include the nutrient artery). Retract all neurovascular structures anteriorly and posteriorly before sawing.
- Develop an extraperiosteal plane distally and perform the distal osteotomy with a Gigli saw.
- Sharply elevate the FHL off the fibula for 1 cm proximal and distal to the osteotomy sites. Retract the fibula anteriorly to identify the distal continuation of the peroneal vessels; ligate and divide them distally.
- Grasp the osteotomized fibular segment with a bone clamp and externally rotate it. This exposes the deep anterior compartment musculature for sharp release.
- Apply gentle lateral traction and incise the interosseous membrane from distal to proximal, staying directly on the fibular crest to avoid avulsing the peroneal vessels.
- Release the tibialis posterior muscle from the fibula under direct vision, ensuring the peroneal vessels are protected throughout.
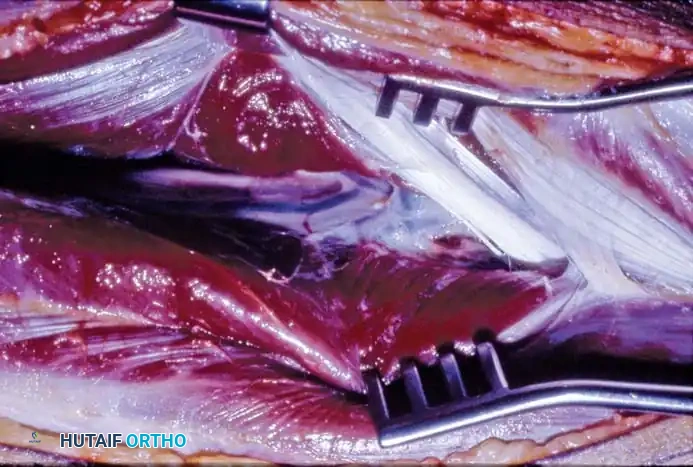
Recipient Site Preparation and Microvascular Anastomosis
While the donor team harvests the fibula, the recipient team radically debrides the defect. All necrotic bone, scarred soft tissue, and infected material must be excised until healthy, bleeding tissue is reached (the "paprika sign" in bone).
The recipient vessels (e.g., posterior tibial artery, superficial femoral artery, or radial artery depending on the site) are dissected free of the zone of injury.
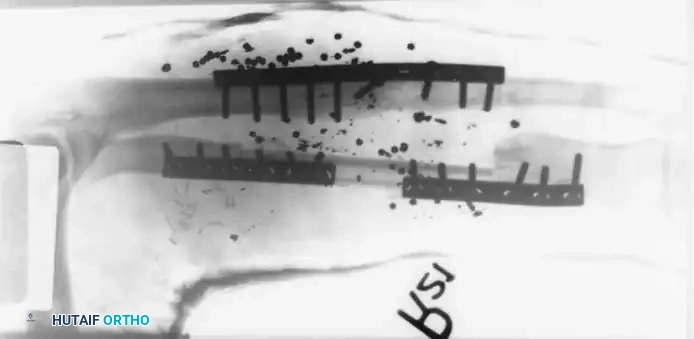
Once the fibula is transferred, it is rigidly fixed into the defect. Fixation methods vary but typically involve bridging locking plates, intramedullary nails, or external fixators. The stripped ends of the fibula are often impacted into the medullary canals of the host bone to provide intrinsic stability.
Following rigid skeletal fixation, the microvascular anastomosis is performed under an operating microscope. The peroneal artery is anastomosed end-to-end or end-to-side to the recipient artery using 8-0 or 9-0 nylon sutures. The venae comitantes are anastomosed to the deep recipient veins.
Microsurgical Pearl: Always perform skeletal fixation before the microvascular anastomosis to prevent catastrophic traction or avulsion injuries to the delicate microvascular repair during bone manipulation.
Postoperative Protocol and Rehabilitation
Postoperative management requires a multidisciplinary approach.
* Monitoring: The viability of the graft is monitored clinically (if a skin paddle was included) or via an implantable venous Doppler probe.
* Anticoagulation: Protocols vary, but many centers utilize low-molecular-weight dextran, aspirin, or subcutaneous heparin to prevent microvascular thrombosis in the immediate postoperative period.
* Weight-Bearing: The reconstructed limb is kept strictly non-weight-bearing initially. Radiographic union at the host-graft junctions typically occurs between 3 to 6 months.
* Hypertrophy: Once union is confirmed, a graduated, progressive weight-bearing program is initiated. Controlled mechanical stress is essential to stimulate fibular hypertrophy. Over 12 to 24 months, the fibula will dramatically remodel, expanding its cortical diameter to match the mechanical demands of the reconstructed limb.
Complications and Pitfalls
Despite high success rates in experienced hands, complications can be severe:
* Microvascular Thrombosis: The most devastating complication, leading to complete graft loss if not recognized and revised emergently within the first 24-48 hours.
* Nonunion at the Host-Graft Junction: Occurs in up to 15-20% of cases, often requiring secondary cancellous bone grafting at the docking sites.
* Stress Fractures: The fibula is vulnerable to stress fractures during the early hypertrophy phase (typically 6-12 months post-op) if weight-bearing is advanced too rapidly. These usually heal with conservative casting.
* Donor Site Morbidity: Includes flexor hallucis longus weakness, claw toe deformity, common peroneal nerve neuropraxia, and valgus ankle instability (if the distal syndesmosis is violated). Meticulous surgical technique and adherence to anatomical boundaries minimize these risks.
You Might Also Like